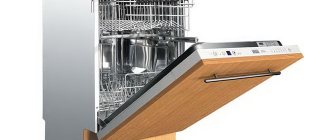
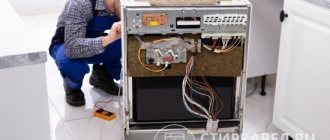
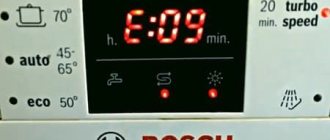
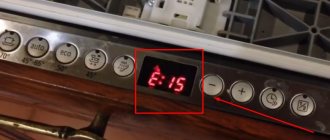
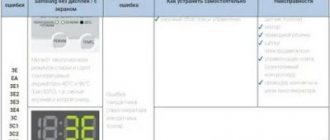
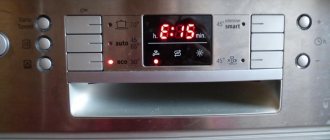
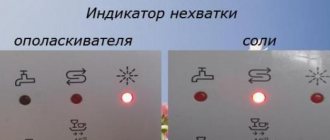
Krona dishwashers are quite popular, so many users choose different models of this particular brand. Modern electronics work like a Swiss watch, and if any breakdown occurs, it is immediately notified by a coded notification on the device display. For example, error E3 often occurs in a Krona dishwasher, for which there are several causes. What kind of error this is and how to properly eliminate it should be known to all users who have dishwashers of the specified brand at home.
All error codes for Krona dishwashers
| Error code. | Description of the malfunction. | Causes of occurrence. | Possible self-repair. |
| E1. | The water takes a very long time to fill. |
|
|
| E2. | Water does not drain. |
|
|
| E3. | The water does not heat up. |
|
|
| E4. | Water remains in the chamber and the Aquastop sensor is triggered. |
|
|
| E5, E6, E7, E9. | The water does not heat up. |
|
|
| E10. | Drying does not occur. | Program crash. | Restart the washer. |
| E11. | The program ends, but without heating the water. |
|
|
| E14. | There is too much or too little water. |
|
|
| E15. | The leakage protection system has activated. |
|
|
| E16. | The program stopped while drawing water. | Flow sensor failure. | Install a working sensor. |
Transition to service test on Bosch PMM machines
Since the names of the buttons on the control panels of different Bosch PMM models may vary, we have prepared a summary table that shows the buttons used to put the dishwasher into test mode.
To switch to test mode, you need to press and hold the buttons shown in the table (2nd and 4th from the left), and then turn on the machine by pressing the on/off button. Press the indicated buttons again to run the test program. Wait until the program finishes and the error code is displayed. To exit test mode, turn off the machine.
In fully built-in models, you need to open the door to enter test mode, and close it to start testing.
The list of models in the tables is far from complete, but the general principles are valid for almost all Bosch PMM models. We will describe some of the features a little further in this article, in particular, we will tell you how to run a test program on PMMs that do not have buttons, but only have a washing program selector knob.
| Bosch dishwasher models | Buttons to run the test program |
| SHU/SHI430x, SHU431x | Power Scrub Plus Regular Wash |
| SHU33/DLX | Power Scrub Plus Rinse & Hold |
| SHU43C, SL34A, SHU432x | Regular Wash Rinse & Hold |
| SHU53/66C/68, SHI66A/68 | Scrub Wash Delicate/Econo |
| SHU53A, SHX/SHY56, SL95A | Regular Wash Quick Wash |
| SHU88 | Power Scrub Plus Quick Wash |
| SHU990x, SHV43/48 | Power Scrub Plus Regular Wash |
| SHU991x (UC/11) | Power Scrub Plus Quick Wash |
| SHU991x (UC/12), SHU992x | Power Scrub Plus Delicate/Econo |
| SHU995x | Regular Wash Delicate Wash |
| SHV66A, SHY66A | Scrub Wash Delicate/Econo |
| SHV68 | Scrub Wash Regular Wash |
| GI976/966, GM276 | Intensive Delicate |
| DW44 | Heavy Wash Light Wash |
| SHV46C, SL84A, SHX43E/ 46A-B | Regular Wash Delicate/Econo |
| SHX33A | Regular Wash Rinse & Hold |
| SHU43E/53E/66E | Rotating the program selector knob (see below) Start/STop |
| SHV99, SHX99, SHY99 | Two left buttons (see below) |
Dishwasher models without display: KRONA BDX 45096 HT and KRONA BDX 60126 HT
Fault information is provided through blinking indicators.
| Indicators. | Description. | Solution. |
"Quick wash". In the bottom row, far right:
| Water takes a long time to arrive. | See E1 . |
| "Glass". The glass icon is on the far left in the bottom row. | Strong pressure or overflow. | Similar to E4 . |
Ways to prevent dishwasher breakdowns
Although the Ariston Hotpoint is a very reliable dishwasher, operating errors can damage it too. The technician will “report” on all types of possible malfunctions in a timely manner; you just need to understand the nuances of deciphering the codes in order to determine the necessary and sufficient measures to eliminate the cause of the malfunction.
And in order not to become a regular customer of repair shops, you just need to follow the operating rules and follow a few tips that will extend the life of the equipment.
Recommendations for use:
- Ariston Hotpoint has filters that purify water from various impurities. To avoid clogging, they must be cleaned in a timely manner.
- It is recommended to install a grease filter at the entrance to the sewer to avoid external blockages.
- To make the machine easier to operate, wipe the dishes with a napkin before loading to remove any remaining food.
- If your water supply has hard water, use regenerating salt softeners or install a special filter at the inlet to the PMM.
- Do not use soap, shampoos or other substances not intended for dishwashing equipment as cleaning ingredients. Only specialized detergents with characteristic low foaming are suitable for operating the dishwasher.
- Do not overload the dishwasher with items. You should strictly follow the manufacturer's recommendations for loading the dishwasher given in the data sheet.
- After each start of the machine, wash and dry the tablet tray.
- Place dishes so that they do not touch or block the spray arms.
And the last piece of advice - at least once a month, arrange a “clean day” for your assistant, running it in idle mode along with a cleanser and disinfectant.
Fault marking meaning
It would seem that everything was done correctly: all the necessary ingredients were added (from salt and rinse aid to the appropriate detergent). The device will turn on and water will flow through its hoses. However, literally five minutes later a message appears about error code E1.
To get started, you can refer to the instructions. The transcript provides data on long-term activation or closure of the valve. The latter means that no water is supplied. This can happen for the following reasons:
- low water pressure at the inlet from the water supply system;
- it is necessary to check the sensors;
- If the above points are denied, the malfunction may be due to a broken electrical circuit inside the device.
Characteristics
Model series
| Series | AQUA Stop |
| Energy efficiency class | A |
| Energy consumption per cycle | 0.74 kWh |
| Water consumption per cycle | 13 l |
dimensions
| Overall dimensions (H*W*D) | 820*445*550 cm |
| Niche size (H*W*D) | 820*450*580 mm |
Loading
| Maximum capacity | 8 sets |
Noise level
| Noise level | 53 dB |
Control
| Control type | electronic |
Functions
| Number of washing programs | 7 |
| Accelerated washing program | Yes |
| Washing thin glass | Yes |
| "Partial load" mode | Yes |
| Hot water rinse mode | Yes |
| Preliminary rinsing | Yes |
| Delayed start | up to 24 hours |
Advantages and disadvantages
The advantages of PMM Krona BDE 4507 include:
- low price;
- availability of special programs;
- easy to install and operate.
According to user reviews, the device has a large number of disadvantages, which include:
- poor washing quality when using short programs;
- short service life of some parts;
- high noise level;
- high water consumption;
- inability to use combined detergents.
Indication
| Ind. time until the end of the program | Yes |
| Operating mode indication | Yes |
Internal equipment
| Box height adjustment | Yes |
| Folding plate holders | Yes |
Security systems
| Leak protection | full |
| Name leak protection | AquaStop |
| Self-diagnosis is faulty. | Yes |
Equipment
| Basket for table. devices | Yes |
| Funnel for filling. salt | Yes |
Similar models
The following Krona brand PMMs have similar characteristics:
- BDE 6007 EU. Full-size model, designed to wash 12 sets of dishes. The machine is suitable for installation in houses with large kitchen areas. In 1 cycle, the device consumes up to 16 liters of water. The functionality includes 7 programs, including delicate washing, pre-soaking and quick mode. Complete protection against leaks helps prevent emergency situations from depressurizing the housing. Disadvantages include high noise levels, lack of child protection and automatic water hardness adjustment.
- BDE 4507 LP. Compact machine, holds up to 9 place settings. The device is equipped with an automatic fault diagnosis system and complete protection against leaks. It differs from the previous model in lower energy consumption and water consumption. The functionality includes 4 main programs, including pre-soaking, intensive washing and short cycle. When washing dishes with this device, you can use combination detergents.
- BDX 45096 HT. A narrow dishwasher with a high energy efficiency class and economical water consumption. The user is offered 6 programs and 4 temperature modes, from which you can select a function appropriate to the type and soiling of the dishes. The ability to change the height of the upper basket makes loading easier. The set includes plate holders and a tray for kitchen utensils. The device is equipped with the Aquastop system and automatic error diagnosis.
- BDX 60126 HT. Fully built-in PMM, holds up to 12 sets of dishes. The device is equipped with a glass holder and a height-adjustable basket. The budget model has only the necessary programs and functions, including a delay timer and leakage protection. The camera is made of high quality steel. Partial loading mode allows you to avoid accumulating dirty dishes. Disadvantages include low quality replacement parts and high noise levels.
Connection
| Power consumption | 1760 W |
How to use
According to the instructions for use of PMM Krona, installation and operation of the device includes the following steps:
- Connection to communication systems. When choosing where to install the machine, you need to take into account the distance to the water and sewer pipes. The connection is made by tapping into the pipe and installing an adapter. All connections must be tight. To connect to the power supply network, install a socket near the installation site.
- Preparing for work. According to the manual for Aquastop BDE 4507 EU, salt and rinse aid must be added before the first use. The dishes are loaded so that they do not interfere with the movement of the sprinklers.
- Selecting a program and starting the device. After pressing the power button, use the keys located on the control panel to select the desired function. Detergent is added to a special compartment. After pressing the “Start” button, the machine begins the washing cycle. You can open the door and remove dishes only after the sound signal appears.
Color and weight
| Control panel color | grey |
| Weight | 33 kg |
