The machine is intended for household use only...
Page 2
- Image
- Text
SM277
✽
The machine is intended for domestic use only.
✽
Any modification or attempt to modify the appliance may be hazardous to the user and may cause damage to the washing machine itself.
✽
Given the significant weight of the machine, special safety precautions must be observed when moving it.
✽
Children are prohibited from using the machine without adult supervision.
✽
Any changes to plumbing or electrical
networks
must
carried out by specialists.
✽
After installing the machine, make sure that it is not standing on the electrical power cord.
✽
Before turning on the machine, remove all packing material and blocks used to transport it (safety
screws).
IN
Otherwise, you can seriously damage both the car and the apartment.
✽
If the appliance is installed on a rug-covered floor, you should check that between the washing machine
And
floor
free
air circulated.
✽
The washing machine must be connected to a grounded electrical network in accordance with safety regulations.
✽
At the end of each wash, you must unplug the machine from the mains and turn off the water supply valve.
✽
Do not insert or remove the electrical plug with wet hands.
✽
Do not overload the washing machine.
✽
Machine wash only machine washable fabrics. If in doubt, refer to the recommendations
manufacturer,
given in the form of symbols on the clothing label (see “Clothing care symbols” page 6).
✽
Before putting items in the washing machine, make sure all pockets are empty. Hard and pointed objects such as coins, pins, nails, screws or stones can seriously damage the machine.
✽
Do not wash items soiled with products containing gasoline in the washing machine.
If stains are removed with solvents, you should wait until they have completely evaporated from the surface of the fabric before putting items in the machine.
✽
At the end of the wash cycle or after switching off the machine, it can only be opened after one minute.
✽
At the end of washing runners, bedspreads and other fabrics made from long fibers, you need to check
filter
And
at
need to clean it.
✽
Before a long planned absence from home or when it is expected that the washing machine will not be used for a long time, it is necessary to remove the plug from the socket and close it.
tap
submissions
water.
It is also recommended to leave the car door slightly open to allow ventilation inside the car.
✽
Do not expose the washing machine to the elements.
✽
Under no circumstances should you try to repair device malfunctions yourself, as repairs performed by non-specialists can cause serious damage to the machine and will deprive you of the right to warranty repairs.
✽
Repairs to the device must only be carried out by service personnel. Only original spare parts must be used for repairs.
2
NOTES AND TIPS FOR THE USER
SM277.p65
04/10/01, 17.46
45
Preparing the washing machine for startup
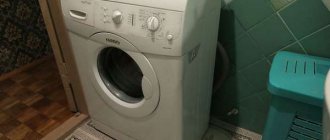
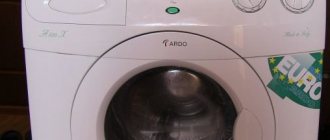
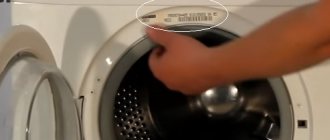
When answering the question of how to use the Ardo washing machine, the first thing you need to figure out is how to accurately connect the device to communications. Thanks to this, the device will work correctly and will not cause problems for the owner. Moreover, if you make a mistake, the washing machine may not turn on at all. For example, if the drain or inlet hose is connected incorrectly, the device will not start or a characteristic message will appear on the display indicating an error.
Attention! Some models of washing machines respond to the floor level, which must be ideal - otherwise the unit will not work or will do so with errors. Therefore, each machine, regardless of model, must be installed on a flat surface.
Compared to the well-known Bosch brand, Ardo washing machines are more unpretentious in terms of water pressure, but they are highly dependent on the network voltage. Therefore, before purchasing this model, it is necessary to check the current in the outlet where the equipment will be connected. As a rule, it should be less than 240 volts and more than 210. If your parameters are different, it is better not to buy an ardo a600x or other types of this washing machine model.
After delivering the unit home, you need to follow a number of rules:
- the first step is to unpack it and remove the shipping bolts (how to do this correctly is written in the instructions for the machine),
- make sure that the length of the hoses is sufficient to install the device in the wound place you have prepared,
- connect both types of hoses to the unit as shown in the instructions on the assembly diagram,
- then you should connect the hose intended for filling water to the water supply twin,
- the next step is to secure the hose to the siphon,
- The last thing to do is to level the Ardo machine - for this you can use a level, since even a slight tilt can lead to breakdown or malfunction of the unit (this is especially common with the Ardo a1000x model).
Attention! When leveling the washer, you need to remember that its level is easy to adjust using the legs.
It is also considered an important criterion that the hose intended for draining must be raised to a height of more than 70 cm - otherwise it will not be possible to ensure normal drainage of waste water.
Professionals advise people who have tiles in their bathroom or kitchen to place a rubber mat under the washing machine. Thanks to this, the device will not slip during spinning, when there is vibration, and will remain in place, which directly affects its performance and service life.
Attention! The Ardo machine must be connected directly to an outlet, without using tees or extension cords.
Machine installation (depending on model)
Page 3
- Image
- Text
SM277
3
MACHINE INSTALLATION (depending on model)
V
For transportation, the swinging unit of the machine is fixed with 4 spacers on screws. Before using the machine, unscrew the locking screws and remove them together
With
blocking
spacers. Save the screws and spacers for future moves.
Cover the holes on the back panel with the supplied
V
complete
plugs. Note: If the spacers are still inside the machine, remove the rear panel, remove them, and reinstall the panel.
For transportation, the swinging unit of the machine is fixed with 4 spacers on screws. Before using the machine, unscrew the locking screws with a wrench.
Insert a screwdriver into the holes and remove the 4 plastic locking spacers as shown in the picture. Note: If the spacers are still inside the machine, remove the rear panel, remove them, and reinstall the panel.
SM277.p65
04/10/01, 17.46
46
Installing and leveling the washing machine Having chosen for...
Page 4
- Image
- Text
SM277
4
Installing and leveling the washing machine
Once you have chosen a suitable location for the machine, level it using the adjustable feet [Fig. 3]. Pay particular attention to the positioning of the machine, its leveling and the tightness of the locknuts. If the washing machine is not leveled correctly, the machine will be unstable and make noise during operation, which can subsequently lead to damage.
If the machine is installed on a rug, you should check that air circulates freely between it and the floor.
It is not recommended to install the washing machine in rooms where the temperature may drop below 0
o
C.
Connection to water supply
➘
The water pressure in the water supply network must be within 0.05 1.00 mPa (0.5 10 bar.)
➘
Before connecting the machine, open the tap and let the water flow to clear the pipes of impurities such as sand and rust (this operation is especially important when the washing machine has not been used for a long time, or when it is connected to a curved water supply pipe).
➘
The inlet hose must be connected to the cold water tap with a 3/4” threaded fitting.
➘
Place the filter mat included with the machine between the tap and the pipe, and then tighten the connection tightly [Fig. 4].
➘
Place the gasket on the other end of the inlet hose and screw it to the washing machine [Fig. 5].
➘
During washing, the water supply tap must be fully open.
➘
The water drain pipe should be at a height of 60 to 90 cm [Fig. 6].
➘
If water is drained directly into the sewer, the free edge of the washing machine pipe must be inserted into a sewer pipe with an internal diameter of at least 40 mm.
➘
Make sure that the drain pipe of the machine is not tightly inserted into the sewer pipe so that the siphon does not fill with air and, accordingly, there is no overflow of water.
➘
If water is drained into a sink or somewhere else, the free end of the pipe must be secured at the point where it bends with a special holder included with the machine. Thus, place the pipe on the edge of the sink and secure the holder so that the pipe does not fall [Fig. 7]. The sink drainage channel must be clean so that water can flow through it freely.
MIN. 60 CM MAX.90 CM
SM277.p65
04/10/01, 17.46
47
Additional functions
Page 9
- Image
- Text
SM277
9
ADDITIONAL FUNCTIONS
(provided depending on model)
ON/OFF: To turn on the machine, pull the programmer handle towards you or press the on/off button (if provided), after which the control light should light up.
Temperature limit button: By pressing this button the temperature can be limited to 60° when the temperature control knob is set to a higher value.
Cold Wash Button: Pressing this button turns off the heating element and washes in cold water.
Rinse off button: When this button is pressed, the washing machine will automatically stop after the last rinse is completed and before the water is drained. In this case, the laundry remains immersed in water and does not wrinkle. This function is only applicable for synthetic and wool washing programs.
Spin Off Button: When this button is pressed, the washing machine will perform a wash cycle without spinning.
Economy button: Pressing this button reduces water and energy consumption. This function is used if the weight of the loaded laundry is less than 3 kg.
Extra rinse button: The washing machine is adjusted to minimize water consumption. As a rule, three rinses are sufficient. For areas with very soft water and for washing items belonging to people with allergies to washing powder, a button is provided that allows you to program an additional rinse cycle.
550/MAX Spin Speed Button: This button is used to switch the spin speed from minimum to maximum (maximum spin speed varies by model). If your machine has a spin speed control knob, it should be set to the desired speed.
Attention: This function is only applicable when using vigorous wash programs. When performing washing programs for delicate fabrics and wool, regardless of the position of the regulator, the spin speed will be 550 rpm.
Thermostat knob: Using the thermostat knob, you can set the desired washing temperature. To do this, turn the handle to the right and set it to the desired position. To select the correct temperature, please refer to the program table.
Attention:
Changes and selection of programs and above functions
should only be performed when the washing machine is turned off, i.e. the on/off button or the programmer knob should be in position 0.
SM277.p65
04/10/01, 17.46
52
Starting the machine before washing clothes for the first time
The operating instructions for the Ardo washing machine contain information that before the first wash it must be “idled”. This means that the owner of the equipment needs to select any mode, pour in a little powder and turn on the device. It is recommended to do this in order to clean the drum and parts of the washing machine from technical oil, dirt and dust.
Correct setting of washing clothes at idle speed:
- close the door of the Ardo machine,
- pour a little detergent into the container intended for the powder (if desired, you can also add fabric softener), and then close it,
- pay attention to the position of the programmer - it must be in the off state,
- press the power button on the device, remembering to connect it to the power supply,
- select the shortest washing mode (usually called “quick wash”)
- press the unit's power button (as a rule, it is called Start) - if it is not available on the Ardo machine, you just need to pull the toggle switch towards you, which will lock the door and turn on the time indicator).
After this, the machine will immediately begin to draw water - this means that everything was done correctly.
Attention! The toggle switch with which the mode is selected can only be rotated clockwise: if the required program accidentally slipped through, you need to turn the toggle switch to the required value, and not try to turn it back.
After washing, the device must be turned off by pressing the button labeled Stop or set the programmer to its previous position.
