Have you noticed that the washing machine has started to make unusual sounds during operation? Or did the noise appear and then disappear? Or, perhaps, after washing, you were missing clothing accessories on your items, for example, buttons, zippers, wires from a bra or corset? Or maybe even a small item, like a sock or underwear, has disappeared somewhere after washing?
It is likely that the items in question slipped into the tank. Often other small items are sent there in a similar way: coins, bolts, screws, toothpicks, pins, curtain fittings, Lego parts, and so on.
When to call a specialist?
Three situations are possible:
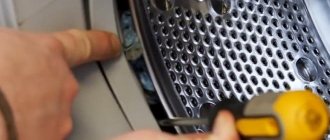
- A thin object, such as a bra wire, got stuck in one of the holes in the drum. To remove it, pinch the accessible end with pliers and gently pull, being careful not to break it. Of course, such a task can be completed without a specialist.
- The loss is not visible, but you are sure it is in the typewriter. Small things like a chain, screw, or coin may end up in the drain filter. It’s not difficult to get them yourself - you don’t need a master either.
- If you hear a clanging noise as the machine is running, as if metal is rubbing against metal, a foreign object may have gotten underneath the drum. At this point you need to call a specialist. A metallic sound may also indicate wear or malfunction of a part. It is difficult to diagnose a breakdown without the help of a specialist.
Through the “socket” for the heater
On washing machines in which the heater is located on the back side under the tub, you can remove the stuck object through the hole in the heating element. Moreover, it is here that the “lost ones” cling, clinging to the hot spiral. You cannot leave a rope or other small thing here - the machine will stop heating at full strength, and the element itself will quickly burn out.
Before any repair operations, make sure that the washing machine is disconnected from the water supply and electricity supply!
To remove the cord from the tank, you will first have to remove the heating element. We are guided by the following instructions:
- turn off the power to the washing machine;
- turn off the water supply tap;
- turn the machine with the back panel towards you;
- remove the “backdrop” by unscrewing the bolts holding it;
- find the heating element “chip” under the tank;
- release the heater from the connected wiring;
- loosen the central nut without unscrewing completely;
- press the rod inward so that it is “even” with the nut;
- use a rocking motion to remove the heating element from the “socket” (do not pull the heater by the connected wires - this can damage the power circuit);
- treat the heating element with WD-40 cleaner if the heating element does not work.
As a rule, the lace is pulled out along with the heating element, since the rope clings to the spiral. If the heater is “clean”, then you need to shine a flashlight through the hole and find the “lost” one. The item is obtained using an inserted hand, a screwdriver or a bent wire.
After “releasing” the cord, it is recommended to carefully inspect the heater for defects. It is possible that even short-term contact with a foreign object damaged the heating element. If there is noticeable damage, cracks or chips on the surface of the element, it must be replaced. Ideally, even visually the entire device should be checked with a multimeter. A replacement replacement is selected based on the serial number of the washing machine.
After all the manipulations, the washing machine needs to be assembled. We follow the instructions described, only in reverse order. At the “finish”, we make sure to carry out a test wash, checking the correct installation of the heating element, drain pipe or garbage filter. Let’s not forget about “working on mistakes”: from now on, it’s better to wash small items in special protective bags.
Interesting:
- Washing laces in the washing machine
- Washing white socks in the washing machine
- Washing laces in the washing machine
- Which LG washing machine to choose
- How to wash clothes for newborns
- The washing machine tears clothes - causes and repairs
Reader comments
- Share your opinion - leave a comment
How do they get there?
There are three ways for foreign objects to get into the machine:
- Every little thing falls into the drum from clothes sent for washing. If you just get lazy or forget to check your pockets, a problem is just around the corner. It’s not so bad if the dropped item gets damaged, and it’s much worse if the equipment gets damaged. The most common “clients” of the drum are money, jewelry, and fasteners. It happens that more important things - a phone or a passport - are accidentally erased.
- During rotation, beads, buttons, and other accessories may come off from clothing. Also, during the washing process, solid elements of bras may fall out.
- "Force Majeure". If small children or pets have access to the machine, they can easily put some toy or any other thing inside. By the way, foreign bodies can enter not only through the hatch, but also through the powder cuvette.
Express extraction
As soon as you realize that something unnecessary has gotten into the machine, take action immediately. Cancel a running program. This is done like this:
- Press the “start/pause” button of the selected program - the machine will stop washing.
- Press the same button again and hold for five seconds.
- Wait until the pump pumps out water and the machine turns off.
There are machines that do not have automatic draining. In this case, you will have to drain the water through an emergency drain or through a drain filter. This must be done to unlock the hatch door. Afterwards, the door is opened and the foreign body trapped inside is removed.
How to remove small items from the washing machine?
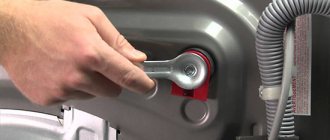
If you are sure that the source of the noise during rotation is something foreign, you can try to remove it yourself. Provided that you have basic skills in handling equipment and tools. The wall of front machines is removed; depending on the model, the front or rear wall is removed. Before disassembling the unit, familiarize yourself with the diagram of this process. For example, let's look at the most common option - you need to remove the thing by first removing the top cover and back wall:
- Drain the water and disconnect the machine from the power supply.
- Unscrew the bolts securing the top cover - they are located on the rear wall - and remove the cover.
- Unscrew the screws that secure the back wall and remove it. At this stage, you can detect soft objects - for example, paper, a belt or a sock. Once outside the drum, they are wound onto the heating element. But you shouldn’t stop there, because if you hear a noise, you need to look for a solid body that could have produced it. So let's move on.
- Take out the heating element (heating element). To do this, disconnect the wiring that goes to it and unscrew the fastening nut. The heating element can be removed by hooking it with a screwdriver.
- Illuminate the hole formed after removing the heating element with a flashlight. The debris that is there needs to be removed. Small things often get caught in the gap between the tank and the drum. To make sure there is nothing else, rotate the drum - if a foreign element is stuck, it will fall out during movement.
- Build a wire hook. The length and configuration are selected taking into account the location of the stuck item. Take out the loss by picking it up with a hook.
- If you have already removed the heating element, clean it of deposits. When returning it to its place, make sure it fits exactly there. Tighten the nut and connect the wires.
- Reassemble the machine parts in reverse order. Tighten all fasteners.
To avoid mistakes when connecting the wires, take a photo or sketch first.
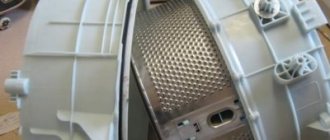
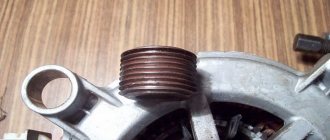
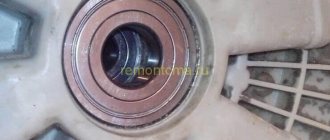
It happens that the loss gets stuck so much that the drum jams. Then disassembling the tank is inevitable. Removing the “lost” is comparable in complexity to replacing a bearing. But to remove anything from a non-separable tank, you will have to saw its body. This task takes several hours and requires special skills and tools. Usually it is entrusted to a specialist.
Important! Even soft objects, a scarf or a sock that gets inside the machine can block the drain pump or prevent it from rotating.
How to avoid problems
Anything caught between the tub and the drum may cause damage to the appliance. Therefore, it is better to follow some rules:
- It is important to always inspect pockets for coins, nails and other small items.
- Carefully check buttons, fasteners and other accessories. If you are not sure that these elements will not break off during washing, it is better to place the clothes in a special mesh cover for washing.
- It is worth getting a special cover for washing bras - this will protect both the machine and the product itself (the bra will not lose its shape during washing).
- If there are small children in the house, it is better to always keep the washer door closed, because... a child can easily throw something inside while playing. Always inspect the drum before washing.
If you carefully monitor the clothes that a person throws into the wash, the likelihood of a foreign object getting into the drum and deeper will be reduced to zero.
Bra in the washing machine
What's the harm?
If a bra wire gets into the machine, and the user ignores this fact, the following problems may occur:
- Mechanical damage to device parts. At high rotation speeds, the solid element acquires enormous force - it can easily pierce the walls of the drum and disrupt the integrity of the tank or heating element. We will have to repair damaged elements and fight the flood.
- Damage to the rubber seal around the hatch.
- Rotation lock.
- Even if it doesn’t interfere, a bone stuck somewhere in the depths will begin to rust over time and begin to stain clothes that are washed in the machine.
You can tell if a bone is stuck by hearing extraneous sounds. You can remove it in the same way as any other items - by disassembling the device. We have provided instructions above.
How to get it?
The extraction process depends not only on the location of the item, but also on the material from which it is made. Bra inserts are made of plastic and metal. Iron ones are much more dangerous - they can seriously harm the machine. But they can be removed with a magnet without resorting to disassembling the device. To get the plastic analogue, disassembly is required.
Extraction through heating element
The method is suitable for models with a heating element located at the rear. Sequencing:
- Disconnect the device from the power supply - remove the plug from the socket.
- Turn the device over so that it is convenient to enter from behind.
- It’s good if there is a service hatch, you can work through it. If it is not there, remove the wall and remove the heating element, disconnecting the wires. Then they take out the “lost one”.
What if through the drain?
If the bra element is stuck in the pipe, it is removed from below. The order is:
- Disconnection from the power supply;
- Installing the device in a convenient position;
- Removing the container for washing powder;
- Turning the machine over onto the side wall;
- Unscrewing the screws and removing the clamps securing the bottom of the device - this way you can get to the drain pipe;
- Removing the pipe;
- Removing the bone. Cleaning and installing the pipe. Machine assembly.
No disassembly
If the bone is at the bottom of the tank, you can do without disassembling it. A flashlight and something thin, for example, a knitting needle or wire, will be available as auxiliary tools. After establishing the exact location of the loss, it is hooked with a hook made of wire/knitting needles. Moreover, there should be hooks at both ends. The object being removed is picked up first. The other one will come in handy in case of the fate that befell the bra wire. Having inserted the hook into the hole, pry the thing up and slowly scroll it until the bra insert stands vertically. As soon as the end of the bone gets into the hole, the pliers go into action.
Is there really a lost cord in the drum?
If you don’t see laces among the washed items, don’t panic and immediately disassemble the washing machine. The rope does not always get stuck in the tank or drum - perhaps it got caught in another place. First we do this:
- we probe the drum cylinder (sometimes the lace sticks to the wall or clings to the rib punch);
- We carefully check the things taken out of the drum (often the rope is “hidden” in pockets or folds);
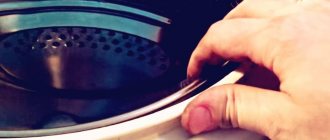
- inspect the cuff of the hatch (bend the elastic band back and look for the lace).
If the lost cord was not found in the mentioned places, it means that it managed to fall into the tank. As a rule, due to its low weight, the rope does not stay there, but “goes” along with the water into the drainage system. More precisely, it is wound onto a garbage filter or pump volute. To remove the product, you will have to disconnect the machine from communications, open the technical hatch door, lay down rags and unscrew the drainage nozzle. Afterwards, all that remains is to inspect the vacated hole and find the “lost thing”.
Operating a washing machine with an object stuck in the tank is dangerous - the item can clog the drain or cause the heating element to break down.
It is more difficult when the lace remains in the tank. You can get it in several ways, but it’s better to start with the simplest:
- start the rinse program with an empty drum;
- wait until the machine is “washed”;
- At the end of the cycle, check the garbage filter and snail.
There is a high probability that after repeated rinsing, the stuck string will leave the tank along with the water, remaining on the filter or snail. If the method does not work, then you should turn to more effective measures. It is strongly not recommended to leave the rope inside the machine - it can stick to the heater and cause its breakdown.
