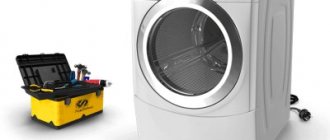
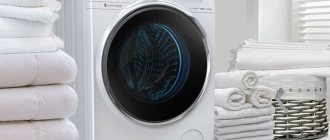
Today not a single housewife can do without a washing machine. Often, even working equipment malfunctions. Sometimes the breakdown is due to a malfunction of the drum. The article describes in detail how to determine the cause of the malfunction, how to repair or replace a broken element with your own hands, including disassembly, dismantling and assembly, as well as what preventative cleaning measures can be taken to avoid troubles in the future. An informative bonus is information about prices for such work carried out by specialists.
How to replace and repair Indesit and Samsung yourself?
Determining the cause of the malfunction
Advice
Washing machines from Indesite and Samsung have a simple drum structure, it can be easily dismantled and, in case of a malfunction, repairs can be made with your own hands. You need to know the signs that indicate a defect.
If the drum is faulty, it begins to wobble chaotically during the washing or spin cycle. It happens that when disconnected from the network, the drum is turned manually, whereas without electricity it should be fixed. These are the main symptoms of a malfunction, which may be accompanied by additional ones:
- loud wash, whistling spin;
- during spinning, tapping movements are made on the SMA or sunroof glass;
- jumping movement or vibration of the washing machine at different operating modes, when rinsing clothes;
- friction of the drum against the cuff of the hatch with a creaking noise;
- Spreading stains of an oily dark liquid are visible under the machine during and after operation;
- rusty marks at the back of the machine on the edge of the tank;
- the drum regularly flies off or falls to the bottom of the tank;
- chewing on things while washing;
- the washing machine breaks plugs or even smokes.
These are alarming signals for a mandatory inspection of the car and correction of the situation. A loose drum must be corrected for future operation of the equipment. If this is not done in time, then soon the washing machine will have to be scrapped.
Important
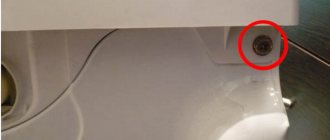
The drum of the washing machine may not rotate due to a motor failure, a loose or broken drive belt, a software failure, or if a foreign object interferes with the movement; in this case, it does not rotate even manually when the power supply is turned off.
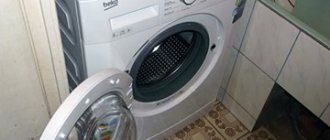
Disassembly
Disassembling the washing machine is necessary to accurately determine the malfunction. It happens that there is no problem in the operation of the equipment, just a foreign object got into the drum or the doors opened in the vertical. The problem is usually associated with transporting equipment and accidentally shaking it.
The machine needs to be disassembled to gain access to the tank. It is necessary to pull out the equipment so that the walls are not in the way, unscrew the bolts on the back panel to open the top cover. To remove it without damaging the body, you need to move it backwards with smooth movements. Then unscrew the screws of the back cover and remove the heating element.
General disassembly procedure for all types of breakdown:
- the rear panel latches are unscrewed and set aside;
- the side panel extends to the side and is also removed;
- the wires are disconnected, but first you need to fix their location;
- the screw that holds the shaft is unscrewed;
- the loading hatch is closed, the tank is taken out;
- the halves of the tank are separated, the drum is taken out;
- Parts are cleaned or corrected depending on the problem that has arisen.
Dismantling
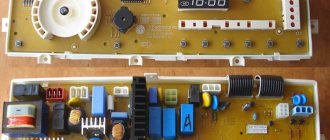
Dismantling is necessary due to failure of the control board. This can happen due to voltage surges or improper operation of the equipment. In case of serious damage, you have to remove the board. To do this, disconnect, then pull out the top panel, dismantle the top part. The fixing strips are also removed, then the module can be freely unhooked and removed.
Often it is necessary to replace some parts that have been worn out. The motor clamped by the tank must be checked for flaws, blackening, and other defects that may affect the functionality of the equipment. The tank must be lifted and the motor freed. In branded washing machines you also have to remove the side wall to gain access to:
- brush;
- slats;
- winding
Bearing replacement and device assembly
Before you begin disassembling the elements, if you need to remove the bearing, it is important to make sure that the tank is empty and there are no residual water or foreign objects in it. The equipment is disconnected from the electrical network and moved away from the walls so that the lid can be easily opened at the top and side.
In Indesite and Samsung washing machines, the bearings are located in a protected place. To remove them, you need to have a jigsaw and a screwdriver on hand. The bearings can be easily removed if all fasteners have been successfully removed. Otherwise, you will need to tinker with disassembling the equipment (read about how to repair or replace bearings here).
Attention
Due to bearing wear, the operation of the drum is severely inhibited, until the equipment burns out. In addition to the bearing itself, the oil seals, which are inextricably linked with this part and depend on its operation, must be replaced.
Work order:
- the back and top covers can be easily removed after unscrewing the retaining fasteners;
- dispenser is dismantled;
- the clamps are unscrewed and the control unit is removed;
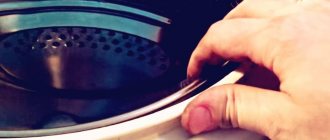
- the loading hatch opens to remove the rubber cuff;
- the cuff is tucked into the drum;
- the blocking is removed;
- All fasteners can be removed for quick access to the front panel;
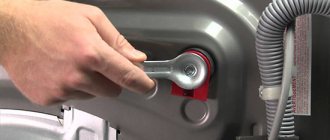
- the clamp is loosened, the counterweight is removed;
- The heating element is removed by disconnecting the wires and removing the heating element;
- the tank and housing are released by disconnecting the pipe and drive;
- unscrews, takes out the engine;
- The tank is removed along with the drum.
For ease of operation, the tank is placed on a flat table. Then do:
- bearing knockout;
- removal of seals;
- lubrication of the socket;
- installation of new parts.
When assembling the drum, installation must be done very carefully. It is good to coat the joints with sealant to prevent leakage. When assembling, you need to be guided by a fixed diagram, which was drawn up before disassembling the parts and fasteners.
We invite you to watch a video about replacing bearings in a washing machine:
Washing machine breakdowns are always associated with a lot of inconvenience. Sometimes it is not possible to call a professional technician, and then the owners try to solve the problem on their own. In our articles you will find detailed instructions for repairing and replacing the pump, pump, drain and pressure switch, tank, heating element.
Myguru service quality
We provide high-quality repair and maintenance services for household appliances at reasonable prices. The company employs qualified specialists with many years of experience. The work is completed in one visit, in front of the client. The staff is polite and friendly, both cash and cards are accepted for payment. We work in all areas of the city. Urgent call possible. Consultation and diagnostics are free. The work comes with a two-year warranty. Call us, we will answer all your questions!
Preventative cleaning measures
Due to frequent use of equipment, malfunctions occur. Therefore, it is necessary to carry out regular prevention:
- Before washing complex laundry, you must make sure that all items are removed from your pockets and that there are no sharp buttons or protruding decorative elements on the surface.
- Check the condition of the rubber seals regularly. If they are not tensioned tightly, then water seeps through them and the drum begins to rust. Signs of damage can be seen in these same elastic bands: as soon as they darken, they need to be pulled closer to the body.
- Check the condition of the water that is pumped into the tank. If there is excessive salt content in it, the tank becomes coated. Regular cleansing is the ideal solution to the problem.
- You should not load the tank with a large number of things, so as not to wear out the fasteners and other parts.
Advice
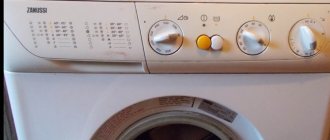
Before each load of laundry, it is necessary to check that the drum is securely fastened and that there are no visible changes in its appearance, first pour water into the tank and run it idle to make sure that the engine is working properly.
Requirements for glued joints
When new bearings are installed, the question arises - how to repair a plastic tank that has been sawed in half. How to seal the drum to prevent leaks? What to choose - glue or sealant? It is better to use glue, since no sealant can provide the necessary strength characteristics of a glued structure.
Reliable connection of parts requires two operations:
- The halves are connected using bolts and nuts. To do this, holes are made in the plastic - evenly along the entire seam.
- The gap between the parts to be joined is filled with glue or sealant.
Not every composition will work. It is important to know what sealant to glue the halves together with. In this case, the operating features of the unit are taken into account:
- Strong vibrations - the connection must withstand severe mechanical loads.
- Extreme temperature conditions - the unit either heats up or cools down.
- Contact with aquatic environment. Including water supplied under pressure.
If the purchased composition fails you, leaks are possible. Then you will again disassemble the machine and fix the problem.
Repair price from specialists
If you call a technician to your home, but know about the malfunction in advance, then the cost of repairing the washing machine drum will be insignificant. If you don’t need to change the drum, but just fix it or clean it, then you will need to pay from 200 to 300 rubles. depending on the region. If it comes to a complete replacement, then the master will charge from 700 to 1000 rubles. depending on where you live.
If you take your washing machine for repair yourself, the price will not differ much. The maximum difference will be 100–300 rubles.
It is possible to repair a washing machine drum yourself at home if you know the equipment and have the skills to disassemble/assemble equipment. If you do not have such skills, then it is advisable to contact a workshop or service center.
Why do you have to glue it?
Sealing and gluing the washing machine tank is a forced process that owners of some SMA models have to deal with. Washing machines with a non-removable tank are offered, for example, by brands such as Ariston and Indesit. Manufacturers, making this element monolithic, do not intend to disassemble it. If the bearing breaks, the unit must be completely replaced. But such a replacement costs a lot of money and our people simply cannot agree with this order of things. As it turned out, you can halve the drum, remove the bearing, replace it with a new one, and then connect the halves. It is important to know how and with what to seal the tank.
This is interesting: Why ice freezes on the back wall of the refrigerator: causes of malfunction
Operating principle of the washing machine
Front-loading and top-loading automatic washing machines have a similar structure. Regardless of the brand (LG, Zanussi, Candy, Ariston), the unit has a metal body, consisting of a top, rear, front wall and, almost always, a base. The internal structure of the machine consists of 20 main elements:
- Control Panel.
- Electronic module.
- Water supply hose.
- Water tank (fixed).
- Powder dispenser.
- Drum for laundry (rotating).
- Drum rotation sensor.
- Tank springs (spirals).
- Water level sensor.
- Motor (regular or inverter).
- Drive belt (for a conventional engine).
- Tubular electric heater (TEH).
- Drain pump.
- Water collector.
- Drain hose.
- Connections (for example, the connection connecting the detergent compartment to the tank).
- Support legs.
- Hatch door.
- Rubber door seal.
- Latch-lock.
Here is a visual diagram of the internal structure of the unit
The operating principle of all washing machines is almost the same. After turning on the unit, the inlet valve opens, through which water passes through the hose to the powder compartment and from there enters the tank. The liquid level is monitored by a water level sensor. As soon as the required volume is reached, the control module sends a corresponding signal to the valve and it closes.
When repairing a washing machine yourself, always follow the instruction manual.
Next, the machine heats the water using a heating element, while the temperature is controlled by a timer and a special sensor. Simultaneously with the heating of the water, the engine starts, which rotates the drum in both directions at short intervals. After completing the main stages of washing, the used water is drained and clean water is taken in for rinsing. Then the motor turns off and the water is completely drained from the tank through the drain system. The final stage is the spinning of things, which occurs when the drum rotates.
After becoming familiar with the structure and operating principle of the mechanisms, repairing an automatic washing machine no longer seems like an impossible task. Before starting work, do not forget to prepare a minimum set of tools: screwdrivers, keys, pliers, wire cutters and other accessories.
How to glue a plastic water tank?
Below are adhesives and sealants that are suitable for bonding the drum. These compositions easily withstand the difficulties characteristic of SMA - temperature extremes, vibration attacks, high pressure, contact with water.
Permatex 81730
This is a flowable adhesive-sealant designed for hermetically sealing headlights and glass in a car. The composition is characterized by transparency. Frozen seams do not allow water to pass through and are not afraid of extreme temperatures. The operating range of the composition is from minus 62 to plus 232 °C. Great for the task. Costs on average - 175 rubles.
Kraftool
The composition is highly elastic. Withstands strong vibrations and heating up to plus 250 °C. Its main purpose is to seal connections in electric motors. Reliably fastens the halves of the product even without bolted connections. One tube can glue 4 tanks together. The cost is about 200 rubles.
Glue F
This is polyurethane glue. If you use it, then you won't need bolts. But it is so strong that if you need to disassemble the machine again, you will have to saw it again. The second disadvantage is the price, it costs much more than sealants, a 310 ml can costs almost 700 rubles.
ABRO 11AB-R
An ultra-resistant sealant that can withstand the harshest conditions. He is not afraid of very high temperatures, and is not afraid of chemically aggressive substances, including acids. The cost is approximately 350 rubles.