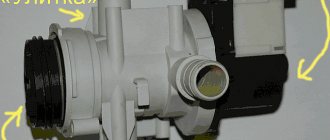
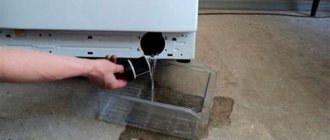
It happens that organizing the drainage of waste water from the tank of an automatic machine becomes a real problem for users of the equipment. In cases where the washing machine is installed at some distance from the main house communications, and moreover, they cannot be quickly converted, the owners have no choice but to look for non-standard ways to connect the drain hose to the sewer system. One of the unusual options is to fix the hose in a tee through a special cuff for draining the washing machine. Let's figure out how to connect using this principle.
What is a washing machine cuff?
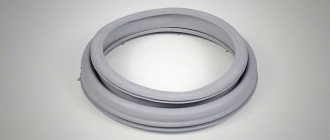
In simple words, this is a rubber part that is installed in the area of the unit hatch. It provides sealing during the process of clogging the loading tank during operation of the device. It is due to this layer that not a single drop of water can leak out.
Where the cuff is located and what type it is depends on the model of the automatic washing machine. If we are talking about front loading, it ensures the connection of the tank to the front wall, and the shape is round. If the loading type is vertical, the part connects the tank and the upper wall, and is also presented in the shape of a rectangle.
Some time ago, seals were made from highly flexible rubber, although today the situation has changed. Currently, cuffs have a similar material, but it is mainly silicone. It retains its elastic properties, regardless of temperature. It is also worth noting that the cuffs belonging to different models are different in size and shape.
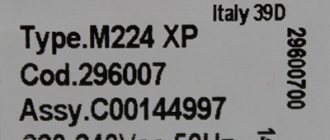
Examples of current positions
It is worth noting that a huge number of cuffs are universal, since the hole for the door is most often unified. The dimensions of the drum, including the format of the washing machine, are realized through the internal volume with the transfer of the load point and shock-absorbing ligament below or above the non-removable part of the device body. Therefore, the following universal and original (for a whole series of devices) rubber seals are popular:
- GSK007WH, 481246668775 (for the Whirpool line, consisting of more than 100 models) – 420 rubles .
- INDESIT 0262267, GSK012ID (with clamp and clamp) – 440 RUR .
- ARDO 4001000 (suitable for many washing machines with a load of 5 kg and an additional drain channel in the elastic band) – 950 rub .
- Universal for Indesit/Ariston 103633, GSK002ID, IT3004, AF546TIT – 600 rub .
- Whirlpool 481010410453 (for all vertical washing machines of this manufacturer) – RUB 3,350 .
- BOSCH/SIEMENS 8kg, 680405, 478300, 478322, 681211 (with lamp outlet) – 4,000 rub.
- Zanussi 1327756100 – 3,874 rub .
Types of cuff and its purpose
The type of cuff is determined by the design of the automatic washing machine. If we are talking about vertical loading, and the splash protection option is provided, the element does not come into constant contact with water.
Tightness plays an important role in the case of spinning, because water simply cannot fly away in different directions under pressure. In such machines, the cuff is a guide for water drainage, and the tightness is ensured solely by the lid.
The remaining details depend on the design features of the tank. If the body part is a water container, a cuff of increased flexibility is not required. If the tank acts as an independent element and is suspended on shock absorbers, the cuff is attached to the frame and the tank at the same time. In this case, it is possible to provide a sealed sleeve that does not allow water to pass through in the joint area.
If the design of the machine provides for a front-loading type, the cuff is assigned a more important role. Along with providing protection against splashes, it holds the water mass while filling the container. The sleeve is constantly in contact with the liquid, and the load is uneven. The upper area is washed by splashes and waves during the operation of the drum. The lower area is almost always filled with water, which in turn can be cold or hot.
To ensure constant and tight contact with the hatch, it is necessary to ensure that the material has optimal performance parameters. To solve these problems, modern manufacturers are forced to seek a compromise.
On the one hand, they provide an increased level of product strength. On the other hand, the absence of hardening of the material due to temperature changes and the influence of aggressive detergent compositions plays a role. An important role is played by the compliance of the cuff with hygiene standards.
Got a non-standard tee
There are cases that a tee with a diameter of 50 mm simply does not fit on a modern sewer pipe of the same size. The free installation of the tee is hampered by a couple of extra millimeters, due to which it does not fit into place. This is explained by how long ago the structural elements were produced, and by the fact that in the recent past there were certain other standards in production that differed from the current ones. A standard cuff, therefore, is also not suitable for organizing this connection.
If you find yourself in this situation, the problem can be solved in two ways:
- Having removed the sealing ring, fill its seat with waterproof sealant, and also treat the part of the surface of the tee that enters the sewer network. This way the part will easily enter the sewer system a couple of centimeters.
- By purchasing a tee with a diameter of 40 mm and a transition collar having dimensions of 50 * 40 mm. Connecting the outlet and the pipe in this way will be very easy.
The first method is suitable in case of vertical mounting of the outlet. The tee will fit very tightly, and together with the sealant, it will never let water through. If the structure is horizontal, preference should be given to the second method.
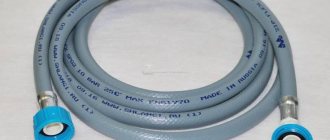
In the vast majority of cases, the diameter of the corrugation connected to sinks is no more than 40 mm. This suggests that the use of a tee of the appropriate size will in no way affect the ability of the pipe to pass water. When there is a branch with a diameter of 50 mm at the end of the corrugation, you can cut it with careful movements. The bell is quite fragile, so you should not press hard on the cutter; cutting is done with light circular movements.
What materials are the cuffs made from?
When removed, the cuff is a sleeve, which is characterized by a cylinder or rectangle shape. Everything depends solely on the design of the loading hatch and the type of device, which can be vertical or frontal. Certain features apply to products that have a clothes drying mode. An outlet is provided in the area of the working wall.
As for the ends, they have clamping-type sides, which are characterized by a complex shape. It is due to them that the product fits as tightly as possible to the flanges of the body and tank. The fastening itself is very tight, but when heated, the material has the ability to expand. Therefore, to ensure increased reliability, the sides are fixed using clamps or springs.
A similar type of tie is used in the case of a rectangular cuff. The exception is a design in which the bottom hangs completely into a container attached to the body part. The material used in production is classic: it is rubber with an impressive rubber content. As for vulcanization, this process is carried out in a special way in order to maintain maximum softness and elasticity. Along with this, the mixture contains additives that provide the cuff with protection from tanning during prolonged exposure to liquid.
Rules for choosing a new cuff
In order for the cuff to be connected correctly and reliably, it is not enough to simply buy and install it: you will need the right approach to choosing a device. Several parameters should be taken into account:
- first you need to determine the diametrical cross-section of the pipe - outside and inside, so that the seal fits well to the walls;
- You should buy a product whose elastic band is as dense as possible so that it tightly grips the pipe; only with this approach can reliable fixation be ensured, especially in conditions of draining water and spinning things.
If the cuff is purchased separately from the tee (and they are usually sold as a set), you will need to follow similar rules. The main thing is that there are no cracks or holes in the product. Experienced plumbers say that it is worth purchasing a product that is made of modern alloys, because... They last a long time and are reliable.
After purchase, proper installation of the cuff will be required. The procedure for this is as follows:
- you need to insert the tee into the connector area, the rubber band for sealing is not removed;
- after this, the device is securely fixed, and the cuff itself is installed in the hose connector;
- subsequently a drain hose is threaded into it.
After this, the installation process is considered complete. If the cuff is installed in the tee itself, the seal is fixed to the sewer pipe. After this, the hose itself is inserted. So, the purchase is optional, but very desirable. And since the device itself is inexpensive, saving on it is unacceptable.
How is the connection made?
If your apartment is equipped with a modern metal-plastic sewer system with a pipe diameter of 40 or 50 mm, then there will be no problems connecting the drain hose. It is necessary to purchase from a specialized retail outlet an appropriate tee with an inclination angle of 45° (if it is intended to be installed under a sink) and a seal for it with an internal ring diameter of 25 mm.
When installing a cuff into a purchased tee, it is important to follow one rule. Do not remove the sealing ring from the pipe cavity; it will serve as a guarantee of the reliability and tightness of the connection being created. If you cannot insert the cuff, try heating it in hot water for 2-3 minutes. Having been exposed to heat, the elastic band will become softer and more flexible, so it will freely fall into place.
After installing the cuff, only a thin limiting edge of the seal should be visible from the tee outlet.
Tools needed to replace the cuff
Replacing the cuff is a fairly simple process, especially if you follow simple instructions. The first thing to do is check the product for damage. Only after this can you insert it into the device. To do this, you need to remove the old part by removing the clamp that held part of the cuff attached to the wall in front. After inspection, a decision is made as to whether the rubber will be repaired or replaced. The tools that are required for this are few:
- flat-type screwdriver;
- slotted screwdriver;
- new cuff;
- glue (if the part will be repaired and not replaced).
In some situations, additional adaptations may be required. The main thing is that they are used in a certain order and are of high quality.
Replacing the rubber seal yourself
To replace the cuff yourself, you need to follow a certain algorithm of actions. To understand the order of events, it is worth familiarizing yourself with it in more detail.
Removing the front clamp
The clamp is attached to the front wall in different ways, depending on the specific model and the material from which the part is made. In general, there are three main options - using latches, springs and screws. The first method is ideal for clamps made of plastic, the rest - for products made of metal material. In any case, you cannot do without using a flat-head screwdriver.
The further procedure depends on the type of fastening. The screw is unscrewed, the spring, in turn, is pulled back and weakened, the plastic clamp pulls towards itself at the junction of the latches. After this, the clamp is removed using a screwdriver. Although the procedure seems simple, difficulties may arise in practice.
The fact is that some brands produce models in which you need to remove the front wall to remove the elastic band. These are Samsung, Siemens, LG, Bosch, etc. Doing this work on your own is very problematic, but if you want, everything is possible. The main thing is to carry out the work carefully to avoid damage to wires and contacts.
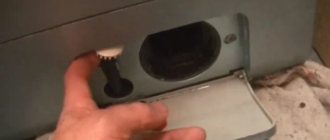
Removing the Bezel
The first thing that must be done is to remove the unit from the electrical network and make sure that there is no water in the drum and sump. Only after completing these steps can you remove the front panel. To get directly to the screw, you need to remove the powder receiver by pulling out the tray all the way and pressing the corresponding key.
After this, all that remains is to open the hatch and disconnect it. It is located in the lower area of the front wall of the unit. To do this, use a screwdriver to unscrew the mounting screw. After this, the hatch door is opened, the clamp is removed, which secures the cuff to the panel located in front.
This is easy to do if you pry the spring with a slotted screwdriver and then remove it together with the clamp from the seal groove. After this, the edge of the cuff is pulled out of the recess in a circle, the elastic is sent to the inside of the case, and the hatch door is latched. All this will allow you to get to the top screws, which you need to unscrew, and then move the panel forward a few centimeters. After this, all that remains is to hold the wall suspended and disconnect the plastic fasteners from it. After that, do the same with the locking contacts.
Removing the old cuff and inspecting it
After the front clamp is removed, you need to completely remove the seal from the rubber. The procedure in this case is as follows:
- the front part of the rubber seal gently slides out, before which it is held on the body of the machine due to its own tension;
- after this, the mounting mark is found, which is located on the cuff;
- using a marker it is marked in the tank area;
- The second clamp is removed according to the same principle as the first.
After all the work is done, it will not be difficult to remove the cuff from the machine. To do this, you just need to pull it towards you.
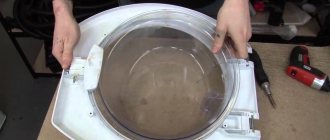
Preparing the site for installing a new cuff
The cuff needs to be replaced when cracks and other similar damage appear on it. In this case, you can safely install a new rubber band. The preparatory step is to completely clean the edge of the tank, because it is in this place that, as a rule, a large amount of dirt accumulates. Residues of household chemicals – detergents used for washing – also end up there.
Cleaning activities are best carried out using a sponge, which is periodically moistened in a soap-based solution. There is no need to rinse off the remaining foam, nor do you need to wipe the part dry. The fact is that soap becomes a lubricant and allows you to cope with the process much faster.
Installation of a new sealing rubber
You can put it on yourself, but this process involves some difficulties. Firstly, the material is difficult to stretch; moreover, it causes resistance and stubbornly “refuses” to fall into place. Therefore, you first need to attach the element to the edge area from above and do this in such a way that the mounting marks easily match. After this, you need to slide along the rubber with your thumbs to properly tighten the cuff.
In the next step, it is recommended to use a special lubricant made from soap. The cuff is stretched in the lower area, so putting it back in place is problematic. Therefore, in this area, the seal must be placed on the tank. After completing this work, the rubber is held tightly on the edge.
At the last stage, it is necessary to ensure that the part is installed correctly. If there are areas of loose contact with the metal base, there is a high probability of leaks occurring during operation of the machine.
Installing the Inner Clamp
There are several options for solving this problem, mainly it all depends on the type of fastening. If we are talking about spring-type tension, a screwdriver is used to carry out installation activities. The tool is inserted into the hole responsible for blocking the hatch, and then a spring is put on it. As a result, the fastening stretches and the clamp is easily put on in the required place.
If you have a clamp equipped with a screw, this task is much easier to solve. In this case, the tension is unscrewed almost 100%, and the clamp, in turn, is placed on the seating area. To secure the part, you just need to tighten the screw.
If the washer has a wire-based clamp and there are no tensioners, it is customary to use pliers as an additional tool. They are needed to carefully tighten the metal ends, and the knot that is formed is hidden in a special recess on the cuff.
Practice shows that it is most advisable to use a plastic clamp. Its fastening is carried out using latches. After the work is done, the cuff is pulled over the edge of the panel in front and secured using a clamp. At the end of the work, the seal is checked for leaks. To do this, the fast washing mode is launched. If there are no leaks, the cuff is installed rationally.