The German manufacturer of large household appliances Bosch is famous for the consistently high quality of all its products.
The company never tires of delighting consumers in 150 countries around the world with increasingly technically advanced models of washing machines.
Bosch Maxx washing machines are one of the most rarely malfunctioning units. They serve for decades without breakdowns.
But what if the car still breaks down? How to carry out initial diagnostics of a breakdown and decipher the error code?
Features of Bosch Maxx models
The Bosch Maxx line of washing machines includes many models:
- Maxx 4,
- Maxx 5,
- Maxx 6,
- Maxx 7,
- Maxx Logixx,
- Classixx, others.
These are the most advanced washing machines from Bosch. What sets them apart from their competitors among other brands is their high “intelligence.”
The “brain” of Bosch Maxx washing machines—the control module—is far superior in parameters to similar devices in other models.
Distinctive feature of the Bosch Maxx control module :
- extremely accurate self-diagnosis system,
- self-diagnosis mode - service test.
Diagnostic system database
Despite the fact that there are not very many error codes for Bosch Max 5 washing machines, you don’t need to memorize them all by heart; keeping this kind of information in your head is not easy - you will inevitably miss something and make a mistake. Just write out or print the guide and keep it handy. Here is a list of codes.
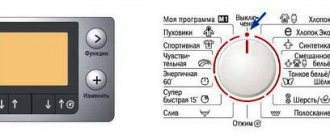
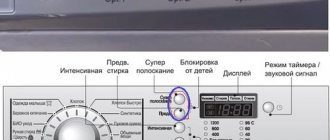
- F16 on the screen, or the “Spin 800” indicator is permanently lit. The problem is most likely in the hatch door. Open the door and then close it, if necessary, press down lightly with your knee. Now try restarting the program.
- The display shows F17, or the same “800 rpm spin” light and the indicator next to the image of a basin of water are on. Here the problem is in the collection of water: it either does not flow at all, or does so too slowly. There may be several solutions: clean the filter mesh, check the water pressure in the pipes. You can also open the faucet of the washing machine all the way.
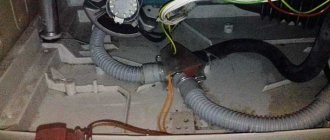
- Code F18 has a similar problem (analogue – the “Spin 400” and “Spin 800” lights are on). In this case, the water, on the contrary, does not drain or drains much longer than expected. Check the drain filter for contaminants and remove them, also check the pressure switch. If it is defective, replace it with a new one.
- F19, or the following combination: basin with water, spin-800, spin-400. This indicates problems with water heating. It can either not heat up at all or literally boil. Here it’s all about almost 100% probability in the thermostat or heating element and its contacts. It is useless to repair these elements; it is easier to replace them with new ones. Voltage surges in the electrical network can also be the cause. Check the level to ensure it meets the standards.
- Error F20 and the lighting of the spin-400 and spin-600 lights indicate a subtype of problem F19 - untimely heating of water. How to fix it - see the point above.
- Error F21 and the spin-800, spin-600, spin-400 indicators and the basin icon light up simultaneously. This fault code indicates that the drive motor has stopped or is rotating unevenly. This leads to blocking the rotation of the drum, respectively. In this case, it is recommended to check three parts: the motor itself, the tachogenerator and the control module.
- F22 or on machines without a display - spin bulbs 800, 600 and 400. Most likely, something has shorted inside the NTS sensor, or the wiring has burned out. Accordingly, the solution depends on checking and repairing/purchasing a new sensor.
- F23 or the same three spin buttons 800, 600, 400 are lit along with the basin. This means that the presence of water was detected in the pan of the machine, and a leak occurred somewhere. To find out, inspect all parts that come into contact with water. It is also possible that the connecting circuits of the Aquastop system may break.
- F40\the second light in the “Spin” column is on, as well as the top one in the right column. A rather complex error is a violation of equipment synchronization. Check the value of the machine's power supply; most likely, the indicators are off.
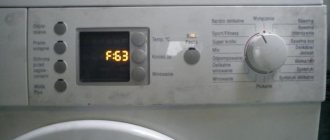
- F63 the remaining spin lights are added to the previous indicators. There is only one way out - to reflash the electronic module or completely replace it with a new one.
As you understand, DIY repairs are not always possible; sometimes the help of a competent person is not even questioned. However, you should not think that you are involved in a complex adventure. It is enough just to regularly properly care for your equipment.
Attention! If the need for complex repairs does arise, do not attempt to carry them out without sufficient confidence in your knowledge and skills. Otherwise, further repairs will be even more expensive.
What is a service test and how to do it
A service test is the primary diagnosis of a breakdown at home. The owner of a Bosch Maxx washing machine can produce it without the help of a professional technician.
Why carry it out? To prevent more complex malfunctions and the possibility of complete failure of the Bosch Maxx.
The algorithm for launching the service test differs depending on the Bosch Maxx model.
Bosch Maxx 4 is one of the most popular models of this Bosch “family”.
To run a service test on the Maxx 4 washing “assistant”, you will need:
- Turn off the washing machine.
- Use one hand to simultaneously press all additional function buttons.
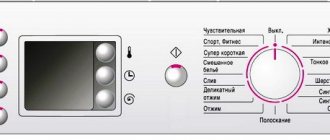
- With your other hand, turn the wash mode selection switch to “Cotton 30?” Diagnostics starts.
- Select test.
Each washing program corresponds to a test of a specific part or assembly of the washing machine:
- Electric motor - Cotton 60°.
- Drain pump (pump) - Cotton 60° Economy;
- TEN (tubular electric heater) - Cotton 90°;
- Main valve - Spin;
- Pre-valve - Drain.
By setting this or that mode, the owner of the washing machine starts checking one of the most important parts of the unit.
- Click the “Start” button.
Bosch Maxx 5,6 and 7 are also popular among Russian consumers
In these models, the test runs like this:
- Close the unit door.
- Set the mode to “Off”.
- After a couple of seconds, press the “Spin” button or set the toggle switch to this mode (different models vary).
- Press and hold the spin speed change button.
- After a couple of seconds, when the “Start” button indicator starts blinking, set the “Drain” program.
- Switch the toggle switch to “Off”.
- Press the “Start” button.
Decryption problem
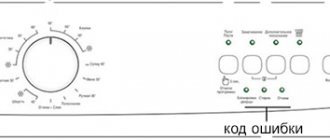
The difficulty is that not all housewives even immediately understand what exactly happened, simply not knowing how the machine that produces the error code behaves. Of course, on units with a display everything is simple and clear - I looked at the combination, found the value, and thought about what to do next. But what about those whose models are not equipped with a screen? In this case, the diagnostic system also works, but somewhat differently, namely by flashing lights on the control panel. Accordingly, when the machine freezes, and chaotic blinking is the only reaction to the user’s actions, panic appears.
Here you need to calm down and carefully observe the diodes. You need to write down which keys are lit or blinking, and if they are blinking, then in what order and at what interval. And only after that, open the instructions, manual or other document where the meanings of fault codes are collected, you will probably find the one you need. How to proceed next is another question, perhaps on your own, and perhaps with the help of professionals.
Other engine components
Have the brushes been tested? So, let's move on to diagnosing the lamellas. These are metal plates that are glued directly to the shaft and transmit current to the winding. If peeling occurs, the transmission is disrupted and the motor is unable to operate at full power. Repair of minor delaminations is limited to sharpening the engine surface on a lathe; in case of severe deformations, only replacing the entire assembly will help.
Damaged lamellas reveal themselves by the presence of detachments and “burrs”.
A damaged winding also causes the engine to stop. Most often, the problem is that there is a current leak, a short circuit, subsequent overheating of the motor and the thermistor triggering. The control board detects a problem and displays an error code. The guess is confirmed as follows:
- turn on the multimeter to measure Ohms;
- connect to the slats;
- We compare the result with the norm of 20-200 Ohms.
At the “finish” we check the stator with a buzzer. If you hear a squeak, the motor will have to be replaced. Repairing a damaged winding is very troublesome and expensive; it is easier and more profitable to purchase a new motor.
Interesting:
- Bosch dishwasher errors
- Self-diagnosis of the Atlant washing machine
- Error codes for Electrolux washing machines
- Which Bosch washing machine is better to buy?
- Indesit washing machine - error F12
- Error codes for different dishwashers
Reader comments
- Share your opinion - leave a comment
Solving the error yourself
If you are interested in knowing how to correct the situation when F 63 is on, follow this scheme:
- Unplug the machine from the power supply for 15 or 20 minutes.
- Within the specified time, the electronic module must reboot.
- Turn on the machine: if the screen does not show an error, everything is fine.
- If the display shows F63 again, it means drastic measures are needed.
Machine repair for error F63
Typically, technicians fix the problem by carrying out one of three possible repair operations for a given case:
- The SM processor is being repaired.
- Repair the control board if the processor is working properly.
- Change the control unit.
It is not recommended to independently check and repair the processor and board - a professional should work with such complex equipment. If the board burns out during an unsuccessful repair, the repair will cost you exorbitantly.
Motor check progress
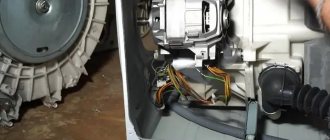
In any case, the reason for the appearance of F12 is “hidden” in the electric motor. Therefore, it is necessary to remove the motor from the washing machine body and check each problematic part for functionality. The procedure is as follows:
- disconnect Bosch from the power supply and sewerage;
- turn the “back” towards you;
- remove the back wall of the machine;
- we find the engine located in the lower part of the body;
- remove the drive belt from the pulley;
- loosen the central retaining bolt;
- swing the engine and pull it towards you, removing it from its seat.
Before disassembling the washing machine, you must make sure that the equipment is disconnected from the power lines!
Before you try to fix the engine, it's worth diving a little into its structure. We remember that Bosch machines use commutator motors, which are compact and powerful. The impulse from the engine is transmitted to the drum shaft through the drive belt.
Now about the “internals”. A tachogenerator is located on the motor body, which controls the degree of its rotation and transmits speed data to the control board. Next to the sensor, on both sides of the engine, there are electric brushes that smooth out the friction force. Two more integral components are the rotor and stator.
First of all, it is necessary to check the performance of the engine as a whole.
- We establish contact between the stator and rotor windings.
- We supply them with a voltage of 220V;
- evaluate the result (if rotation starts, then everything is in order).
However, this verification has its own risks and difficulties. Firstly, it is impossible to test the operation of the motor in different modes. Secondly, applying voltage directly threatens a short circuit due to overheating of the engine. To reduce the likelihood of overheating, it is recommended to include a heater in the circuit, which will take over the main power from 220 V. Has the engine passed the test? This means that spot diagnostics are next - assessing the condition of brushes, lamellas and windings.
What did you do before?
You can fix a washing machine that displays F00 on the screen with your own hands. To find out the reasons for the error code, you need to remember what manipulations were carried out with the machine in recent days. If you literally repaired the device yesterday or the day before, and today the designation “slows down” the operation of the equipment, then it will be easier to identify the fault. Typically, the F00 code occurs after replacing any part of the washing machine or temporarily disconnecting an individual element.
In some cases, F00 appears on the display after a power surge.
Sometimes an error can appear out of nowhere. If the washing machine has not been repaired and there has been no power overload, you can try to “reset” the code. If restarting the equipment helps, then you can continue to operate the machine. But what to do if the manipulations do not give the desired result? If F00 appears again, you will have to look for the root cause of the problem. The control module may be damaged and the board will need to be re-flashed.
But you shouldn’t immediately assume the worst. In most cases, you can reset the code and it won’t bother you anymore. Let's figure out how to get rid of the F00 error.
