Those who have had to wash by hand in their lives know how a washing machine makes life easier. Without exaggeration, automatic washing saves enormous time and effort. The breakdown of this equipment is usually upsetting, primarily because the purchase of a new unit is not always included in the family budget. To extend the life of household appliances, they resort to repairs; as a rule, they call a specialist for this.
You can also fix certain problems in your washing machine yourself. To do this, you need to have some skills in repairing household appliances, have a general understanding of the design of the device and become familiar with the types of the most common breakdowns.
Washing machine device
Before you understand how to troubleshoot a washing machine, you need to understand its structure and understand the operating principle of this equipment.
The main parts of the washing machine include the following components:
- Engine
- Electric heater
- Drain pump
- Container for water
- Drum for things
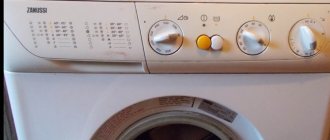
- Electrical control panel
- Water intake valve
- Washing machine body
In addition, the equipment also contains various valves, sensors, counterweights, a siphon and a filter.
Principle of operation:
- First, the laundry is loaded, a mode is selected and the wash starts. The machine door is automatically locked.
- Through the inlet valve, water is drawn into the drum, it passes through the container for washing powders and gels.
- Water is drawn to the required level, then the valve is closed by a special sensor.
- The heating element heats the water to the desired temperature, the drum with things rotates in different directions.
- Dirty water from the drum is drained through a pump into the sewer system.
- Spinning occurs during rapid rotation of the drum.
- When the spin cycle is completed, the hatch unlocks and the wash is completed.
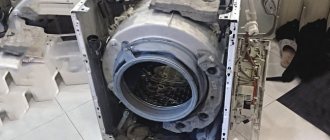
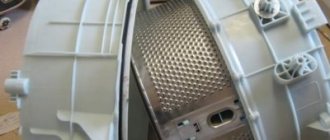
Drum and tank
By removing the body and wiring of the washing machine, you are left with a laundry tub and drum assembly. The latter can be easily dismantled after removing all the clamps. It's hard to come up with ways to reuse a tank, but a drum would make a great patio heater. The aluminum casing can become part of a wind turbine.
Common washing machine problems
There is a list of the most common faults that most often cause a washing machine to fail.
- The water does not heat up. To determine whether the water is heating up, during washing you need to touch the door of the washing machine; it should heat up from the hot water. If the door is cold, then the heating element, thermostat or electronic programmer has failed;
- Tapping and vibration. This may indicate improper installation, broken bearings, shock absorbers, or foreign objects between the drum and the tank. Replacing bearings in a washing machine can be done by yourself;
- Water leakage is also one of the common reasons. This means that it is time to replace the gaskets, the hatch cuff has ruptured or the pipe has broken;
- The wash does not start and water does not flow. It is possible that the water supply hose is clogged, the inlet valve is broken, or a program failure has occurred.
- The washing machine does not turn on. This may indicate that the power supply has burned out, the power supply has broken, or the firmware has crashed.
What can you repair yourself?
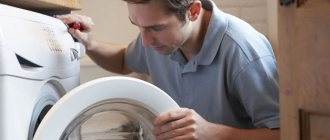
Most of the breakdowns can be fixed on your own. In this case, you will need a minimum of tools. The only downside to repairs is the time required. Sometimes you have to wait several days or weeks for parts for your washing machine. During this time you will have to be patient.
Most often, for initial diagnosis and repair, a Phillips screwdriver, a wrench, pliers and a universal voltmeter are enough. Let's look at all types of breakdowns and types of repairs in order.
Check filter
This action is necessary both as a preventative measure and for repairing and cleaning the pump. The fact is that most of the small debris is located in the filter and snail of the washing machine. From this unit, dirt enters directly into the impeller. The latter jams and the pump stops draining water. In this case, cleaning is part of the repair.
Is there electricity
Another problem with which you need to start a diagnostic examination. The first step is to check the outlet. Sometimes the contact in it disappears, and the current does not flow through the wire. The second thing to look at is the power cord. You should test it with an electric voltmeter and check the integrity of the circuit. It also happens that the surge protector installed inside the housing of expensive models burns out. Here you will have to open the case and check the module separately.
Engine
To get to the motor, you will have to disassemble part of the washing machine. The motor itself can be checked by simply twisting it. It should scroll with a slight stretch in both directions. The surest way is to look for open circuits using an electric voltmeter. Sometimes you can fix it yourself, for example, change the brushes, but most often the winding burns out, and then it’s easier to replace the electric motor with a new one.
Bearing or bushing on the drum axle
The drum rotates on an axis through a bearing, which has a limited service life. Most often it is this part that breaks. The bearing seizes as it falls apart. The bushing on the axle can wear out and fail. You can grind it yourself or order a finished part on the Internet.
Button contacts
For some washing machines, the buttons are the weakest point. They stop working due to clogging or rusting of the contacts, that is, the circuit simply stops closing. This problem can be corrected by cleaning the contact group.
Inlet valve
This unit in the washing machine is responsible for supplying water to the tank. The intake valve is also called a solenoid valve. In passive operating mode, it is constantly closed; when electricity is supplied, the solenoid snaps open and water flows into the drum or powder receptacle. It is the solenoid and the rubber part of the element that become the main cause of failure. When repairing the valve, be sure to turn off the cold water inlet tap.
How to fix the fill valve in a washing machine with your own hands
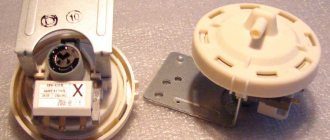
Pressostat
This sensor is responsible for the liquid level in the tank. To check the relay, you will have to remove the top cover of the device, since most often the pressure switch is placed in the upper area. The sensor can be adjusted, but there is no point in repairing it entirely. It's easier to buy a new part.
The pressure switch in the washing machine is broken: what to do?
Tachogenerator
The second name for this element is a hall sensor. It is responsible for controlling engine speed when the washing machine is operating. Usually located in the motor casing. In some cases, you can try to solder it, but the easiest way is to change the entire part.
Drain pump
The pump consists of an impeller, a protective casing, an electric motor and a wide nozzle. Before repairing, you should check the integrity of the contact group, as well as the power cord that goes to the pump. The motor itself may also fail. In this case, a complete replacement of the pump will be required.
What to do if the washing machine stops draining water
Impeller jammed
The impeller is located in close proximity to the filter. Sometimes it can become jammed with small debris (hair, threads). In these cases, the pump stops, although the sound of the motor (quiet hum) may be present. You can start the motor impeller through the technical hatch at the bottom of the washing machine. To do this, you will need to remove the filter and check the movement of the impeller by hand. Most often, these actions are enough to get it working again.
Belt broke
The drive belt is located behind the housings at the rear. When it breaks, the drum stops spinning. You can replace the belt yourself by unscrewing and removing the back wall. It is necessary to correctly tension the belt on the shafts so that it does not fly off, but also does not become too tight during operation.
Replacing shock absorbers
Shock absorbers and dampers (rubber or spring) keep the device in a central position. If the washing machine begins to jump and crawl on the floor, we inspect and replace them, if necessary. The complexity of the repair may vary depending on the manufacturer and specific model. The main thing is to disassemble everything sequentially and work carefully.
How to replace and repair shock absorbers on a washing machine with your own hands: step-by-step instructions
Repair of hoses and seals
Hoses and seals play a huge role in the operation of the washing machine. It is important to note that the inlet hoses need to be replaced completely, rather than trying to repair them, since they carry water under high pressure. Exhaust hoses can be repaired, but it is better to replace them too. Old or torn seals are thrown out and new ones are installed.
Control block
The control unit is the brain of the washing machine. Alas, in 90% of cases it can only be changed. In rare cases, you can solder something yourself. The price of the control unit can reach half the cost of the equipment. The only saving is not spending money on installing this part. The control unit is located under the cover of the device. It is not difficult to find, but difficult to repair, since you need knowledge in microelectronics and direct hands.
Repair and flashing guide for washing machine control board
Possibility of self-repair
When repairing a vertical washing machine or repairing horizontal equipment, you need to know its structure and arrangement of components. Improper intervention can aggravate the situation and lead to even greater damage.
For the home craftsman, there is a list of parts that you can replace yourself.
- Drive belt
- Pump
- Thermal sensor
- Filter
- Control board
- Ten
- Pipes and filters
Wash basin
- If you have a summer house, you can build an outdoor washbasin from a washing machine drum.
- In addition, valves that stop and start the flow of water can be used in an automated garden watering system.
- There are weights in the machine that keep the washer from moving, so they can be used on items if you need to keep them from blowing away in a strong wind or need to squeeze something together to make it stick.
- Bearings and casting can be used for wind turbine.
- The glass door can be used as a bowl or used as a porthole style window.
- The motor can be used to power another project, or you can add magnets and make a generator for a wind power project.
- You never know when a lot of good long wires of decent quality will come in handy around the house.
- Sheet metal is a good source of sheet metal for other projects.
- Screws, nuts, bolts, clamps, springs and shock absorbers are all useful for DIY projects. Reuse a glass door as a bowl and more.
- All washing machines have adjustable wheels and legs, so they can be installed on a sofa or other furniture.
Washing machine pump repair
The pump can break down for several reasons:
- Engine malfunction;
- Damage to the seal;
- Incorrect pump connection;
- The filter is clogged or there are foreign objects;
To repair the washing machine pump, you need to find out where this unit is located. In different models of washing machines, the pump is located in different places - below, behind the back cover or behind the front panel.
Interior details
We have not listed everything that can be made from a washing machine if you have a lot of imagination and certain skills. If you don’t need a lathe, then there are many ideas for using parts from an old washing machine in the interior of an apartment or private house - all you have to do is choose the most suitable one.
Sealed door
The loading hatch door from a front-loading machine can be adapted to fit a window in a wooden frame - it looks unique and is actually practical. To do this, you just need to cut out the door along with part of the front panel of the household appliance - an original porthole is ready that fits into almost any interior.
If you live in the private sector in your own house, and there is a shaggy guard in the yard, then you can insert a machine door into his booth, through which in severe frosts he will see everything, but be in a warmer room. With the help of such a homemade product, you can isolate the formidable watchman when guests arrive - he sees everyone, but is not able to bite or tear clothes.
We must remember that the hatch is sealed, so make side holes to ventilate the booth.
Coffee table
Using a stainless steel drum with plenty of perforations, you can change the interior of your apartment beyond recognition: make a unique coffee table in a fashionable hi-tech style. You can decorate it with internal lighting from an LED garland to save energy - it’s simple, but it looks original and very unusual.
This is not difficult to do: you just need to attach a few steel pins to the drum body. Attach a table top made of plexiglass or MDF board on top. A piece of furniture made in this way will decorate the interior of your living room.
Unique poufs
Fantasy has no limits - with a certain skill and imagination, you can make various poufs from a drum for a children's room. We take a colored pillow and cut out a square of the same size from chipboard, then use a stapler to secure the pillow to the square.
We attach the halves of the card loop to the chipboard and the outer wall of the drum using self-tapping screws and self-tapping screws, paint the side surface of the drum with bright paint - a unique pouf with a hinged lid is ready, and inside children can store small toys and things.
Such original poufs made of stainless metal will last for many years, when children grow up, they can be covered with discreet fabric and placed in the living room.
Lampshade for the nursery
To completely change the interior of a children's room using an original homemade lampshade from a drum from an old washing machine, you need to do the following:
- from any non-flammable, non-conducting material (textolite, ebonite) we make a circle half the size of the drum diameter;
- then we cut out a hole for the cartridge and connection wire;
- insert the cartridge into the prepared hole, fix the circle on the back wall of the drum, take the wire out;
- We screw three special hooks into the ceiling, as shown in the photo;
- We attach special cables to the drum body on which the entire structure will hang;
- we hang the assembled structure;
- connect the wire from the chandelier to the socket terminals;
- We screw the light bulb through the receiving hole of the drum - everything is ready.
To dim the light and create a fabulous interior, you can attach multi-colored light fabric to the walls inside.
Cleaning the filter
This is the simplest type of repair and is very easy to carry out. There is a small door at the bottom of the unit that needs to be opened. Then you need to unscrew the rubber plug behind which the filter is located.
The filter itself is washed with clean water; all debris that is collected in the filter must be removed by hand. Then the clean and washed filter is installed in place; this procedure must be performed regularly.
Fire pit or grill
Before hauling your car to the dump, remove the drum and turn it into a fire pit. With just a few basic materials, you can create a gorgeous, modern pit suitable for barbecuing and gathering with family or friends all year round.
The metal drum can be placed on fire bricks or stones to raise it slightly. The fire is held securely inside and holds enough kindling wood to produce plenty of coals. The holes in the drum create excellent airflow, so the fire starts quickly and burns brightly. The drum is light enough to be easily moved for ash removal and for transport outside of your campsite.
Repair and replacement of heating elements
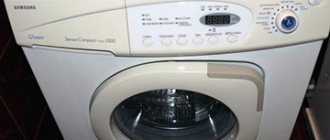
To get the heating element, you need to open the back cover of the washing machine. Typically this unit is located at the rear of the equipment, but this may also depend on the model. For example, before you start repairing a Samsung washing machine, you need to familiarize yourself with its structure and the location of all components and parts.
First you need to disconnect the terminals, using a multimeter you need to check the heating element for functionality. The heating element itself is built into the seal; use a screwdriver to get it out.
The new heating element is installed in place of the old one in the same way; while removing the old heating element, you can photograph all the stages to make installing the new heater easier.
Wires
The machine's wiring can be simply cut out using pliers. But if you put in a little time, you'll end up with plenty of long pieces of wire that can be used in a variety of projects. They can usually be easily removed without cutting. The metal and plastic clips that secure the wires can also be reused.
By removing the top layer you will get to the “guts” of the washing machine. There are also many useful wires here, after disconnecting them it will be easier to get to other parts. You will have to store the machine's spare parts somewhere, but they can be useful when repairing other equipment or working on some homemade project. Disassembling an old device can save you from searching for the necessary items at flea markets and sales in the future.
Water leak
One of the most common problems is water leakage. The cause of this problem may be:
- Cracked hose
- Weak clamp
- Damaged seal
- Tank leakage
- Sewer blockage
All specified parts must be checked for integrity, after which the unit is repaired.
How to avoid malfunctions
Repairing an LG washing machine or any other model can be quite difficult, so it is best to take care of the equipment and try to avoid breakdowns and damage.
To do this, you must follow the following rules:
- Don't overload the drum.
- For washing you need to use high-quality gels and powders.
- The inlet and outlet filters must be cleaned regularly.
- After washing, the door should be left open and the seal should be wiped dry with a rag.
In addition, it is important to follow the instructions and read them carefully before connecting the washing machine and starting to use it.
To carry out minor repairs, it is also important to study the design principle of your household appliances and take into account the model of the unit. If you are not confident in your abilities, it is best to contact a specialist or a service center for repairing household appliances.
Useful mechanisms
First of all, you can use spare parts from an old washing machine to make useful mechanisms for the household.
Grinding and cutting machine
Giving a second life to the electric motor of household appliances is quite simple - its power is quite enough to make a sharpening machine. There are no particular difficulties for the home craftsman: attach the motor housing to a strong wooden base (a piece of board will do), connect the start and stop button, make an adapter attachment on the shaft where the grinding or cutting wheel will be attached. You can see other homemade products made from a washing machine engine here.
Smokehouse
Many people dream of having their own smokehouse to surprise friends with smoked meats, but in a city apartment there is no place to install it. We offer a mobile analogue - it is made from the drum of a top-loading washing machine. We fix a thin sheet of steel in a circle so that the smoke does not escape through the perforations, and insert a special grate in the middle where fish and meat will be laid out for smoking.
A hole is made on top for the pipe, where the smoke will come out; under the grate we lay out wood blocks or chips from oak, alder, cherry or apple tree. The main task is not to overdo it, the volume of the smokehouse turned out to be small, so you don’t need to put a lot. It is better to find out the norm in advance using an empirical method, from smallest to largest. Experts in this field assure that five small bars or dry branches are quite enough.
Feather removal machine
For those who are engaged in breeding poultry for subsequent sale in city markets, this improvement will be to their liking. We mean assembling the feather removal machine on your own. It works in the same way as the factory analogue, only it looks less aesthetically pleasing, but is many times cheaper.
The operating principle is not particularly complicated:
- The fairly capacious tank is studded with special rubber pins (beaters) with a threaded connection at the end for a tight and reliable connection to the body.
- The bottom rotates at high speed and is also studded with rubber beaters.
- A poultry carcass scalded with boiling water is placed in the tank: chicken, goose, duck or broiler.
- When turned on, the bottom rotates, the beaters force the carcass to quickly move throughout the entire internal space, as a result of which the feathers fly off in different directions.
- In 2 minutes the carcass is cleaned, leaving only minor residues in the area of the inside of the wings, tail and paws.
Using the example of some farms, up to 30 carcasses can be plucked in this way in an hour.
Amateurs believe that mechanical plucking causes damage to carcasses, but in practice their presentation is 100% preserved.
The tank is positioned horizontally and water is supplied as shown in the photograph. An outlet is made at the bottom to remove water and feathers, so the bottom is slightly smaller than the diameter of the drum. The supply of water has a beneficial effect on the entire process of mechanical plucking.
The most expensive part is the purchase of pins made of durable rubber: the cost of one is at least 1.5 dollars, and you need at least 120 of them, but the costs will quickly pay off.