The drain pump in any washing machine is a very important element that pumps water out of the tank after washing or rinsing.
When it breaks down or stops working for some other reason, not a single brand of washing machine, from Samsung to Electrolux, will be able to perform its functions.
But in order to remove and replace it, it will be necessary to remove certain parts from the unit. Each individual model has different options for accessing the drainage device.
- 2 Dismantling through the bottom
- 3 Through the walls
- 4 Vertical models
About details
A pump is an internal pump in a washing machine that pumps waste water out of the tank. It works during the initial spinning of the laundry or when rinsing it. Pumping out water without a pump is impossible.
There are two types of pumps - drain and recirculation. The first one works only for draining. The second can operate in drain mode or be connected at the stage of rinsing clothes, passing water in a circle.
Usually the pump is an intermediate link between the drain channel and the snail in which the filter is located. It is located at the bottom of the machine. This simplifies its diagnosis and maintenance. The pump itself consists of a plastic casing, a motor and an external impeller, which pumps dirty water out of the washing machine.
Attention
Home appliance experts call the pump the “heart” of the washing machine. There is some truth to this. After all, its purpose is to pump liquid.
Where is the washing machine pump located?
Before proceeding with disassembly, you should establish exactly where the pump itself is located, as well as all the main parts. Despite the large size, the design of such household appliances is quite well thought out, so you can carry out repairs without much effort with your own hands.
For popular models Samsung, Beko, LG, Whirpool, Ariston, Candy, etc. it is located at the bottom, so the machine itself must be carefully placed on its side. After which all that remains is to remove the cover, under which the required part is immediately located.
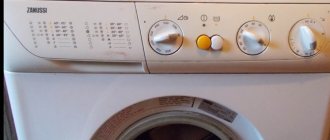
For Zanussi and Electrolux machines, everything is even simpler - the lid is located at the back, so you just need to unfold or move the equipment slightly away from the wall. The cover is secured with several bolts.
The situation is more complicated with models from Bosch, Siemens and AEG, because in this case you will have to completely dismantle the front panel.
Required Tools
Repairing the pump is simple, as it does not require many tools or special devices. Most often, three things are enough for dismantling and repair:
- Phillips screwdriver;
- sharp knife or chisel;
- electric voltmeter.
Pliers or pliers are useful as auxiliary tools to remove the clamps from the hoses.
Prepare a dry rag and bucket in advance . There will likely be a small amount of water in the pump that will spill onto the floor.
Preventing the problem from recurring
To ensure that the filter cover does not become sour and can be easily unscrewed, it is necessary to periodically open it and clean the filter from the very beginning of operation (as prescribed in the instructions).
When screwing, you need to make sure that the lid is not skewed and fits exactly along the thread.
Some craftsmen use a special plumbing paste such as Unipak or similar. It fills the threads and prevents dirt from penetrating between the threads.
At the same time, the paste itself is not aggressive towards plastic, does not decompose or dissolve it. This protection of the lid allows you to open it without difficulty the next time.
Expert opinion
It-Technology, Electrical power and electronics specialist
Ask questions to the “Specialist for modernization of energy generation systems”
Why does the water supply valve filter become clogged? The cleaning procedure is quite simple, does not require special knowledge and experience, and even a woman who is not familiar with the structure of the washing machine can handle it. Ask, I'm in touch!
How to repair a pump in LG or Samsung models?
As an example, we will consider LG and Samsung washing machines with a load of up to six kilograms. These models can be found often, as they are very popular. They usually have a similar design:
- Open bottom without plastic or other protection. This arrangement makes it easier to maintain and repair the washing machine.
- Technical hatch in the lower right part. This door is made for replacing and servicing the coarse wastewater filter.
- A plastic cover on the front bottom of the washer that hides the fixing bolts.
There are more complex models for 8 or more kilograms . Such washing machines have special protection at the bottom, additional shock absorbers and water overflow sensors. These models are too complex for DIY home repairs and are not widespread, so their maintenance will not be considered in the article.
Disassembly
Disassembly should begin by turning off the device from the electrical network. It is worth checking that the tank is full. Sometimes pumps in washing machines break when the wash is in full swing and the device is filled with water. This point is worth considering so as not to collect soapy liquid all over the floor in the bathtub.
If the tank is completely filled with water, then you need to drain it into a basin. To perform this operation, you need:
- Raise the back of the machine above the floor at the height of your pelvis. You can add old books or boards.
- Then tilt the machine slightly onto its back so that its back rests against the wall and locks in this position.
- Carefully crawl up from the bottom and disconnect the inlet tube from the tank to the cochlea. In this case, you need to plug the hole in the hose with your finger so that water does not spill onto the floor.
- Place a basin under the machine and release the hose hole.
It is best to have two people drain the water, so that one person is always on hand. Moreover, a washing machine with a full tank of water will be very heavy. It is not easy to cope with such a task in one hand.
Another important point is primary diagnosis. Perhaps your machine does not require major repairs. To find out, you need to do an initial examination before preparing for the main work.
By doing repairs yourself, you automatically remove the warranty from your household appliance ! Remember this. If you are not confident in your abilities, take the machine to an official service center.
You can view instructions for disassembling washing machines of different brands here.
How to determine a breakdown?
If the water stops draining, and the machine works and turns on, you need to do a number of manipulations:
- Check the drain hose for bends and kinks. Perhaps in one of the places it has a bend - water simply cannot pass through this area.
- Listen to the machine work. If you hear a loud crunching or crackling sound in the bottom area during push-up mode, you should check the coarse filter. Perhaps it is simply very clogged and water cannot pass through in this place.
- Remove the filter and check the condition of the pump impeller. If it is in its place, try to scroll it. There are times when it simply gets stuck in one position.
- Check the contact on the pump. To do this, you will need to carefully lay the machine on its side and inspect the contact of the power wire to the pump. If necessary, you can remove the terminal from the socket and put it back in place. Then try to start the machine.
If none of the above cases apply, then you need to completely remove the pump and inspect it in place. Another possible breakdown is a gasket leaking at the point where the pump is connected to the volute. The pump works, but a puddle accumulates under the machine. It can only be eliminated after completely dismantling the pump.
Advice
Often the impeller blades get jammed or broken by small coins, paper clips, and other small items that people forget to take out of their clothing pockets. Carefully inspect all laundry before loading into the bin. With this simple method you can save a lot of money on washing machine repairs.
Dismantling
Removing the pump is easy. The main thing is to perform the initial preparation, disconnect the inlet hose to the water outlet. Next you need to do this:
- Open the technical hatch and remove the coarse filter. This may cause a small amount of water to leak out.
- Remove the protective cover at the bottom of the machine. To do this, you will need to pry off the latches in its upper and lower parts with a sharp knife. Take your time when removing the trim. Careless actions may cause damage to the mounting holes.
- Carefully place the washing machine on its left side to allow access to the bottom of the machine.
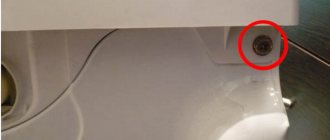
- Unscrew the fastening bolts under the trim. Typically there are two screws in these locations. You need to unscrew the bolts that hold the pump itself.
- Disconnect the pump from the power cord.
- Disconnect the pump from the volute.
Now you can thoroughly examine the entire unit and repair it.
Before removing the pump from its seat, take a photo of it on your phone or other gadget. This will help you when installing the pump in place after the repair (how to repair a washing machine pump yourself?). Otherwise, you may install the pump incorrectly. This will affect her productivity.
Procedure
- The first thing you should pay attention to is keeping the impeller on the axis. Sometimes the fastening splines on it break off, and it simply stops holding in place. Rotate the impeller with your fingers and check the movement. If the part rotates freely or flies off the axis, you need to order a new impeller.
- The second is a direct inspection of the electrical part of the pump. Check the integrity of the winding coils that drive the pump rotor. Carefully inspect them for burning or broken copper wire. If there are breakdowns or you can see an open burn on the winding, you should order a new unit as a whole, since repairing such a fault will not have a positive effect, but will only take time.
- Inspect the contact group where the terminal is connected. Sometimes an oxide film forms in these places. Perhaps the problem is in this place, you just need to clean the contacts.
- Check the electrical circuit of the pump motor. Test it with a voltmeter to check for broken contact. If the device is silent, it means there are breaks in the electrical circuit of the pump.
Let's get ready for work
First, you should think about whether you are going to replace the pump on your Zanussi washing machine yourself or with the help of a specialist. Obviously, the master will make the replacement quickly and efficiently, but his work will cost some money.
If you want to make the replacement yourself, you will only spend money on a new pump, but the repair will take more time than if a professional did it.
In order to make the repair yourself, you will need the following tools: a screwdriver, a set of screwdrivers, pliers and a multimeter in case you need to check the pump. To work, you need to find a suitable place, since the washing unit will have to be disassembled, and it is unlikely to be possible to do this at the installation site. Therefore, it is better to drag the machine to the middle of the room or to some large room (a garage, for example), having first disconnected it from the power supply, sewerage and water supply.
Expert advice
Professional technicians who service machines know several causes of breakdowns that do not lie on the surface, but affect the performance of the pump:
- Particularly “bouncy” machines can fray the power supply wires of the pump during washing. Then the pump will appear to be in good working order, but will not work and spin. To diagnose this problem, you will need to disassemble the device down to the electronic control unit. This repair is quite labor intensive. Only a master can handle it; a beginner cannot repair it.
- In some cases, the electronic control unit program may fail. Such diagnostics and repairs can only be performed by a professional technician with special equipment.
- Another rare malfunction is a blockage in the hose running from the main tank to the volute with the pump. It can be determined by hand, squeezing different areas in turn. If necessary, the hose can be removed and cleaned under strong pressure from the tap.
Most often, technicians check the contact group and the pump impeller. If the cause of the breakdown does not concern these parts, the specialist simply replaces the entire assembly.
You can repair the washing machine pump yourself. This is a simple operation, especially if you have an assistant. When working, you need to take precautions, do not forget about the remaining water in the tank and do not try to repair or solder the pump unless the impeller or contact group is involved.
Washing machines have long become indispensable in everyday life. For smooth operation, you need to install it correctly. Well, if a breakdown occurs, read our articles on how to repair or replace a drum, pump, drain and pressure switch, bearings, heating element, tank.
Signs of breakdown
Main signs of pump damage:
- after the start of the draining procedure, the liquid does not leave the working container;
- when the impeller rotates, an extraneous hum is heard;
- water is removed from the tank slowly, after washing the laundry remains wet;
- During the operating cycle, errors are displayed, leading to an emergency shutdown of the washing machine.
Reasons for failure
The need to repair the washing machine drain pump arises due to the following reasons:
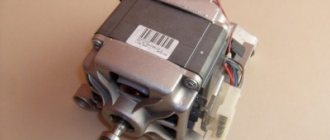
- damage to rotor bearings or stator windings;
- destruction of the impeller as a result of mechanical defects;
- loss of tightness of the rubber seal;
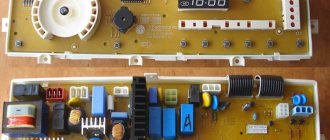
- failure of the water level sensor, which controls the operation of the pump;
- debris or scraps of fabric getting into the filter element or drain lines.
Operating rules
In order for the pump to work properly, you need to follow simple rules:
- Before putting the laundry in the wash, turn the pockets inside out, shaking out even small debris.
- All items with buttons and zippers are fastened and washed on the reverse side. It's good if you can use a mesh bag.
- Clean the filter and seat at least once every 5 cycles. Debris accumulating inside increases the load on the pump and leads to premature wear of parts.
- If extraneous sounds and a burning smell are detected, diagnostics are performed and faulty parts are replaced.
- Use a surge protector to avoid voltage surges.
