Samsung automatic washing machines provide high-quality processing of items during a full wash cycle.
During prolonged use of the device, malfunctions and wear of individual components are possible. One of the problems is the failure of the heating element. You can solve the issue of replacing the heating element of a Samsung washing machine yourself or by contacting a specialist.
We will tell you in the article how to remove it, how much it costs, and how to change the heating element.
Peculiarities
The heating element for the Samsung washing machine is made in the form of a curved tube and is installed inside the tank. The tube is a body in which there is a spiral that conducts current. The base of the housing contains a thermistor that measures temperature. The wiring is connected to special terminals on the heating element.
In fact, a heating element is an electric heater that allows you to turn cold water from the tap into hot water for washing. The tube can be made in the shape of the letter W or V. The conductor located inside has a high resistance, which allows water to be heated to elevated temperatures.
The heating element is covered with a special dielectric insulator, which correctly conducts heat to the steel outer casing. The ends of the working spiral are soldered to the contacts to which voltage is applied. The thermal unit, located next to the spiral, measures the temperature of the water in the tank of the washing unit. Activation of the modes occurs thanks to the control unit, while a command is sent to the heating element.
The element is intensely heated, and the resulting heat warms the water in the washing machine drum to the set temperature. When the required indicators are achieved, they are recorded by the sensor and transmitted to the control unit. After which the device turns off automatically and the water stops heating. Heating elements can be straight or curved. The latter differ in that there is a 30-degree bend next to the outer bracket.
Samsung heating elements, in addition to the protective anodized layer, are additionally coated with ceramics. This increases their service life even when using hard water.
It should be clarified that heating elements differ in operating power. In some models it can be 2.2 kW. This indicator directly affects the rate of heating of water in the tank of the washing device to the set temperature.
As for the normal resistance of the part, it is 20-40 Ohms. Short voltage drops in the network have almost no effect on the heater. This is due to high resistance and the presence of inertia.
This is interesting: Why does the washing machine tear things: causes of malfunction, ways to fix the breakdown
How to find a fault?
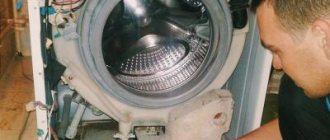
The tubular heater is located on the flange in Samsung washing machines. The fuse is also located here. In most models from this manufacturer, the heating element should be looked for behind the front panel. This arrangement will require significant effort during disassembly, but you can replace the part if you refuse to work completely independently.
You can understand that the heating element is not working for a number of reasons.
- Poor quality of washing when using high-quality detergent and choosing the right mode.
- When washing, the glass on the door of the washing unit does not heat up. However, this must be checked only after 20 minutes from the start of the process. It is also worth considering that in rinsing mode the machine does not heat the water.
- During operation of the washing machine, energy consumption is significantly reduced. This reason can be verified, but in a very difficult way. First you need to turn off all electrical consumers except the washing device. Then you should record the electric meter readings before turning on the machine. At the end of the full wash cycle, compare them with the resulting values. On average, 1 kW is consumed per wash. However, if the washing was carried out without heating the water, then this figure will be from 200 to 300 W. Once such values are obtained, you can safely replace the faulty heating element with a new one.
The formation of scale on the heating element is the main reason for its failure. A large amount of limescale on the heating element leads to overheating. As a result, the spiral inside the tube burns out.
The heating element may not work due to poor contact between its terminals and the wiring. A broken temperature sensor may also be the cause of the malfunction. A faulty control module is also often the reason why the heater will not work. Less often, the cause of breakdown is a manufacturing defect of the heating element.
Where is the heater located in a Samsung washing machine?
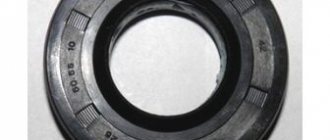
The heating element of the automatic machine is located under the laundry compartment. It is a curved M-shaped tube that connects to the wires inside the device. The configuration of the part determines its name: tubular electric heater (TEH).
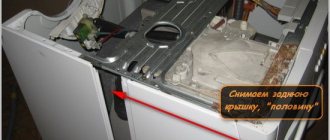
In Samsung machines it is located at the front wall, but in some models it can also be located at the back. When checking the heating element, you must first unscrew the fasteners on the rear wall, because Removing the front panel is a more labor-intensive task. To remove the back cover, just unscrew the 4 screws that secure it to the body.
If there is no heater at the back of the car, you need to start disassembling the front part:
- Remove the panel covering the lower front of the appliance. Unscrew the filter and drain the water. Do not remove the filter cover completely.
- Pull out the powder dispenser container, press the button inside the container and pull it out of the opening.
- Unscrew the fasteners located behind the container. Unscrew the screw on the control panel. Slide the front panel without removing it completely.
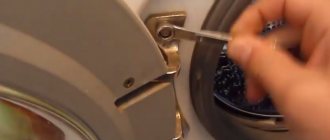
- Use a thin screwdriver to pry up the clamp that holds the seal between the tank and the loading door. Turn the rubber cuff inside the drum.
- Unscrew the fasteners near the garbage filter. Remove the panel by prying it off with a screwdriver or other thin tool.
- Grab the bottom of the front wall and lift it off the 2 hooks. Move the wall aside to be able to get to the heating element, but do not move it far from the car.
The contacts are located at the end, so there is no need to remove the heater to check conductivity. However, to diagnose a mechanical breakdown (fistula, sediment, etc.), it is necessary to remove and examine the surface of the part.
Dismantling electrical contacts and heating elements
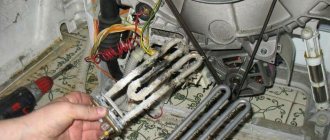
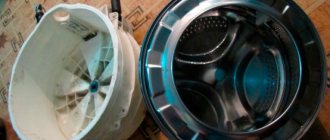
In most cases, the heating element is located under the tank. It looks (or rather, the part with contacts) like an oval block with three contacts and a nut in the middle. The last one is fastening the heating element through the sealing collar.
Before dismantling the heating element, remove the terminals from the contacts, remembering which one was located. Disconnect the ground wire terminal in the center, as well as, by bending the clip in the connector, the block with the temperature sensor wires.
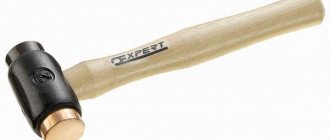
Now it's up to the central nut. Carefully unscrew it, without removing it completely, and press inward. This is necessary so that the rubber cuff compressed inside decreases in profile and ensures free exit of the heater from the installation socket of the washing tank. To push the nut with the stud inside, you may need to tap it with a hammer through some piece of wood so as not to spoil the thread.
After the pin is pushed in, carefully remove the heater from the tank socket. Because The edges of the heating element flange are sharp; it is worth protecting your fingers with gloves in advance. The pulling forces can be quite large and it may be necessary to pry off the sealing rubber with a screwdriver. In this you should be careful and patient, without using excessive force and without damaging the tank and heating element with tools.
Once the element is finally completely removed, the moment of truth comes - the heating element may be in good condition with a clean surface, which indicates high-quality detergents and not hard water. Or there will be a deposit of scale on it, which you will have to get rid of by placing the working part of the tube in a basin with anti-scale. After cleaning the surface of the heater tubes, wipe them dry and remove any contamination from the rubber seal. Now it is like new and can be used again.
If you already guessed that the heater is out of order and have already bought a spare one (usually the heating element is suitable for different models of machines and costs from 600 to 800 rubles), simply replace it by installing it in its original place.
Heater (heater) for washing machine Indesit, Ariston, Hotpoint 1700W, <190mm-195mm>, with hole for sensor
To complete the repair and maintenance, perform all operations in reverse order, tightening the seal nut, screwing the contacts and connecting the ground terminal. Install the cover and screw it in place.
If you encounter other problems with your washing machine, this workshop will allow you to fix other items. For example, you can easily replace a worn drive belt. Or, if the machine does not start, the reason is probably due to worn-out carbons of the electric motor rotor contacts (two rectangular rods on copper wires with springs).
You can easily determine this if you remove them from a special compartment on the machine engine and measure the size of the rods. It should not be less than permissible for a given model of the unit.
- How to fix an LED light bulb yourself: step-by-step instructions
- How to fix headphones yourself: step-by-step guide
- How to repair a smartphone and tablet with your own hands: basic repair details
Photo: manufacturing companies, Andrey Kireev
What causes the crash
The first sign of a heater malfunction is washing in cold water (if you select a high temperature mode). The machine washes in cold water due to a breakdown of the water heating system as a whole.
If you, for example, have a SM Samsung Diamond, then error code H1 will appear on the display, and the wash will end early. The reasons may be:
- malfunction of the control unit;
- temperature sensor failure;
- heater failure.
Most often, the heating element fails due to poor water quality. If the water in the water supply system is too hard, when washing at high temperatures, and especially when boiling, scale forms on the heating element.
If you do not carry out periodic preventive maintenance and do not deal with water hardness and scale itself, the layer becomes thicker. Over time, the heat generated by the heating element stops passing through the thick coating, and the heater burns out.
You may not notice it right away, but when the clothes stop washing or the error code comes on, everything will become clear.
Causes of malfunction
A cold wash indicates a malfunction of the heating element. The machine does not respond to the user’s choice of high temperature mode and the water does not heat up. In Samsung Diamond models, error message H1 appears on the display, and the wash will end prematurely.
The reason for this behavior of the machine:
- Control unit malfunction;
- Temperature sensor malfunction;
- Burnt heating element.
The cause of failure of the heating element is most often the use of too hard water. As a result of washing in hard water, a layer of scale begins to form on the heating element, which prevents its normal heating. As a result, the heater overheats and eventually burns out.
Associated works
Before replacing the heating element, it is recommended to check the old one just in case. If it suddenly turns out that it is working, but the machine does not heat the water, then the reason is not a burnt-out heating element. Sometimes there are malfunctions in the electronics unit of the machine.
A tester or multimeter is set up to check resistance. The value in Ohms should be set to the lowest possible on the device.
When checking the heater:
- All wires must be removed from the contacts of the heating element and temperature sensor. You should act carefully so as not to accidentally break the wires;
- The probes need to be connected to the contacts;
- Depending on the tester readings, the situation is assessed: if the device shows a value from 25 to 30 Ohms, the heating element is operational. If the device display shows 1 or 0, then the heater must be dismantled and will have to be replaced.
If you don’t have a multimeter at hand, you can assess the condition of the heating element without it by conducting a visual inspection. If the part is covered with a layer of scale or there are black discolorations on its surface, then in 95% of cases it’s time to change it.
Reply to the post “Washing machine with dryer. Pros and cons", or Candy, and programmed aging
I apologize to the public, I broke the title and, accordingly, the link to the parent post. I correct my mistake and add the required link. Washer-dryer. Advantages and disadvantages
So, let's go. The story will be about the older (by age) brother of this device - Candy-264 with drying. He came into my service in 2016, for the first year and a half or two he buzzed like a bee almost every day. Of the minuses: a narrow machine with underweight counterweights can’t help but jump during the spin cycle. No matter how you level it, no matter how solid the foundation it stands on, it will still go for a walk around the apartment during the spin cycle. At least 16 kg of weight was missing, I checked by placing weights on the lid. This problem was overcome by two anchors with rings in the floor, and a car luggage belt with a ratchet, with which she was forever chained to her place. But then, after two or two and a half years, breakdowns began. First, glitches began with the “start” button not turning on. The button turned out to be complete guano and was replaced with an analogue from “chip and dip” for 20 rubles (much better quality) because The control board assembly costs obscene money. Then the drive belt began to creak. The belt is a rare size, 5-ribbed, the original service centers sell for 4-5 rubles, and you have to wait. If you search, you can find much cheaper analogues, but only on order, because... The machine does NOT have a mechanism for adjusting the tension, and the size may not be correct. I didn’t look for adventures, but simply treated the rivulet part of the original belt with an alcohol-rosin solution. The creaking and slippage have disappeared and have not reappeared for two years. Then glitches began with filling with water. The machine began to overflow, filling the drum more than half with water, and poured out errors, the numbers of which I, alas, forgot. Yes, I don’t care, because... Google did not report anything sensible about them. But you and I are smart adults, and we know where to look for the problem? That's right, the pressure switch is to blame for underfilling and overfilling.
Article on the topic: Hotpoint Ariston washing machine where to pour powder
It can be seen in the corner of this photo. A gray tube made of shitty plastic goes from it to the very bottom of the drum. When the drum is filled with water, its pressure (depending on the level) is transmitted through this tube by air to the pressure switch, and it gives the command to stop drawing water. But the tube is made of shitty plastic, and was laid stupidly, with a bend, and at the site of this bend it broke. The air pressure was released through the hole, the pressure switch was malfunctioning. He spliced the pipe and rerouted it. Couldn't they have chosen a better material, like silicone? A year later, the same song again: overflowing water. It turned out that due to the fact that the tube was connected to the drum from below and at an unfortunate angle, it became clogged with dirt and lint and the pressure switch turned off the water supply at the wrong time. Okay, washed, reassembled and repaired again. This year, just when it was damp and cold, the dryer failed. The program runs, but the laundry is wet. Let's find out.
Here in the photo above, you can see a hair dryer snail with a heating element unit, a hair dryer motor, and on the snail body there is a block of return thermal fuses that have tripped. Below is a close-up photo of the thermal fuse.
Pressing the pins turns them back on. I turned on the pre-heater, the heating element rang - it turned out to be intact. Suspicions fell on the engine. And they were confirmed.
The plastic of the winding cheeks is non-heat-resistant shit, it began to dry out and crumble, a piece fell off and the winding terminal came off. I was able to restore the cheeks, soldered the winding, and the hair dryer engine came to life. Assembly unit - 6500 (snail without heating element with engine). Why not make the linings from heat-resistant plastic? Fuck it, it's some kind of nonsense. These are the pies. For now, the machine is washing and drying. I'm looking forward to the next one falling off. I suspect that the control unit kicks in; sometimes it malfunctions and does not start the program, despite pressing the “start” button. Treated by attention to the cord from the outlet. It would be necessary to reflash it, but there is no in-circuit programmer and I haven’t found the firmware yet. True, I didn’t really look for it. I am sincerely convinced that plot devices such as the lack of tension adjustment and the use of shitty plastics that are unsuitable for the task are the direct intention of the manufacturer.
Prevention
To prevent such a situation leading to failure of the heating element, the water must be softened before use. This is done by adding special products, such as Colgon or the like, to the detergent tray.
The use of such prevention is daily, but not the only one:
- When loading things into the drum, you need to ensure their even distribution and quantity. Both the overload of the drum and the unevenness of things in it often cause machine malfunction;
- Do not wash too often at temperatures above 90 degrees. The washing machine will last much less if you often use the boiling mode;
- When putting things into the drum, it is necessary to carefully check the pockets so that small items such as keys, coins, toothpicks and other objects with sharp edges can damage the machine;
- Items that have buckles, metal locks, or large buttons must be washed in a special bag, which you can purchase in a store or sew yourself. Shoes are always washed in such bags;
- Under no circumstances should the washing machine be left unattended for long periods of time while washing.
In this case, if the device gives an alarm signal, the owner will be able to take the necessary measures in time and prevent breakdown. In addition, if a leak occurs, then the likelihood of repairing the premises depends on the speed of taking emergency measures or not; - After each wash, you need to wipe the powder container and leave the loading hatch for ventilation;
- It is advisable to clean the filter after each wash and drain the remaining water through it or through the emergency hose;
- The rubber cuff of the hatch should be wiped dry after washing, avoiding any remaining moisture in its grooves. Otherwise, the rubber of the cuff may tear and will have to be replaced.
Important: when washing, it is not advisable to turn off the machine by de-energizing it. This may lead to failure of the control module.
Regardless of the use of products to combat hard water, the machine must be cleaned periodically. This must be done once every two to three years. Dry cleaning should be done once every six months.
To carry out dry cleaning, a special product is added to the washing powder tray. It can be purchased at household chemical stores. After this, the machine must be run without laundry for a long wash cycle at high temperature. As a result, the machine will be cleared of dirt on its internal parts. Unlike mechanical cleaning, chemical cleaning only requires time.
Mechanical cleaning is carried out as follows:
- The top cover, back cover and tray (if present) should be removed;
- The drain pipe is removed and cleaned manually;
- The pump must be removed and cleaned;
- The pipe leading to the tank from the powder receiver must be removed and thoroughly washed;
- The garbage filter must be removed and cleaned;
- The drain and inlet hoses should be removed and washed thoroughly.
This is interesting: Why does the refrigerator hum, make noise, rattle: what is the reason, how to fix it?
Clean the heating element from scale
The most common reason for the heating element of a washing machine to break down and need to be replaced is local overheating, i.e. it is designed in such a way that for normal operation it must be constantly in water, which does not allow it to heat up too much, taking away some of the heat. As soon as it becomes overgrown with a thick layer of scale, heat transfer is no longer as effective and the heating element burns out. There are a lot of ways to combat this problem, some of which actually help against scale, but at the same time can lead to breakage of the drum cross, which is made of an aluminum alloy that is resistant to an alkaline environment (washing powder), but cannot withstand an acidic environment (citric acid).
Due to the frequent use of citric acid in a washing machine, elements such as pipes, crosses, seating of tank bearings, etc. can be damaged and fail, so you need to use any “CHEMICALS” to remove scale with extreme caution and no more than once a year
Citric acid in sachets has proven itself best; it is the most affordable product that most users have. Add citric acid instead of washing powder and select a program without pre-rinsing with the highest possible temperature, maximum once a year, 50-80 grams of citric acid.
After any dry cleaning of the washing machine, you need to clean the washing machine drain filter and immediately run the wash with regular powder to neutralize the acidity inside the tank
It is better to use special products for descaling that have been tested and will definitely not damage your equipment in the process. Such products are more expensive than citric acid, but they are less likely to break other components; at the same time, any cleaning, even the most gentle, increases the chance of damage to the body of the heater tubes, since any chemical reaction thins them
We don’t know which is better: Calgon, Tiret or Antiscale, since this requires more in-depth and professional research. Based on statistics and accurate calculations. According to our repair practice, the composition of the water has a greater influence and if the water is free of impurities and “soft”, then no scale will form, at the same time if the water has an odor, is cloudy and hard, then scale formation is an inevitable process, and replacing the heating element is one of the most simple procedures and not very expensive, especially since you can do it yourself and repair your washing machine yourself.
How to replace with a new one?
When it is determined that the heating element is indeed faulty, it is necessary to purchase a new one and replace it. In this case, you need to choose a heating element of the same size and power as the previous one. Replacement is carried out in the following order .
- The small nuts on the heating element contacts are unscrewed and the wires are disconnected . It is also necessary to remove the terminals from the temperature sensor.
- Using a socket wrench or pliers, loosen the nut in the center. Then you should press it with an object that has an elongated shape.
- Now you should pry the heating element around the perimeter with a slotted screwdriver and carefully remove it from the tank.
- It is important to clean the planting nest well. It is necessary to remove debris from the bottom of the tank, remove dirt and, if there is any, remove scale. This should only be done with your hands so as not to damage the body. For better effect, you can use a solution of citric acid.
- On a new heating element, you should check the resistance using a multimeter.
- To increase the tightness, you can apply motor oil to the rubber gasket of the heating element.
- The new heater must be inserted into place without any displacement.
- The nut is then carefully screwed onto the stud. It must be tightened using a suitable wrench, but without force.
- All wires that were previously disconnected must be connected to the new element. It is important that they are connected well, otherwise they may burn out.
- To prevent unwanted leaks, you can “seat” the heater on the sealant.
- All other parts must be assembled in reverse order.
- If all wires are connected correctly, you can install the panel in place.
When installing a new heating element, it is important to be very careful, especially when you have to work with heavy tools, because there are important mechanical parts and electronic elements inside.
After installation is complete, the washing unit should be tested. To do this, you need to run the wash in a mode where the temperature will not exceed 50 degrees. If the washing machine works well, then the problem has been fixed.
How to buy the right heating element for a washing machine
Before replacing, you will need to buy a heating element suitable for a specific washing machine. It is recommended to first study the design principle of the heater.
All heating elements are arranged identically inside, but outwardly they are slightly different. The main ones are straight and elongated shapes:
- Direct is most often used and installed in models from the most popular manufacturers;
- Elongated and curved heaters look very similar to straight ones, but if you look 50 mm from the outer bracket, they bend 30 degrees.
The heating mechanism remains alone. Standard resistance is in the range of 20–70 ohms. Extended heating elements are produced based on the design features of some washing machines - these are models Ardo, Ariston, Indesit and others.
Types of Exterior Covering
Most models are covered with a metal shell with a protective anodized coating. It is characterized by high resistance to temperatures, is not afraid of water and protects the heating element from rusting.
A part coated with a special layer of heat-resistant durable ceramics is considered more reliable and durable than metal – even with daily grueling use. Some companies, for example, Samsung, additionally coat their products with this layer.
It is generally accepted that it is more reliable and lasts longer, and prevents the formation of scale when using a source of hard water.
Resistance and Power
To a greater extent, the elements differ from each other in terms of operating power. For different manufacturers it can reach 2.2 kW. The higher this characteristic, the faster the element will heat the water inside the machine to the desired temperature.
Standard resistance values range from 20 to 40 ohms. More often than not, the heater does not experience any short-term voltage fluctuations within the network. This is achieved due to the inertia and high resistance of the heating element.
Purpose of the element
The tubular heating element of the washing machine is designed to heat water. The heating element is a metal tube that is filled with a heat-conducting electrical insulator .
A conductive thread runs through its center, ensuring the transfer of the required specific power and heating of water.
Its ends are soldered to the contacts to which voltage is supplied when the washing machine is operating.
Activation of the heating element is triggered by a signal emanating from the control module. At the same time, the element warms up and transfers heat to the water, heating it to the required temperature.
In addition to washing machines, heating elements are used in:
- boilers,
- electric kettles,
- dishwashers,
- heating boilers, etc.
The procedure for replacing the heating element
- Disassembling the washing machine. The heating element is located under the washing machine tank; disassembly is required to get to it. In the simplest case, if the heating element is removed from the back, the technician will simply need to unscrew the back wall of the washing machine, which is secured with several screws. This arrangement of the heating element is typical for most washing machines from manufacturers Indesit, Hotpoint-Ariston, Zanussi, LG, Candy, Ardo, Electrolux, etc. You will have to tinker more with disassembly if the heater is removed from the front. The technician will need to remove the top cover of the washing machine and disassemble the front panel. The front location of the heating element is most often found in washing machines of the Bosch and Samsung brands.
- Disconnecting the supply wires and the continuity of the heating element. Before replacing, the technician must check the heating element with a multimeter for an open circuit, short circuit, or breakdown to the housing. There have been cases when, according to all indirect signs, the heating element of the washing machine seemed to be faulty, but the reason turned out to be not in it.
- Dismantling a faulty heating element. To do this, the master unscrews the central nut that secures the heater without removing it from the stud, and with the help of light taps pushes the stud and nut inward to press out the rubber gasket-seal of the heating element. Then, by hand or using a flat-head screwdriver, the technician carefully pulls the heating element out of the tank.
- Installing a new heater. Perform in the reverse order of removal. The technician inserts the heater into the tank as far as it will go, checks that the heater is firmly seated in place and does not loosen, and then tightens the central nut. Then the wires are connected to the heater.
- Checking the work. The master starts a program with water heating and checks that after replacing the heating element there are no leaks and the element itself is working properly.
- Assembling a washing machine.
Article on the topic: Which brand of washing machine to choose
Preventive measures
To avoid damage to the heating element, first of all you should carefully read the instructions and use the device as described in it. It is also important to properly care for the unit. For example, detergents should be used only those intended for automatic washing machines.
When choosing, you should pay attention to ensure that the powder and other substances are of high quality, since counterfeiting can lead to significant damage to the device.
Scale forms when water is too hard. This problem is inevitable, so you should periodically use special chemicals to solve it. It is also necessary to clean the internal parts of the washing device from scale and dirt.
To learn how to replace the heating element of a Samsung washing machine, see below.
Causes of breakdowns and failures
The following phenomena may be a sign of heater failure:
- cold water entering the tank;
- increasing the duration of individual stages or the entire cycle;
- the machine stops working a few minutes after drawing water;
- the appearance of a burning smell, the operation of apartment automatic devices (traffic jams);
- electric shocks if you accidentally touch the body of the machine with your hands.
Heavy soiling does not wash well at low temperatures, so the first symptom of a problem is stains on clothes, linen or fabric shoes after washing.
Possible causes of malfunctions are:
- destruction of the heating core or top layer of the heating element, formation of a fistula;
- formation of a thick layer of scale;
- contamination of the tube surface;
- voltage surges in the home electrical network;
- manufacturing defects.
The service life of Samsung machines is 8-12 years. The service life of the heater depends on the hardness of the water, the parameters of the electrical network and the quality of the element itself.
Algorithm of actions
We will give detailed instructions for checking and replacing the heating element a little lower, but now we suggest you familiarize yourself with the universal algorithm of actions, regardless of the specific brand of washing machine.
Table. Procedure for replacing the heating element.
| Repair stage | Brief description of actions |
| Determining the location of the heating element | Manufacturers install heating elements in various places. Getting to some is not difficult, but in other cases you have to disassemble almost half of the unit to do this. This is done deliberately; using this method, manufacturers force consumers to repair machines only in specialized workshops. How to find out where the heating element is located? Move the machine aside and inspect the back wall of the case. If there is a large metal plug on it, then it is easy to remove the heater - remove the cover and gain access to the fixing screws. If the case is solid, you will have to remove the entire front panel. It will take much more time to dismantle the elements than it takes to replace the heating element. |
| Dismantling the heating element | Before starting work, be sure to unplug the washing machine from the socket. Unscrew all elements of the washing machine body that prevent access to the heater. Inspect the device carefully. If you don't trust your memory, it is recommended to take a photo of it. Some types of heating elements may contain temperature sensors; this complicates the replacement algorithm and increases the cost of repairs. |
| Additional performance check and installation of the heater | The heating element can fail for several reasons; you must make sure that it is faulty. We will explain how this is done a little further in this article. Installation of elements is carried out in reverse order. Pay attention to the condition of the rubber gasket; it may be damaged when removed. If you have such a situation, then you need to change it too. It’s better to do this right away than to discover leaks under the washing machine during operation. They can provoke very unpleasant consequences. |
Before starting work, it is recommended to familiarize yourself with the technology for checking the serviceability of the heating device.
Prices for different types of multimeters
Multimeter
Rules for checking heating element
You can check the heating element without removing it from the tank, which greatly simplifies and speeds up repair work. If it turns out that it is completely serviceable, then the problem is with the control electronics, and its repair requires special technical education. Without such knowledge, it is better not to touch the control system. The test is done with a tester or other electrical device that allows you to measure resistance and current.
The serviceability of the heating element is controlled by three parameters.
- To break a nichrome spiral . This is the most common reason for heating element failure: for some reason the coil burns out and no current passes through it. This malfunction is checked by testing the element; for this, the tester leads are connected to two terminals of the spiral. The measurement switch is set to the “Resistance” position. If the arrow of the device sharply deviates towards o, then the spiral has burned out. Before dialing, check the functionality of the device - close the two outputs, the resistance arrow should suddenly move to zero.
Using a multimeter you can determine the break in the spiral
Article on the topic: At what height should you hang an air conditioner?
This is how hull breakdown is determined
Checking the power of the heating element
Installation Rules
When installing a new heating element, the following rules must be observed:
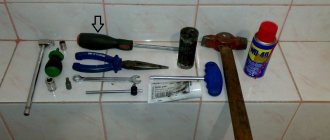
- Disassembly should be carried out using rubber gloves and only after disconnecting the machine from the network;
- before changing the part, it is necessary to check the new heater for external defects and operating resistance (the nominal parameter is indicated on the packaging or in the description);
- after removing the damaged element, you need to clean the hole (groove) from small debris, dirt, metal particles and scale, which can impair the performance of the new heater;
- Before installation, the seal must be lubricated with machine oil or WD-40;
- You need to carefully disconnect the front wall and the contacts of the heating element, because broken wires complicate diagnostics and increase the volume of repair work;
- You need to pull the contacts of the tubular element slowly, without jerking, because the legs may break off due to an increase in the thickness of the part due to the layer of carbonates.
Before disconnecting the contacts to check and replace the part, it is recommended to photograph or record the position of the wires in writing. Poor electrical contact with high power heating elements can lead to burning of the wires, so during installation you need to firmly connect all the elements of the circuit.
Useful tips and tricks
Poor heating and the appearance of errors on the display may be due to unstable voltage. Before you begin disassembling the machine, you must ensure that the electrical connection is incorrect.
If it is connected to the outlet through an extension cord or adapter, you need to plug it into the network directly and repeat the cycle without laundry. To eliminate unstable voltage in the home network, you need to connect the machine through a stabilizer.
If, after taking measures, errors continue to appear, it is necessary to check the functionality of the heating element itself.
To reduce the risk of overheating the tube, you need to periodically descale it. It is not necessary to disassemble the machine every time you clean it. To remove the layer of carbonates, just run a hot wash with a weak solution of citric acid.
- Errors HE1 and HE2 in a Samsung washing machine
- How to change the belt on a Samsung washing machine
- Error E1 in a Samsung washing machine
- Samsung washing machine does not drain water
Additional recommendations
Before changing the heating element, check the hole in which it was installed.
Over the years, it can accumulate dirt, scale and debris. All this can prevent a new part from working stably. Take a cloth and clean the hole. You can also wear a thick glove and gently remove debris with your fingers.
Now you know how to change the heating element so that the washing machine heats the water normally. As you can see, there is nothing complicated about this. You can visually study the replacement of the heating element in a Samsung washing machine in the video:
In what cases does it require repair?
During the washing process, most modes require heating the water. If the heating element is damaged, then the water does not heat up. The Samsung washing machine reports a malfunction using an error code that appears on the display.
It could be:
NS2,- NS1,
- NS,
- E6,
- E5,
- HE2,
- HE1,
- H2,
- H1.
Machines that do not have a display on the body signal a failure in the following way:
- flashing of all wash mode indicators;
- two central temperature indicators are lit.
Or in this version:
- flashing of all wash mode indicators;
- The second from the top and bottom temperature lights are on.
Despite the breakdown of the heating element, the machine can still work properly on programs that do not require water heating.
If the machine displays an error code and does not heat up, you need to make sure that the problem is in the heating element.
To do this you should:
- Check whether the machine is properly connected to the power supply. If possible, extension cords and tees should be removed to allow connections directly into the outlet.
- Check whether the failure is a random malfunction. To do this, turn off the machine, then turn it on and start working again.
If after all the checks, the heating element still does not heat, you will have to do repairs. To do this you will need a tool and a new part.
The lack of heating does not necessarily indicate a problem with the heating element, and the possibility of a failure in the control module and a breakdown of the temperature sensor cannot be ruled out .
It is possible to verify that the device is not working only by measuring the resistance. This can be done with a multimeter. Before this test, it is impossible to say for sure that the problem is in the heating element. Failure of the heating element is one of the most common malfunctions.
Call the master
Do-it-yourself repair of lg washing machine faults
A technician will come out for diagnostics and repairs upon prior request. You can make a call by phone or through the feedback form on the website. Provide the service manager with the following information:
- Make and model of the washing machine (see the instructions on the body).
- What happened, when, after what, the main symptoms of the breakdown (needed to select tools and components before leaving).
- Optimal time for repairs.
- Contact details.
The technician will tell you why the malfunction occurred and what to do only after visiting and inspecting the washing machine. Most breakdowns are fixed within 1-2 hours; removal of equipment to our service is not required. Immediately after the repair is completed, the washing machine will be ready for use. In rare cases, repairs may require more time and a return visit from the technician. We are ready to order any components and perform complex software repairs, but this often increases the work time.
Let's get to the details
If we are talking about T or LG, then there is nothing difficult in this work, because in cars of these brands the heating element is located at the back. You just need to remove the back wall, remove the drive belt, and lo and behold, the heating element is already within reach. With a Samsung washing machine, not everything is so simple, because its heating element is installed in the front wall of the tank, and the front wall of any washing machine is more difficult to remove than the back.
Important! There are also advantages to the front location of the heating element of the Samsung washing machine, because in order to remove the front wall it is not at all necessary to completely pull out the washing machine and disconnect it from all communications.
However, this small difficulty should not prompt you to contact specialists who will charge you extra money to replace the heating element in your Samsung washing machine. Replace it yourself, especially since such repairs are considered simple.
So, how to remove the front wall of a Samsung washing machine?
Be careful! When lifting the control panel, do not accidentally tear off the electrical wiring. They are very thin in places and are held on by snot; if you tear them off, you will add problems.
Well, when the front wall of the Samsung washing machine is removed, we can see the contacts of the heating element right before our eyes. But there is no need to rush to replace the heating element. First, we will check everything, make sure that the unit is faulty, and only then we will make a final decision.
Functionality check
We will always have time to replace the heating element; first we will check everything. How to do it? Well, first of all, you need to prepare your multimeter. We set up the device to check resistance, setting the minimum value in Ohms. Now we remove all the wires from the heating element sensors. This must be done carefully so as not to inadvertently tear off anything.
Next, we install one probe of our measuring device on one contact of the heating element, and the second probe needs to be leaned against the second contact and see what resistance value appears on the multimeter display. If the number on the display is close to 28, for example 25, 27 or 30 Ohms, the heating element is working. Well, if the meter shows 0 or one, the heating element has burned out. You will have to buy or order a similar part and replace the heating element yourself.
By the way, the heating element is far from the most expensive part of a Samsung washing machine, but you need to be careful when purchasing, since the heating elements are also different for different models. They differ in power and modification, so in order not to make a mistake, carefully look at what is written on the old heating element. Or even take the old heating element with you to the store and show it to the seller of washing machine parts - it will be more reliable. The minimum price of a new part is currently about 6.5 dollars, and the maximum is about 30 dollars.
The heating element power of a Samsung washing machine is mainly 1.85 or 1.9 kW.
Self-repair instructions
The procedure for replacing the heating element of a washing machine is as follows:
- First determine which side the heater is located on. Move the body away from the wall and turn it towards you. If the back cover is large, most likely the heating element is squeezed under the tank from the back side. There will be less work here. If the lid is medium in size, through it you can only get to the washing machine belt, and the heating element is clearly located below, but in front. You will have to completely disassemble the front panel, which will take more time than in the first case.
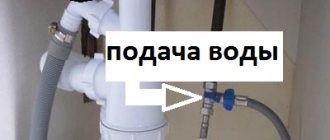
- Having determined the position of the heater, it’s time to move on to disassembling the housing (you can see instructions for disassembling washing machines of different brands here). First, unplug the device to avoid electric shock. If the heating element is located at the rear, disconnect the water supply, drain hose, drain the remaining water from the machine (this can be done by lowering the drain pipe below the level of the device body or using a special drain filter).
Then there are 2 options:
- If the heating element is behind the back cover, remove it.
- If it is behind the front, remove the cover from above, pull out the tray into which detergents are poured (it is attached with self-tapping screws and secured with a latch. Carefully remove that too). Pull the steel hoop off the seal. It is held by a spring - stretch it a little. Next, remove the seal, the door blocker (disconnect the wires from the blocker), and remove the front panel.
- The next step is replacing the heating element.
It is held in place by only one nut, but before unscrewing it, disconnect the power terminals, wires from the temperature sensor, and grounding. To unscrew the nut, take a socket wrench (if you don’t have one, take an open-end wrench). Unscrew the nut slightly (not all the way, but to the length of the thread), then, pressing the pin inward (this will allow you to pull the part out of the seat), unscrew the nut completely. Use a screwdriver to pry the heating element around the perimeter and slowly tear it away from the rubber. This is done with loosening movements. - Check its functionality.
- When you go shopping for a new heater, take your old one with you. This will allow you not to make a mistake when choosing a new one, because different heating elements are produced for each model. The part may differ by literally a few centimeters or even millimeters. This is done in order to assign a new series to a line of devices and sell them at a new, higher price. And heating elements are no longer interchangeable.
- Over time, the installation site becomes covered with a layer of calcium and carbon deposits, so it must be cleaned before work. Do not ignore the tank (how to repair a washing machine tank with your own hands?). Help yourself with a flashlight.
- Loosen the nut and insert the new heater into place. Tighten and connect all wires.
- Carry out a test: pour a little water into the tank, turn on the heat for a few seconds. After turning it off, touch the heating element. If it is warm and there are no water leaks, screw on the remaining parts.
Article on the topic: Can carpet be washed in a washing machine?
Where is he located?
In order to gain access to the heating element, it is necessary to partially disassemble the washing machine. To do this you will need a set of screwdrivers. In most Samsung machine models, the heating element is located at the bottom with access from the front side.
Before starting the repair, it is necessary to complete the preparatory work:
Drain water if there is any in the tank.- Disconnect the washing machine from the power supply by unplugging the plug from the socket.
- Turn off the water supply to the machine.
- Pull out the cuvette to add washing powder.
- Pull out the machine in such a way that you have free access to it from all sides.
- From the rear wall, unscrew the screws that hold the top panel.
- Slide the top cover and remove it.
- At the top of the machine, from the front and ends, find and unscrew the screws that hold the panel with indicators. Since it is connected to the machine not only by external fasteners, but also by wires located on the inside, you must act very carefully.
- The unscrewed panel is placed on top of the machine without breaking the contacts.
- Find all the screws that hold the facade panel and unscrew them.
- The front panel is removed. In the area of the hatch lock, this panel is connected to the machine by wiring. The wires must be carefully disconnected, and the panel with the hatch door must be moved to the side.
With the panels removed, you can access the heating element. At this stage, the tubular element itself is not yet visible; only the fastening and supply of contacts are available for review.
Frequent breakdowns
Most often, clients ask us to fix problems related to the fact that the machine:
- Does not drain water - stops when working with a full tank. The problem is probably a clogged filter or pump failure. There is no water drainage either constantly or from time to time. It is enough to clean or replace the filter; when the pump has been in use for more than 5 years, it is replaced with a new one.
- Humming/noisy noise when spinning – sounds like a jet plane taking off should alert you. The reason is usually bearing wear, which is inevitable over time. It is advisable to replace parts if the design of the washing machine allows it.
- Doesn’t draw water - check the water supply, the presence of cold water, whether the tap is turned off, whether the door is closed or not. The problem occurs due to a malfunction of the heating element, the inlet valve.
- Doesn't heat the water - a common problem. Place your hand on the door, if the glass is warm 20 minutes after start, the heating element is working, if not, check it. The machine may be displaying an error code.
- Indicators are flashing - there is a problem with the control module. Appears as a result of sudden changes in mains voltage. If the machine stops during washing, washes for too long, the spin cycle does not work, or the automatic circuit breaker (RCD) knocks out, check the control module. Usually complex repairs help - soldering microcircuits, flashing.
- The drum does not spin - the problem is overload or the drive belt. The weakest models in this regard are Samsung and Indesit.
The machine does not turn on, leaks, vibrates a lot, does not wash at all, or the door does not open? A comprehensive diagnosis and appropriate repairs are required. To repair equipment at home in Moscow, call a specialist.
Price and place of purchase
A new heating element, to replace a damaged one, can be bought in a store or ordered for delivery through an online store. As a rule, there are no problems with the order.
But it is necessary to approach the issue seriously, since there are various models of heating elements on sale. They differ in power and modification.
To be sure of purchasing a new part, you can take the already removed heating element with you to the store and simply buy a similar one. Or take a photo of the markings with your phone.
For Samsung washing machines, heating elements often come with the following power:
- 1.9 kW,
- 1.85 kW.
The cost of one of the popular heating element models for a Samsung washing machine, with a built-in heat sensor, TPd 180-SG-1900, will be from 500 rubles.
The heating element is not the most expensive part. There are many types of heating elements, but it is advisable to choose a model that is similar to the one being replaced. You should not buy a used heating element, even if it is called out - there is no guarantee that it will serve for a long time.
Reasons for failure of the heating element
When heating especially hard water, the heating element (heating element) becomes covered with a coating of scale, or water stone. It has low thermal conductivity and prevents the heating element from transferring heat to water.
As a result, in order to heat water to the required temperature, the inner surface of the element overheats, which leads to combustion of the coil, deformation of the heating element and its partial or complete destruction. When the machine panel overheats, an alarm light comes on and it stops turning on.
The heating element is a wire with high resistance placed in a tube that protects it from external influences. Electric current passing through the wire heats it, and it transfers heat to the tube, from which the water is already heated.
To heat water to a certain temperature, the wire needs to heat up much more. Therefore, the heat transfer of the heater surface is extremely important - the better it is, the less energy is required to heat the water.
If the heater is destroyed, water that gets inside can cause a short circuit if it shorts to the housing, which poses a threat to users.
Visual assessment and installation
Having taken out the heating element, you can immediately understand, without any special equipment, what condition the part is in. We are 95% sure that there is scale on it, and if black spots are visible, the heating element is probably burnt out.
Installing the heating element is as simple as possible:
- Check the resistance of the new element with a tester. You need to make sure that the part is not defective.
- Lubricate the seal with grease or machine oil. WD-40 is ideal.
- Install the part in place of the old one.
- Reinsert the temperature sensor.
- Connect the wiring.
Now you know that replacing the heating element in a Samsung washing machine will not require any special tools or special skills: even a beginner can handle such repairs.
Heater replacement
If you removed the front panel and already bought a new part, then it’s time to repair the machine. Let's figure out how to get the heating element without much hassle:
- Armed with a socket wrench, unscrew the nut. The fastening is located in the very center of the shank, between its contacts.
- Grab both contacts of the old part and loosen it.
- Using a small hammer or the same wrench, hit the stud onto which the previously removed nut was screwed.
- Has the hairpin fallen in? Great, continue.
- Using a minus screwdriver, pry the part, thus displacing it from its place.
- Pull the contacts to remove the heating element from the groove.
Attention! Do not overdo it when removing the heating element: if the contacts break off, it will be more difficult to remove the heater.