Most components and assemblies of modern cars have a significant resource. With proper maintenance, they rarely need to be repaired. But this does not mean at all that if symptoms of a malfunction appear, it makes sense to postpone a visit to the service center to a later date.
- How to check a wheel bearing? Video:
- Unsuitable materials
On the contrary, the sooner the breakdown is fixed, the less money will have to be spent on repairs. After all, one, even seemingly insignificant at first glance, part, being faulty, has a negative impact on many other components of the structure.
A failed front or rear wheel bearing not only affects the technical condition of the car, deteriorating its performance, but there is a risk of destruction of the wheel mounting structure while in motion.
Such a breakdown leads to loss of control of the car and, as a result, an accident, the consequences of which can be very severe.
To prevent this from happening, you need to promptly respond to emerging alarming symptoms and take immediate action.
Signs of a bad wheel bearing
Most often, two main symptoms signal that it’s time to change a part:
1. Axial or lateral play of the wheel, the appearance of which is often accompanied by a number of related problems:
- Uneven tire tread wear.
- Pulling the vehicle to the side when driving in a straight line.
- Steering wheel beating, similar to what occurs when the wheels are improperly balanced.
2. Noise (humming) in the hub area, the pitch of which varies depending on the speed. Inexperienced drivers often attribute these sounds to tire tread characteristics or poor wheel alignment adjustments.
You can verify the cause of the malfunction by performing a number of simple steps.
Replacing the wheel bearing yourself. Video:
How to determine when an element is time to change?
The main signs of a wheel bearing malfunction are a metallic hum and/or wheel play while driving. The last criterion is difficult to notice on your own. A video taken from a car behind you may help.
In order for the driver to determine where the fault is located, it is necessary to turn sharply at speeds of up to 15 km/h. If the noise disappears, the element on the opposite side has broken. To check, it is recommended to make a similar turn in the other direction.
When grinding and crunching noises are heard, the driver is advised to stop. This is a sign of complete failure of the bearing, which may result in the wheel flying off.
In stationary conditions, the malfunction is determined after the vehicle is placed on a lift. Deviations on the drive axles are checked by accelerating to 70 km/h and listening to the hum near each of the wheels. If the wheel is not driving, it is turned by hand and rocked. The play will be felt.
How to check a wheel bearing?
Act consistently, and then you can eliminate the possibility of mistakes even if you are doing such work for the first time.
- First of all, hang up the wheel being diagnosed, ensuring that it rotates freely. To do this, you can use a jack or place the car on a lift.
- Then spin the wheel with your hands, making sure it rotates freely. In some cases, noise may occur due to the fact that the wheel does not release the brakes completely, and the brake pads rub against the disc or drum.
- Holding the top and bottom edges of the wheel, rock it away from you and towards you. Then repeat the operation, changing your grip to 90 degrees.
If you find any play, you will have to check the tightness of the hub nut.
Here you cannot do without a wrench with a large shoulder, a torque wrench designed for significant forces, and a suitable socket size.
It is important to have on hand the technical specifications of your car, which indicate the tightening torque of the wheel bearing nut. The sequence of actions is as follows:
- Remove the protective cap of the nut (if equipped).
- Remove the cotter pin (if equipped).
- We put an assistant behind the wheel and ask him to fix the wheel by pressing the brake.
- Using a torque wrench, check the tightening force.
If the torque corresponds to the value specified in the specification, but the play remains, the bearing will have to be replaced.
How to check a wheel bearing? Video:
We diagnose by ear
But it also happens that there is no play, but only a hum, confirming the presence of a malfunction. How to determine which wheel bearing is humming? The task is not easy.
Due to resonance effects, this is not always possible from the driver's seat. Again you will have to call an assistant and use a trick. Possible options:
- Move past the observer standing in the open area, changing modes and direction of movement. This method will give results if the noise is clearly audible even at low speed.
- Place the assistant in another car. Let him move along the highway with you, opening the window and listening to the source of extraneous noise.
Both options for this type of diagnosis require certain skills.
Having established which part needs to be replaced, you can begin work, the complexity of which directly depends on the design features of the car. You will have to take into account:
- On which axle, front or rear, driving or driven, is the replacement being made?
- What type of bearing is installed on your car.
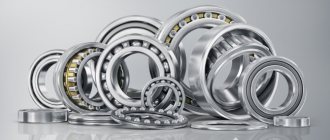
There are parts of various designs:
- Open or closed type.
- Single or double row.
- Conical or radial.
- Ball, roller or combination.
There are two options for configuration and delivery of the part:
- The bearing is manufactured separately. In this case, to complete the work you will definitely need a special puller, mandrels and a press.
- The bearing and hub are assembled into a single unit, which can be replaced as a whole. This greatly simplifies repairs, but increases the cost of parts.
It should be taken into account that the most common cars now are those with front axle drive. We will describe the conditions and sequence of repair operations specifically for machines of this configuration.
Do-it-yourself modification of a trailer for a passenger car: possible options
- socket heads;
- socket wrenches;
- hammer;
- bench vice;
- pliers;
- shaped screwdriver;
- flat screwdriver;
- puller for pressing and removing the hub;
- gloves;
- new bearing;
- locking wheel;
- lubricants, etc.
An alternative to a puller can be a regular hammer, with which the bearing is knocked out and hammered. But only an experienced master can afford this, and it’s unlikely that he works in a leading car service center. This is considered an artisanal method.
Current methods
There are two main methods for changing the wheel bearing on the front wheel.
- The first does not involve dismantling the steering knuckle. The advantage of this method is that after completion of the repair and restoration work there is no need to adjust the wheel alignment. After all, the camber bolts themselves were not removed. But here you cannot do without an inspection hole, which not all car owners have;
- The second method involves removing the fist. A more convenient option, since after dismantling it will be possible to carefully press out and install a new hub bearing, working on the table. But then the wheel alignment will be disrupted. To minimize additional adjustments, be sure to mark the fasteners and knuckle during disassembly.
Decide for yourself which path to take.
Sequence of work
Before starting the process, prepare everything you need, read the instruction manual and be patient. Yes, this is much simpler than changing the cylinder head gasket, but it also has its own difficulties and subtle nuances.
Since the procedure may differ for different machines, an approximate replacement scheme is as follows:
Replacing the front wheel hub bearing
Cars from different manufacturers have their own design features that will have to be taken into account during the work. We will describe only the general principles and sequence of operations performed. We proceed like this:
- Disconnect the battery.
- Loosen the wheel mounting bolts.
- Raise the front wheel. It is best to do this on a lift. If it is not there, then, placing shoes under the rear wheels, lift the car using a jack and securely place it on a rigid support.
- Remove the hub nut protective cap (if equipped) and remove the cotter pin from the threaded end of the drive shaft.
- We put the assistant in the car and ask him to press the brake hard. After this we get the opportunity to unscrew the hub nut.
- We remove the wheel.
- Unscrew the brake caliper from the mounting location. Take care not to damage the hoses. Disconnect the clips securing the hoses to the hub. Carefully secure the part itself to the body using wire so that the hoses are free.
- Disconnect the ABS sensor. It will be enough to simply disconnect its connector.
- Remove the screws securing the brake disc to the hub. We remove the disk.
- Disconnect the steering end from the shock absorber strut pivot pin.
- Unscrew the ball joint nut and use a puller to disconnect the conical tip of the ball joint from the strut.
- Carefully pull the strut towards you and remove the splined part of the CV joint from the hub.
- In some cases, it is necessary to dismantle the brake system mounting plate.
- Using a puller, remove the hub along with the bearing. Sometimes it is more expedient to remove the entire strut (to do this, unscrew its upper support) and remove the hub using a press.
- If the new hub is assembled with a bearing, press it into place. If the bearing is supplied separately, we do not try to install it on the old hub - the likelihood of damaging the seat of the part is too high, but we buy a new hub and press the bearing onto it.
- We reassemble in reverse order. Don't forget that you first need to tighten the wheel bearing, and only then put the wheel in place and lower the car to the ground.
Now you know how to replace the front wheel bearing of a front-wheel drive car. But this is a theory. And practice will require you to have strength, patience and a good specialized tool.
Without this, you shouldn't even start. And further. This work should be done by two people.
It's not just about safety requirements. In some situations, two hands will simply not be enough.
When carrying out work, you must adhere to the following rules:
- Use only components from trusted manufacturers. The wheel bearing is a critical part, and replacing it takes quite a lot of time. It’s better to overpay for a quality product than to start all over again.
- Work carefully. A slight misalignment during the installation of installed parts often causes their damage during the assembly process.
- Keep clean. If dirt gets on the mating surfaces of rubbing parts, your work will be meaningless. Always have clean rags and degreasing agents on hand - gasoline, kerosene or white spirit.
Replacement sequence
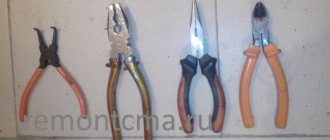
We advise you to prepare the necessary tools in advance so as not to be distracted while working. When repairing a generator, you cannot do without sockets, a ratchet, screwdrivers, a vice, pliers, a hammer and a puller.
Various oxidized parts will succumb when exposed to WD-40 fluid. By the way, knowing these instructions, you can easily figure out how to replace the air conditioning compressor bearings.
The area above the hood should be well lit - then there will be practically no difficulties. We begin the repair by disconnecting the negative terminal of the battery, and after the generator, they simply unscrew. Next, the crankcase protection is removed, and the fastenings of the device are unscrewed from under the bottom.
After removing the unit, clean it, and where there are threaded connections, lubricate it with WD-40. Use a screwdriver to remove the plastic cover of the generator, under which there are circuit elements.
Next, you need to unscrew the brush holders in sequence. The same goes for the voltage regulator. If difficulties arise, please study the supporting photographs.
Remove the pulley and clamp the device in a vice. Using an adjustable wrench and a hexagon, you need to unscrew the pulley nut. After removing the washer and unscrewing the bolts, you will be able to disassemble the generator housing.
Changing the engine oil with your own hands - step-by-step instructions on how to correctly, quickly and easily change the oil in the engine and transmission (125 photos and videos)Do-it-yourself speed controller - how to make a simple adjustment device or smooth descent (120 photos)
- Can a non-owner apply for compulsory motor liability insurance?
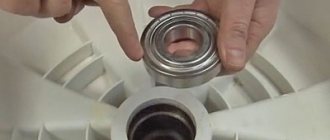
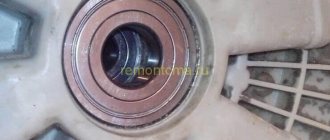
Now you can get rid of the plastic casing and front bearing. Using a special puller, you can remove it. The bearing in a washing machine is replaced in a similar way.
All that remains is to press the bearing out of the cover - you will need a hammer and a mandrel suitable for the size of the part. Before installing new bearings, wipe the seating surface on the rotor and cover. When putting the part in place, add thick lubricant to it.
We press the bearing with a pipe and a hammer. Reassemble everything using the reverse sequence of these instructions. Now you can easily answer the question of how to replace the rear bearing of a generator with your own hands.
Replacing the rear wheel hub bearing
There is no particular point in repeating myself. The order in which the necessary operations are performed largely coincides with the sequence already described. The differences will be as follows:
- You won't have to disconnect the tie rod.
- On the driven axle there is no need to remove the CV joint.
- If you need to use a press, and the machine is equipped with a lever suspension, then you will have to dismantle not the stand, but the lever on which the hub is mounted.
Taking this into account, replacing the rear wheel bearing is somewhat easier than replacing the front one.
On vehicles with all-wheel drive, the difference will be minimal. Considering the design features of the equipment, sometimes to remove the CV joint it makes sense to unscrew the drive shaft from the gearbox and leave the lever or shock absorber in place.
If you have to deal with a solid rear axle and a drum brake system, replacing the rear wheel bearing is done differently. This combination most often uses tapered roller bearings, which you can access by removing the brake drums and pads.
On some machines, even the hub is made integral with the drum. But such a device is becoming increasingly rare and, as the owner of a passenger car, you are unlikely to encounter it.
We will try to answer several related and most frequently asked questions by car owners.
Hub unit design
It is important to understand the design of the hub itself in order to safely replace the bearings. Popularly, the hub assembly is often called the steering knuckle, because mechanical energy is transmitted through it to the wheels. The bearing plays an important role in the operation of the unit, since if it breaks, it will cease to function normally.
The device of the car hub unit
Note! There are several types of wheel bearings (ball, tapered and others). But the replacement occurs according to the same algorithm for all types of parts.
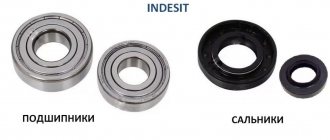
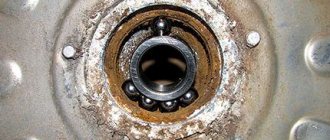
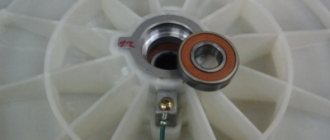
Wheel bearing structure
The bearing consists of several parts: the outer and inner ring, the cage, and the rolling element. To reduce the coefficient of friction, grease is used. During operation of the part, rotation is transmitted through the rolling body. The inner and outer bearings have no connection with each other, since the outer one is connected to the steering knuckle, and the outer one is connected to the car hub. The transmission of torque to the wheels occurs thanks to splines located inside the hub assembly.
Be sure to use hub lube
Is it possible to drive if the wheel bearing is humming?
Troubleshooting must be done without delay. It is difficult to judge the degree of wear of a part by external signs. And the chance of encountering trouble is very high. Most likely, as a result of mechanical damage or overheating, the hub will simply jam.
This is fraught with loss of control and an accident, especially at high speed. But even tire wear, vibrations on the steering wheel or increased fuel consumption are sufficient reasons to visit a service center.
Signs of bearing failure
Breakdowns depend on various factors, including the build quality of the equipment and its age.
Trouble can happen for the following reasons:
- due to a worn oil seal, the bearing assembly is destroyed by moisture;
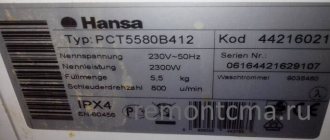
- the rules for installing the washing machine were violated (instructions for proper installation are given here);
- regular tank overload.
Another possible problem is the initially poor quality of the bearings themselves. It is often possible to find out about a breakdown even by hearing.
The signs of a bearing unit malfunction are eloquently signaled by:
- the drum does not spin after turning on the washing program, although the motor is running (other reasons for such a breakdown are discussed in this article);
- the drum rotates, but makes an atypical grinding noise, and sometimes a rumble, the washing machine vibrates significantly;
- washed clothes are not spun (we talked more about noise and lack of spin in another article).
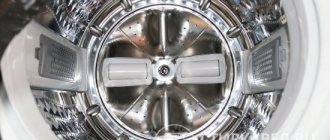
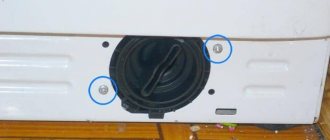
Having decided to deal with such an obstacle on your own, you need to clearly understand that this is a very labor-intensive process related to a major overhaul, in which virtually the entire washing machine must be disassembled.
You can make sure that there is a problem in the bearing by turning off the power to the washing machine and trying to rotate the drum in different directions by hand. The knocking and grinding sounds that appear in response will confirm suspicions
When the final decision is made to fix the breakdown yourself, in order not to aggravate the situation, you need to stop using the faulty mechanism and start preparing for repairs.
What grease should I use for wheel bearings?
Considering the design features of modern parts, which are already lubricated at the factory and have protective boots, this issue does not make much sense.
But if, after looking behind the boot, you doubt whether the amount of lubricant provided by the manufacturer is sufficient, you can use almost any high-quality lubricant.
It is important that the following requirements are met:
Do-it-yourself steering rack repair for a VAZ2114 car - here is more useful information.
- Wide permissible temperature range. After all, during operation, the lubricant will both become very cold in cold weather and heat up during operation. It must be refractory.
- High viscosity and low fluidity. In this way, it is possible to guarantee the presence of a stable protective film on the mating elements of the bearing.
- Ability to withstand high loads for a long time.
Lithium greases and lubricants containing molybdenum meet these requirements.
Unsuitable materials
But it is recommended to avoid compounds with a high content of zinc or iron - they accelerate the destruction of wheel bearings. You should absolutely not use lubricants containing graphite - they have a completely different purpose.
You may be interested in this article - Replacing rear and front brake pads.
The characteristics of lubricants used to work in constant velocity joints (CV joints) are also not high enough. Such materials are not designed for use in highly mobile joints and structural elements.
Why do you need to change the bearing?
As a part that is constantly subjected to severe loads, a bearing has a limited service life - usually from 6 to 10 years. The oil seal is the first to fail - the rubber is deformed, it begins to leak water from the tank onto the bearing, the lubricant is washed out, and the unit can no longer ensure smooth rotation of the shaft. If the part is not replaced in time, the shaft, drum and tub of the washing machine may be destroyed.
Replacing a bearing on your own if done poorly can lead to a reduction in the service life of the entire unit. To carry out the work you need to have special skills and the necessary tools.
An additional factor affecting bearing wear is overloading the washing machine drum. If you regularly wash too much laundry, the unit may fail after just a few years of use. You should not discount possible factory defects in the part or errors in its installation.
Thus, if you hear knocking and grinding noises when the washing machine is operating, which intensifies during the spin cycle, get ready to replace the bearing. A sign of a problem will also be a noticeable play of the drum relative to the tank.