Any washing machine, regardless of brand, has a filter that protects the drain pump from foreign objects. During operation, it becomes clogged, which leads to poor water drainage. The problem is solved by removing debris from the filter element. You can do the work yourself, but to do this you need to know where it is and how to clean the filter in an automatic washing machine (WMA)?
Where is the pump and pump located?
Each of the models of automatic washing machines has its own structural layout of components. Some expensive units consist of two types of pumps: a circulation pump and a drain pump. The circulation pump supplies water directly to the washing area, and the drain pump removes it from the machine tank. The area where the circulation pump should be located coincides with the location of the drain. On the modern domestic market, models with one drain pump are mainly presented. Washing machines with two pumps are very rare to see.
Removal of the drain pump, depending on the structural layout, can be done through the bottom, rear or front parts of the washing machines.
Types of filters and their purpose
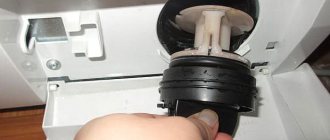
The drainage (inlet) element is designed to prevent large and fibrous objects from entering the drain pump wheel blades. It is installed inside the device on the path of dirty water moving to the drain electric pump. It looks like a glass-shaped plastic stopper with holes.
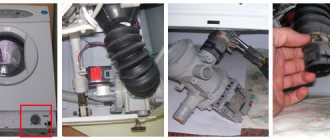
The drain filter of the washing machine is located at the bottom of its front wall under the filling hole. The part is hidden under a small hinged lid, which can be round or rectangular. The manufacturer can also place it under a removable panel, which occupies the entire width of the case at the very bottom.
Signs of blockages
You can identify the presence of a blockage in the drain filter by the following signs:
- The machine does not turn on and gives an error. The error code can be anything, but it is important to make sure that the device is correctly connected to the water supply and electrical network, and that the drain hose is located at the correct angle;
- the time for draining water increases due to its prolonged removal from the drum or at the end of the cycle the laundry remains wet, and a small amount of liquid is present inside the tank;
- The “Spin” or “Rinse” functions do not work.
Preparation
Before disassembling the washing machine and gaining access to the drain filter, it is necessary to complete the preparatory stages of work. These include the following:
- Disconnect the washing machine from the network and block the access of water to it. It is unsafe to work with a device connected to the mains.
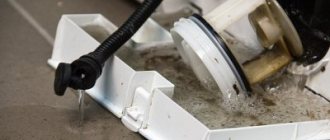
- Prepare containers with low sides into which the liquid inside the housing will be drained. An ordinary basin will not work in this case due to the low location of the pump; it is better to use a small tray or bowl. If there is no suitable container, then tilt the washing machine as far back as possible by placing books or wooden blocks under its front part.
- Remove any mats that may become wet during cleaning operations. Will take care of the safety of the floor covering if it requires such measures.
- Prepare a rag for wiping the floor, cleaning the filter, a small jar for collecting accumulated debris, gloves and cleaning agent.
Instructions for checking functionality
Signs of abnormal operation can be seen by listening to the sound the pump makes. It should be smooth, without noticeable sound deviations. Before you clean the pump in the washing machine and test it for functionality at home, you need to remove it.
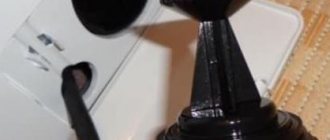
First of all, you need to remove the drain filter located at the bottom of the front panel under a small hatch. It opens after pressing the latches. The filter is unscrewed by thread. Do everything carefully so as not to break the parts. Do not forget that you will have to drain the remaining water from the drainage system.
After disassembling the elements of the machine body that limited access to the pump, the drain pump itself is removed. After a detailed inspection, the drain pump (by unscrewing the mounting screws) is disconnected from the volute. Then the following steps are performed:
- external control is carried out for the presence of mechanical damage;
- check for traces of washed clothes, such as hair or lint, on the impeller;
- by manually rotating the rotor, the engagement of the impeller with the rotor shaft is determined;
- The play of the rotor shaft in the mounting slots and the amount of wear are checked.
The electrical part of the pump is diagnosed using a multimeter or tester, so the problem can be determined. The device is set to the dialing mode, and the control wires are connected to the metal contacts of the pump. Any three-digit number on the instrument scale means normal. Values “0” or “1” indicate an open circuit.
The serviceability of the electrical part can be checked by connecting special contacts from the network to the pump. In this way, tests are carried out to identify the problem and find out whether the pump operates when power is applied to the motor. Analysis of faults allows us to draw a conclusion about the possibility of repairing or replacing the drain pump.
Location of filters in the washing machine
Any washing unit is equipped with two filters: inlet and drain. One serves to remove mechanical impurities in the water poured into the tank, and the other protects the drain pump from foreign objects. To properly operate an automatic machine, you need to know where the filter devices are located.
In household washing units from different manufacturers, the units are located in approximately the same places. The fill filter is installed in the receiving fitting, located in the upper part of the back side of the SMA, and is a mesh with a fine mesh. It is attached to a special collar with a spacer ring.
The drainage filter is located at the bottom of the unit on the front wall and is closed with a hatch or a removable decorative panel.
The filter element is a perforated plastic part of a cylindrical shape.
On the front side there is a round cap with a thread and a rubber sealing gasket. The other is shaped and sized to prevent objects from entering the pump that could damage the impeller.
Next to the plug there is a rubber tube with a stopper for emergency drainage of water and drainage of pipelines before removing the filter. This arrangement of the units provides access to their maintenance without moving the washing machine.
What happens if you don't clean it?
A blockage in the trap creates serious problems for the normal functioning of the device; failure to clean it will aggravate the situation:
- the appearance of an unpleasant odor in the washed laundry or emanating from the drum. Pathogenic bacteria actively develop in the accumulated garbage, causing this lump of dirt to smell bad. Gradually, mold and mildew form there. By the way, citric acid can also help get rid of the smell in the washing machine; more details in this article;
- problems with drainage. The extreme stage of this situation will be the complete impossibility of removing dirty water from the drum or the washing machine refusing to start the wash cycle;
- complete failure of the drain pump. In this case, there is an increased likelihood that large debris will jump over the clogged filter and jam the pump or break the impeller blades. Only complete replacement of the part will help correct the situation. A repairman will be able to carry out this operation, which entails additional financial costs.
How to detect the problem
Although regular cleaning should be done, many washing machine owners forget about it. In this situation, a blockage occurs that will prevent the machine from continuing to operate.
Modern washing machines, such as Indesit or Atlant, are equipped with a built-in diagnostic system that can determine the cause of the failure:
- If the pump is clogged, it may indicate that the problem is in the drain system. This problem is visually manifested in the fact that water stops flowing from the tank.
- It is possible that drainage occurs, but very slowly and unevenly. In this case, the water will not flow out completely. As a result, the diagnostic system stops the car. In this case, you can hear the noise that is made during operation. Sometimes knocking sounds are heard if foreign objects get there.
When the diagnostic system indicates improper operation of the drain system, the instructions indicate the need for cleaning. To do this, you need to disconnect it from the washing machine.
Maintenance frequency
Standard recommendations suggest cleaning the washing machine filter once every 2-4 months, depending on the intensity of its use.
If the device is used several times daily, the drain pump mesh should be cleaned every month or more often.
Also, the frequency of maintenance of this part depends on the type of fabrics that are most often washed. For example, if you frequently load flannel, flannel, or woolen items into the tank, it is recommended to clean the filter once every few weeks.
If a down jacket or feather pillow has been washed, then it is necessary to remove dirt from the filter immediately after the end of the cycle. If you find a missing part on clothing after washing (a bra wire or a button), you should immediately check the drain filter mesh.
Water filter design
Of course, before you start replacing this part, you need to study its design and structure in advance. A household filter consists of several parts:
Liquid purification occurs in the cylinder. Thanks to the installed rubberized rings in the lower and upper parts of the cylinder, the entry of dirty liquid is prevented. After filtration, only clean water that can be drunk gets into the flask.
Different materials are used to make the cartridge:
There are products where manufacturers include rubber seals in the design.
Step-by-step instruction
Unscrewing a soured washing machine filter is sometimes very difficult. It is necessary to act carefully, not to apply too much force, so as not to break the machine parts.
In addition, you need to make sure that the rotation is in the right direction - counterclockwise. To resolve the issue, you can use several methods.
Using a tool
One of the easiest options is to try to grab the filter handle with pliers and unscrew it. Caution is required here, as the force is quite large. Without proper calculation, you can break the handle of the knot. You need to act slowly, rocking, turning the plug in both directions and gradually increasing the amplitude.
If the filter can be turned a quarter turn but does not go any further, do not apply force. It's better to try another way.
Removing the drain pump
If you cannot unscrew the cover using the usual method, you can try dismantling the entire pump. As a rule, it is attached to the machine body with two screws, but there are a lot of manufacturers, so any options are possible.
Getting to the node from the other side is much more difficult. Partial disassembly of the machine body will be required. In order to determine the location of the device, you need to look inside the case. The easiest way is to tilt the car and look from the bottom. Sometimes it is not there at all, or it can be easily removed. Then you can support the housing on a wall or other strong object and disassemble the pump from below.
General algorithm: which way to unscrew and how to put it back together
The first sign of a clogged filter is a decrease in pressure in the pipeline (water is drawn slowly, there is not enough pressure when the shower is turned on).
Let's consider the procedure to take if such a situation arises:
Mesh
To wash or replace the mesh, you need to unscrew the sealed plug in the form of a nut.
Let us consider in order the entire process for mesh systems:
Trunk
They acquired their name due to their location on main pipelines. The flasks into which the filter elements are inserted are made of plastic or stainless steel.
To get to the cartridge you need to:
Cartridge cleaning systems under the sink
In city apartments, owners often prefer to install a filtration system under the kitchen sink. This is convenient due to the saving of free space, as well as its close location to the purified water valve.
This system is usually equipped with several stages of purification, in some cases including reverse osmosis purification. It requires periodic replacement of cartridges according to the manufacturer's recommendations.
Let's look at the order of filter maintenance:
Step-by-step cleaning instructions
Proper maintenance will extend the life of your washing machine. And the risk of a situation where at the most inopportune moment some element breaks is reduced. And dirt accumulated in various components can lead to failure of one of them. Therefore, it is important to carry out preventive maintenance of all elements of the machine that are subject to contamination during operation.
Cleaning the drum and heating element of the washing machine from scale
Various impurities of hard tap water create conditions for the formation of deposits on the drum and heating elements of the washing machine. Scale from calcium and magnesium salts can be removed by washing in a solution of citric acid.
If the amount of deposits has reached a significant size, then the heating element should be removed from the machine. Cleaning as part of all equipment leads to breakdown of the drain pump or other components.
Cleaning the rubber seal
After you finish washing all components and parts in a solution of citric acid, the work is not finished yet. There are places covered with sealing rubber where mold accumulates. Using a damp cloth and cleaning product, thoroughly wipe the area behind the pulled elastic. Finish the process by wiping with a dry cloth.
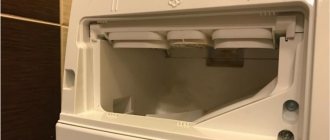
Cleaning the tray (bath, dispenser)
For high-quality cleaning, the container for powder, softener and other products must be removed from the washing machine. Different models have their own method, which is indicated in the instructions for use. The compartment in which the tray should be located can be cleaned with special products, using small brushes for hard-to-reach places. Soak the tray itself for 30 minutes in a solution of household chemicals or a mixture of vinegar and soda. After this procedure, the plaque will easily come off with a sponge.
What folk remedies are used
Each housewife has her own way of cleaning the filter from dirt and scale.
The most popular are:
- Soda. Dissolve 50-70 g of baking soda in 1 liter of warm water. Immerse the filter in the resulting solution for 30-40 minutes. After this, rinse in warm water and brush. Removes dirt, mucus, rust and detergent deposits.
- Vinegar. Pour 200 g of vinegar into a container and bring the volume to 1 liter with warm water. Place the removable part in the solution for 10-12 hours, then rinse under running water. The inside of the shaft is treated with a rag generously moistened with vinegar.
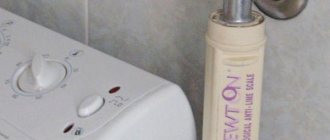
- Lemon acid. Pour 100 g of the substance into the machine and turn on the washing mode at maximum temperature. When the set parameter value is reached, disconnect the unit from the network for 6-8 hours (until the water cools down). Then drain the solution and rinse the tank.
Cleaning with citric acid removes scale not only from the filter, but also from the heating element and drum. After removing dirt, be sure to unscrew the part and check its condition.
Can't unscrew
Sometimes it is not possible to unscrew and remove the filter due to various objects stuck in it. Hair, socks and handkerchiefs, coins, beads and other small items during washing can end up in the catcher in front of the pump and plug it. Limescale deposits on the threads, which occur if the filter has not been removed for a long time, can also become an obstacle.
In this case, there are three ways to open the garbage filter. Apply them in turn, proceeding to the next method only if you tried the previous one and it did not help. Before you begin, be sure to unplug the machine and close the valve to prevent water from flowing.
- 1 way . Use pliers or pliers to unscrew the filter cap. There is a handle on it that you need to try to turn using a tool. Manipulations should be carried out very carefully so as not to break the filter part.
- Method 2 . Lightly tap the drain pump filter cover several times while tilting the washing machine.
This method is suitable when:
- The garbage filter cover does not rotate at all;
- partially rotates;
- It can be unscrewed, but it cannot be removed.
Tilt the machine back and lean it against the wall. Tap the dust filter cover and the housing next to it. If the snag is in small objects that have stopped the desired part, then the knock will cause them to move, and you can unscrew and pull out the filter.
3 way . If the previous two methods were unsuccessful, then you need to completely remove the drain pump. The task is to clean the snail and remove the filter. This method is quite complicated - you need to get to the pump, unhook the pump from the volute and through the resulting hole get to the filter.
The design features of certain models of Kandy washing machines allow the drainage pump to be dismantled through the bottom. If it is easily removed or is absent altogether, then it is easier and more convenient to get the snail with the pump in this way. Putting the machine on its side or simply tilting it in the desired direction and resting it on the wall, remove the bottom and find the pump. It is located behind the filter, that is, in the lower part of the housing.
The listed methods should only be used if you are confident in your abilities and have certain skills in repairing various devices. If the filter does not unscrew and you are not very well versed in technology, it is better to call a specialist. It must be remembered that through ignorance you can not only waste time, but also worsen the situation.
Step-by-step actions of a do-it-yourself master
There are times when inspection is needed when the drum is stopped.
Remove the power plug from the indoor network. Close the water inlet valve to the machine.
Washing machines are often built into something in the kitchen or bathroom. Pull out the housing and use the passport to determine where the protective panel of both purifiers is located.
Use a sharp tool to pry up the cover or panel; they are removed or moved, revealing an overview of both filters;
Place a small flat container for residual moisture or a rag under the place where you unscrew the valve. Drained from the drum, it is found in some quantity in the pipe system.
Remove the filters one by one. At the inlet, simply unscrew the hose, having previously shut off the water supply to it.
Remove the filter and clean it. There is always a plug on the drain. Twist it to the left. Pull out the housing.
Clean the filter element by hand, and rinse its body from rust with a large stream of water in the sink of a bathroom or kitchen sink.
Pay attention to the external condition of the water pump, clean it of rust, and its blades of any deposits. It is possible that dense threads are wound onto the impeller during washing; over time, they will slow down the rotation, causing the pump to malfunction.
Return all products to their original places. Screw it carefully clockwise, feeling the correct thread under your fingers.
But don’t squeeze it, don’t create a distortion, otherwise your prevention will not be beneficial. Check the quality of work by running the unit in rinsing mode. Make sure there is no moisture leakage.
What to do if the filter leaks after cleaning
After removing contaminants, the filter may leak. It is not possible to identify this problem immediately, but after 2-3 washing cycles. The reasons for the appearance of water can be:
- Incorrect installation of the part. The filter may not be inserted straight into the hole or may not be screwed in completely. It is necessary to fix the part in exact coincidence with the thread, and tighten it more tightly until it stops, but without using excessive force;
- wear of the rubber gasket. Over time, this part, which ensures tight contact between the filter and the socket, can dry out or become damaged if dismantled carelessly. To eliminate the leak, you will need to install a new original gasket or replace the entire assembly if there is no replacement for it;
- thread damage. Such mechanical failure can occur if the part is incorrectly unscrewed or if force is used to remove it. The problem can be corrected only by completely replacing the damaged unit. In some cases, it may be necessary to install a new “snail”. This work must be performed by a certified repair technician.
If the machine is working properly
You cannot immediately begin unscrewing the filter - you must prepare for the procedure in advance. Without preparation, the water in the tank will rush through the vacated hole onto the floor. A flood can occur even when the tank is visually empty, since a certain amount of liquid remains in the pipes and spontaneously pours out without a “plug.” How much will leak is unknown - it all depends on the capacity of the Bosch model. You will still have to clean up the consequences of the flood, wasting your time.
If you anticipate spontaneous drainage, then removing the filter will be quick and simple. The main thing is not to rush and prepare for the procedure with the following steps:
You cannot unscrew the garbage filter immediately after washing at 45-90 degrees - the machine will not have time to cool down and you can get burned by boiling water!
- disconnect the machine from communications, electricity and water supply;
- remove from the machine all objects and things that deteriorate from moisture (extension cords, rugs, powders);
- cover the surrounding area with oilcloth, polyethylene or old rags;
- prepare a container for collecting water, a basin or a plastic container;
- tilt the unit back so that the body hangs 3-5 cm in the air with its front legs;
- Place the prepared container on the right under the machine into the resulting “gap” of 3-5 cm.
Once prepared, you can begin the procedure. You need to take a slotted screwdriver and use it to hook the technical hatch door, which is located in the lower right corner of the washing machine body. Once the latches are released, you need to open the door and find the black filter cover behind it. Then just grab the protruding “handle” and start rotating counterclockwise. Then we pull and pull the “spiral” out.
Water will flow out of the hole immediately after removing the filter. In this case, the stream will be uneven, since the “plug” will spray liquid around.
Other reasons for slow drainage
A clog at the filter level is a common, but not the only reason for slow or non-existent drainage. Quite often it is caused by a malfunction of the pump (pump), problems with the pressure switch (water level sensor) or malfunctions of the control module. Sometimes it happens that water is drained on some programs, but not on others. In this case, the mechanical components of the device are working properly; the problem should be looked for in the electronics.
Drain pump failure
The pump is responsible for pumping dirty water from the tank through a system of pipes and hoses directly into the sewer. The pump is usually installed at the bottom of the machine, under the tank. This arrangement allows the device to optimally perform its function. Over time, the pump, like the drain filter, may become clogged, and then the water will drain very slowly.
When metal objects (keys, coins, buttons) enter the drain system, they often break the impeller blades or damage the pump body. A complete lack of drainage most often indicates a violation of the integrity of the pump or combustion of the motor as a result of voltage surges.
Electronics malfunction
This breakdown is somewhat less common than the ones listed above. However, it is this that is the most difficult and expensive to eliminate. All processes in the machine are controlled by an electronic module; it is this module that activates the pump. At the right moment, a command is given to turn on the pump, and when all the liquid is pumped out of the tank, a signal to turn off is given. If the wiring or triac of the pump burns out, the connection between the nodes is interrupted, and water will not be drained, even if the pump is working.
Such repairs are not cheap, because the repairs are carried out by highly specialized electronics specialists. But they, as a rule, give a guarantee on their work for a month or two. After this period, the problem may return. In addition, it is not always possible to restore a damaged control unit, and replacing it is impractical due to the high cost of the spare part itself. Therefore, if you have such problems with electronics, you should seriously think about buying a new washing machine.
Diagnostics of the Candy washing machine
It is better to start searching for the reason why the waste water has not been drained with the simplest and most accessible components for inspection.
According to statistics, the most common problem of not draining water from the washing machine tank is a clog. The error codes that the device itself displays on the display can make it easier to find the reason for stopping work without draining:
- E03 – water draining error, in which the liquid either does not leave the tank at all or drains very slowly;
- E06, E15 – control module failure;
- E20, E22 – problem with the pressure switch (clogging, malfunction of the control module, etc.).
Even the device issuing a specific error code requires additional diagnostics. This is because multiple nodes may be involved in the failure.
In devices without a display, information about a failure is provided by a series of flashing lights. The number of light signals corresponds to a specific code.
Alternative ways to solve the problem
It is not always possible to remove a stuck drain filter even after removing the pump. In such cases, the main reason lies in a thick layer of scale or sodium deposits due to hard water. Removing them is much more difficult than removing debris and dirt.
But this is not a reason to buy a new washing machine. There are several alternative methods that will be much cheaper.
- Dissolve the lime. It is best to get rid of scale using citric acid. To do this, put 1-2 spoons of lemon juice into the drum and start a short cycle at a water temperature of 40-60 degrees. If by that time the pump has already been disassembled, then we soak the glass with the filter in the same solution in the proportion of 1 tablespoon per six-liter basin. Do not forget that the water should not be higher than 60 degrees, otherwise the rubber seal will be seriously damaged. It doesn’t hurt to weigh down the parts so that the plastic case does not float to the surface for 1-2 hours. As soon as the time is up, take it out, rinse it under cold water and try to free the catcher from the snail using any of the methods described above.
- Break out the filter. If the citric acid trick doesn't work, you'll have to act more harshly. We take pliers or wire cutters and carefully break off the fragile plastic of the catcher body. Then we unscrew the remains and remove the entire part. The main thing is to be extremely careful and not damage the snail. Even a small crack will lead to leaks.
Attention! Without knowing the internal structure of the machine, you can easily damage the wiring, pump or other important parts of the washing machine, which will seriously aggravate the situation.
- Remove the snail filter. There is also a quick option - break out the glass along with the filter. Failure to execute the previous method will lead to the same end. This method is the most expensive, but it has an undeniable advantage - replacing both elements of the drain system guarantees the absence of leaks and a low probability of clogging.
If it was not possible to solve the problem “peacefully” and you had to break out the part, then it is necessary to replace the unusable elements. Find a new filter and pump volute in specialized stores using the serial number of your existing washing machine. True, the more replacement parts are required, the more expensive the repair will be.
Therefore, it is recommended to adequately assess your knowledge, capabilities and experience. And if you have the slightest doubt or misunderstanding about what to do, do not rush or experiment, but contact the service center for help.
Preparatory activities
Before cleaning the filter, you should thoroughly prepare for the upcoming actions. Its dismantling is most often accompanied by the release of dirty water, which can flood expensive floor coverings.
To prevent possible troubles, you need to do the following:
- pull out the built-in unit from the kitchen cabinet, first disconnecting it from the communications system;
- cover the floor covering at the work site with unnecessary rags or oilcloth;
- Place a large container directly under the filter cover.
If before disassembling the washing machine has completed a full operating cycle with rinsing, you will need to pause for draining. If this is not done, then when disassembling the filter, the volume of spilled water will increase noticeably.
Dismantling
Upon completion of the preparatory operations, they proceed to removing the filter from the machine and then cleaning it.
To do this, you will need a simple tool kit consisting of a screwdriver (sometimes the filter is additionally attached to a bolt), a plastic hammer and an old toothbrush.
Utility materials and cleaning products will require a piece of flannel fabric, rubber gloves and citric acid.
The procedure for dismantling the filter trap is as follows:
- First, you should grab it by the protrusion on the cover and, turning it counterclockwise, pull it towards you.
- If this cannot be done due to accumulated dirt and scale, you need to use a plastic hammer and lightly tap it on the body.
- After unscrewing the filter base completely, you will then need to remove it and get ready to clean it.
If, when unscrewing, the housing does not move even after tapping on it, this means that it is additionally secured with a bolt. When carrying out these procedures, not only the filter dirt catcher needs to be cleaned, but also the cavity in which it is attached.
To do this, wear rubber gloves and remove all foreign objects (buttons, coins, etc.) from it. After this, use a toothbrush to sweep away small particles of dirt and remove accumulated mucus from the walls with a flannel.
Finally, all that remains is to thoroughly wipe the walls of the cavity with a damp cloth or rags and leave it to dry for a while.
Cleaning procedure
To clean, you will need to do the following:
- Manually remove dirt and hair deposits adhering to the parts.
- Rinse the filter attachment under running water while cleaning it with a toothbrush or soft brush.
- Let it dry and inspect for contamination.
- Upon completion of cleaning, the filter device is installed in place.
- To do this, insert it into the cavity and, rotating the body clockwise, fix it in it.
If it is not possible to completely remove dirt while cleaning the filter element, you need to soak it in a citric acid solution for a couple of hours. At the same time as cleaning, this will get rid of limescale and unpleasant odors.
The filter is soaked in cold water, since at low temperatures citric acid dissolves better and the plastic body of the device does not deform. In addition, hot water causes the seal to lose its elasticity, which will disrupt the tightness of the joint.
Where to look for a drain pump
To clean the pump, you still need to find it inside the housing. To do this, prepare a screwdriver, a wrench, a basin with low walls (to drain water into it) and a rag. The easiest way to find where the pump is located in a washing machine is in machines from the brands Indesit, Beko, LG, Samsung, Whirlpool, Ardo, Ariston and Candy.
In Bosh, AEG and Siemens machines you need to disassemble the front of the machine. Necessary actions:
- Take out the powder tray and unscrew the screw.
- Open the door in the bottom panel of the machine, unscrew the screw and remove the panel.
- Unscrew the screws, remove the clamp and disconnect the cuff.
- Release the clamps and remove the housing front.
- Unscrew the screw, place a basin and drain the water, remove the pipe and disconnect the wires.
If it's Zanussi:
- Unscrew the clamps and disconnect the drain hose.
- Unscrew the screws and remove the back wall of the machine.
- Disconnect the wire terminals and unscrew the drain pump.
- Disconnect the pipes. Everything is ready for cleaning.
First you need to understand how the drainage system works. From the drum, the liquid enters a special pipe (a thick rubber pipe), it is connected to a filter that traps most of the debris, then the water enters the pump, which drives it through the drain hose into the sewer. Anything can become clogged, but most often you have to clean the filter, so check it before removing the pump.
First, you need to disassemble the pump; to do this, unscrew the screws, you will get two parts - a “snail” and a pump. Initially, it is worth inspecting and, if necessary, cleaning the pump impeller, then check the “snail”. Reassemble everything and check the machine on rinse and drain.
If nothing works, you will most likely have to change the pump.
So, for example, how to clean the pump in an LG washing machine:
- Unplug the machine from the outlet and check if there is any water in the powder tray.
- At the bottom of the machine, find a special panel and open it with a flat-head screwdriver.
- Unscrew the screw and disconnect the filter from the housing.
- Tilt the machine back and place a basin, open the filter lid and drain the water.
- Unscrew counterclockwise and clean the filter. After this, you can check whether this contamination may have caused the breakdown; turn on the machine in the “drain” mode, you should hear the pump blades operating.
- By gently pressing and turning the pump counterclockwise, you can reach it from the bottom of the machine (it would be better to lay it on its side, if possible).
- Disconnect the wires and pipes, loosen the clamps. Everything is ready, you can clean it.
Cleaning
To unscrew and clean the pump, you must first gain access to it. This procedure can be applied to almost any brand of washing machine, for example, Kandy or Ariston. You will need to do the following:
- The power supply wires must be disconnected from the pump.
- You need to place a rag or bowl under the part. This is due to the fact that water may leak during disassembly.
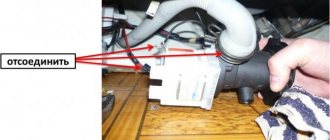
- The pipe attached between the drain tank and the pump must be disconnected from the latter by removing the fastening clamp.
- At this stage of disassembly, you can try to clean the inside of the cochlea from foreign objects. There is a chance that in this way you can remove objects and debris that are blocking. If this can be done, then now it will be enough to unscrew it. If not, you need to continue disassembling the pump further.
- Now you need to remove the clamp that secures the connection of the drain hose to the pump. Now the latter needs to be removed from the snail.
- Now it is possible to disconnect the pump unit from the washing machine body. The mounting screws that need to be removed can be installed on the side wall next to the cover or on the bottom of the structure.
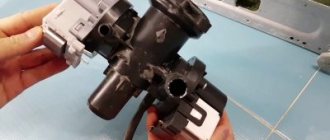
- After disconnecting the pump structure, it is necessary to disconnect the volute from the pump. Sometimes it is attached using a latch and other times it can be done using screws. In order to disconnect, you need to unscrew the screws or rotate the part so that the latch comes out of the grooves.
After disassembly, cleaning must be done. After this, you can easily unscrew its lid.
If it has been cleaned, you need to install it back. To do this, all of the above operations are performed in reverse order. After this, you will need to replace the wall of the machine or the bottom if they were disconnected.
How to prevent filter clogging
In addition to drainage problems, bacteria can grow in the dirt on the filter element. Following this, an unpleasant odor appears, which will penetrate into the tank and be transmitted to the laundry. Manufacturers of washing machines recommend performing preventive filter cleaning on average once every 2-3 months. The frequency of repetition of the procedure directly depends on the frequency of washing and the type of fabric.
For example, when washing woolen and pile items, cleaning must be done very often, almost once a week. It is also necessary to check the pockets of your clothes before washing for the presence of various items in them.
Cleaning frequency: more often or less often?
The drain filter is an important part of the design of an Electrolux washing machine. It is designed to catch small debris and foreign objects that have fallen into the drum. If cleaning is not carried out on time, the part gradually becomes clogged with layers of debris and mucus, which leads to problems with the operation of the washing machine.
A number of factors determine how often the filter needs to be cleaned. With average intensity of use of the device - once every 2-3 months.
But there are situations when Electrolux cleaning has to be carried out unscheduled. These include:
- Problem with draining (it is slow or water does not leave the tank at all).
- Water leakage from the side of the housing where the drain is located.
- Washing of items with a large number of pills or lint.
- Unpleasant odor inside the drum.
- After washing, it was discovered that the down jacket or pillow was torn and the filling got into the drum and tank, etc.
If cleaning is not carried out regularly, as prescribed by the equipment manufacturer’s instructions, the following violations are possible:
- mold development;
- unpleasant odor from the drum and from already washed clothes;
- deterioration of water drainage, up to its complete blocking;
- damage to the pump and, as a result, more expensive repairs with replacement of parts.
If washing is done frequently, dirt will form faster. The following circumstances also contribute to blockage:
- Washing items with lint and pellets.
- Damaged items (dangling threads, torn lining, poorly sewn buttons, etc.).
- Presence of pets with fur in the house.
In order not to quickly cause filter clogging and other damage in the washing machine, it is important to prepare things before putting them in the drum - check pockets, sew up holes, etc.
Signs and causes of blockage
Filter systems mainly become contaminated with rust due to constant contact with tap water. be checked in what condition they are in every 3 months . Limescale also leads to clogging. Minerals and salts are deposited on the parts, which are formed when waste water comes into contact with the filter.
During the washing process, the following is washed out of things:
- sand;
- hair;
- wool and other debris.
If you clean it on time, the filter will not become clogged and the machine will drain water normally.
Expert advice
To summarize, I would like to give expert recommendations:
- Take care of the quality of liquid in the house - this greatly affects all household appliances and plumbing fixtures.
- After washing soiled items or pillows with feathers, be sure to clean the trap.
- Instead of expensive products, you can use baking soda and vinegar with the same effectiveness.
We told you how to clean the inlet filter in a washing machine, and now we suggest watching a video on the topic: