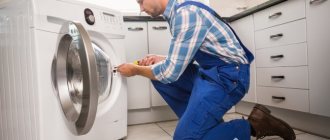
Almost any repair of a Zanussi washing machine involves disassembling it, because the vast majority of parts are hidden inside the body. It is clear that complete disassembly is not always required; often it is enough to just remove the top cover or back wall and behold, the broken part is already before your eyes. But what should you do if you need to repair the crosspiece or bearings, or worse, you need to change the tank? In such cases, repairs can only be made by completely disassembling the Zanussi washing machine. How to do this, let's figure it out!
How to open the lid of a top loading washing machine?
If the machine does not open, turn off the power completely - then the locking device will stop functioning and the lid
you can easily lift it up. After unplugging the cord from the outlet, wait a few minutes. The locking plates will cool down and the machine will open. This will allow you to gain access to the inner flaps of the drum.
Interesting materials:
How to sell a game on Steam? How to sell games on Steam from the library? How to continue the game on another device? How to complete the entire GTA San Andreas game? How to set the path to the game? How to unblock the Adobe Flash Player plugin in games? How to reset Archero game? How to reset the Hay Day game? How to reset games on ps vita? How to download a game to a flash drive?
What tool is needed?
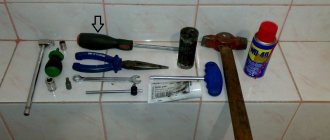
Let’s not “beat around the bush”, but let’s immediately start preparing, because it won’t be possible to disassemble a Zanussi washing machine with a 5 kg drum load right away. First we need to collect all the necessary tools. There shouldn't be any problems with this. It’s enough to rummage around in the garage, rummage in the pantry, and everything you need will be found:
- a set of screwdrivers (you can use a screwdriver with a set of heads of various configurations);
- a set of keys (you will need various keys, including spanners);
- a driver with a set of heads (mostly 7 and 8 mm);
- pliers (large and small);
- small pliers;
- bearing puller;
- mites;
- WD-40 liquid;
- hammer;
- awl;
- markers of several colors.
As you can see, the tool is simple, you can get all this without difficulty, so further discussion of this issue is pointless. The only thing I would like to note is to take only high-quality tools. When unscrewing fasteners with Chinese keys, you will most likely tear off their edges and then add more work to yourself. If you don’t have normal keys, ask your neighbor for the time of repairs or buy Soviet keys from junk dealers - you won’t regret it.
Let's get into the washing machine body
It would seem that it would be easier to climb into the body of a Zanussi washing machine and see what is there, to study, so to speak, its structure in practice. But it was not there. The body of old washing machines of this brand can be disassembled quite cunningly.
The top cover can be removed without any problems, we take a knob with an 8 mm head, unscrew two bolts, grab the cover, move it a little towards ourselves, and then up - nothing special. But the same cannot be said about removing the rear wall of a Zanussi car. The body of the Zanussi washing machine has one serious feature - it does not have removable side walls. What does it mean?
For washing machines of most brands, the housing structure assumes the presence of five or six elements:
- top cover;
- bottom;
- back wall;
- front wall;
- left side wall;
- right side wall.
For your information! Some models of washing machines do not have a tray or a lid that covers the body from the bottom.
The Zanussi washing machine has an unusual device in that the body of this “home assistant” (except for the top and bottom) can be disassembled into two large halves:
- front wall, half of the left wall and half of the right wall of the body;
- back wall, half of the left wall and half of the right wall of the case.
To get to most of the necessary parts, such as the engine, drive belt, drain pipe, we need to completely remove the rear half of the housing. How to do it?
- We drag the Zanussi washing machine to where it will be convenient to work with it.
- We unscrew two or three (depending on the model) screws that are located at the bottom of the rear wall of the case.
- Remove the top cover of the machine as described above.
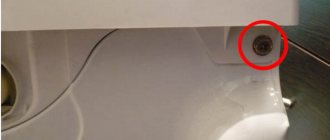
- Now we examine the side walls and find plastic plugs on them. Using an awl, pull off the plugs.
- Find the screws under the plugs and unscrew them.
- Let's move on to the upper part of the body. If you look into the upper part of the case without a lid, you will immediately notice a rather large metal plate that provides a stiffening rib. Along the edges of the plate we find screws holding the back of the case; they need to be unscrewed.
- The last element that prevents us from removing the rear part of the Zanussi washing machine body is the plastic fastener. A filling valve with two pipes is installed on it. There is no need to remove the pipes; we will pull off the entire mount by carefully prying up the plastic latches with a flat screwdriver.
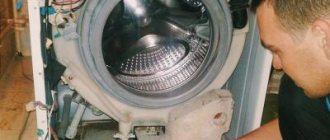
- Now all we have to do is go around the back of the washing machine and pull the back of the body towards us, it should move and move back. We remove the back part of the case, and a picturesque view of the insides of the Zanussi washing machine opens to our eyes.
To make the back of your body move back faster, rock it from side to side.
Dismantling the main components
By removing the back of the Zanussi washing machine, we made it much easier for us to remove its main components. Now we can unscrew and pull out a lot for repairs, and nothing will interfere with us. What details are freely accessible?
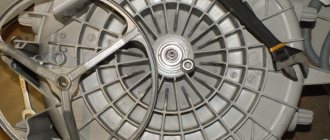
- Drum pulley and drive belt.
- Rear counterweight.
- Washing machine motor.
- Anti-vibration racks.
- Heating element (heating element).
- Temperature sensor.
- Inlet valve with pipes.
- Drain pipe and pump.
- Two pressure switches.
- Interference filter.
- Watering pump (used for forced injection of water into the tank while washing things).
We begin the next stage of disassembling the Zanussi washing machine by removing the wires from the heating element (it is located under the drum pulley), the engine, and removing the temperature sensor from the tank. Next, remove the wires from the pressure switches. They are located in the upper left part of the machine body and the pump, which is located at the bottom left. Remove the wire from the intake valve. After this, we’ll do a very useful thing: unscrew the rear counterweight, so that later it will be easier for us to pull the washing machine during repairs. It is held on by 4 bolts.
Attention! All wires you remove must be marked using multi-colored markers and paper labels so that nothing gets mixed up later. After all, the electrical installation of a Zanussi washing machine may seem complicated to a beginner.
Remove the drive belt. We hold the belt with one hand and rotate the drum pulley with the other. The belt will come off easily. We remove the clamps from the pipes and pull them off. We take a wrench with an 8 mm head and unscrew the two bolts that hold the Zanussi washing machine motor at the front, and then unscrew two more screws at the back. Having unscrewed the fasteners, hold the engine from below with one hand, and lightly hit its pulley with the other - the motor will be removed.
Now we take out the heating element. Unscrew the nut located between its contacts. We lightly press on it, and then we take the heating element by the contacts and very carefully, swinging it to the sides, we begin to pull it towards ourselves. It is important here not to break off one of the contacts, otherwise you will have to change the heating element.
Next, remove the racks. On one side they are held on by peculiar plastic rods, and on the other by a regular screw. To remove the rod, you need to take a 14 mm socket, put your hand behind the rod and put the head on its latch. After this, you need to grab the front part of the rod with pliers and pull it towards you, holding the tank - the fasteners will pop out. Unscrew the rack from below and move it to the side. We do the same with the second rack.
We take out the pressure switches from the grooves, remove the clamps from the filler pipes and remove them together with the filler valve. Unscrew the watering pump and disconnect the hose from it. Now let's look into the car body through the top. On the top wall of the tank we see a small breather pipe, we carefully pull it out. What's next?
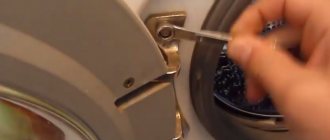
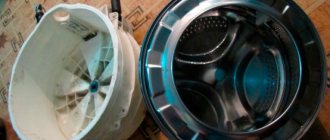
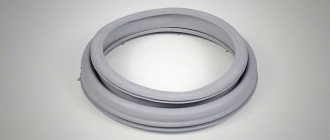
- We come in from the front. Open the hatch of the Zanussi washing machine. We take our hand by the upper part of the rubber cuff of the hatch and slightly pull it towards ourselves.
- Next, use a flat screwdriver to pry up the plastic clamp and move it around until you find the latch. We disconnect the latch and remove the clamp.
- Since we have a Zanussi washing machine with watering and a large load, it means that in the upper part of the cuff there is an inlet to which the watering pipe is connected. Again, take the upper part of the cuff and pull it towards you.
- Remove the clamps from the pipe and the pipe itself.
Bottom line
To replace or repair a particular part in a Zanussi washing machine, the equipment will need to be partially or completely disassembled. You can do this yourself if you have the necessary tools. During the process, it is recommended to take photographs of each step in order to correctly assemble the washing machine, especially when connecting the wiring. Observing this rule and following the instructions, many will be able to disassemble the equipment and replace the necessary part. However, if you are not sure of a positive result, you should call professionals and trust them to disassemble and repair the washing machine.
What tool is needed?
Let’s not “beat around the bush”, but let’s immediately start preparing, because it won’t be possible to disassemble a Zanussi washing machine with a 5 kg drum load right away. First we need to collect all the necessary tools. There shouldn't be any problems with this. It’s enough to rummage around in the garage, rummage in the pantry, and everything you need will be found:
- a set of screwdrivers (you can use a screwdriver with a set of heads of various configurations);
- a set of keys (you will need various keys, including spanners);
- a driver with a set of heads (mostly 7 and 8 mm);
- pliers (large and small);
- small pliers;
- bearing puller;
- mites;
- WD-40 liquid;
- hammer;
- awl;
- markers of several colors.
As you can see, the tool is simple, you can get all this without difficulty, so further discussion of this issue is pointless. The only thing I would like to note is to take only high-quality tools. When unscrewing fasteners with Chinese keys, you will most likely tear off their edges and then add more work to yourself. If you don’t have normal keys, ask your neighbor for the time of repairs or buy Soviet keys from junk dealers - you won’t regret it.
Let's get into the washing machine body
It would seem that it would be easier to climb into the body of a Zanussi washing machine and see what is there, to study, so to speak, its structure in practice. But it was not there. The body of old washing machines of this brand can be disassembled quite cunningly.
The top cover can be removed without any problems, we take a knob with an 8 mm head, unscrew two bolts, grab the cover, move it a little towards ourselves, and then up - nothing special. But the same cannot be said about removing the rear wall of a Zanussi car. The body of the Zanussi washing machine has one serious feature - it does not have removable side walls. What does it mean?
For washing machines of most brands, the housing structure assumes the presence of five or six elements:
- top cover;
- bottom;
- back wall;
- front wall;
- left side wall;
- right side wall.
For your information! Some models of washing machines do not have a tray or a lid that covers the body from the bottom.
The Zanussi washing machine has an unusual device in that the body of this “home assistant” (except for the top and bottom) can be disassembled into two large halves:
- front wall, half of the left wall and half of the right wall of the body;
- back wall, half of the left wall and half of the right wall of the case.
To get to most of the necessary parts, such as the engine, drive belt, drain pipe, we need to completely remove the rear half of the housing. How to do it?
- We drag the Zanussi washing machine to where it will be convenient to work with it.
- We unscrew two or three (depending on the model) screws that are located at the bottom of the rear wall of the case.
- Remove the top cover of the machine as described above.
- Now we examine the side walls and find plastic plugs on them. Using an awl, pull off the plugs.
- Find the screws under the plugs and unscrew them.
- Let's move on to the upper part of the body. If you look into the upper part of the case without a lid, you will immediately notice a rather large metal plate that provides a stiffening rib. Along the edges of the plate we find screws holding the back of the case; they need to be unscrewed.
- The last element that prevents us from removing the rear part of the Zanussi washing machine body is the plastic fastener. A filling valve with two pipes is installed on it. There is no need to remove the pipes; we will pull off the entire mount by carefully prying up the plastic latches with a flat screwdriver.
- Now all we have to do is go around the back of the washing machine and pull the back of the body towards us, it should move and move back. We remove the back part of the case, and a picturesque view of the insides of the Zanussi washing machine opens to our eyes.
To make the back of your body move back faster, rock it from side to side.
Dismantling the main components
By removing the back of the Zanussi washing machine, we made it much easier for us to remove its main components. Now we can unscrew and pull out a lot for repairs, and nothing will interfere with us. What details are freely accessible?
- Drum pulley and drive belt.
- Rear counterweight.
- Washing machine motor.
- Anti-vibration racks.
- Heating element (heating element).
- Temperature sensor.
- Inlet valve with pipes.
- Drain pipe and pump.
- Two pressure switches.
- Interference filter.
- Watering pump (used for forced injection of water into the tank while washing things).
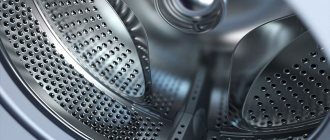
How to tell if a bearing is broken
The surest sign of a malfunction is error codes E13 and E55 on the washer display. If the self-diagnosis system detects problems and issues a code, you can proceed with disassembly and inspection.
But if there is no code, and every time you wash you hear a lot of noise, hum, vibration, grinding - all this also indicates wear of the bearings.
Additional check: open the hatch door and shake the drum by hand. If its rotation is uneven, it deviates strongly from the tank towards the rear wall - a malfunction is obvious.
Disassembling the dishwasher
All dishwashers are designed quite simply.
In addition to the washing chamber, there are several control elements. They are located below. To access, you need to remove the side panels. And also the top cover. Unscrew the screws on the back of the PMM.
Backside
Remove the cover.
Front view
We take out the decorative plastic panel under the door. It is installed with latches.
Removing the bottom panel
Bottom panel and open door
Unscrew the screws hidden by the panel. They secure the side walls.
Front mounting screws
Remove the side panels.
Dishwasher without side panels
In principle, you can look at the side below and perform some actions. But it will be more convenient to remove the plastic bottom. Unscrew the screws and pull out the panel.
Bottom side view
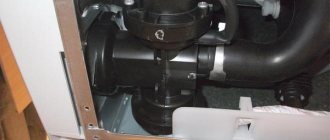
This Zanussi PMM model has a flow-through heater installed, and it is combined with a recirculation pump. In the photo below, the heating element is highlighted.
Heating element with recirculation pump assembly
Pump assembly and contacts of instantaneous water heater.
Heater contacts
Nicknamed a multimeter. The normal value is 30-50 Ohms. If there is no resistance, then the heater has burned out. It is not supplied separately from the pump. Therefore, either purchase the complete unit - as of 2017, this is 11,200 rubles, or repair.
To purchase, you need the product number of the dishwasher. It's on the door.
Product number on the door
Preparation for repair
To successfully dismantle and then install a bearing, you need:
- Screwdrivers: slotted, Phillips, hex.
- Torx keys.
- Pliers.
- Set of wrenches.
- Hammer and bolt (15-20 cm).
- Glue or sealant.
- WD-40 for stuck parts.
Time to prepare the washing machine. Disconnect it from the network, turn off the water supply. Disconnect the intake hose and drain the water from it. Also drain any remaining water from the drain filter, which is located at the bottom of the front panel, behind the hatch.
Article on the topic: How to clean a washing machine drum at home