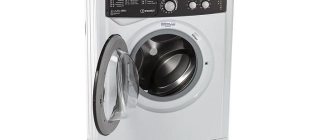
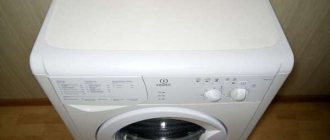
Washing machine Indesit WITL 106 reviews
Advantages:
- washes well;
- there is a delayed start of washing;
- simple controls;
- does not vibrate;
- simple and convenient menu;
- not very noisy;
- spacious drum;
- there is a quick wash;
- washing sports shoes;
- not an expensive machine;
- reliable washing machine;
- has many modes and programs;
- there are fast programs.
Flaws:
- inconvenient powder compartment;
- Doesn't rinse well.
Washing machine Indesit WITL 106 reviews are based on 24 user reviews in Yandex Market.
Indesit witl 106 control unit diagram
We continue the series of articles on repairing washing machines with your own hands.
All Indesit witl 106, witl 86, witl 1067, witl 867 models are similar to each other and the repair problems are the same.
Washing machines can be assembled on an ARCADIA or EVO-II electronic board
This depends on your CMA product number.
- Deciphering the error code by flashing indicators:
By adding the numbers corresponding to the blinking LEDs, you will receive an error code.
As an example of error F10, we add the sum 8+2=10 (F10).
- Faults by error code (EVO-II board):
We have already published in a previous article how to troubleshoot a fault on the EVO-II board of WISL models by error code. They are similar to each other.
- Faults by error code (ARCADIA board):
This board is the newest of all, it replaced the EVO-II. Installed since 2007.
Schematic connection of the Arcadia control board with end devices
1. Anti-interference filter (power capacitor) 2. Heating element 3. Pump (pump) 4. Door locking device 5. Tachogenerator 6. Motor stator 7. Electric motor rotor 8. Main wash water intake solenoid valve 9. Pre-wash solenoid valve 10. NTC (temperature) sensor 13. Water level switch (pressostat) 14. Linear water level switch
- When the machine does not display an error code:
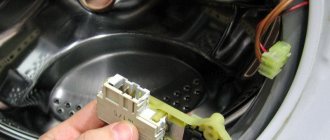
— When plugged in, the door immediately locks (a click is heard) and the hatch lock indicator light comes on.
Suspicion of a breakdown of the motor triac, burnout of the resistance, or short circuit of the motor.
It is necessary to remove the top cover by unscrewing the screws:
Visually inspect the board by unscrewing the fasteners:
Next, we use a tester to call the engine block (6 wires, 2 of which are red - tacho, and 4 black are divided in pairs: rotor and stator):
— Frequent malfunctions are associated with the engine. It is a collector type.
For example, after pressing the start button, the hatch lock is activated and “silence” occurs. In many cases, brush wear can be determined by external inspection or by the intensity of sparking on the engine commutator: both under load (there is laundry in the machine tank) and without it - in this case, abundant sparks occur (not along the entire perimeter of the commutator).
If the brushes wear out significantly, there is a loss of engine power - for example, if the drum of the washing machine does not “turn” with the laundry loaded into it.
Engine control circuit via tachogenerator (ARCADIA module):
— It takes an infinitely long time to wash, constantly filling and draining water.
It is necessary to properly organize the drainage system. The tip of the hose should be at a height of 60 to 100 cm.
In addition, a break in the stream must be ensured when draining to avoid water being sucked back into the SM.
-All indicators flash, except for the pre-rinse, main and rinse.
The hero of the occasion is the control unit (module), namely the switching power supply in it. An incorrect signal (voltage) is sent to the board and the lights blink.
Where is this module located:
With front loading, it is located under the tank on the rear side. In the vertical racks under the top control cover.
What to look for in the power supply is the swollen capacitors C17, C16, C20.
We select new capacitors, maybe 1000 uF. We take a soldering iron and change them.
- Exploded top view:
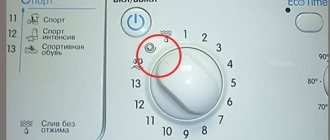
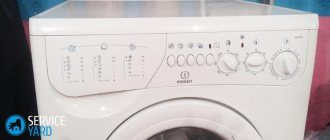
001 - control knob 002 - white on/off/reset buttons 003 - white control panel 004 - bitron switch 005 - function keys 007 - display 008 - lid handle 010 - dispenser release lever 011 - dispenser hook spring 012 - dispenser release button 016 - cover support 018 - partition with shock absorber 021 - door locking device 022 - white dispenser 023 - siphon cover 026 - control panel wiring 027 - 8-pos. potentiometer
We continue the series of articles on repairing washing machines with your own hands.
All Indesit witl 106, witl 86, witl 1067, witl 867 models are similar to each other and the repair problems are the same.
Washing machines can be assembled on an ARCADIA or EVO-II electronic board
This depends on your CMA product number.
- Deciphering the error code by flashing indicators:
By adding the numbers corresponding to the blinking LEDs, you will receive an error code.
As an example of error F10, we add the sum 8+2=10 (F10).
- Faults by error code (EVO-II board):
We have already published in a previous article how to troubleshoot a fault on the EVO-II board of WISL models by error code. They are similar to each other.
- Faults by error code (ARCADIA board):
Features of Indesit witl repair
For free
Call and diagnosis
Spare parts
Own warehouse
10% discount
For beneficiaries
We continue the series of articles on repairing washing machines with our own hands.
All Indesit witl 106, witl 86, witl 1067, witl 867 models are similar to each other and the repair problems are the same.
Washing machines can be assembled on an ARCADIA or EVO-II electronic board
This depends on your CMA product number.
- Deciphering the error code by flashing indicators:
By adding the numbers corresponding to the blinking LEDs, you will receive an error code.
As an example of error F10, we add the sum 8+2=10 (F10).
- Faults by error code (EVO-II board):
We have already published in a previous article how to troubleshoot a fault on the EVO-II board of WISL models by error code. They are similar to each other.
- Faults by error code (ARCADIA board):
This board is the newest of all, it replaced the EVO-II. Installed since 2007.
Schematic connection of the Arcadia control board with end devices
1. Anti-interference filter (power capacitor) 2. Heating element 3. Pump (pump) 4. Door locking device 5. Tachogenerator 6. Motor stator 7. Electric motor rotor 8. Main wash water intake solenoid valve 9. Pre-wash solenoid valve 10. NTC (temperature) sensor 13. Water level switch (pressostat) 14. Linear water level switch
- When the machine does not display an error code:
— When plugged in, the door immediately locks (a click is heard) and the hatch lock indicator light comes on.
Suspicion of a breakdown of the motor triac, burnout of the resistance, or short circuit of the motor.
It is necessary to remove the top cover by unscrewing the screws:
Visually inspect the board by unscrewing the fasteners:
Next, we use a tester to call the engine block (6 wires, 2 of which are red - tacho, and 4 black are divided in pairs: rotor and stator):
— Frequent malfunctions are associated with the engine. It is a collector type.
For example, after pressing the start button, the hatch lock is activated and “silence” occurs. In many cases, brush wear can be determined by external inspection or by the intensity of sparking on the engine commutator: both under load (there is laundry in the machine tank) and without it - in this case, abundant sparks occur (not along the entire perimeter of the commutator).
If the brushes wear out significantly, there is a loss of engine power - for example, if the drum of the washing machine does not “turn” with the laundry loaded into it.
Engine control circuit via tachogenerator (ARCADIA module):
— It takes an infinitely long time to wash, constantly filling and draining water.
It is necessary to properly organize the drainage system. The tip of the hose should be at a height of 60 to 100 cm.
In addition, a break in the stream must be ensured when draining to avoid water being sucked back into the SM.
-All indicators flash, except for the pre-rinse, main and rinse.
The hero of the occasion is the control unit (module), namely the switching power supply in it. An incorrect signal (voltage) is sent to the board and the lights blink.
Where is this module located:
With front loading, it is located under the tank on the rear side. In the vertical racks under the top control cover.
What to look for in the power supply is the swollen capacitors C17, C16, C20.
We select new capacitors, maybe 1000 uF. We take a soldering iron and change them.
- Exploded top view:
001 - control knob 002 - white on/off/reset buttons 003 - white control panel 004 - bitron switch 005 - function keys 007 - display 008 - lid handle 010 - dispenser release lever 011 - dispenser hook spring 012 - dispenser release button 016 - cover support 018 - partition with shock absorber 021 - door locking device 022 - white dispenser 023 - siphon cover 026 - control panel wiring 027 - 8-pos. potentiometer
