Accustomed to the benefits of civilization, we don’t even notice what household appliances do for us: we automatically cook food, clean the apartment, or wash clothes. The slightest malfunction in the operation of an appliance, especially a washing machine, can take us by surprise. What to do if the “washing” unit does not draw water properly and hums all the time? Read about common causes of malfunctions in this material and watch a detailed video of methods for resolving the problem.
Incorrect device connection
This malfunction often occurs when installing recently purchased washing equipment yourself.
There may be several reasons why water does not enter the drum:
- the drain is not connected correctly to the unit or drain;
- the water supply hose is pinched;
- installation or operation rules have been violated.
Connecting a washing machine
If the washing machine has a display, then an error code may appear on its screen, which will help you find out the cause of the malfunction. As a rule, all of them are described in the manual for the machine. If the drain hose leaks water at the connection to the unit or at the outlet to the sewer, check that it is installed tightly and that there are no kinks.
Attention! Failure to properly lift the drain hose to the correct height is a common cause of machine malfunction.
Also, water does not flow into the machine if the supply hose is pinched or deformed. Check it for any sharp bends or breaks that are preventing good flow and turn the unit back on.
Reasons for lack of water supply
Water may not be collected for the following reasons:
- the valve on the pipe is closed;
- clog in the inlet hose or filter;
- valves are faulty;
- wiring is damaged;
- control module failure;
- the pressure switch is not working properly;
- the hatch is not tightly closed;
- the drain pump is broken.
Washing machine without water
Let's consider each item in detail, as well as corrective measures.
The water supply tap is closed or there is low pressure in the water supply
New type washing machines must have a water shut-off tap. As a rule, its valve is located directly on the pipe or on the comb. It is clear that if the tap is closed, water will not flow into the car. At the same time, the unit hums, and an error is displayed on the display.
It is quite easy to fix such a “breakdown”, just press the pause button, open the valve and start the machine again.
If the tap is open, but water does not flow into the washing machine or it fills slowly, then there may be a problem in the water supply: there is no water or the pressure in the pipes is not strong enough. Open any tap in the bathroom and check for availability. Call the hotline of your housing office and find out the timing of water supply. Of course, you will have to postpone washing for this time.
Attention! Do not turn on the washing machine immediately when water appears in the water supply. Due to wear and tear of the water pipes, it may become rusty.
Useful tips
To wash without problems with water supply, carry out regular preventive maintenance.
Here are 5 simple tips to prevent common problems:
- pay attention to the sounds the machine makes to identify the problem in time;
- do not run the machine dry: check the presence of water in the taps and open the shut-off valve of the inlet hose;
- every 10 washes, clean the rubber seal, the hatch door and the latching mechanism;
- do not allow high levels of humidity to maintain the functionality of the board;
- Explain to children the dangerous consequences of playing with the programmer while doing laundry.
Following the recommendations will extend the life of the washing machine and fully preserve the functionality of the device.
Clogged or broken inlet valve filter
Everything is in order with the water supply in the house, the device is working and connected correctly, but water still does not flow into the machine, and the process is accompanied by a characteristic hum? The reason may be more serious - the water supply valve is clogged or completely broken.
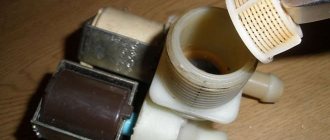
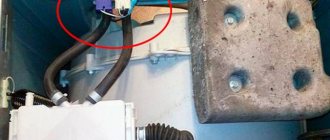
Water enters the washing device under pressure from the water supply. Its supply is regulated by a special plastic valve, which receives a signal from the control module. If the valve is broken, the washing machine cannot draw water. It must be replaced using the services of a service center.
Washing machine inlet valve
The cause of the malfunction may be another - the filter on the inlet valve is clogged. This problem can be solved without calling a service technician. To clean the filter with your own hands you need to:
- Unscrew the water supply hose from the machine.
- Remove the strainer using pliers.
- Clean it of small debris and rinse under water pressure.
- Install everything in place in the same sequence.
- Check the device for functionality.
Attention! It is not enough to clean just the filter. There may also be a blockage in the supply hose. It is also recommended to rinse it well under running hot water.
Do-it-yourself AEG machine repair: we fix major breakdowns
Having determined what the fault codes mean, you can begin repairs yourself or call a specialist. If you are a brave craftsman with experience, feel free to start repair work: it will not cause you any particular difficulties. Well, if you don’t have time to understand the intricacies of repairs, it’s better to invite a specialist.
The heating element in the AEG machine has failed: what to do?
This is relevant when errors E61 (C7), E71 (C8) are detected
Follow this action plan to remove the old heating element from the machine and replace it with a new one:
- Order/buy/find an original heating element.
- Carefully inspect the back cover of the washing machine. Look for a modest-sized hatch for technological purposes. If it is there, then you can be sure that the heating element is in the front. If the hatch is not detected, then the developers placed the heating element at the back. If you are a little in doubt, first disassemble the case from the back (it is easier to do there).
- Having found access to the heating element, armed with a multimeter (tester), check it. If the node is working properly, the readings should be 30 ohms.
- If you find a malfunction, get rid of the useless part. To do this, find a large bolt in the center and remove it. Afterwards, free the heating element from the contacts and sensors.
Carefully! When removing the temperature sensor, do not pull it sharply towards you. There is a tab at the top that needs to be pressed to quickly remove the sensor from the hole.
- Shake the heating element left and right, carefully pull it towards you and remove it from the holder.
- Take a new heating element, insert it in place of the old one, tighten the bolt. Reconnect all contacts and sensors in reverse order.
Replacing the temperature sensor yourself
Relevant for errors E71 (C8) and E74
In modern washing machines, the temperature sensor is a thermistor mounted on the heating element. Therefore, when checking the heating element with a tester, at the same time spend time on the thermistor. Replacing it also does not require much effort and time - as written above, hold the sensor tab, carefully remove it and replace it with a new one.
Troubleshooting the AEG drain pump
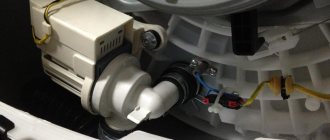
If error E21 (C3, C4) occurs, indicating a breakdown of the pump (drain pump), you can remove it and replace it with a new one without the help of a specialist, doing everything yourself. Getting to the pump is a little more difficult than getting to the heating element, so it’s worth stocking up on tools and patience.
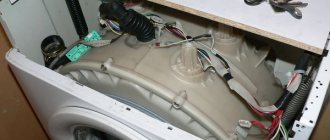
To get to the location of the drain pump, you need to remove the SM facade wall. Follow these instructions:
- Disconnect the top cover from the body.
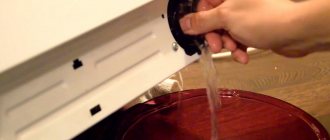
- Next, remove the front panel, behind which the manufacturer placed the drain filter (just drain the remaining waste water) and unscrew the bolts holding the pump (pump).
- Having taken out the container for powder and rinse aid, unscrew the bolts that secure the control panel.
- Carefully lift the panel, being careful not to touch the wiring.
- Remove the clamp from the drum cuff - you also need to get rid of it.
- Unscrew the bolts holding the housing cover in place from the front, moving it away for now.
- Remove the wiring from the pump and loosen the clamps.
- Having taken out the pump, remove the volute and inspect the impeller - there may be damage or debris in it. At the same time, taking a tester, you can check the motor winding.
- After confirming that the pump is faulty, install a new part that matches your AEG machine model. Connect the sensors and wires, reassemble the SMA in the reverse order.
Repair of AEG control board
Repair or replacement will be needed if errors CF (T90), EC1 or E21 (C3, C4) appear.
Often, the breakdown of an electronic module is accompanied by breakdowns of other systems and components, so the first difficulty that you may encounter during repairs is diagnosing the breakdown.
The second problem is that it is not always clear whether the control module should be replaced or whether it can be repaired.
That is why, if you need firmware or replacement of the board, it is better not to save money and contact a specialist who will check the board with special equipment and give his verdict - repair or replace.
The lock of the laundry loading hatch is broken or not closed
One of the main protections for new generation washing machines is the lock on the door hatch. If it does not fit tightly or closes without a characteristic click, water will not be poured into the unit and the washing program will not start. Make sure the door is tightly closed. To do this, open and close it again. Start the washing program again.
In some cases, the door may not lock, and the corresponding error icon will light up on the electronic display. This means that your lock is broken: the problem is in the locking tongue or latch located inside the body of the machine itself. Open it and look carefully: perhaps the rod that serves as a fastener for the latch has fallen out of the tongue on the door. It can be inserted by carefully disassembling the hatch. A mechanically broken lock and damaged door will need replacement.
If the door is not closed tightly, the machine will not draw water.
With frequent and long-term use, the hinges in the washing machine hatch that connect it to the washing machine body may become loose. This will cause the door to latch tightly. You can screw the hinges with your own hands using a screwdriver.
Failure in the control module
In electronic washing machines, the control module may malfunction. The appliance does not start the washing program and water does not flow into the drum. This problem is encountered after several years of using automatic washing machines, especially if the operating rules described in the manual are not followed.
You can solve the problem by manually flashing the module. Set all programs to zero and turn on the machine. If it blinks, the program has been reset and you can continue to use the device.
This action may not be enough if, for example, some cable or wire in the electronic module has burned out. Then it should be completely replaced, but without a specialist you will not be able to fix the breakdown.
If all of the above steps are completed and nothing helps, then most likely the washing machine has more serious damage. The drum may be faulty, the pressure switch may be broken, the pump or measuring instruments may be faulty. The machine, of course, will not draw water. Without a specialist, it will be difficult for you to understand the intricacies of the device. Only a qualified specialist can diagnose, identify and repair a washing machine.
How to fix a breakdown (is it possible to do it yourself, and when should you contact a specialist)
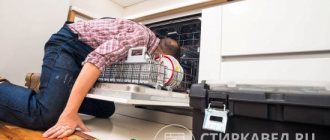
Problems with filling a washing machine with water depend on various reasons. From the simplest, like forgetting to open a water valve, to complex ones, like the breakdown of components of varying degrees of complexity. If you have confidence in your skills and ability to handle equipment, you can carry out SMA repairs without outside help, but it is important not to overestimate your abilities.
When the machine suddenly stops drawing water into the washing or rinsing tank, users resort to calling a technician.
To achieve your goal, draw up a rough action plan and study the procedure for disassembling (assembling) a particular unit. During repairs, do not deviate from this order. Before starting repair work, you should pay attention to the warranty periods. If they have not expired, then you have a direct route to a service workshop, otherwise there is a risk that the malfunction will not be fixed and you will lose money.
Self-repair of electronics is worth undertaking if the warranty period of the device has already expired and you are confident in your skills in working with a soldering iron and multimeter.
