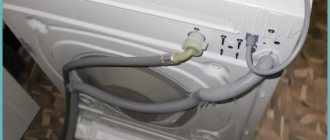
Methods for connecting to the sewer system
Water drainage is organized in the following ways:
In the first case, a permanent connection is not made, but during washing the possibility of using a bathtub, washbasin or toilet is limited.
Connecting to a siphon under the sink is the most popular method. The drain is mounted permanently, without restricting access to plumbing. A siphon with an outlet for an additional pipe is installed for connection. The hose is connected to the drain channel under the bathtub if the equipment is located correctly. The height of the connection point is taken into account for the normal operation of the check valve of the washing machine.
As an example of communicating vessels, consider the tank in a washing machine and the pipe connected to the drain. The knee at the bend divides it into 2 parts. If the long half of the tube is connected to the sewer, then the column of liquid in it will be greater than in the short part during drainage. The pressure in the communicating vessels is different, so the liquid from the container will drain until its amount is equal to the rupture point.
What to do if the tank, hose or its connections are leaking
There are cases when the cause of leakage is mechanical damage. Most often they are associated with the appearance of cracks due to wear of components or the entry of solid bodies into the mechanism.
The hose is damaged. At the first suspicion, you can detect a leak by applying a paper napkin to it. If a leak occurs at the junction of the hose and the housing, you will have to replace the gasket that allows the liquid to pass through. If the plastic tube itself is damaged, then it is enough to seal it with waterproof glue or electrical tape. The latter option is suitable as a temporary measure, since such protection will not be enough for a long time.
The tank is damaged. If you follow the operating rules, this situation is unlikely. However, those who like to wash items with large metal accessories and shoes may encounter this phenomenon. The only solution is to replace the component with the help of a technician.
When self-draining occurs
Even experienced craftsmen make mistakes during installation; they do not level the level correctly, resulting in self-draining of unused clean water. The machine is emptied and the liquid is drained into the sewer. The installation instructions for any device indicate that the outlet of the drain hole into the sewer is located at a height of 50 to 100 cm from the floor level.
The height of 50-60 cm exceeds the maximum permissible level in the drum. Self-draining occurs when the hose is installed lower, so the washing water is immediately removed into the sewer.
Bending the hose above the water level in the machine allows you to carry out a wash cycle and work out part of the program. Once the bleed pump is activated, water will move through the hose and a siphon effect will result.
Washing anti-siphon
Non-return valve for a washing machine on the drain under the sink. This type of check valve has a body designed to be mounted to a siphon under the sink. This device will prevent dirty water from the kitchen sink from entering the washing machine. Almost anyone can install such a valve. The negative side of this type of mounting is that the siphon under the sink is located at some elevation from the floor level. Therefore, the water remaining in the part of the hose from the washing machine to the valve will flow back into the machine.
[custom_ads_shortcode2]
Types of valves
Classification:
All devices are designed to protect against the siphon effect in the washing machine and prevent contamination of the tank. Segmented anti-siphons are used when working with dirty tap water. They are easier to disassemble and clean from debris.
A mortise check valve is inserted into the drain running through the sewer. First, the drain is equipped with an insert, then the product is inserted into it.
A check valve against the siphon effect in a new washing machine is installed in the following situations:
The valve protecting the drain of the washing machine can be installed independently if necessary.
Antisiphon
A check valve for a washing machine on the drain (anti-siphon), mounted on the drain system, in order to prevent waste liquid from returning from the sewer pipes to the tank of the washing machine.
The non-return (anti-siphon) hydraulic valve does not interfere with the planned outflow of dirty water from the tank of the automatic machine. And if there is an attempt to return it from the sewer pipe to the tank, the damper in the valve design immediately blocks its path. In order to purchase and install the necessary drain valve, you need to decide on the types of these devices.
[custom_ads_shortcode2]
Principle of operation
The siphon effect stops after installing the check valve. The device is often mounted in a walled-up pipe; the junction of the products is covered with special reflectors. Tap water enters the washing machine through the inlet valve, the return valve is responsible for the correct drainage of waste after the washing program is stopped and prevents the return of dirt.
The operating mode of the washing machine is sometimes disrupted after proper installation, an unpleasant odor appears or the wash takes too long. The siphon effect is the root of these problems and occurs when the diameter of the sewer pipe is larger than the hoses that come with the equipment.
The difference affects the appearance of discharged pressure; a slight difference affects the outflow of waste water. Modern technology takes away the missing liquid from the water supply, so the washing time increases and the quality of laundry cleaning decreases. This is the siphon effect, which a check valve helps prevent.
Siphon effect
The manifestation of such an unpleasant phenomenon - arbitrary drainage of water into the sewer system or the return of it (liquid) from the sewer into the washing machine tank, is typical for washing machines and dishwashers installed in apartments located on the upper floors of multi-storey buildings. This does not exclude its (“siphon effect”) manifestation in the rooms of the lower levels, if washing equipment is installed incorrectly.
That is, when the outlet end of the tube is below the water level in the tank, as a result of which the water rises and returns to the tank or is spontaneously discharged. The result of this is excessive consumption of electricity and water or laundry spoiled by sewer liquid that needs to be washed again. Avoiding these unpleasant moments is quite simple. You need to buy and install a washing machine water drain check valve. This can be done by calling a plumber or doing it yourself, especially installing a check valve (anti-siphon), the operation is not complicated and does not require special tools.
[custom_ads_shortcode1]
Connection Tips
When choosing an installation method, you need to ensure that the hose does not fall into the water. Specialists know what to do in such a situation. The serviceability of the sewer system is checked before installation, the pipes are cleaned, and fast and free outflow is organized.
The tube pulsates while the machine is operating, so it is necessary to secure it firmly to prevent leaks. When the pump is turned on suddenly, a jerk occurs, which can cause the connection to break.
Source
Self-draining water from the washing machine
In this article we will touch on the topic of self-draining water from a washing machine.
In fact, the topic is quite hackneyed, but would you know how many times I have had to explain to people over the phone how to properly secure the drain hose of a washing machine, and end up going to applications with this problem.
Main symptoms: during the washing mode, the device constantly or periodically takes in water, the washing time increases greatly, or the washing does not finish at all.
The main cause of this problem is improper installation and connection of the washing machine to the sewer.
Correct connection of the washing machine drain.
Instructions for installing the washing machine are included with the device when sold in a store. But some buyers, for reasons of economy, install the machine themselves, often ignoring the recommendations of the operating instructions, while others use the services of not very competent craftsmen, and often plumbers (I have nothing against them), who are also not trained professionals in installing household appliances. But it also happens that during operation this problem arises, mainly when the drain hose is poorly secured to the back wall of the machine.
Incorrect connection
The washing machine constantly fills and drains water . This is what the main symptom of an improperly connected drain hose to the sewer looks like. Moreover, the drainage occurs on its own, and not with the help of a pump. Let's look at this situation in more detail.
The first mistake is when the drain hose is connected to a sewer pipe, which is located near the floor or on a small hill. The second mistake is that the drain hose lies on the floor along its entire length. Under such circumstances, the water entering the washing machine tank will immediately flow into the sewer.
Since there are no valves in the washing machine that would prevent it from draining itself, water will continue to fill indefinitely until the machine gives an error that it cannot draw the required amount of water in the allotted time.
What to do if the connection is incorrect?
If you correct only the second defect, namely, lift the drain hose and secure it as indicated in the instructions, then this will not save the situation much. In this case, the water will not immediately flow into the sewer, but only after the first drainage of the water using a pump.
Typically, such drainage occurs at the border of the washing and rinsing programs. Before each rinse, the water is drained and a vacuum appears inside the drain hose. When a fresh portion of water enters the tank, it is simply squeezed out of the tank into the sewer by atmospheric pressure, because there is no pressure at the other end of the drain hose and the water quietly drains from the washing machine.
To correct this situation, you need to extend the sewer pipe vertically upward to a distance of 50-60 cm from the floor level. This does not require special skills or serious preparation. If you are not confident in your abilities, you can contact us, we will help you.
In cases where access to pipes is difficult or extension of the pipe is impossible, there is another solution to the problem. To do this, you will need another drain hose and a drain back valve . The valve is installed between the drain hoses at the highest point on the back wall of the washing machine. Its task is to force air inside the drain hose when a rarefied space occurs, thereby preventing self-draining of water.
Video instruction: correct connection of the washing machine drain
The above is not the only reason for this behavior of the washing machine. There are several other options with similar characteristics.
Unstable pressure in the water supply
Constantly changing water pressure can also cause problems with the washing machine, causing it to drain. The permissible pressure level is 1-4 bar. Values below or above these indicators indicate bursts and other problems with the water supply.
If the problem is of a general nature and has also arisen among neighbors, then it is advisable to contact service agencies. On a local scale, this may indicate flaws in the plumbing wiring or its defects. Namely:
- deposition of salts inside the pipe, which reduce its diameter and, accordingly, throughput;
- clogging of the water filter;
- presence of cracks.
The optimal solution in these situations is to replace the plumbing.
Important! Preference should be given to plastic products that are not prone to corrosion.
If holes have formed in plastic pipes, they can be filled with sealant or repaired using cold welding. Don’t forget to prevent the problem by regularly cleaning the filter.
Emergency water drain
Let's consider the option when the washing machine draws in and immediately drains water using a pump . This scenario assumes that the washing machine has a self-diagnosis function and in case of emergency it can turn on an emergency drain of water.
There are two types of such systems. The first is mechanical, when the pressure switch (a device that monitors the water level in the tank) has not two switching positions (empty tank, full tank), but three (empty tank, full tank, overfilled tank). When you move to the third position, the water drain is automatically turned on and it turns out that the washing machine simultaneously fills and drains water.
The second system involves an electronic pressure switch and an electronic unit for analyzing the device readings. If the readings are outside the acceptable limits, the water is drained and an error code is indicated.
There is also an option with two pressure switches that duplicate each other and if their readings diverge, the drain is turned on again.
Emergency drainage can occur for several reasons.
Failure of the water fill valve (WPV)
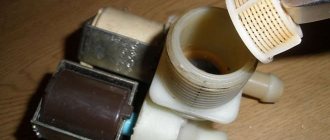
The valve works according to the following principle. An electric current is supplied to the winding and the valve opens, water begins to flow into the tank under the pressure of the water supply; a special pump is not needed for this, as some mistakenly believe. When a valve breaks, it gets stuck in one of the positions : either always closed or always open. Such a malfunction can only be repaired by replacing the device.
If the CEN malfunctions, it will need to be replaced with a new one.
Malfunction of the pressure switch (water level sensor in the tank)
The job of the pressure switch is to give a timely signal that the water level in the tank is sufficient. There are two reasons why he cannot do this. The first is that the tube through which air is supplied to the device from the tank is torn or clogged . The second reason is that the pressure switch itself has failed . In both cases, you can forget about adequate operation of the pressure switch.
The first malfunctions can be detected by simply blowing the tube in one direction and the other. First, disconnect the tube from the pressure switch itself and blow air into it; air should flow freely into the tank; if this does not happen or occurs with great effort, look for a blockage.
Attach the tube back to the pressure switch and disconnect the end that is connected to the tank and also blow into it. Air should not escape at all; if this happens, look for a hole in the tube.
Error codes
| Brand | Error code |
| Ariston | F04, F10 |
| Samsung | LE, OE |
| Indesit | F04, F10 |
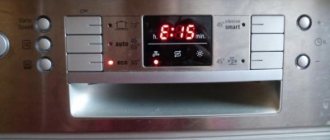
| Bosch | F17 |
| Zanussi | E30 |
| LG | I.E., F.E. |
| Candy | F02 |
| Siemens | F17 |
| Electrolux | E30 |
Modern washing machines have learned to take maximum care of the user’s safety, so in any emergency situation the washing machine stops and drains the water . If the user is inattentive, it may seem to him that water is being poured in and immediately drained. In fact, the control unit found a malfunction and, to prevent flooding, drained the remaining water and stopped all processes. At this moment, try to remember the error code that the washing machine displays and my advice to you is to call a specialist.
Connecting a washing machine to ready-made communications (instead of an old washing machine)/connecting a washing machine from scratch. Ready-made communications include a separate water tap for the washing machine, a prepared drain pipe or siphon under the sink, and an installed socket. When connecting from scratch, all these communications are installed by the master.
Required if, when executing the program, the valve does not allow water to enter the machine. The work includes: partial disassembly of the machine, replacement of the old valve and installation of a new one.
Removing the faulty part and installing a new one. Checking the washing machine for serviceability.
Washing machine repairman since 2004 . During this time, he made more than 10 thousand visits and lost count of the number of washing machines repaired. More details
Source
Complete or partial replacement of the electronic module
If the device does not wash normally, stops during operation, or does not maintain the optimal water level, then the problem may lie in the operation of the electronics. This is an internal computer responsible for the operating modes of the machine and their changes. If the device is equipped with a display, an error code will appear on the display, the explanation of which and ways to solve the problem are in the attached instructions.
But if there is no electronic display, then a module malfunction can be identified by the following signs:
- all LEDs are on;
- the light indication blinks regularly or chaotically;
- the machine does not want to execute the specified program or turns off during its execution;
- the water overheats or, conversely, remains cold.
The reason for this can be either a manufacturing defect or a simple discrepancy with the parameters of the electrical network, or the ingress of water and other foreign objects into the control module. When the error code is known, you can find its description from the manufacturer or try rebooting the device.
If the problem persists, it is advisable to seek the services of a specialist, since without proper knowledge of electrical and electronics, it is unlikely that you will be able to get rid of the problem on your own.
Advice! Partial replacement, which involves working with separate sensors, is not recommended. In this case, it is better to completely replace the board.
The module can be easily removed. Depending on the type of washing machine and its model, you need to remove the control panel from the front or get to it from the top. After this, the screws are unscrewed and the fixing strips are removed, and the board is simply dismantled. The installation sequence of a new module is inversely proportional to that described. All actions are performed when the machine is turned off from the network.
Why does this phenomenon occur?
A working washing machine takes in water for no more than 2-4 minutes, after which it starts washing, and starts draining only at the final stage . If the machine does not stop dialing and immediately drains the water, then one of the elements of the system has failed. As a rule, the cause of self-draining is:
According to the instructions, the main bend of the drain hose should rise above the bottom of the tank, which is on average 50-80 cm from the floor level. If the hose is connected to the washbasin siphon, then the rule is observed, but when connecting directly to the pipe, lowering the bar is often allowed. As a result, due to insufficient pressure, the water in the machine is not retained and flows by gravity into the sewer.
When self-draining, the washing machine begins to make specific sounds - the hum of a running pump and the noise of an incessant water flow.
The second possible cause of an unplanned drain is a faulty inlet valve. If the membrane, sealing rubber or sensor is damaged, the device begins to work incorrectly, or rather, does not close back. After a signal from the control board, the valve mechanism opens, water enters the tank, but at the right time the supply does not stop. An overflow occurs, the pressure switch detects that the maximum level has been exceeded, the protection is triggered, and the system activates an emergency drain. And so on in a circle.
The pressure switch that controls the degree of filling of the tank is also suspect. If a sensor breaks down, it incorrectly displays the water level without noticing critical values. It is logical that the board does not receive a signal to stop dialing, the drum overflows, the security system detects the danger and triggers an emergency drain. The situation is similar to the previous one - self-draining occurs.
Likely consequences
It is difficult not to notice problems in the operation of the washing machine, because this is accompanied not only by atypical sounds and vibrations, but also by a number of other signs. The laundry removed from the drum remains unwashed, although the wash cycle takes longer. Puddles may form around the machine, and an unpleasant burning smell emanates from the machine itself, which occurs due to overload of the internal components from continuous operation.
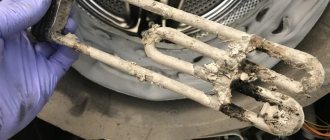
In particular, constant supply and drainage of water can lead to burnout of the heating element. One of the unpleasant consequences is that the internal circuits may short-circuit, and the current will flow through to the body, which is why you can get a blow upon contact. Also, if measures are not taken to eliminate breakdowns in a timely manner, utility costs will increase significantly.
How to fix a machine?
It is not difficult to fix the problem on your own and stop self-draining. It is necessary to consistently check each possible “culprit”, moving from simple to complex. Diagnostics begins with the easiest thing - the drainage hose. The drain hose is checked as follows:
If the washer continues to fill and drain, then we start the wash again, wait for the drum to fill, forcefully stop the cycle and activate the drain. After 1-2 minutes, we repeat the stop and look behind the hose. Does water continue to flow out? This indicates that the corrugation is connected incorrectly - its height needs to be adjusted.
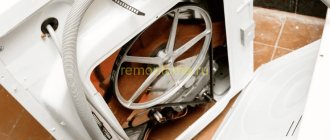
It is more difficult when the intake valve fails. To diagnose it, it must be found and examined. The mechanism is located under the top cover in the place where the inlet hose is connected to the machine body. To remove the device, disconnect the supplied wiring, loosen the fixing fasteners and unscrew the retaining bolts. Next, the check begins:
The valve cannot be repaired. The situation can only be corrected by replacing it. If everything is in order with the hose and valve, then the pressure switch is to blame. You should remove the top cover, remove the sensor, inspect the tube and blow it out. Is the device broken? Then repair will not help - only replacement.
Don't delay in solving the problem
Having noticed “oddities” in the behavior of the washing machine, you cannot postpone diagnostics. Reasoning in the style of “once it erases, it means everything is fine” and “until it breaks, it’s better not to interfere” more often have disastrous consequences . As a result, either the cost of repair increases significantly, or repair becomes impossible - the machine fails irrevocably. So, continuous self-draining is not only inconvenient, but also dangerous. Without human intervention, the problem will not be solved, but will only get worse. Poor laundry washing will be complemented by:
It is not always possible to see the self-draining. More often this happens unnoticed, especially if the user starts the wash and goes to another room. Therefore, experts recommend periodically listening and taking a closer look at the working machine. If the pump hums without stopping, and the machine does not stop dialing, then there is a failure in the system.
You can deal with constant drainage yourself, the main thing is to act consistently and according to the instructions. If you couldn’t solve the problem yourself, then don’t delay contacting the service.
Source
Reasons why the washing machine does not drain water
The drain mechanism of the machine is extremely simple. A pump and a drain hose connected to the sewer are responsible for draining the water.
When starting, the machine draws water. After the wash is completed, water from the drum passes through a corrugated tube with a filter, then enters a pump, which, under pressure, pushes the liquid into the drain hose.
If the washing machine does not drain water, the reasons may be as follows:
Most of the faults that cause the drain to not work depend on the service life of the machine and the operating characteristics.
Blockage
A common reason for a washing machine not draining is a clog.
Clogging occurs when pins, nails and coins from clothing pockets get into the washing drum. Fallen objects are washed out along with waste water.
Modern machines have a protective strainer installed at the drum outlet. Debris does not pass through the fine mesh of the mesh, so it gets stuck in the filter.
Small fibers of fabric, threads, hair, and animal fur from clothing can even pass through the filter mesh. In this case, the clog clogs the drain hose, so the washer cannot drain the water.
The machine can become clogged and stop draining liquid due to time of use or the carelessness of the owner.
Wrong program selection
The machine will not drain water if the non-draining washing mode is selected.
Spinning and delicate washing, for example, do not use the drain mechanism. To drain the water, you need to install this program manually.
In most washing machine models, the pump will not pump out water in hand wash mode.
To select the correct washing program, the housewife should study the instructions describing the features of each mode.
Damage to the pump or other parts
Long service life, blockages and hard water can damage the drain pump. A faulty pump will hum constantly or stop turning on.
Damage to the electric pump can be caused by running without water. This usually happens when the impeller jams. The part with the blades is located inside the pump. The impeller rotates, converting energy from the motor into pressure to mix the liquid. Stuck threads or hair block the impeller blades, and it stops turning water in the washer. As a result, the pump runs dry and burns out.
The electronic control board may break. The cause of its malfunction is usually a short circuit. A power surge causes capacitors and microcircuit wire contacts to burn out.
Troubleshooting
To find out why the washing machine does not drain water, you need to check the unit according to several parameters. The time spent searching for the causes of the malfunction is compensated by saving money on calling a technician.
How to drain the water
To empty the drum, prepare a container to catch the escaping liquid.
You can drain the water through:
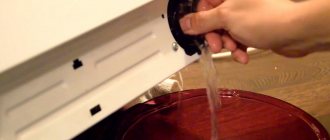
It is better to start with the emergency tube, which is located in front of the drain filter. You need to open the small hatch and lower the tube down. Not every washing machine has a tube.
If there is no tube, go to the drain filter. For washing machines of different brands, the drain filter is located in different places. The part may be located behind the hatch on the front panel of the machine or under the body of the unit. The structural features of a specific model are described in the instructions.
In the first case, you need to open the square door, unscrew the screw and pull out the filter. The second option is more complicated: before removing the filter, you will have to remove the bottom.
The next step is draining through a hose. Usually the pipe is attached vertically to the body of the washing machine. Loosen the fastening clamps and lower the hose into a water collection container or bathtub.
If gentle methods do not work, you can drain the water through the laundry hatch. To do this, turn off the washing mode and wait a couple of minutes until the door unlocks. Then open the hatch and be prepared for water to flow onto the floor.
Removing blockages
If the problem is a clogged filter or drain hose, you will need to disconnect them from the machine body.
To clean the filter, you need to follow the following sequence of actions:
After cleaning the filter, move on to the drain pipe. The hose must be removed and the following done:
Having freed the drain mechanism from blockages, start the wash again and check whether the water flows out.
Reset programs
To eliminate a program error, you must reset the set washing mode. To do this, touch the power sensor or press the start button on the panel.
If pressing once does not work, the button should be held down for several seconds.
Do not unplug the power cord from the outlet. This will not solve the problem: when you turn it back on, the machine will resume the interrupted program.
Turning off the power during the washing process may damage the control board.
How to change a washing machine pump
If during inspection you find a non-functioning part, you should replace it with a new one.
A multimeter will help evaluate the performance of the pump.
To check, bring the terminals of the device to the contacts of the pump wires. If the resistance shows a three-digit figure, the part is in good condition. The appearance of “0” or “1” indicates a breakdown. A worn out pump will not be able to pump out water.
To install a new pump:
The control board is a complex microcircuit consisting of tracks, resistors, capacitors and triggers. It is better to entrust the inspection and replacement of parts to service center professionals.
