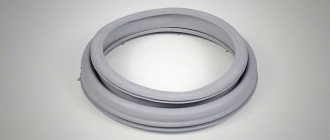
A defect in the sealing rubber surrounding the SMA hatch can be detected with the naked eye. Since it is located in a visible place, if you look a little closer, you can find cracks on its surface, severe dirt and other troubles that can worsen the operation of the washing machine. A gasket that is even slightly damaged will begin to leak water from the tank. Replacing the hatch cuff is not as difficult as it might seem at first glance. We will tell you how to do this further.
Why do this?
It may be necessary to remove the sealing collar not only if external damage is detected. Often it looks intact, but it no longer performs its functions one hundred percent. Experts recommend periodically replacing the gasket with a new one, or cleaning it thoroughly. This will help prevent leaks and maintain the tightness of the system. So, the sealing gum will have to be removed to achieve the following goals:
- cleaning the cuff and its installation site from plaque, scale, dirt and debris accumulation;
- replacing a part if it has stopped functioning and cannot ensure the tightness of the automatic machine.
Important! It is very easy to diagnose the need to replace the sealing cuff. If you find a violation of the integrity of its surface, an unpleasant odor emanating from the gasket, or a leak that occurs during the washing process, you must urgently remove the old one and install a new one.
Prevention measures
In order to avoid problems associated with the hatch cuff, you should take into account the following expert advice:
- When putting things into the drum, you need to make sure that sharp objects that can damage the washing machine, including the sealing rubber, do not get into it.
- Do not allow water to stagnate in the sealing collar recess or have foreign objects in it.
- When caring for the washing machine, in the process of cleaning the rubber rim, do not use objects with an abrasive surface, as well as scratch, scrape the cuff, or make any effort when cleaning it.
- When putting things into the drum of a washing machine, there is no need to tamp them down, overload them by weight, or forcefully push in oversized items.
- After placing things in the drum, the door should close without effort. Things should not hang down, lie on rubber, fall into the lock groove, etc.
- Rubber parts should be protected from pets that may chew on them.
Getting ready for work
To change the door rubber on a Samsung washing machine with your own hands, you do not need to have any special tools or skills. To properly remove the cuff, you just need to understand the order of work, what and how to do at a certain stage, and also prepare a set of tools available in every family:
- screwdriver;
- Phillips and flathead screwdriver.
If you still don’t have a screwdriver at hand, all manipulations can be done without it, but then the process will require a little more effort from you. Having prepared the necessary tools and turned off the power to the washing machine, you can begin the replacement procedure.
Glass damaged
If the glass on the door is cracked, then there will be no problems with diagnostics - you can immediately begin repairs. After removing the hatch from the body, we get to work. It is important to understand that operating a “broken” machine is highly discouraged: if the seal is broken, there is a high probability of leakage and electric shock.
Replacing glass is also not an option, since this option is available for single models. Therefore, the user has only two options: buy a new machine or seal the gap. The second method is cheaper, but will require some steps.
The crack is sealed according to the following instructions.
- Secure the film on the outside of the glass with tape, avoiding voids and cracks.
- Apply reinforcing tape to the inside.
- Mix resin and hardener in a ratio of 6 to 4, adding EDP glue. You should get a homogeneous mass, similar to liquid sour cream. If the composition is too thick, it is recommended to heat it in a water bath, stirring regularly.
To seal cracks in sunroof glass, it is better to use epoxy resin, as tape and sealant give short-term results.
- Fill the crack with the prepared mixture.
- Leave for a day.
- Remove the polyethylene and sand the glass.
It is not recommended to use tape and sealant instead of epoxy resin solution - they do not last as well and give short-term results. But you need to strictly observe the proportions. Otherwise, the “protection” will not last long.
Removing the outer clamp
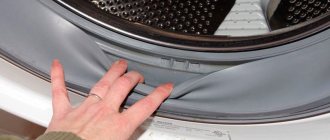
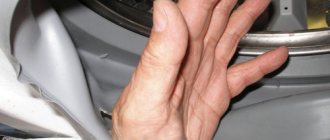
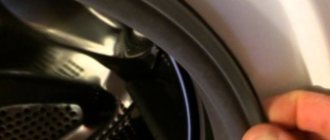
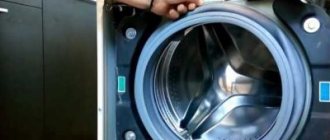
The process of removing the old cuff is divided into two stages. First, the outer spring clamp is disconnected. To do this, using a flat-head screwdriver, slightly pull out the seal, pry the clamp (in the part where the metal spring is located) and carefully pull it towards you.
For the vast majority of Samsung SMAs, the clamp is made of metal and has an insert - a dense spring, by stretching which the ring can be dismantled without damaging the structure. There are models equipped with a plastic ring. In this case, fixation occurs using latches that open conveniently and easily. After removing the outer clamp, you should unhook the hatch door cuff from the outer body wall of the washer and tuck the rubber band inside the drum so that it does not interfere.
We dismantle the internal clamp and elastic band
Next, you should release the sealing collar from the second metal clamp, which holds the rubber band from the inside of the unit. To do this, you need to perform the following algorithm of actions:
- remove the top cover of the SMA body by unscrewing the two bolts that hold it in place (they are located on the back side of the washer, along the edges at the top);
- loosen the steel ring by unscrewing the tension bolt securing the inner clamp. The bolt is not unscrewed completely, but so that the ring can be pulled out freely;
- After loosening the clamp, pull the sealing collar along with the ring through the hatch door of the machine.
All actions must be carried out very carefully so as not to damage the internal parts of the SMA with the tool, and if you only need to clean the seal and reinstall it, it is important not to tear the rubber band.
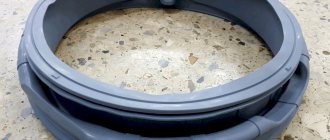
If the gasket was removed from the housing for cleaning, wash its surface thoroughly using various disinfectants. Do not forget to clean the space opened after the excavation, as well as all the recesses on the previously closed surface of the drum. Usually scale deposits accumulate at the place where the cuff is installed; special detergents will help to deal with it.
Causes of cuff damage
The part can rarely be repaired, so it is easier to replace it. Replacing the hatch cuff may be necessary after the machine has been in service for too long - this part has its own safety margin.
There are other reasons for wear:
- Excessive use of detergents, which causes the gum to “age.”
- Mechanical friction against other parts of the drum or buttons, rivets on clothing.
- Fungus. This pest slowly and quietly contributes to the deterioration of the cuff quality.
- Careless handling. Loading or unloading the drum can damage the rubber band.
Having understood the causes of wear, we can proceed to the next stage: how to remove the hatch cuff if repair or replacement is required.
Removing the front wall of the case
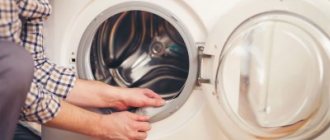
Further installation of the rubber gasket is the most difficult and time-consuming step. Installation of the seal involves removing the facade of the automatic machine to gain free access to the inside of the drum, where the cuff is secured. To unscrew all the screws holding the front wall of the washing machine body, it is better to use a screwdriver; this will greatly facilitate your work and significantly speed up the progress of work.
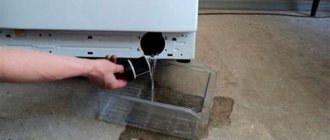
First of all, unscrew the three screws located at the bottom. To reach them, try tilting the unit backwards. The top of the washing machine façade is secured with screws under the main control panel, so it must be unfastened and placed on top of the appliance. Another bolt can be found under the detergent dispenser tray. Under the retracted electronic panel there are 2 more screws along the edges. After all the fasteners have been unscrewed, you can remove the front wall of the case, thereby gaining access to the drum.
Some craftsmen use the method of replacing the cuff without removing the front wall of the machine, this reduces the time required for the procedure, but the process of securing the elastic from the inside will be a little more complicated.
How to order
In order to complete the repair at one time, you need to buy a cuff in advance.
This can be done in a specialized store that sells spare parts for washing machines and other household appliances.
If there are no such stores in your locality, you can find them on the Internet.
When placing an order, indicate the name of the washing machine and model number, since the internal diameter of the cuff and the features of its fastening will depend on this.
The necessary information can be found on the plate that is attached to the machine above the hatch opening.
You might be interested in an article about washing machines and dryers. Read an article about the features of front-loading washing machines here.
We put on a new rubber band
Here it is very important to follow a certain sequence of actions, this will prevent subsequent problems with poor sealing and leakage of the gum. The main stages of the final part of the installation are as follows:
- insert the cuff immediately with the inner retaining ring into the body and put it on the protrusion of the drum located from the inside;
- carefully insert the gasket with the clamp around the circumference;
- check that the inner ring of the elastic band is tucked along the entire length of the recess around the seal, then tighten the clamp screw all the way;
- tuck the outer part of the rubber seal from the front side of the machine;
- After completely installing the gasket, place the outer clamp in its original place.
When the new or well-cleaned old sealing collar is put on and secured, you can proceed to installing the front and top covers of the unit in their original place. Attach the removed control panel and both walls, secure them with the screws unscrewed at the very beginning of the work. The process of replacing the cuff is completed, you can begin further operation of the Samsung washing machine.
Interesting:
- How to change the cuff on an Atlant washing machine?
- Indesit washing machine is leaking
- How to change the cuff in a Candy washing machine?
- The washing machine door is leaking
- The cuff in the washing machine broke between the drum and...
- How to change the cuff on an LG washing machine
1 reader comment
- 05/06/2020 at 09:54
Irina:
Very useful tips. Everything is described in detail. I took it apart myself, checked everything and put it back together! Works!
Answer
Problems with the handle
Repairing a washing machine handle is sometimes necessary for the same reasons as replacing hinges. In order to change it, we remove and disassemble the door, as in the article on replacing hinges.
Most often, the handle lever that moves the mount to the machine body is damaged. To disconnect the handle, you need to press this hook while holding it on the front side of the hatch. The handle will come out of the groove, and you need to push it all the way up. After this, the handle can be easily removed. Reinstall the new part in reverse order and reassemble the door in reverse order. Be sure to carry out diagnostics in the rinsing mode.
The blocker is broken
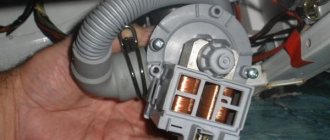
If the lock is broken, it is impossible to turn on the washing machine, as this is contrary to safety regulations. The door may not close completely, causing water leakage and flooding. According to a well-known law, the hatch lock device fails when the door is closed. In this case, you need to remove the top cover. We find the lock latch with our hand between the body and the drum and open the hatch. In essence, replacing a blocker comes down to replacing the entire lock.
Using a screwdriver, release the rubber seal from the clamp and remove the gasket. Then unscrew the two bolts and remove the lock. We remove the connector with the wires, connect the new lock and install it in the seat. After this, we mount all the parts in the reverse order. Since during repairs the drum can put pressure on the front wall, you can tilt the device back.