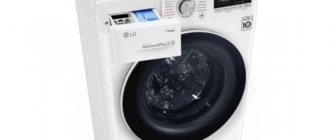
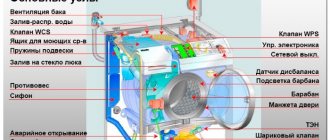
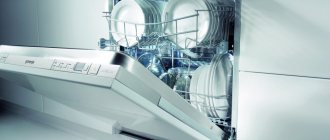
When purchasing any household appliance, a logical question arises: “How to choose a place for a new purchase?” And if it comes to a washing machine, then the task becomes much more complicated, because this unit has impressive parameters. And besides, bathrooms often have a small area, which does not allow placing an additional device there. Therefore, it is very common to place a built-in washing machine in the kitchen, where you can experiment with space-saving options.
Location of the washing machine in the kitchen.
Pros and cons of placing a washing machine in the kitchen
In order to maximize space savings, most often the washing machine in the kitchen is built into a cabinet, under the worktop. But it is important to note that this work should be carried out at the time of installing all the furniture in the kitchen, since otherwise it is unlikely that it will be possible to achieve an aesthetic appearance of the entire facade.
The location of the washing machine in the kitchen cabinet.
Often such equipment is placed separately from the kitchen unit, but this is only possible if there is a large amount of free space. A much more convenient option is one with a built-in washing machine, the surface of which is convenient for organizing the countertop.
This type of installation has many advantages:
- Significant space savings, especially if there is not enough space in the bathroom to install the unit;
- Based on fire safety rules, it is not recommended to install any household appliances in rooms with high humidity, which includes the bathroom;
- The built-in washing machine transmits a much lower level of vibration, which is good news.
Washing machine built into the kitchen unit.
Installation and placement of the washing machine. But in addition to the listed advantages, there are also some disadvantages, which for many are the determining factor:
- It is not possible to store dirty laundry in the washing machine, since an unpleasant odor immediately appears, which is very noticeable in the kitchen;
- It is inconvenient to load laundry into built-in appliances, since the door cannot always be opened completely;
- Washing powder can end up on the kitchen counter, food, and other inappropriate places, so you need to be careful.
Built-in washing machine in the kitchen.
Technical details of the process
The connection for all installation options follows approximately the same algorithm, no matter whether you decide to install the unit in a bathroom cabinet or in a kitchen unit, under a countertop or under a sink. In any case, you should proceed step by step:
- Consider how to connect to the water supply.
- Create a drain for used water.
- Make electrical wiring (it is advisable to install a moisture-resistant socket).
- Make sure that all specified communications can be connected to the machine.
- Check the length of the hoses and power cord so that the device can be conveniently pulled out of the niche in which it is placed.
- Connect the unit to the water supply and sewer pipes.
- Push the machine into the designated place and secure the legs.
When installing a washing machine under a countertop, you must carefully calculate the dimensions of the future niche. There should be a gap of 3-5 cm between the unit and the walls of the furniture so that unnecessary noise does not occur during vibration.
Built-in appliances can be an attractive design element in a kitchen or bathroom. If you show maximum imagination, you will be able to turn the disadvantages of the room into advantages, and the result of the work performed will pleasantly surprise you.
Choosing the right machine "Automatic"
There are two main types of Automatic machines:
- Front loading;
- Top loading.
Top-loading washing machines cannot be installed in undercounter cabinets. But they are much narrower, so such machines can be installed separately from the furniture.
Functional washing machine in the kitchen.
Front-loading machines are more in demand, although they are much larger than the previous type.
There are many models of washing machines. The technical characteristics of each type depend on the permissible weight of the loaded laundry and speed. Also, an important characteristic of each model is its manufacturer. Therefore, you should pay attention to this when purchasing.
Each of the models has certain dimensions. Therefore, before purchasing, you need to find out the parameters acceptable for a particular kitchen set:
- The height of the machine must completely coincide with the height of the kitchen furniture;
- The depth of the cabinet, but there should not be any difficulties here, since the machines are usually narrower.
Placing a washing machine in the kitchen interior.
Very often, when choosing a model, attention is paid to the level of noise emitted by the unit, as well as the amount of energy consumed.
What does the download type affect?
The industry produces two types of washing machines - with vertical and horizontal loading. Front-facing models are more suitable for installation in a closet - they load laundry through a hatch located on the facade. For vertical versions loaded from above, you have to make a special cabinet to order - this is a cabinet with a hinged top lid. This option is used less frequently.
Accommodation options
Washing machine in the kitchen interior.
The choice of location for the washing machine must be approached with the utmost seriousness. The result should be not only beautiful, but also convenient and practical.
Let's look at the most popular options:
- If you have a very small kitchen, the washing machine is placed under the sink. This is very convenient, since the water supply network runs very close and no additional pipe laying is required;
- There is an option to place equipment next to the sink. It's also quite convenient. Moreover, if a dishwasher is supposed to be installed in the kitchen;
- A convenient place to install the Automatic machine is a cabinet under the kitchen table.
Built-in kitchen appliances.
Flaws
There are few disadvantages. The first and most important thing for housewives is combination with the interior. It’s good if you decide to make a renovation, buy a new kitchen set and a new automatic machine that goes with it.
If the equipment does not fit into the interior, it is upsetting. In this case, there is another solution. Close it with furniture doors. Behind it you cannot see how the device works, or what is even there.
The second drawback is storing laundry and powders next to food. There is no need to collect dirty laundry in the kitchen; buy a beautiful basket and place it in the bathroom so that it is hidden from prying eyes.
Detergents (powders, bleaches, wash balls and softeners) do not need to be stored in the kitchen. They can also be given a place in the washbasin cabinet. Or you can place it under the sink.
The third drawback is how to ventilate the equipment. After washing, do not close the hatch door; it is left open to dry the drum and sealing rubber inside. Otherwise, mold and a musty smell will appear inside.
There is no need to worry about the machine coming into contact with children. If your baby accidentally notices the door open and spins the drum, it’s okay. Mom is provided with a 5-minute rest while the baby learns something new.
Successful methods of device camouflage
It is almost impossible to disguise a top-loading machine as furniture, but a model with a front door is much more convenient to install in the kitchen.
A suitable place in the kitchen for the machine.
Let's consider all the options:
- The kitchen set is ordered according to pre-made measurements of all equipment: washing machine, hood, dishwasher;
- Specialists independently manufacture and assemble furniture along with kitchen appliances;
- You can camouflage the washing machine separately with a countertop or door.
Examples of built-in appliances in the kitchen.
You can also install a washing machine yourself into the kitchen wall in various places. This will take more time, but it will be an opportunity to save money.
Under the table top
In this case, the machine is placed in one of the niches in the lower section. If this is the case with a ready-made headset, then there is a possibility of problems with aesthetic installation (for example, there will be large gaps or it will be extremely difficult to connect communications).
Therefore, we would recommend considering this option when ordering a new headset. Then, even at the design stage, you can select a niche of the required size for the machine with millimeter accuracy.
Preparing for installation: necessary tools and materials
Kitchen interior design with washing machine.
Installing a washing machine in a kitchen built under a countertop requires the following materials and tools:
- Special elements used to fasten the unit;
- Pliers and a sharp knife;
- Adjustable wrench;
- Screwdriver indicator;
- Level for construction work required to install the machine in a level position;
- Water filter;
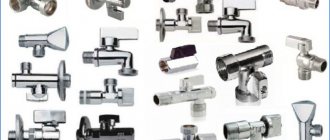
- Shut-off valve;
- Hose for supplying water to the machine;
- Special sealing tape.
Washing machine in the kitchen interior, types and installation.
Once everything you need has been prepared, you can proceed to the actual installation of appliances in the kitchen.
The immediate process of installing the unit
Washing machine in the kitchen, styles and types.
Now you need to install a washing machine in the kitchen. Very carefully, trying not to damage the kitchen furniture, you need to install the unit under the countertop. Sometimes some problems may arise here.
For example, such as:
- The compartment for adding powder in the washing machine does not open;
- Possibility of partial opening of the door to load laundry.
To solve these problems, you can try to push the machine further into the closet. Now it’s time to start installing the door.
Drawing of a built-in washing machine.
But a built-in Automatic washing machine in the kitchen requires more than just proper installation. It still needs to be connected.
Under the windowsill
If the window opening is large enough, install a wide tabletop. A washing machine will fit perfectly under it, and you will get an additional work surface or a small dining table.
However, for this, the panel must be large, otherwise all the space under it will be occupied. In addition, this space is often reserved for batteries - redevelopment will probably be required.
Connecting to communication networks
Connecting a washing machine in the kitchen.
The washing machine in the kitchen requires connection to the sewer and water supply network.
Connecting the washing machine to the sewer must take into account the following nuances:
- To connect the washing machine directly to the sewer network, you will need an additional siphon. The hose connected to the machine is properly connected to the drain directed from the sink in the kitchen. Such a connection completely eliminates the possibility of leakage;
- You can attach the drain directly to the side of the kitchen sink, but this option is not reliable and safe;
- The best option for connecting washing equipment to the sewer network is to install a drain in the kitchen, specifically designed only for these purposes;
- After installing the unit, you should pay attention to the pipe - it must be in a fully straightened state. Then it needs to be secured, while making sure there are no kinks. If it is necessary to lengthen this element, it is worth installing specially designed clamps as a fastening system.
Washing machine in kitchen design.
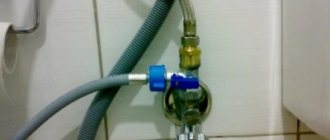
Now you can start connecting the Automatic machine to the water supply network. To do this you will need to do the following:
- Before starting work, you must purchase flexible hoses with a diameter of ¾ inches;
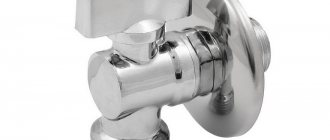
- It is necessary to install a valve to the water pipe, which is usually closed after each washing procedure;
- For an uninterrupted supply of water to the washing machine, you can use outlets in the form of tees or pipes directed from the mixer located in the kitchen. This outlet is attached to the water supply, washing machine and pipe extending from the mixer;
- When making all fastenings, you should use a special FUM tape or tow.
Space in the kitchen for a washing machine.
At this point, the under-counter washing machine is considered fully installed and connected. You can safely start using it.
Disguise at the bar counter
In the kitchen-living room it is now fashionable to install bar counters as a zoning element. Most often, there is enough space under them to equip additional shelves.
Give them up in favor of a spacious niche for the washing machine. If you disguise it with doors, it will be invisible to guests. At the same time, the length of the tabletop is quite enough for evening gatherings.
Final details
To minimize the vibration of the washing machine during operation, it is necessary to install it absolutely level in place. For this purpose, the machine is equipped with special adjustable legs. In their absence, rubber bands with a thicker structure are usually used.
Installing a washing machine in the kitchen.
Now you can check the stability of the washing machine by leaning all your weight on the device. Even with a slight swing, it’s worth starting all over again. A water level will help in this rather difficult task. It is important that in the end, the washing equipment stands in a perfectly level position.
Stable location of the machine in the kitchen.
A washing machine installed in the kitchen saves significant space, especially if it is built into a cabinet covered by a door. Thus, there is no need to select equipment for the headset, or vice versa. The main thing is that the parameters are combined, and the installation is successful, without any problems or damage.
From an engineer's point of view
So, the place for the machine has been determined; model is selected. Now we have come close to how to connect a washing machine in the kitchen.
Here we will have to deal with engineering subtleties: the peculiarities of inserting hoses into the water supply and sewage system of the kitchen.
You need to start the installation with the instructions. Please read it carefully and follow the manufacturer's instructions, from unpacking to test runs. It may indicate nuances that are important specifically for this model. But in general, the installation procedure and connection to kitchen communications for all machines is approximately the same.
Preparing the machine
Unpack your purchase (remove the box, plastic wrap, foam pads). It is better to do this in a free place where it is easy to get around the machine from all sides. We will install it in place a little later.
Removing transport parts
An important procedure is to free the new home assistant from the transport fasteners. These are brackets and clamps that fasten the hoses, as well as special bolts that secure the drum. Unscrew them from the back of the case and insert the plastic plugs. Until the bolts are removed, the machine must not be turned on under any circumstances.
Installation in place
Now the car can be placed where you will use it. It is better if this is a place away from the stove and closer to the sink. It is important to place the “washing machine” firmly and strictly horizontally, using a level - for this it has adjustable legs.
Leveling the washing machine using a level
If the body is not leveled, it will vibrate and make a lot of noise when spinning. Do not use pads made of boards, linoleum, etc. to level the machine: the size of the legs should be sufficient. Leveling is a process that requires patience, but it must be done. This will keep you calm and extend the life of the machine.
Find out how to connect a dishwasher yourself. We save on calling a technician, in which case you can immediately figure out what’s wrong. Read about installing an acrylic bathtub with your own hands in this article.
And here is all about the washing machine under the sink.
Drain connection
There are two ways to connect the washing machine drain hose to the sewer system.
- First: Install a siphon with a special outlet for the washing machine;
- Second: Lead the hose into the sewer pipe. For this, a special tee pipe is used, into one of the holes of which a machine hose is inserted, and into the other - a washing siphon).
The first method is easier, but will require replacing the siphon.
The second is more complicated (you need experience in plumbing work), but more economical: a tee will cost little. The choice depends on your qualifications.
Options for organizing drainage
If connecting to the pipes is impossible for some reason, then there is a simple option - diverting the hose to the bathroom, sink or toilet. The hose is simply fixed at the edge with a special fastener. The main condition here is not to attach the hose higher than the machine itself (the maximum excess is 50 cm). The disadvantage of this method is its unreliability: the hose can easily be touched and knocked to the floor. Additionally, it will be difficult for you to use the bathtub or sink while dirty water is draining into it. When connecting, look again at the instructions: for some machines there is a limitation on the maximum height of the pipe. And one more general rule for all models: after connecting, check if there are any kinks in the hose; whether it is straightened along its entire length.
Water supply
In order to organize the water supply to the machine, you need to make a cold water outlet from the pipe. A special valve with a valve (preferably a ball valve) is cut into the pipe. This method is used for steel pipes.
The machine can be connected to metal-plastic pipes using a special fitting.
Water supply connection diagram
Another way, quite simple and quick, is to connect the machine to the outlet for the toilet tank or faucet using a tee.
The machine should be placed as close to the sink as possible. But if this is not possible, and you do not have enough length of the water intake, it can be extended. Buy a hose with a diameter of ¾ inches and connect the two sections using cuffs (special rubber gaskets).
