Modern life cannot be imagined without a washing machine. The priority is automatic models, which relieve as much as possible from hard work. A smart machine does everything on its own, but it is necessary to create conditions under which the unit will work for a long time and uninterruptedly.
One of the important points to ensure reliable operation is the installation of the washing machine and its subsequent connection. How to do this correctly and what nuances may arise during installation? We will analyze all the points in detail in this material. We will also consider the features of installing a washing machine in various conditions - in the kitchen, in the hallway, in the bathroom, etc.
Recommendations from installation experts
It often happens that equipment installed independently or by a master begins to vibrate during the spin cycle. This indicates that the installation was performed incorrectly. Therefore, even before purchasing, you need to decide on a place for the machine and read the recommendations of installation specialists.
Professional advice on installing a washing machine, as well as step-by-step instructions will help you complete the installation and connection according to all the rules.
Tip #1 - prepare the conditions for installation
When choosing the overall dimensions, type of construction and technical characteristics of the model, they are guided not by their own wishes, but by the capabilities of the room in which it will stand.
In a spacious bathroom, as a rule, there are no problems with installing a washing machine. In order to save money, it is placed as close as possible to the outlet, water supply and sewerage distribution
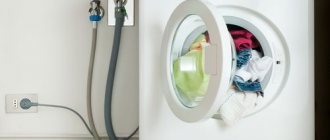
Necessary conditions for the operation of the washing machine include close proximity to an outlet and water. This will help avoid lengthening of electrical cables and hoses.
They also pay attention to ease of use, as well as the aesthetic component. Problems with placement most often arise in small apartments.
Tip #2 - choose the optimal room
Most users, when choosing a location, choose the bathroom as the most suitable from a logical point of view. After all, this is where the water pipes and sewer drains are located. In addition, the washing process will be hidden from view.
The washing machine can also be placed in a small bathroom, having previously decided on the size and location. In this case, to save space, the machine was installed under the sink
When choosing a location for the machine, pay attention to the following points:
- the ability of the floor to withstand vibrations;
- possibility of laying communications over remote distances;
- during measurements it is necessary to take into account unevenness on the walls;
- the space for installing the machine must be at least 1 cm larger than its nominal dimensions.
If space is limited and the dimensions of the machine are large, you should think about placing the unit in the kitchen or hallway.
Tip #3 - The Importance of Proper Connection
The issue of correctly connecting the washing machine to communications should be treated extremely carefully. Next we will consider this process in more detail.
Connecting water to the machine
Machine washing, like any other, is impossible without water. The water supply must meet two basic requirements: sufficient pressure in the pipes and clean water.
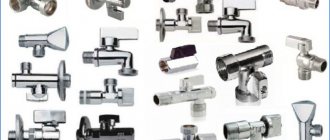
If they are not met, a pump is installed to increase the pressure, and the water is filtered. A tap is built into the pipe supplying water to the machine to shut it off. Thus, the likelihood of leakage becomes minimal.
Electricity supply issue
A washing machine is a powerful unit. Residents of old apartments in which the wiring has not been changed are recommended to install a separate cable, since the wires and sockets installed many years ago are not suitable for connecting modern equipment. The cable cross-section must correspond to the expected load.
The socket for connecting the washing machine is installed with grounding. If we are talking about a room with high humidity, for example, a bathroom, then it is advisable to choose models with a protective cover
We discussed in detail the installation and connection of a grounded outlet in this material.
Tip #4 - take into account external factors
The ambient temperature and type of flooring should also be taken into account when installing the washing machine.
High quality flooring and flooring
There are high demands on the quality of the floor. It must be strictly horizontal, hard and even.
The floor covering will have to withstand the vibrations created by the rotating drum. If there are doubts about the quality, it is necessary to strengthen it at the installation site of the machine.
Ambient temperature
In a heated apartment or house, equipment is kept warm. During prolonged heating outages, which are often observed in country houses and technical rooms, the equipment cannot be left in place.
The water remaining inside the machine after washing will definitely freeze. This will result in a rupture of the hose or even the pump and will require repair/replacement
Getting to know the instructions
Before you start working with the automatic machine, read the instructions! It contains a lot of useful information: what kind of outlet should there be, how to connect the drain and water supply, how to adjust the position of the unit, what malfunctions occur most often and whether you can fix them yourself, and much more.
Reading technical documentation is a separate step, since rarely does anyone turn to the manufacturer's prompts before a problem arises. This is usually only done if something doesn't go according to plan. You shouldn't do that.
The instructions provide detailed recommendations regarding the model of your washing machine, compliance with which will prevent many troubles. Do not ignore the manufacturer's advice: in the event of a breakdown, failure to follow them may result in your case being considered non-warranty.
Stages of installation work
Once your new machine is delivered from the store, it is stripped of any packaging materials and shipping fasteners. Then the height of the legs is adjusted, and the machine is connected to communications. From this moment you can start the first wash.
Step #1 - Removing the Shipping Bolts
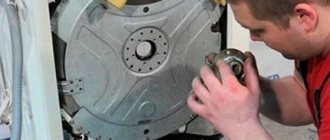
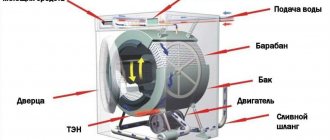
To prevent the moving parts of the washing machine from being damaged during transportation, they are secured with special fasteners (bolts, bars, brackets).
If they are not removed when turning on the machine, the owner of the equipment will be disappointed. It will inevitably fail. To prevent this from happening, the bolts are unscrewed, the plastic spacers are removed, and the brackets are removed.
Bolts are used to secure the drum during transportation. Before turning on the washing machine, the fixing parts are removed. If this is not done, the chassis will break.
Fasteners should be packed in a bag or box and placed in a safe place. They must be saved in case of moving or delivering the equipment to a repair shop.
Special plugs supplied with the device are inserted into the holes for the bolts.
Step #2 - connecting to the water supply system
The machine is connected to the cold water supply using the included flexible hose. A hard connection is not recommended, since vibrations will affect the pipes, gradually destroying them.
The reliability and durability of the connection to the water supply depends on the quality of the parts and the experience of the person doing the connection. When connecting to a metal pipe, a connection is made into the water supply using a crimp coupling or a mortise clamp.
A filter is inserted into the water inlet, which is included with the unit. The nut connecting the hose to the machine is screwed in by hand. The rubber seal ensures tightness. The second end of the hose is also manually (without keys) connected to the cold water tap.
The hose is connected to the water supply through an embedded pipe or tee. As a rule, it has a filter to purify water from contaminants. It is connected to the machine using a conventional threaded connection.
Step #3 - arrangement of drainage of used water
The temporary and simplest solution for organizing water drainage is to place the end of the hose into the bathtub or sink. Typically, waste water is drained into a siphon located under the sink through a splitter.
Experts do not recommend lengthening the drain hose, as this will quickly wear out and create an increased load on the sump pump.
The hose must be long enough to allow it to sag and form a loop. The water that will be in the fold will block access to the unpleasant odor coming from the sewer.
To properly connect to the sewer line, you need to connect the drain hose. This is done in one of the following ways: directly into the sewer or through a drain in a siphon under the sink.
To prevent water from draining by gravity and the spread of unpleasant odors, a water seal is created by bending the hose. Its upper level should be 60 cm above the floor plane. Detailed instructions for connecting a washing machine to the sewer and water supply are given in the following article.
Step #4 - adjusting the legs according to the level
The rotation of the drum should be smooth, without distortions. This is achieved due to the strictly horizontal position of the upper plane.
The inspection is carried out using a building level. If the deviation is more than 2°, the legs will need to be adjusted. This is done by twisting them.
If the machine is not placed in a strictly horizontal position by adjusting the legs, it will “jump” and make loud noises, creating discomfort for others
To prevent the tightened nut of the leg from unscrewing, it is secured with a lock nut. Correctly aligned supports are one of the prerequisites for the correct operation of the washing machine.
Strong vibrations can lead to breakdown of individual parts of the machine and disable the unit. You should not level the position of the machine by placing pieces of wood, linoleum or other spacers under the legs, as they can easily jump out during operation.
Step #5 - connecting to power supply
The optimal solution is to connect to the panel using a three-core cable on which a circuit breaker is mounted. Protection against short circuit to the housing is provided by an RCD device.
The outlet also has special requirements. It is mounted above the floor level at a height that will not allow water to enter in the event of a leak - not lower than 30 cm. In addition, it must be grounded.
We recommend that you familiarize yourself with the principles of installing an outlet for a washing machine, which is supposed to be installed in the bathroom.
Correct placement of the outlet directly affects the performance of the washing machine in the future. Indeed, in the event of flooding, the equipment will be deprived of power supply, and the electrical point will require resuscitation work
Step #6 - Verify installation is correct
If all the steps have been carried out step by step, taking into account professional recommendations, and the machine is connected to all communications and the plug is inserted into the socket, then it’s time to test its performance.
And at the same time make sure that all actions are performed correctly. To do this, water is supplied and the operation of the unit is checked. those. it starts - washing without laundry. If leaks are detected in the hose connections, the nuts are tightened.
Compliance with a strict sequence of installation work, taking into account professional recommendations, is a guarantee that the machine will be installed correctly and its operation will not cause problems
Another important point to remember is preserving the packaging from the new washing machine. The fact is that it must be stored for 7 days in case of exchange if the machine turns out to be faulty, defective or damaged. The reason for the return may also be a discrepancy between the dimensions.
How to independently connect to a toilet flush, bathtub or sink.
A primitive algorithm with its own characteristics. The washing process denies the use of the unit. Draining the contaminated liquid after the end of the cycle results in a permanent wash or bath. Once you fail to secure the hose, the consequences will not take long and will provoke a real flood.
The kit initially comes with a holder for the drain, which is put on its end and snaps into place. An uneven hose with kinks is left on the edge of the toilet, bathtub or sink at the beginning of each cycle. To increase the existing protection, use holders, chains or improvised means that protect against sudden falls.
What to do if the car “jumps”?
Most often, increased vibration occurs after the installation of machines. But time-tested units can show their “character” by bouncing and moving across the floor.
It is better to prevent the problem of vibrations in advance than to deal with it. This will save the unit from breakdown and the owner from repair costs.
To prevent equipment failure, it is necessary to establish the cause of the vibrations and eliminate it immediately.
Strong vibrations can be observed in the following cases:
- They forgot to remove the fasteners (brackets, bolts) that hold moving elements during transportation.
- Uneven floor causing the machine to wobble.
- The floor is slippery and too flat and should be covered with a rubber mat.
- The laundry inside the drum has curled up into a ball.
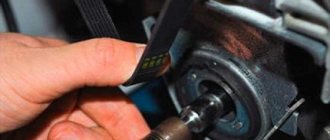
Excessive vibrations can also be caused by technical reasons, which can only be identified and eliminated by a specialist. Such reasons include breakdown of shock absorbers, wear of the springs that secure the tank, loosening of the counterweight fastenings, destruction of bearings, etc.
Any of the listed reasons must be urgently eliminated, since delay is fraught with breakdown. Self-confidence and previous experience are good reasons for installing household appliances yourself.
Professional advice on how to properly install a washing machine yourself, as well as clear instructions, will help you do it without errors.
Preliminary check of the unit
Regardless of whether you buy the washing machine yourself or order delivery to your home, before you sign the receipt papers, check its functionality. In the presence of the seller's representative, open the package and inspect the body of the washing machine. There should not be even minimal damage on it.
Most often they occur during delivery, when it is carelessly transported or lifted into the apartment. If, when inspecting the washing machine, you see chipped paint on it or a mark from an impact, do not sign the report. Demand that the product be replaced with one that is fully functional and without damage.
If the washing machine is delivered safe and sound, calmly sign the acceptance documents. But before you release the courier, make sure you have the store number where you can contact him. The phone will come in handy if a defect is subsequently discovered or other issues need to be resolved quickly.
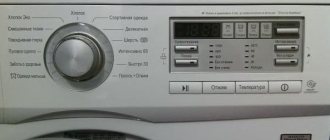
The next step in checking the washing machine is connecting it to electricity. Plug in the power cord and make sure that the backlight of the screen and control unit is on. Turn the washing machine mode switching knob, the values on the display should change.
Installation options for various conditions
Before installation, you need to think about the conditions and mode in which the machine will operate. Based on this, measures are taken to eliminate operational problems in the future.
Installing a machine in a private house
The layout of electrical cables and pipe routing must be thought out at the construction or renovation stage.
If the washing machine is located in the basement, its connection will be 1.20-1.50 meters below the sewer level. The problem is solved by installing conventional pumping equipment
The dry basement of a private house is the best place to install washing and drying equipment. In this case, the residents of the house do not feel noise, odors and dampness.
Installation of appliances in the kitchen and hallway
Washing does not go well with cooking and eating food. However, very often the machine is installed in the kitchen, as its design fits perfectly into the interior.
In the kitchen, the machine can be placed at any point. The most convenient option is to install it under a countertop or in a cabinet, where it can be hidden behind the doors.
When installing in a corridor or hallway, it is better to place the machine near the wall behind which the bathroom is located. This will simplify connecting the unit to the water supply and sewerage system
You can rarely see her in the corridor. It is difficult to find a place for such an installation and you will have to resolve issues regarding laying communications into the floor or walls. You will also need to hide the machine behind a curtain, place it in a built-in closet or under a countertop.
Placement on laminate or wood floors
The ideal surface for a washing machine is hard and rigid concrete. A wooden floor increases vibrations, which have a destructive effect on surrounding objects and the unit itself.
Anti-vibration mats are made from various materials, they vary in structure, but serve one purpose - to protect the unit from vibrations and prevent its breakdown
The floor can be strengthened in several ways:
- concreting a small foundation;
- arrangement of a durable podium on steel pipes;
- using an anti-vibration mat.
The listed methods will help reduce unpleasant vibrations, but they cannot be compared with concrete screed.
Features of installing a built-in machine
The built-in model is an ideal option that will fit into any interior. Hoses and wires are hidden behind the cabinet, and its front door is identical to the unit.
Built-in machines only provide a front loading option. In this case, it is necessary not only to install the machine, but also to provide space for opening the hatch
This type of equipment is more expensive than conventional equipment, so many are interested in whether and how it is possible to install or build the machine into a cabinet.
The problem to be solved is accomplished in several ways:
- by installing under the countertop;
- placing a compact model in a ready-made cabinet;
- installation in a specially made cabinet, with or without a door.
To prevent adjacent cabinets from experiencing vibration, the base must be solid.
Installing the machine above the toilet
For owners of small toilets, the idea of installing a machine above the toilet may seem strange. But there are enthusiasts who can solve even such a difficult problem.
The design for installing the washing machine should be as thoughtful and reliable as possible. European manufacturers produce powerful fasteners, but their cost is very high
When planning installation, pay attention to the following points:
- If the quality of the walls is in doubt, a steel structure resting on the floor is made.
- The hanging shelf is made from a durable metal profile.
- The shelf is equipped with a safety side so that the machine does not slide off it due to vibration.
- The retractable shelf will prevent laundry removed from the machine from falling into the toilet.
- The mounting height is such that the toilet flush pit remains within the access area.
- It is more convenient to place the machine not above the toilet, but behind it.
- It is more advisable to choose a model with shallow depth.
In order for the unit to remain suspended and not fall on its head at the most inopportune moment, it is necessary to adhere to safety precautions.
Remember that if repairs are needed, the heavy machine will have to be lowered to the floor and then returned to its place.
Mandatory preparation of the machine
Instructions on how to properly install it yourself begin with clear manipulations: studying the instructions, unpacking, removing the foam frame, film, tape and other devices protecting the body of the machine during transportation. Next in line is unscrewing the transport bolts and filling the resulting “voids” with special plastic plugs. The latter are definitely included in the kit.
And finally, we move the unit to the intended installation location. You should not immediately place it in the set, under the sink or close to the wall - first you need to connect and remove all communications. Residents who love cleanliness can wash the floors in the selected area, since regular cleaning will be difficult in the future. It is recommended to take care of a suitcase with tools in advance.
