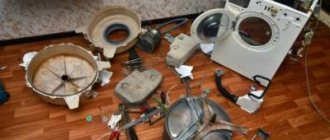
Atlant washing machines are loved by users for their good technical characteristics, modern design and affordable price range. Unfortunately, in many respects they cannot compete with their foreign counterparts, especially when it comes to durability.
It is often easier to entrust the repair of the washing machine to a good technician, but in some cases you can repair Atlant washing machines yourself.
In this article you will learn about typical breakdowns, fault codes, and also how to disassemble an Atlant washing machine and carry out independent repairs.
How to determine if a bearing is damaged and replace it?
The main sign of wear is a humming noise when spinning. Squeaks and knocks are especially audible at high speeds. Open the hatch door, rotate the drum by hand, and rock it up and down. If play is visible and uneven rotation occurs, this indicates bearing wear.
Don't delay replacement. Following the moving parts, the drum shaft will begin to deteriorate, which will lead to the replacement of the cross. And this is an expensive repair.
Everything in the Atlant washing machine is collapsible, so you can replace it yourself. It is enough to follow the step-by-step instructions.
What you will need for repair:
- Set of screwdrivers (phillips, flat).
- Open-end and socket wrenches.
- Hammer.
- Bolt or chisel.
- WD-40 liquid for unscrewing stuck fasteners.
- Lubrication.
- Repair kit.
What bearings are in the Atlant washing machine? For example, element 6203+, 6204+oil seal 25*47*8/11.5 is suitable. It is advisable to buy original parts. You can find them in the online store or order directly from the supplier. If it doesn't work out, then Korean parts will do. They last longer than those produced in Russia.
Call the master
If you are not sure that you will be able to cope with the repair on your own, it is better to call a specialist. Offers can be found online or in newspaper advertisements . You should also ask your friends, perhaps they have already used similar services and can recommend a good specialist.
The cost of work depends on its complexity. The price starts from 2000 rubles. You will have to pay separately for parts.
Before agreeing to a repair, you need to ask the specialist about its final cost and the guarantees he provides. If you cannot find a private specialist, contact the service center.
Tool preparation
Disassembling any machine cannot be done without tools. First of all, you will need:
- flat and Phillips screwdrivers;
- pliers;
- wrenches and socket wrenches;
- hammer.
It is quite difficult to tell the size of the keys; you can find out when you start disassembling the machine. Therefore, it is better when the household has a set of different keys. Most often, 8, 10, 13 mm wrenches are required. In addition, it’s a good idea to have special tools, instruments and devices on hand, for example:
- bearing puller;
- ohmmeter or multimeter;
- screwdriver;
- WD-40 liquid;
- a rag and a container for water.
Partial disassembly of the machine
In most cases, repairing a washing machine requires partial disassembly of the machine. To get, for example, a drain pump or heating element, you do not need to disassemble the entire housing. Therefore, first let’s talk about how to get to machine components that do not require complete disassembly. If you have a poor understanding of the structure of a washing machine, then you need to at least familiarize yourself with the diagram, which shows all its main components and parts. The picture below is one of such schemes.
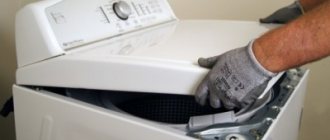
Disassembling the washing machine should begin with the top and rear housing covers, which are held in place by several self-tapping screws, but before that, disconnect the inlet hose. To lift the top cover, you not only need to unscrew it, but also move it back 1.5 cm. Under the top cover you have access to:
- pressure switch (water level sensor);
- transformer;
- interference filter (mains capacitor);
- water supply valve.
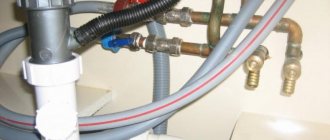
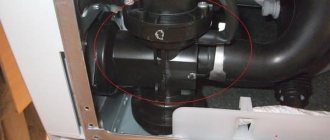
If you put the Atlant machine on its left side, you will see the drain pump and drain pipe. The pump is held on by two self-tapping screws that can be easily unscrewed. To remove the pipe, you need to use pliers.
Important! Before turning the machine over, drain the water from it. This can be done either through the emergency drain hose located near the drain filter, or through the filter itself.
Next, you can remove the back cover of the case, behind which you will see the heating element, drive belt, engine, and tank. From all this, you can remove the heating element without much difficulty. It is located at the bottom under the tank. Before pulling it towards you, you need to disconnect all the wires and the temperature sensor, fixing their correct position in the photo. If the heating element does not come out of its seat well, use WD-40 fluid.
There is also an electronic module attached to the back wall on the left, which is also easy to remove; just disconnect all the chips with wires from it. Now let's move on to the front part of the machine. On this side, you must first remove the powder receptacle from its seat, then unscrew the control panel.
To remove the hatch door, you need to unscrew the two screws holding it. The hatch cuff is secured with a metal clamp that needs to be loosened. To remove the front housing cover, you also need to unscrew the door locking device and disconnect the sensor from it by sticking your hand into the drum. Thus, the body of the Atlant washing machine will be completely disassembled.
Removing moving parts and tank
Replacing the bearings in the tub, pulley and drum of the washing machine will require a lot of effort and time. Parsing these elements can be quite labor intensive. Not many people agree to carry it out at home. To remove the tank from the car, you need:
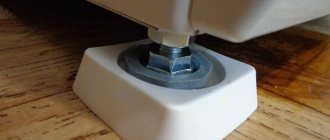
- unscrew the counterweights;
- remove the drive belt;
- Unscrew the screws holding the motor, disconnect the wires from the motor and remove it;
- disconnect the wires from the heating element and temperature sensor;
- loosen the clamps of the drain and filler pipes and remove them;
- in front, remove the hatch cuff from the drum;
- remove the pressure switch;
- We remove the racks and pull out the tank along with the drum from the housing.
It is worth noting that it is inconvenient to pull out the drum of the Atlant washing machine alone; it is better to use someone’s help.
Now, let's start disassembling the tank of the Atlant washing machine. Before you start disassembling the tank of a washing machine of this brand, you should know that the manufacturer initially made such tanks non-separable. But this, of course, does not mean that this is an insurmountable obstacle for us. What should be done?
- We lay our removed tank with the hole for storing laundry facing up.
- We find the place where the two halves of the tank join together.
- We select the screws with which we will then tighten the halves of the tank.
- We drill holes in a circle (according to the diameter of the screws), it is better to drill them immediately, so that later you can easily combine the halves of the tank.
- Next, take a hacksaw for metal and begin sawing the tank along the seam; this work is labor-intensive and requires patience.
Be careful when sawing the tank, try not to touch any metal parts, including the drum.
- Having cut the tank, we disassemble it into two halves, one half (the bottom) remains on the tank, and the second is removed to the side.
- Take the T-40 star wrench and unscrew the screw located in the center of the drum pulley. If you have problems with this, you can spray the screw with WD-40.
- Using loosening movements, remove the drum pulley.
- We tighten the screw back so that it is convenient to knock out the shaft.
- Next, we apply light blows to the screw with a hammer so that the shaft together with the drum pops out of the tank half along with the bearings. If the shaft does not come out, then blows must be applied through a wooden block so as not to damage the important part.
Advantages and disadvantages of repairing at home
Repairing equipment at home has a number of advantages, including:
- High speed of work completion. The specialist will be busy only with repairs, without being distracted by external factors.
- No need to buy tools. The master has them in stock.
- The employee travels to the address, so there is no need to pay for the transportation of equipment.
- Payment is made upon completion of work, after verification by the user.
- Affordable repair cost.
Among the disadvantages of home repairs are the risk of meeting with scammers, paying for the repairman’s travel, and the lack of warranty obligations (not all private repairmen provide them).
Preparing for disassembly
To disassemble the Atlant washing machine, you first need to prepare the tools. The user will need:
- Set of flat and Phillips screwdrivers.
- Set of wrenches.
- Set of socket heads.
After disassembly, in the process of diagnosing equipment and replacing parts, other tools, materials and devices may be required - a multimeter, a screwdriver, WD-40, rags, etc.
Before disassembling the Atlant washing machine, the equipment must be disconnected from the network, water supply and sewerage and moved to a spacious place for more comfortable work.
"Brain" of the machine
Continuous communication of all components with each other is possible thanks to electronics. The control module is the “brain” of the washing machine, coordinating the actions of all nodes, issuing commands and monitoring their implementation. The board consists of numerous semiconductor components. Communication with other parts of the machine is carried out along electrically conductive paths.
Modern washing machines are equipped with a self-diagnosis system. It notices any failures and malfunctions in the operation of the equipment and notifies the user about them by flashing the display or displaying an error code on the screen.
It is the “brain” of the unit that sets the algorithm of actions when choosing a specific washing program. The sequence of operations and settings of each mode are programmed in the intellect, the user only has to launch the desired one through the control panel. Some Atlant models offer the possibility of adjusting factory washing programs. So, the user can change the temperature of water heating and the spin speed.
How to disassemble the body of an Atlant washing machine
When disassembling the washing machine, it is recommended to take photographs of each step, especially when disconnecting the wiring. This will allow you to easily assemble the equipment in the future, without making mistakes that could lead to disastrous results and expensive repairs to the device.
In numerous cases, for example, when replacing a drain pump or heating element, to repair equipment it is necessary to only partially disassemble the Atlant washing machine.
To gain access to these components, you must:
- Unscrew the screws, slide the top cover back and remove it.
- After unscrewing the fasteners, remove and remove the back cover.
By completing these steps, the user will gain access and be able to replace the pressure switch, transformer, interference filter (FPS), and water inlet valve.
If you drain the water through a filter or emergency drain hose, the washing machine can be turned on its side. This gives access to the drain pump and pipe.
Behind the cover, located on the back of the device, there is a heating element, drive belt, tank and motor, as well as an electronic unit. Of these components, the easiest to remove for repair or replacement are the heating element and the electronic module.
To completely disassemble the washing machine, you should remove the detergent drawer from its seat and unscrew the screws that are located behind it. This will allow you to detach the control panel.
Instructions for removing the cover
To disassemble the lid of the Indesit vertical washing machine, you need to prepare a Phillips and slotted screwdriver. No additional tools are required. It is advisable to study the diagram of your SMA model before disassembling; this will give you an idea of the location of the main components and fastenings of the automatic machine. In principle, you can do without this information.
The algorithm of actions will be as follows:
turn off the power to the washing machine; pull out the machine to have free access to its rear and side walls; disconnect the control panel, otherwise you will not be able to remove the top cover of the case. To do this, unscrew the two bolts securing the panel, they are located on the sides of the element
It is important not to damage the plastic latches when removing the panel; Move the control panel aside. If it interferes with your work, disconnect the wires, having previously photographed the connection diagram, and remove it altogether;
This way you can remove the lid of the Indesit vertical washing machine. If the work is not completed and you need to continue disassembling the machine, then we will tell you what to do next.
How to disassemble the tank of an Atlant washing machine
To perform more complex repairs, such as installing new bearings, it is necessary to remove the tank from the housing and disassemble it, and then pull the drum out of it.
This process looks like this:
- Unscrew and remove the counterweights.
- Remove the drive belt.
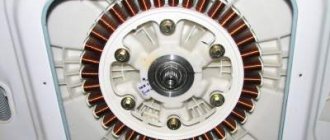
- Disconnect the wiring from the motor, unscrew the fasteners, and remove the motor.
- Disconnect the wiring from the heating element and temperature sensor.
- Remove the clamps of the fill and drain pipes.
- Pull the hatch cuff out of the drum.
- Disconnect the pressure switch.
- Pull out the racks and remove the tank from the housing.
Unlike a number of other manufacturers, Atlant washing machine tanks cannot be disassembled, so they need to be cut to install a new bearing. Necessary:
- Place the bin with the laundry opening facing up.
- Find the place where the two halves are soldered.
- Select screws for subsequent twisting of the tank halves.
- Drill holes in a circle corresponding to the diameter of the screws. It is recommended to do this right away so that the parts can be easily aligned during assembly.
- Use a hacksaw to cut the tank along the seam. This is a labor-intensive process that must be done carefully so as not to damage the drum and other elements inside.
- Divide the sawn tank into two halves, remove the top one to the side.
- Remove the screw located in the center of the pulley. If it gets stuck, apply WD-40 to it.
- Remove the pulley.
- Select a screw similar to the one removed from the pulley and screw it into the shaft until it stops to knock it out.
- Lightly tap the screw to knock out the shaft along with the drum and bearings.
Disassembly is complete, then you can begin replacing the bearings.
Features of the machine
In a normal situation, all components and sensors of the washing machine work smoothly, without failures. Each element strictly performs its assigned functions. The process is controlled by the main control module, the “brain” of the machine. The board monitors the order of operations, receives and transmits signals, and ensures communication between components.
The most voluminous element of the washing machine is the tank. It is a large plastic or metal cylinder, the position of which is controlled by shock-absorbing springs and dampers. A drum made of stainless steel is placed in the container. It actively rotates during washing, thanks to the “wheel” attached through the cross. The pulley is spun by the drive belt, which in turn is driven by the engine. It is due to the increased speed that the laundry in the drum is washed.
Almost all automatic machines from the Belarusian manufacturer are equipped with plastic collapsible tanks.
After starting the wash, the drum begins to fill with water. The user, by pressing the “Start” button, sends a signal to the control board, which gives a command to the solenoid valve. It opens, liquid flows into the system, and the pressure switch controls the degree of filling of the tank. When the water reaches the desired level, the sensor will notify the “brain” about this, and the set will stop.
Next, the heating element is activated to heat the water to the set temperature. The control unit controls the stages of the cycle, moving from soaking to main wash, then to rinsing. In between, a command is given to the pump to drain the water.
This is exactly the general picture of almost every wash. In fact, there is nothing complicated in the principle of how the machine works. To understand even better how the machine works, you need to disassemble each of its components separately.
Recommendations for assembling the tank and body of the washing machine
After the work on replacing the bearings has been carried out, and the user begins to assemble the tank, he needs to carefully coat the joints of the two halves with sealant, and then fasten them with selected bolts. The sealant should be chosen taking into account that it will have to withstand high temperatures and aggressive environments.
The Atlant washing machine is assembled in the reverse order of the disassembly process. If the user took photographs, then the work should be carried out by constantly checking with them. This is especially true for wiring; incorrectly connected wires can entail significant costs for damaged parts and expensive equipment repairs.
After the machine is assembled, it should stand for as long as necessary for the sealant to completely cure in accordance with the recommendations of the manufacturer of this substance.
Next, the Atlant washing machine needs to be connected to electricity, drainage and water supply, pour a small amount of detergent into the cuvette and perform a test wash. This is necessary to remove dirt, lubricants, debris, and unpleasant odors that may have appeared during the repair process. If, at the end of the work, no water appears under the washing machine, this indicates that the repair was carried out correctly and that the device was assembled correctly.
Possible difficulties
Difficulties that you may encounter when repairing the bearings of an Atlant washing machine:
- screws and screws for fixing different parts differ in length and size - to avoid confusion, they are folded onto separate sheets and labeled;
- if the bolts are rusty, you should not try to twist them by force - first they are treated with VD-40 lubricant, after 5 minutes the attempt is repeated;
- the new bearing does not fit in size - a similar situation arises if a part was purchased that is intended for a machine of a different brand; if the integrity of the part and packaging is not compromised and the receipts are preserved, you can try to replace the bearing.
Rules for operating and maintaining the washing machine
To ensure that the washing machine does not break down and the user does not need to disassemble it for subsequent repairs, the following rules must be observed:
- Do not overload the washing machine. Loading the drum three-quarters full or in accordance with the operating instructions will extend the life of the device, and things will be washed much better.
- When washing, you need to use high-quality detergents, as well as use special filters and water softeners. Equipment should be regularly cleaned of scale and other harmful deposits, which reduce the life of the equipment and impart an unpleasant odor to things.
- The machine must be installed correctly and level. After completing the wash, you need to turn off the water and disconnect the equipment from the network. The connection to the sewer must be carried out in such a way as to prevent the outflow of water during operation and the accidental entry of dirty water from the drain.
The user can partially or completely disassemble the washing machine for subsequent repairs at home, without the help of specialists. To do this, you need to have the necessary tools and know the correct sequence of actions. During the process, you need to photograph each step to prevent mistakes during subsequent assembly of the equipment.
“>
What is the structure of the electronic unit?
The solution in this case may be the ability to connect Samsung equipment not directly, but through a stabilizer. The progress of filling the loading tank with water is carried out gradually and is also regulated electronically.
Repair of a thyristor unit Repair of this unit should be carried out only after checking for faulty capacitors.
In the instructions for the equipment, the manufacturer gives several recommendations in case the machine does not turn on: It is necessary to check the connection network and the integrity of the wire; Check that the inlet hose is connected correctly; Make sure the door is closed tightly; It is also necessary to pay attention to the parameters of the selected washing program, the absence of a wash delay. What may indicate a malfunction and subsequent repair of the board in the washing machine: SMA displays an error code on the display
From the second anode A2 of this triac, the signal arrives through a resistive voltage divider to the pin. Naturally, such modules will not work, since they must first be loaded with firmware files corresponding to certain SM models. The winding diagram can also be found online
What may indicate a malfunction and subsequent repair of the circuit board in the washing machine: SMA displays an error code on the display. From the second anode A2 of this triac, the signal arrives through a resistive voltage divider to the pin. Naturally, such modules will not work, since they must first be loaded with firmware files corresponding to certain SM models. The winding diagram can also be found on the Internet.
We recommend: How to connect a triple socket
The water overheats or does not heat up, which does not correspond to the selected mode. Indesites-Aristons, there are also about five boards lying around, with Electrolux and Zanusi processors, very rarely in the sense of which I could not repair - There is only one LG Electrolux board in my home collection - There is not a single one that I could not repair, despite the inconvenience of repair.
Indesit-Ariston, there are also about five boards lying around, with the processors. The diagram of the control module of a Samsung, Ariston, Indesit or other popular brands of washing machine allows you to understand the sequence of connections of the circuit components and the functions of each component. Any person, even those far from physics, can understand this scheme.
About the mechanism as a whole
After this, you can mount a new trigger. It is easy to eliminate such troubles if the protection systems prevented an accident. The capacitor is always soldered only to the positive electrode in the block.
General information A distinctive feature of the VEKO SM electronic modules under consideration is that, despite the various functionality of the SM, their “electronic filling” undergoes almost no changes with the exception of the external components of the electronic module as part of the SM. It is worth noting that some manufacturers strive to completely eliminate this problem. Any person, even those far from physics, can understand this scheme. Repair of the Samsung WF-R862 washing machine module. Doesn't turn on.
Causes
In order to get ahead of the severity of the problem and find ways to fix it, you first need to understand the reason for the occurrence of such an error.
Electronics related
Here it is necessary to immediately say that these problems, related directly to the electronics of the device itself or to problems connecting to the electrical network, are considered the most difficult and quite dangerous to solve. Therefore, you can eliminate them yourself only in cases where you already have similar experience and have the necessary tools at hand. Otherwise, it is better to seek help from specialists.
Such problems are indicated by the following codes.
- F2 – the sensor that determines the water heating temperature is faulty.
- F3 - there are problems in the operation of the main heating element. In this case, the device does not heat the water at all.
- F7 – errors with connecting to the electrical network. This could be voltage surges, too high/low voltage in the network.
- F9 – disturbances in engine operation, there are problems with the tachogenerator.
- F12 – problems with the motor, contacts or winding.
- F13 – an electrical circuit has broken somewhere. The wires could burn out or the contacts could break.
- F14 - a serious malfunction has occurred in the operation of the control module.
However, problems with electronics are not always the only cause of malfunctions in the washing machine.
With water supply and drainage
The following codes indicate such problems.
- F4 – water does not drain from the tank. This may be due to a clog in the drain hose, a faulty pump, or a clog in the filter itself.
- F5 – water does not fill the tank. It either enters the machine in very small volumes or does not enter at all.
- F8 – tank is full. Water either enters in too large quantities or does not drain at all.
- F15 – water leakage occurs. This error may appear for the following reasons: a break in the drain hose, the drain filter being too clogged, or due to a leak in the machine tank itself.
There are a number of other codes that also slow down the operation of the automatic machine.
Other
Such errors include the following.
- None – this error indicates that too much foam is forming inside the tank. This may occur due to a large amount of powder used, an incorrectly selected type, or due to an incorrectly selected washing mode.
- Sel – indication does not work. This error can also be classified as one that occurs due to electrical problems. But sometimes there may be another reason - tank overload, for example.
- Door – the door in the machine is not closed. This happens if the hatch is not closed completely, if something gets caught between the rubber bands of the door, or due to a broken locking lock.