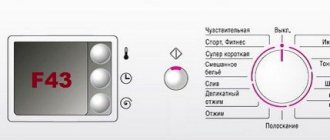
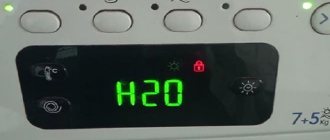
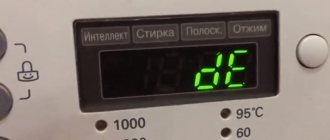
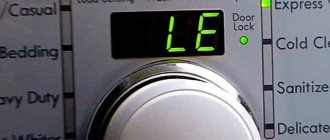
All error codes for the Haier washing machine. Chinese brand SMAs are becoming popular due to their affordable price and excellent quality. It is worth noting that the company recently bought the Italian Candy manufacturer. Which, in turn, owns a plant in the city of Kirov, where washing machines are produced.
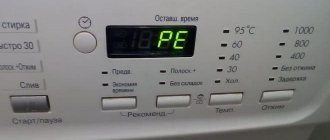
All Haier washing machines are equipped with an advanced diagnostic system and informing users about faults. If there is a display, the code is displayed on it. If absent, a light indication occurs. In addition to deciphering the errors, recommendations are given on how to fix the problem yourself.
1,ERR1,ERROR1,E2 2,ERR2,ERROR2,E1 3,ERR3,ERROR3 4,ERR4,ERROR4 5,ERR5,ERROR5,E4 6,ERR6,ERROR6 7,ERR7,ERROR7 8,ERR8,ERROR8,E8,FA 9,ERR9,ERROR9 10,ERR10,ERROR10 13,ERR13,ERROR13,F7 No salt UNB EUAR FC0,FC1,FC2 FE Fd F9
What is this code?
Typically, the Hans automatic washing machine displays error E04 either at the very beginning of the cycle or in the middle of the wash, before rinsing. For an attentive user, it will not be difficult to associate this fault code with the process of drawing water into the tank. But what kind of element are we talking about failure?
The intelligence of the Hansa washing machine is programmed to determine how much liquid should be drawn into the drum at each stage of the cycle. The pressure switch controls the fullness of the container. Error E04 is displayed on the display if the machine, for any reason, draws too much water into the tank. When the machine displays error E04, you can suspect a breakdown of one of three elements:
- water level sensor. It is the pressure switch that controls the amount of water in the tank and sends a signal to the “brain” when the set should stop;
- intake valve. The membrane opens when it is necessary to pour water inside, and closes when the tank is full;
- control module. The “brain” coordinates the process of collecting water, activates the filling valve, closes it, and receives signals from the pressure switch.
What to do first? First you should try to reset the error. Sometimes it may not indicate a breakdown at all, but be the result of a simple short-term failure. Therefore, unplug your Hansa washing machine, wait 20 minutes and start the appliance again. If the procedure does not produce results, you will have to check each of the three modules responsible for drawing water into the system. Having discovered a breakdown, you need to fix it. The repair progress will depend on the cause of the fault code.
Possible faults requiring repair
| Signs | Breaking | Repair or replacement | Cost* (work only) |
| Haier SMA does not take up water during washing or rinsing only. After several attempts to dial, the machine writes emergency code E4. |
Fill valve. This unit consists of a housing, a membrane and an electromagnetic coil that opens and closes the membrane. Most often, it is the coil that burns out, which is why the valve cannot open and water filling does not begin.
Pressostat (water level sensor in the tank). Most often in this node:
The wizard performs diagnostics of the board and, based on the results. The technician “rings” the valve circuit, finds the break point and repairs it:
*The price is only for the work of the master, spare parts are paid additionally.
If your Haier machine has stopped working and is showing error E4, and dirty things are piling up in the trash, it’s time to seek help.
Haier washing machine errors: what do codes E4, E1, E2, EUAR and others mean, error e4 in a Haier washing machine, how to fix it.
Testing and changing the intake valve
If the problem is not with the pressure switch, you will have to pay attention to the solenoid valve. It is located on the rear panel of the Hansa washing machine, near the inlet hose connection.
It will not be difficult to detect the element. You can check the intake valve with a multimeter. The tester probes are applied to the coil and sensor contacts. If a malfunction is detected, you will have to replace the entire part; the solenoid valve cannot be repaired.
If there are no electrical problems, you need to check the flow filter. The mesh is located here, in the place where the inlet hose is connected. The filter element often becomes clogged with impurities and becomes covered with limescale. After cleaning the part, you should return it to its place and check whether the washing machine is working.
Water does not fill into the tank
Often an error indicates the machine’s inability to fill the tank with water to start the cycle. The cause is failure of the dial valve, pressure switch, control unit or clogged filter mesh. To solve the problem, you need to more accurately determine the source of the malfunction; you need to take a number of simple steps.
- If the powder in the dispenser is not washed out, then the supply valve is at fault. The situation will be corrected by closing the network by supplying 220 V to the device, after which water will flow into the tank. If there is no response to the current, unscrew and replace the element.
- When the machine hums and takes a long time to fill, clean the mesh.
- The pressure switch is checked by blowing through the fitting with a tube of suitable diameter.
If unsuccessful, we stop self-diagnosis. Most likely, the corresponding resistors on the module have burned out and need to be replaced. Only a professional master can handle this.
Testing the temperature sensor
- remove the back cover of the SMA housing;
- carefully disconnect the wiring from the sensor;
- slightly loosen the bolt holding the heating element;
- remove the thermostat.
The tester switches to resistance measurement mode. The multimeter probes are connected to the thermostat contacts. Next, the sensor is lowered into a container of hot water.
At a water temperature of 20 °C and a working thermistor, the tester will give a value of about 6000 Ohms. After immersing the temperature sensor in water, monitor the readings of the multimeter. The thermostat is operational if the resistance is below the standard value. When the fluid temperature is approximately 50 °C, the resistance value should be approximately 1350 ohms.
If a breakdown of the temperature measurement sensor is detected, it will have to be replaced. The thermostat cannot be repaired. Assembling the automatic washing machine occurs in the reverse order.
Inspecting the wiring
If everything is in order with the flow filter and water supply valve, then we next check the internal wiring. It is rare, but it happens that the wires to the control board, pressure switch and existing system break, and the machine loses the “connection” between the elements. As a rule, washing machines in private homes where wild rodents live are at risk.
The instructions on what to do to check are simple. It is enough to remove the top cover of the washing machine and visually assess the condition of each wire. First of all, we look at the integrity of the insulation, and finally we check the quality of the contact connections. At the same time, it is recommended to clean the pressure switch tube.
Fault code “5” on Hayer washing machines indicates problems with water intake. Therefore, we first check the hoses, valves, filters and wiring.
Share your opinion - leave a comment
ERR2
Error related to draining water from the tank. Appears on the machine's display four minutes after the start of the operation. Informs about possible blockages and/or malfunctions in the following elements of the drain system:
- hose;
- mesh filter;
- drain pump;
- pressure switch;
- contacts of the electronic unit.
It is necessary to thoroughly diagnose the relevant components and eliminate minor faults, for example, kinks in hoses. If possible, carry out the necessary repairs. Some parts may need to be replaced.
[custom_ads_shortcode3]
How to fix it?
Each error in the operation of an automatic washing machine can be solved in different ways.
- E1. This code appears when the door of the device itself is not closed properly. You just need to press the hatch more tightly against the body of the machine until it clicks. If this does not help, unplug the device, turn it on again and close the door. If this attempt is unsuccessful, then it is necessary to replace the lock and handle on the door.
- E2. In this situation, it is necessary to check the proper operation of the pump and the integrity of its winding. It is also necessary to clean the filter and drain hose from dirt and foreign objects that may obstruct the drainage of water.
- E3. Failure of the thermistor is easily resolved - you need to check the integrity and serviceability of the wiring and install a new sensor. If necessary, all wiring should be replaced.
- E4. Visually inspect the connecting circuit. If there are any malfunctions, replace it completely. Check the operation of the heating element; if it does not work, replace it with a new one.
- E5. If such an error occurs, you need to check whether there is water in the line. If there is, then rinse the filter mesh thoroughly in a solution of citric acid until completely clean. Did not help? Then the solenoid valve coils must be replaced.
- E6. It is necessary to find the exact fault in the main unit and replace the necessary sections.
- E7. When the problem lies in a malfunction of the electronic board, it requires a complete replacement, but only with the original manufacturer's board.
- E8. It is necessary to check the integrity and serviceability of the pressure sensors, and also clean its hoses from dirt and all debris. It is also necessary to inspect the triac and, if necessary, replace its pressure switch on the board.
- E9. This error code appears only when the exhaust valve protective membrane fails. Only its complete replacement will help here.
- E10. Complete diagnostics of the pressure switch; if the relay breaks down, its complete replacement is required. If the relay is working properly, just clean the contacts.
- UNB. Disconnect the automatic washing machine from the power supply and level its body. Open the drum and evenly distribute the items in it. Start the wash cycle.
- NO SALT. It is necessary to turn off the machine and remove the detergent dispenser. Clean it of powder and rinse thoroughly. Add the detergent recommended by the manufacturer and activate the work.
Finally I would like to say. That errors in the operation of Haier brand washing machines occur quite rarely. But if they appear, especially when it is necessary to diagnose electronic circuits or replace complex parts, it is best to call a technician or contact a service center.
Such actions require certain tools and knowledge, which the average person does not always have.
For information on replacing the bearing on a Haier washing machine, see below.
Reasons for appearance
Errors in the operation of any washing machine cannot just happen. Most often they are a consequence of:
In some cases, the occurrence of such errors too frequently is a sign that the automatic washing machine is nearing the end of its life.
But preventing such situations from occurring is much easier than solving the problem itself later. Therefore, when purchasing a Haier machine, you must:
But if, even despite all the precautions, an error code is still displayed on the machine’s display, and the machine itself does not work as it should, the problem must be solved immediately.
Let's do the calculations
What to do when you find a code on the screen? One of the reasons for the appearance of error E4 is the failure of the heating element of the washing machine. You can diagnose the heating element yourself by ringing it with a multimeter.
The tester will determine the resistance produced by the heating element. To calculate the nominal value of the parameter specifically for your washing machine model, you will have to remember the basics of physics. Resistance in Ohms is determined by the formula: R= U²/P, where:
- U – voltage in the electrical network (in an apartment and house, the parameter value is usually 220 Volts);
- P – power of the heating element. You can see this value in the instructions. If the information is not specified in the manual, the World Wide Web will help you find the power value. On the Internet you can collect information about a specific model of machine.
How is counting done in practice? Let's say the power of the heating element is 1800 W. Then the resistance will be 220*220/1800=26.89 Ohms. The breakdown of the heating element can be stated if the tester showed a mark significantly higher or lower than the calculated value.
ERR7
A critical error indicates a problem in the electronic unit. This may occur due to:
- there is a short circuit;
- the machine was operated for a long time in a room with high humidity;
- one of the module tracks is damaged;
- semiconductor elements have failed;
- The contact between the semiconductor and one of the tracks has disappeared, that is, in the block that fits the connector of the modular board, one (several) wires “sit” loosely.
This error requires professional elimination. It is more advisable to involve an SMA electrical specialist.
[custom_ads_shortcode2]
Let's check the filling valve
Among the causes of error “ERR5” is a faulty solenoid filling valve. It is located under the top cover of the machine and is responsible for the flow of water into the machine. If its operation is disrupted, the unit does not perceive the system command to start the cycle, and washing does not begin. To correct the situation, you need to take out the “box” and check it for integrity and functionality.
Finding the valve is not difficult. It is enough to remove the housing cover and see a black or white plate near the back wall near the inlet hose on one side and the pipes leading to the dispensary on the other. Then we proceed like this:
- We inspect the valve body for damage, chips, and traces of burning. If no visual problems are found, we listen to it;
- disconnect the connected pipes by loosening the metal clamps with pliers;
- release the connected wiring;
- Unscrew the bolts holding the part and remove the valve.
Now you need to verify that the breakdown has occurred. The easiest way to diagnose is to lift the device under the sink or basin, connect the inlet hose and open the water supply tap. A working element should hold back the flow. If a leak is noticeable, the valve will have to be replaced with a new one. There are other ways to diagnose the valve.
- Apply 220 volts to the valve coil. If in this case the device works and lets water through, then everything is in order. But be careful and careful, as water and electricity should not come into contact.
- Connect the device to the multimeter. We turn on the “Resistance” mode on the tester and alternately attach the probes to the windings, evaluating the indicators. If the display shows values of 3 kOhm, then the part is fully operational.
Repairing a faulty valve yourself will not help. The part is not repairable, so you will have to replace the old “box” with a new one. To do this, we purchase a suitable copy from a specialized store and install it according to the previously described scheme, but in reverse order. We fix the valve with a retaining bolt, connect the wiring to the connectors, return the pipes and secure everything with clamps. Lastly, install the top cover of the washer and run a test wash.
We are looking for mechanical damage
There are a huge number of reasons why the hatch does not close or is not blocked, ranging from simple negligence on the part of the owner (he hung heavy wet things on the door, which damaged the hinges) and ending with a manufacturing defect. However, there are also much more banal and topical options for the development of events. Most often, a fault code is displayed for the following reasons:
- after prolonged regular use the door became warped;
- in the UBL, the locking tongue, designed to secure the closed door, has moved;
- any of the constituent elements of the door mechanism has worn out.
It is very easy to recognize this kind of malfunction. It is enough to simply test the machine outside the operating mode. If the hatch really does not close or does not lock in the closed state, then the problem is most likely either in skewed fasteners or in a broken locking device. Sometimes this outcome is the result of incorrect installation, when due to an imbalance of weight, load and vibration, the hinges cannot withstand, but in most cases the reason lies in the dishonest use of the unit. Well, we still need to do something.
- Inspect the drum and the machine body in the area of the hatch; perhaps foreign objects are preventing the lock from closing.
- Check that the locking mechanism fits into the intended niche and that the locking element is not loose.
- Feel and evaluate the condition of the cuff and plastic covering. Perhaps something has peeled off or stretched.
UBL also has such a part - a plastic guide. Due to the low wear resistance of the material, it is often subject to deformation during active use. With a broken guide, closing the hatch seems mechanically impossible, since it interferes with the slamming of the door.
ERR5
Indicates the fact that the machine cannot cope with filling water. The fact is that water must fill the tank to a certain level in a set period of time (maximum eight minutes). If this does not happen, the following reasons should be considered:
- low water pressure in the system;
- water does not flow due to a closed valve;
- the filler valve screen is clogged;
- malfunctions of the valve itself, pressure switch or pump;
- defects in the wiring located between the pump and the control module.
[custom_ads_shortcode3]
Samsung washing machine error codes displayed on the display
| 5e | No water draining from the machine tank | Drain hose clogged. |
| 5s | Blockage in the sewer system. | |
| e2 | 1) Clogged internal hose communications. 2) The filter on the drain pump is clogged. 3) Kink in the drain hose (no water flow). 4) The drain pump is not working. 5) Crystallization of water inside the machine (storage at subzero temperatures). | |
| n1 n2 not not 1 not 2 | No water heating | Lack of power. Incorrect electrical connection. |
| ns ns1 ns2 | The heating element does not heat the water for washing. | |
| e5 e6 | Malfunction of the heating element for drying clothes. | |
| 4e 4c e1 | No water supply to the machine | 1) The shut-off valve is closed. 2) Lack of water in the water supply system. 3) Kink in the hose for filling water. 4) Clogged hose or mesh filter. 5) Aqua stop protection is activated. |
| 4с2 | Supplying water with temperatures above 50°C | The supply hose is connected to the hot water supply system. |
| sud sd (5d) | Abundant foaming | 1) The volume of powder is above the norm. 2) Washing powder is not for automatic washing machines. 3) Counterfeit washing powder. |
| ue ub e4 | Imbalance when rotating the drum | 1) Twisting of the laundry or formation of a coma from it. 2) Insufficient amount of linen. 3) Excessive amount of laundry. |
| le lc e9 | Spontaneous drainage of water | 1) The drain line is too low. 2) Incorrect connection to the sewer system. 3) Tank seal failure. |
| 3e 3e1 3e2 3e3 3e4 | Drive motor failure | 1) Excessive load (overload with laundry). 2) Blocking by a third-party object. 3) Lack of food. 4) Drive motor failure. |
| 3s 3s1 3s2 3s3 3s4 | ||
| ea | ||
| uc 9c | Voltage in the power supply network floats | The permissible voltage parameters are beyond the parameters: 200 V and 250 V for more than 0.5 minutes. |
| de de1 de2 | There is no signal that the loading hatch door is closed | 1) Loose closure. 2) The door locking mechanism is inoperative. |
| dc dc1 dc2 | ||
| ed | ||
| dc3 | There is no signal to close the Add Door | 1) Not closed before starting the wash cycle. 2) The closing mechanism is not working. |
| ddc | Incorrect opening | The door was opened without pressing the pause button. |
| le1 lc1 | Water at the bottom of the car | 1) Leaking from the drain filter. 2) Leaking powder loading unit. 3) Leakage from internal connections. 4) Leaking from under the door. |
| te te1 te2 te3 | Temperature control sensor does not send a signal | 1) The sensor has failed. 2) Lack of contact in the mounting block. |
| tc tc1 tc2 tc3 tc4 | ||
| ec | ||
| 0е 0 f 0c e3 | Water collected above normal | 1) The water supply valve does not shut off. 2) The water does not drain. |
| 1e 1c e7 | There is no signal from the water level sensor | 1) The sensor has failed. 2) Lack of contact in the mounting block. |
| ve ve1 ve2 ve3 all2 ev | No signal from the buttons on the panel | Buttons sticking or jamming. |
| ae ac ac6 | Lack of communication | There is no feedback between control boards. |
| se ac ac6 | Drain water temperature 55°C or higher | The supply hose is connected to the hot water supply system. |
| 8е 8е1 8с 8с1 | No signal from vibration sensor | 1) The sensor has failed. 2) Lack of contact in the mounting block. |
| her | No signal from drying sensor | 1) The sensor has failed. 2) Lack of contact in the mounting block. |
| fe fc | The clothes drying fan does not turn on | 1) The fan has failed. 2) Lack of contact in the mounting block. |
| sdc | Automatic dispenser is broken | Breaking |
| 6s | Automatic dispenser drive is broken | Breaking |
| hot | Temperature exceeds the threshold of 70°C | Disable the start button without disconnecting from the network |
| pof | No power during washing | |
| Sun | Short circuit (short circuit) in the control circuit | 1) The triac responsible for: turning the electric motor on and off has failed; regulation of its speed. 2) Short circuit of contacts on the connector due to water ingress. |
The names of the faults are identical to machines equipped with displays, except that some functions are missing in budget machines. The first two vertical rows indicate a malfunction, and the combination of lights in the third row generates an error code.
| Alarm combination | |||
| Error codes | 1 vertical row | 2 vertical row | 3 vertical row |
| 4e 4c e1 | ¤ | ¤ | 1 2 3 4 – ¤ |
| 5e 5c e2 | ¤ | ¤ | 1 – ¤ 2 – ¤ 3 4 – ¤ |
| 0e 0 f os e3 | ¤ | ¤ | 1 – ¤ 2 – ¤ 3 4 |
| ue ub e 4 | ¤ | ¤ | 1 – ¤ 2 3 – ¤ 4 – ¤ |
| not ns e5 e6 | ¤ | ¤ | 1 – ¤ 2 3 4 – ¤ |
| de dc ed | ¤ | ¤ | 1 2 3 4 |
| 1e 1c e7 | ¤ | ¤ | 1 – ¤ 2 3 4 |
| 4с2 | ¤ | ¤ | 1 2 – ¤ 3 – ¤ 4 – ¤ |
| le lc e 9 | ¤ | ¤ | 1 2 – ¤ 3 – ¤ 4 |
| ve | ¤ | ¤ | 1 2 – ¤ 3 4 |
| te tc ec | ¤ | ¤ | 1 2 3 – ¤ 4 – ¤ |
Legend
¤ – lights up.
NO SALT
The problem is with the detergent. Perhaps its quantity is not enough for a full wash, or its composition is not suitable for this model of washing machine. It will also not be superfluous to inspect for blockages in the channels where the powder enters the tank.
| Haier | Malfunctions of Haier washing machines (Haier). | In this column you can see what needs to be done to fix a washing machine malfunction, but it is better to entrust this to washing machine repair specialists. |
| Error codes | Decoding the code of Haier washing machines (Haier) | Possible malfunction of the Haier washing machine (Haier) |
| ERR1 | The program crashes at startup (the machine does not start). | 1. The hatch door is not tightly closed. It is necessary to close the door more tightly. 2. The door lock latch is broken - you need to replace the lock if this malfunction cannot be restored by repair. 3. There is no tight contact in the UBL device - service the contacts. |
4. There is no contact in the socket. If the socket is faulty, replace it or repair it, inspect the plug of the household appliance and the connecting cord. If a defect is detected, replace these parts.
4. There is a breakdown of the drain pump - seal its contacts, clean the filter. If it is impossible to repair, replace the water pump of the Haier washing machine.
4. There are no reliable contacts at the terminals of the fill electrovalve, or pressure switch, or water pump - service the contacts.
Category: We repair household appliances with our own hands. Here you can familiarize yourself with the error codes of Haier washing machines and, in case of malfunction, try to repair them yourself. If you are having trouble with repairs, but still want to try, then we invite you to visit our FORUM, and if you decide to turn to professionals for help, then you can find addresses and phone numbers in the section Repair of household appliances in your city . There you can also leave your feedback on the quality of the repair.
| Haier Error ERR1 - washing machine startup error. | Possible causes of the malfunction: - malfunction of the hatch locking device (replacement required); — The lock of the washing machine is faulty. |
| Haier Error ERR2 - water drain error. | Possible causes of the malfunction: - the water drain path is clogged (filter or drain hose); - the electronic controller is faulty; - the drain pump is faulty; - the water level sensor is faulty. |
| Haier Error ERR3 - water heating error. | Possible causes of the malfunction: - the temperature sensor (thermal sensor) is faulty and requires replacement. |
| Haier Error ERR4 - water heating error. | Possible causes of the malfunction: in case of this error, the heating element of the heating element is usually faulty. |
| Haier Error ERR5 - water fill error. | Possible causes of the malfunction: - lack of water (or low pressure) in the water supply; - damaged water inlet valves; - faulty electronic controller; - faulty water level sensor. |
| Haier Error ERR6 - error on the electronic control board. | Possible causes of the malfunction: - a malfunction of the electronic controller, repair of the electronic control board is required, or there is a break in one of the module circuits. |
| Haier Error ERR7 is a critical error in the electronic control module. | Possible causes of the malfunction: - the electronic control board is faulty and requires replacement. |
| Haier Error ERR8 - water fill error (water in the tank exceeds the permissible level). | Possible causes of the malfunction: — the water level sensor (pressure switch) has failed; - or the electronic control board is faulty. |
| Haier Error ERR9 - water filling error (water in the tank exceeds the permissible level). | Possible causes of the malfunction: — the water fill valve (inlet valve) has failed and needs to be replaced; - or the electronic control board is faulty. |
| Haier (Haier) Error ERR10 - water fill error (with this error, the water fill solenoid valve is operational). | Possible causes of the malfunction: - the water level sensor (pressostat) has failed and needs to be replaced. |
| Haier (Haier) Error UNB - imbalance (imbalance) of the laundry in the drum during washing. | Possible causes of the malfunction: - during washing, the laundry is distributed unevenly in one pile, you need to stop the machine and distribute the laundry evenly. |
| Haier EUAR error - electronic control unit error. | Possible causes of the malfunction: - the electronic control board has failed, the board needs to be repaired or completely replaced. |
| Haier (Haier) Error NO SALT (from English without salt) - unacceptable chemical composition of the detergent, or its absence. | Possible causes of the malfunction: - lack of the required amount of salt in the washing machine tank, you need to add salt; - washing takes place without detergent - it is necessary to check the supply of detergent from the powder compartment, if necessary, clean the powder compartment and the pipes through which detergent enters the tank, or activate the “wash without detergent” program. |
Most often, washing machine users do not think about what this or that error code means until they come across such a problem face to face. For example, if a Haier washing machine does not want to wash and displays combination E1 on the display, the problem must be looked for in the hatch door or locking device. Sometimes, to solve the problem, it is enough to press the door with your knee, and sometimes this measure is clearly not enough. What to do if difficulties arise?
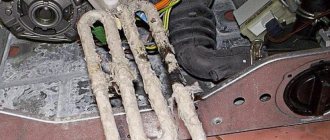
We call the heating element
So, do-it-yourself repair of a Haier machine that displays an E4 error should begin by checking the heating element. Before carrying out work, be sure to turn off the power to the washing machine. Next, remove the back wall of the equipment housing and find the place where the heating element is attached. Then carefully disconnect the power supply from the element.
Turn on the resistance detection mode on the multimeter, set the selector to 200 ohms. Connect the tester probes one by one to the terminals of the heating element. The working heating element will transmit to the multimeter a value close to the calculated number. If the tester displays one or zero, it means that the heater needs to be replaced; it cannot be repaired.
Next you need to check the heater for breakdown. Inside the heating element tubes, between their walls and the internal spiral, there is a dielectric, which sometimes begins to leak onto the body of the washing machine. This situation is extremely dangerous for the user, as it leads to electric shock to the washing machine.
To further diagnose the heater, the multimeter is set to buzzer mode. If you close the probes of the device, a light will immediately light up on the screen and the tester will start beeping. One probe leans against the heating element terminal, the second - against the element body. If the multimeter is silent, everything is fine; the “beeping” of the tester will indicate the need to replace the heater.
Test mode operation
Sometimes the Hyer washing machine does not immediately signal a problem with the appropriate code, but the user himself understands that problems exist. In this case, you can use test mode, which is launched as follows:
- the “start delay” and “no drain” buttons are pressed simultaneously and held for some time,
- you must make sure that the loading hatch is closed,
- the door lock is activated after ten seconds,
- testing has started.
By the numbers that appear on the screen, you can determine which element is being tested:
- 77:77 – the solenoid valve is diagnosed,
- 66:66 – the electric motor is checked,
- 55:55 – pressure switch is tested,
- 44:44 – the engine is being checked while it is running,
- 33:33 – the water heating element is checked for functionality,
- 22:22 – drain pump testing in progress,
- END – testing completed.
If the signal appears on the screen for no apparent reason, a reset should be performed. But when it resumes, it should no longer be ignored.
Advantages
Haier brand devices have many advantages. Let's look at the main ones.
- Original modern design, it can only be compared with expensive options.
- High class of washing and energy efficiency - A.
- Wide range of models. Available in different sizes.
- Availability of service centers, inexpensive spare parts.
- Economical.
- The engine warranty period is 12 years.
- Price. Depending on the equipment, it varies from 25,000 to 70,000 rubles.
- Availability of a large number of automatic programs.
- Self-diagnosis, however, it is better to trust the repair of Haier washing machines only to professionals.
- Optimal ratio of quality and cost.
- Option to automatically determine the amount of water and detergent.
Let's test the control module
If, when diagnosing the electric motor of a Haier washing machine, no irregularities in its operation were identified, you will have to “dig deeper.” Fault code 7 may indicate incorrect operation of the main control module. Repairing a control board is quite difficult; it requires certain knowledge and experience in working with electronics.
At home, you can conduct a visual inspection of the module. Examine the board for burnouts, damage and other defects. To inspect the main block, you should:
- turn off the power to the washing machine;
- remove the detergent dispenser from the body (pull the tray towards you, pressing it onto the central latch);
- Unscrew the bolts securing the control panel of the washing machine;
- Using a thin screwdriver, release the latches holding the panel;
- Carefully, so as not to break the wiring, place the control panel on the lid of the washing machine.
The “brain” of the Haier washing machine is located directly behind the control panel. Before disconnecting the wiring from the unit, be sure to photograph or sketch the connection diagram. Then carefully disconnect the wires and remove the control module. To get directly to the main board, you will have to release the latches of the unit housing.
Carefully inspect the control board. If you find burnt areas or other defects, you will have to repair the part. You can try to repair individual elements of the board yourself. To do this you will need a soldering iron, a multimeter and replacement components.
The upcoming scope of work in case of breakdowns of various kinds.
- Capacitor. Acts as a specific stabilizer on the board. If a capacitor is damaged, it is necessary to solder a new element to the positive electrode. The polarity of the electrodes can be checked using a multimeter.
- Resistor. Diagnostics of the element is carried out using a tester. First order resistors will ideally show a resistance of 8 Ohms and an overload value of 2 Amps. Second-order elements give readings of 3-5 Amps, and the resistance value is directly related to the frequency of the module. If the measured parameters do not correspond to the normative ones, the components are replaced by soldering.
- Thyristor block. The negative resistance of the switch is measured. The reading on the multimeter should not exceed 20 V.
- Block filter. This element may burn out. Cleaning the cathode will help eliminate the problem.
- Trigger. The voltage at the input contacts is detected. The optimal value of the indicator is no more than 12 V. The standard resistance of the trigger filter is 20 Ohms. Installation of a new element is carried out using soldering.
The cause of damage to the control board is strong vibrations of the machine or power surges in the network.
Therefore, it is important to install the equipment correctly to avoid premature breakdowns. If you try in vain to reset the fault code, contact a service center
Possible faults requiring repair
RemBytTech technicians encounter the following breakdowns when experiencing error E4 in Haier.
- the pressure switch tube falls out of place, becomes clogged or damaged;
- the pressure sampling chamber becomes clogged with dirt;
- The sensor itself breaks down.
- returns to its place, cleans or changes the tube;
- cleans the pressure sampling chamber;
- replaces the water level sensor with a new one.
- replaces faulty elements on the circuit with new ones;
- solders burnt tracks and/or contacts;
- If major damage to the board is detected, replace it with a new one.
- twists or changes the entire cable with wires to a new one;
- resolders contacts or replaces the entire contact group.
*The price is only for the work of the master, spare parts are paid additionally.
If your Haier machine has stopped working and shows error E4, and dirty things are accumulating in the basket, it’s time to contact RemBytTech for help. Call:
Or submit an online application.
RemBytTech technicians are a team of professional specialists with many years of experience in repairing washing machines. They will help your Hayer too. We respond to applications as quickly as possible – within 24 hours from the date of application. We repair equipment at home. We guarantee our work for up to 2 years .
Rate this article: 3.9 1 5 16 votes (average 3.9 based on 16 votes)
