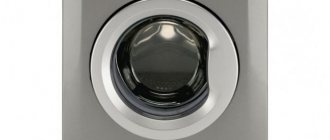
How to remove the lock on an Ariston washing machine?
In order to remove
you need to remove the pressure ring with the spring. On the right we see a lock, held on by two screws, unscrew them. After this, remove the cuff from the hatch frame and reach the lock through the removed cuff.
Interesting materials:
What is a civil cassation appeal? What is a court of cassation in civil cases? What are cations and what groups are they divided into? What is application data caching? What is caching and why is it needed? What is website caching? What is cache memory? What is a website header and footer? What are hash functions? What is password hashing?
Let's prepare the tool for disassembly
At first glance, disassembling a Kandy automatic washing machine is not difficult and does not require a huge number of tools. Sometimes a regular screwdriver is enough. But for a complete analysis of Kandy, you will need a little more.
To get started, you will need a Phillips and slotted screwdriver. A screwdriver will also come in handy. Here you should add hexagons, pliers and a small hammer.
Often, most connecting fasteners are stuck. Before unscrewing one of these screws, the structure should be coated with a special liquid. This liquid is most often used to lubricate car parts, and it is called WD-40. And to make it comfortable to drain excess liquid from the hose, you will need to use a basin. You can thread a hose into it and easily drain excess water.
For those who want to disassemble the Kandy machine, you should stock up on a camera. During the disassembly process, it is better to take photographs so that later, after looking at the picture, you can easily put the device back together. This will allow you not to confuse anything and successfully start the machine after the repair stage.
Disassembling the tank
The tank reservoir itself is non-separable. Such tanks are manufactured so that during operation the tank does not lose its tightness. When the washing machine is operating, temperature changes occur and the fastenings often become loose.
Before disassembling the tank, you should carefully inspect the external parts and look for a seam in them. Parallel to the seam, we will need to drill holes to fasten the halves of the tank, because we will need to assemble the tank later. We make holes using a drill and a drill.
It is necessary to drill 15-20 holes along the seam. After this, you can cut the seam. After cutting, you can easily get inside the tank. You can cut the seam with a special hacksaw for metal. The procedure will take a long time. It is not allowed to make a cut of more than 5 cm. Otherwise, the walls of the tank will become unusable.
Once the sawing is completed, the tank will become a collapsible product. You will get two parts - front and back. The front part is an irregularly shaped plastic element with a hatch in the center. We won't need it for now, so we can put it aside. In the rear part we have all the main elements - the drum and the rotation mechanism. It should be removed. You need to turn the rear part over so that the drum hatch is on the bottom. Now you can start disassembling the shaft.
The first step is to carefully unscrew the screw located in the center. You need to attach a metal rod in the form of a small chisel and strike it with a hammer. Now you need to take a screwdriver and tighten the screw. The shaft must be removed using three pieces of wood (one small and two large). Large blocks will be used to support the tank. A small beam is placed on top of the tank in part of the rod. You need to hit a small block with a hammer.
The part can be easily damaged, so you should combine the power of the blows (first a light blow, then a heavy one).
As a result, the drum will be separated from the tank. It is allowed not to remove the bearings if they are working properly; perhaps the problem is not in them, but in the tank itself. It is checked first.
Sometimes owners need to change the oil seal or bearing. To do this, use a metal rod and hit it with a hammer along the edges of the body. It is not allowed to strike from only one side. Even if one bearing is broken, both will have to be replaced.
Interesting:
- Rating: 5 Best Washer and Dryer Sets
- Disassembling the Indesit washing machine
- Washing machines Candy
- How to disassemble a Zanussi washing machine
- Disassembling a Siemens washing machine
- Review of gas stove with dishwasher and/or oven
Reader comments
- Share your opinion - leave a comment
How to delicately “open” a hatch?
With a full drum, you cannot diagnose and repair the machine. Before dealing with the cause of the failure, you need to empty the water tank and take out your clothes. The main thing is to make sure that the hatch remains locked for at least 10 minutes after washing - only after this time is it recommended to force open Candy.
Most often, the machine remains locked due to a full drum. For some reason the water did not drain into the sewer and for safety reasons the system does not give a command to remove the electronic lock. In such a situation, it is necessary to empty the tank. The easiest way is to activate the Rinse, Spin or Drain program.
After the program ends, you should try to unlock the door again. If the blockage has not been removed and the drum remains full, then it is worth checking the functioning of the drain. First, we inspect the drain hose for any squeezing or blockage, and if necessary, release and clean the hose. Then we turn on any of the above modes again and look at the reaction of the washing machine.
Sometimes cleaning the drain does not help, and the system does not respond automatically to attempts to drain the water. In this case, you will have to empty the tank manually by unscrewing the garbage filter. The sequence is:
- de-energize the machine;
- cover the surrounding area with oilcloth or rags;
- find a basin to collect water;
- pry open the technical hatch door and open access to the filter;
- unscrew the nozzle;
- drain the water from the machine.
The empty machine can be opened. We take a thin string, a knife or a flat screwdriver and proceed to the emergency opening of the machine. We apply the rope to the hole between the hatch and the body in the area of the locking mechanism and carefully press it inward with the tip. We pull the inserted lace in both directions until a click is heard, which will indicate that the latch is activated. Then press the handle and open the laundry loading hatch in the usual way.
If the rope option does not help, we proceed differently. We disconnect the equipment from communications, remove the top cover and tilt the machine body back. The drum should “move away” from the front wall, after which you can stick your hand to the UBL, feel the holder tongue and move it. This will unlock the hatch.
Pumping water
Several elements are responsible for supplying water to the washing machine. These are the control module, inlet valve, inlet hose and level sensor. Filling the tank is carried out according to the following scheme:
- the “brain” of the washer gives a command, after which the inlet valve opens;
- water begins to flow into the system;
- a pressure switch monitors the liquid level in the tank;
- when the container is filled to the required “mark”, the sensor signals this to the board, and the “brain” closes the inlet valve;
- water stops “entering” the tank.
Next, the control module turns on the heating element, which will heat the water to the desired temperature. Draining of the waste liquid begins after the “brain” transmits a signal to the pump. The pump, having received a command, pushes the wastewater through the drain hose into the sewer. These processes are repeated several times - during the main wash and rinse. Water is collected, the laundry is “rinsed” in it, and then, due to the well-coordinated work of the units, the liquid is removed from the machine.
Step by step disassembly
Before starting repairs, it is necessary to disconnect the machine from the electrical network. This will make the work process as safe as possible. In addition to disconnecting the unit from the power supply, you should unhook the cold water supply hose so as not to flood everything around.
How to remove the top of the hatch? First of all, you should remove the top of the device body. The cover can be fixed using various screws, which can be easily unscrewed with a Phillips screwdriver. The screws are located under the top of the panel on the back side. Once they are unscrewed, you can press lightly on part of the lid. You will need to press on the front side. Now you can lift the cover body up.
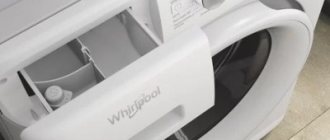
How to remove the detergent tray? The Candy washing machine has a dispenser that is easy to remove. In order to properly remove the detergent tray, you will need to find a separate plastic button by feeling. Typically the element is located in the central part of the tray. You should press the button and pull the container in your direction.
How to dismantle the control panel? The control panel is secured to the washing machine with two screws. The first screw is located under the powder dispenser. The second screw is located on the opposite side. The control panel will need to be handled with extreme care as it is very fragile. As soon as it is removed from the device, you must immediately hang it on a hook or put it away so as not to accidentally damage fragile elements.
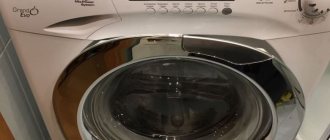
How to remove the service panel? To dismantle the service panel, you will need to simultaneously press two locking latches, and then press the third one located in the middle. How to remove the front wall? You must first remove the metal clamp that holds the hatch cuff. The cuff is installed in the loading hatch. The metal clamp is secured with a small spring. You can push it slightly and the clamp will be removed. Now you can push the cuff inside the drum.
After removing the outer clamp, do not try to pull out the cuff completely, as you will certainly damage it. Why? That’s why the internal clamp also holds it tightly.
The hatch door may interfere with the removal of the front wall, so it would be a good idea to unscrew it. It is tightened with several bolts. After this, you will need to remove the front panel of the device. We unclip the latches that hold the protective cover. If you lift the panel a little, you can easily remove the additional hooks that hold it in place. Inside the control panel there are microcircuits that can be disassembled individually, if necessary.
How to remove the back cover. It is necessary to unscrew the screws using a screwdriver. Typically, screws are placed around the entire perimeter of the back wall to securely fix the elements.
What caused the problem?
Problems with door opening are not always related to the system's protective reaction to a full drum. The hatch may remain impregnable for other reasons. As a rule, problems with the lock on Candy occur due to a broken handle, faulty UBL and a failure in the control board.
- Broken door handle. Careless opening of the hatch, constant slamming or childish pranks can damage the locking mechanism.
- Faulty UBL. The electronic lock fails after long-term use, as the mechanical elements wear out and break over time.
- Failed pressure switch. Probably the level sensor has started to work incorrectly and is sending incorrect information to the board. For example, that the tank is full, even if in reality it is empty.
- Board failure. The most serious failure in which the system freezes and stops analyzing incoming information and commands.
It is strongly not recommended to independently test the control board for performance - it is too risky!
Sometimes the cause of stagnation lies in a non-functioning drain. It is possible that the internal pipe or garbage filter is clogged, the impeller is blocked, or the pump is broken. If you are unable to determine the nature of the problem yourself, you should contact a service center.
Top loading machine
The principle of disassembling automatic top-loading washing machines differs significantly from the front-loading type. Control Panel. It is necessary to carefully lift the top of the control panel from four sides in turn using a screwdriver. First, pull the part up and then in the opposite direction. Now you can tilt it slightly at a certain angle. After this, access to the wiring will open.
Photographs of the wire placement should be taken prior to complete disassembly. Now you can dismantle the remaining parts. How to unscrew the side wall. Before removing the side part, you will need to unscrew the screws. Once they are unscrewed, you can lightly pull the bottom towards you and then pull it down. Once the side panel is removed, you can proceed to the next stage of disassembly.
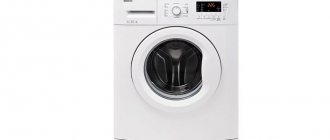
Candy GC41051D
Another small washing machine that will allow you to quickly wash up to 5 kg of laundry. This is quite enough for a family of three. This model is economical; it consumes no more than one kilowatt per hour. The spin cycle belongs to class D. The revolutions per minute are 1000. In one cycle, the machine consumes 45 liters of water. This “washing machine” is quite easy to use, the electronic controls are intuitive. Many buyers notice that they didn't even have to use the instructions. There is also protection against leaks. Built-in balance and foam control. But one of the disadvantages that should be noted is that this machine is very noisy.
FOR NOTES...
Page 34
- Image
- Text
32
FOR NOTES
. . . . . . . . . . . . . . . . . . . . . . . . . . . . . . . . . . . . . . . . . . . . . . . . . . . . . . . . . . . . . . . . . . . . . . . . . . . . . . . . . . . . . . . . . . . . . . . . . . . . . . . . . . . . . . . . . . . . . . . . . . . . . . . . . . . . . . . . . . . . . . . . . . . . . . . . . . . . . . . . . . . . . . . . . . . . . . . . . . . . . . . . . . . . . . . . . . . . . . . . . . . . . . . . . . . . . . . . . . . . . . . . . . . . . . . . . . . . . . . . . . . . . . . . . . . . . . . . . . . . . . . . . . . . . . . . . . . . . . . . . . . . . . . . . . . . . . . . . . . . . . . . . . . . . . . . . . . . . . . . . . . . . . . . . . . . . . . . . . . . . . . . . . . . . . . . . . . . . . . . . . . . . . . . . . . . . . . . . . . . . . . . . . . . . . . . . . . . . . . . . . . . . . . . . . . . . . . . . . . . . . . . . . . . . . . . . . . . . . . . . . . . . . . . . . . . . . . . . . . . . . . . . . . . . . . . . . . . . . . . . . . . . . . . . . . . . . . . . . . . . . . . . . . . . . . . . . . . . . . . . . . . . . . . . . . . . . . . . . . . . . . . . . . . . . . . . . . . . . . . . . . . . . . . . . . . . . . . . . . . . . . . . . . . . . . . . . . . . . . . . . . . . . . . . . . . . . . . . . . . . . . . . . . . . . . . . . . . . . . . . . . . . . . . . . . . . . . . . . . . . . . . . . . . . . . . . . . . . . . . . . . . . . . . . . . . . . . . . . . . . . . . . . . . . . . . . . . . . . . . . . . . . . . . . . . . . . . . . . . . . . . . . . . . . . . . . . . . . . . . . . . . . . . . . . . . . . . . . . . . . . . . . . . . . . . . . . . . . . . . . . . . . . . . . . . . . . . . . . . . . . . . . . . . . . . . . . . . . . . . . . . . . . . . . . . . . . . . . . . . . . . . . . . . . . . . . . . . . . . . . . . . . . . . . . . . . . . . . . . . . . . . . . . . . . . . . . . . . . . . . . . . . . . . . . . . . . . . . . . . . . . . . . . . . . . . . . . . . . . . . . . . . . . . . . . . . . . . . . . . . . . . . . . . . . . . . . . . . . . . . . . . . . . . . . . . . . . . . . . . . . . . . . . . . . . . . . . . . . . . . . . . . . . . . . . . . . . . . . . . . . . . . . . . . . . . . . . . . . . . . . . . . . . . . . . . . . . . . . . . . . . . . . . . . . . . . . . . . . . . . . . . . . . . . . . . . . . . . . . . . . . . . . . . . . . . . . . . . . . . . . . . . . . . . . . . .
Candy EVOGT 13072D-07
This machine has a top loading function. At one time it can wash about 7 kg of laundry. The model is simple and functional. The panel is electronic and has a display, so it is as clear as possible for any user. Since this machine is compact, it can be built into even the narrowest space. The software is designed for 18 modes. There are quick wash and re-rinse functions. In this case, the start of the machine can be postponed for any convenient time.
Spin power is about 1300 rpm. This speed can be changed. Energy class is A+. Therefore, the machine uses less than 1 kW per hour. 48 liters of water are consumed per cycle. The hatch is protected from accidental opening. Immediately after the wash starts, the panel is locked. There is protection against leaks, as well as balance control. The most popular errors of the Kandy washing machine in question are described below.
What to do if none of the methods helped
This means that the washing machine filter cannot be removed due to scale or lime deposits from hard water. Follow the following steps one by one to resolve the issue. This will help minimize possible costs for new parts.
- the glass, soak the glass with the filter in a solution of water and citric acid to dissolve the lime. Or run a preventive wash with lemon juice if you have not yet had time to disassemble the pump. For soaking, you will need a container in which a glass with a filter is placed so that it is completely under water. Pour hot water, but not boiling water, in the region of 40-60°C to reduce the likelihood of damage to the plastic parts of the assembly and the rubber filter gasket. Pour about a tablespoon of citric acid onto the basin. You may need to weigh down the snail with the filter with something so that it does not float up after filling the container with water. Leave the filter to soak for 1-2 hours, then try to unscrew it. It’s not a fact that it will work, but if it works, you’ll save on new parts. The only thing that can be damaged is the rubber filter gasket. Acid can damage it, and then it will need to be replaced. A sure sign of gasket damage is leakage from the filter after reinstallation.
- Try to carefully break the filter out of the snail and install a new one . The plastic is quite fragile and can be cut with wire cutters, and then unscrewed and cleaned out the remains. Proceed carefully, do not damage the thread of the glass (snail). Otherwise, you will need to replace the entire snail, not just the filter. With damaged volute threads, the new drain filter will leak.
- Replace the snail assembly with filter . Immediately, if you don’t want to bother with unscrewing, or when you couldn’t carefully break off the filter. This will cost more than buying a gasket or a new catch filter. But replacement guarantees that the filter will not leak after installation.
If you read the article and realized that removing the washing machine filter yourself is an impossible task for you, then entrust this work to the RemBytTech specialists.