A modern housewife cannot imagine her life without a washing machine, so if the assistant breaks down, it requires immediate repair action. There are often situations when the hatch cuff becomes unusable, replacing which is not always possible in the shortest possible time. In general, such a breakdown will not greatly affect the operation of the washing machine, but it can easily spoil the comfort of the owners, because water will constantly leak near the hatch of the machine. Therefore, many owners are wondering how to seal the cuff of the washing machine hatch and whether it is possible to do it themselves. Of course, you can tape the cuff, but most likely it won’t last too long. This repair should be carried out as a temporary measure until the part is completely replaced.
What are the reasons for wear of a part?
The breakdown of elements of a household appliance depends on several factors. Thus, the wear factor on the hatch cuff of a washing machine may depend on the following reasons:
- The machine has been in use for a long time. Each part is designed for a specific period of use. If washing was done regularly and for a long time, the sealant has lost its properties. It can change its density, that is, become too soft or vice versa, which will lead to a loose fit to the surface.
- The material is greatly influenced by detergents. They have a chemical composition, especially substances for removing stains, scale, and bleaches. Also, when washing work clothes, oils can get on the part, which also affects its wear.
- Temperature difference when washing on different modes, using the drying function.
- When loading the drum, the recommended weight must be taken into account. Since overload will lead to deformation of the hatch cuff. Load and unload carefully, try not to frequently touch the cuff.
- After draining the water, water may remain in the parts, which will lead to the formation of fungus. It also affects the deterioration of rubber quality.
- Before putting clothes into the drum, be sure to check all pockets and remove excess items, as they can lead to cuts or punctures. You also need to wash clothes and shoes in special bags that have parts on their surface that can cause damage.
- Rubbing may result from contact with other machine parts. If such a moment arises, it must be urgently eliminated. If rubbing occurs, apply a patch.
- An incorrectly positioned washing machine will vibrate strongly, which will cause the rubber seal to rupture. Before replacing it, the cause of the rupture must be eliminated.
- Poor quality material. Manufacturers try to save on materials and install low-quality parts. Household appliances should be purchased from proven and proven brands.
A little theory
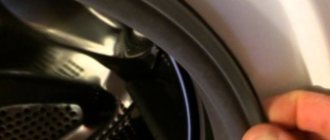
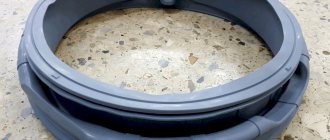
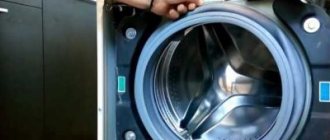
The cuff is a rubber gasket that is installed on the body of the “washing machine” and seals the hatch, preventing liquid from flowing out during washing.
At first, the parts were made of dense and flexible rubber. Now the rubber has been replaced with its closest “relative” - silicone. This has its advantages: silicone is more resistant to high temperatures and does not tan, turning into “wood” after many years of use. And it is easier to withstand severe deformation during repairs and dismantling.
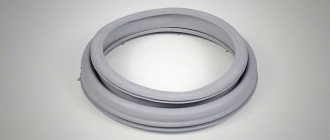
The shape of the waterproof gasket may change depending on the functions of the washing machine: for example, if the machine has drying and aquaspray programs, the “elastic” becomes perforated. It is impossible to talk about all the features of the part within the framework of this article.
How to make a replacement
Often owners of washing appliances try to repair everything themselves. This repair will require patience and knowledge of the sequence of work to be performed.
Step 1: Remove the front clamp
Depending on the modification of the mechanism, changing the cuff cannot be done without removing the front part of the housing.
The cuff is secured to the front of the washing machine with a plastic or iron (wire) clamp and its own meandering shape. The bracket has varying degrees of tension. Clamps made of different materials have different fastenings.
The plastic bracket is removed by pulling towards the part where the latches are connected. To remove the clamp from the wire, unscrew the screw or use a straight screwdriver to pull off the spring.
You can now remove the cuff from the front of the washing machine.
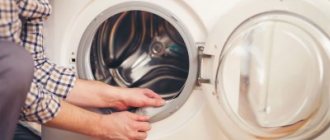
Step 2: remove the front panel
To remove the front panel, you will need to unscrew the screws that hold it in place. If there are plastic latches that hold the control panel, then they are also pressed out and the panel is removed.
Step 3: Pull out the working cuff
Now there is access to the second internal clamp, which holds the seal. Before removing it, we find the installation mark on the rubber band relative to the tank. If there is no mark, it must be marked with a marker. This is necessary, since when installing new material, the displacement will affect the tightness of the fit.
The second clamp is removed using a flat-head screwdriver. If it is not visible from the front, then remove the cover of the device and inspect it from above.
If the two clamps are removed, the rubber cuff is removed from the tank.
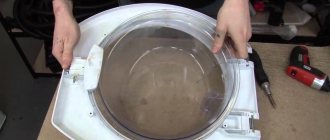
Step 4: inspect the rubber seal
Before installing a new element, it is necessary to inspect it and make sure that they are completely similar. The element must contain the same mark, allowing it to be correctly installed relative to the tank.
Subtleties of cuff repair
It is not always possible to purchase new replacement material. Therefore, they repair the old one, but for this you need to know all the intricacies of repair.
When repairs may be needed
There are rare models of equipment for which it is difficult to find a suitable seal, so it is better to resort to repairing the cuff of the washing machine.
Recovery is also possible if the cuff is torn on the side or top. Then you can seal it instead of buying a new one.
How to select and prepare a cuff
When selecting a new seal, be sure to take into account what brand it belongs to.
If repairs are being made, you first need to find out the cause of the damage. Then select the material to apply the patch.
The patch should be strong and flexible. Rubber gloves may be suitable for this, but it is better to use material for sealing inflatable pools. The glue needs to be waterproof, for rubber products, and after drying, it will give flexibility and not dry out.
Instructions for sealing the seal
If gluing needs to be done in an inaccessible area, then for convenience you need to remove the part from the tank.
In order for the gluing process to give a positive result, you must follow the instructions:
- Preparing the patch. The material is folded into a series of layers that are glued together. Then the required patch size is cut out. It should be about one and a half times larger than the crack.
- Degreasing the gluing area and the material itself. The area should be degreased with maximum overlap around it. Alcohol and solvents are used for work.
- Allow it to dry for a few minutes.
- Apply glue to the gluing area and to the material. Considering the instructions for the glue, wait a while.
- Place the surfaces to be glued together and press down.
- Wait until completely dry. Complete drying occurs within 24 hours.
- Correctly install the part in place.
It is possible to combine gluing with stitching the gap. In this case, the tear is sewn together with artificial thread, and then a special sealant is applied to the seam and left for a day. Afterwards it is possible to install the part in its original place.
Cleaning Rules
To prevent mold from developing in the machine drum and a rotten smell from appearing, you must keep the door ajar. Also, after washing, be sure to rinse the powder tray of any remaining detergent. Wipe it with a dry cloth, and also wipe the connector where this tray is inserted. However, let's return to the drum rubber and tell you how to clean it.
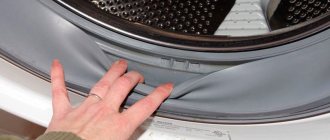
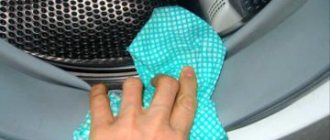
Use a damp cloth to remove mold and other deposits from the outside of the gum. Fold back the edges of the cuff and wipe the inside, where mold usually grows. Soak a sponge in bleach or another chlorine-containing product. Wipe the inside and outside of the gum with a sponge, as well as the surface of the drum.
Particular attention should be paid to the grooves of the cuff, applying more product. Close the drum and leave the machine for half an hour
After disinfection, you need to start the rinse mode to rinse the drum and elastic band from the detergent.. You can effectively clean the cuff from mold with a solution of copper sulfate diluted in a ratio of 30 g per liter of water
It is enough to apply a small amount of solution to the cuff, wait about a day, and then rinse with water and wipe with a dry cloth. You can run the machine in the “Fast 30” mode so that the remaining substance is washed away thoroughly
You can effectively clean the cuff from mold with a solution of copper sulfate diluted in a proportion of 30 g per liter of water. It is enough to apply a small amount of solution to the cuff, wait about a day, and then rinse with water and wipe with a dry cloth. You can run the machine in the “Fast 30” mode so that the remaining substance is thoroughly washed out.
If too much mold and debris has accumulated under the cuff, you will have to remove it completely. This is not difficult to do; the whole process is described in the article on how to replace the cuff on a washing machine. This has its advantage, because this way you can completely and more thoroughly rinse the rubber in a basin in a large amount of water, then dry it and install it back. And if it is damaged, then replace it with a new one.
Complete washing machine cleaning
In addition to weekly and constant care, the washing machine requires complete cleaning. To carry out a complete custom cleaning of the “washing machine” you need:
- clean the drum from scale;
- clean the drum cuff;
- clean the hatch door;
- clean the drain filter;
- Rinse the powder tray.
Since the water in the water supply contains salt impurities, it causes scale to form on the internal parts of the washing machine. Scale settles on the heating element, on the drum, and also on the cuff. To prevent excessive scale formation, you can use water softening agents, one of which is Calgon. However, even in this case, at least twice a year, you need to descale the washing machine. To do this, many housewives use citric acid or a special anti-scale agent.
To effectively clean the machine from accumulated scale, you need to take 100-200 grams of citric acid and pour it directly into the drum, then select the longest program with a water heating temperature of up to 60 degrees. You can set an additional rinse to better wash away any remaining scale. At the end of the program, be sure to wipe the cuff and make sure that there is no plaque underneath.
It is also easy to clean the hatch door of an automatic washing machine from drops of soap solution and other substances. Use any glass cleaner and the door will shine again. As for cleaning the filter, it should be done as often as possible. After all, the filter can become clogged and lead to malfunctions of the washing machine.
To clean the drain filter, you must first unscrew it from the washing machine. But before that, turn off the machine from the network and close the water supply tap. Then, at the bottom of the case, open the panel or door and find the filter cover. Unscrew it counterclockwise and take out the filter. Do not forget to put a cloth, as residual waste water will flow out of the filter. Rinse the filter to remove debris and dirt under running water and reinstall.
Thus, when planning to clean the rubber band of an automatic washing machine, you will need both a drum and a tray for detergents. Such care will extend the life of the parts and the washing machine as a whole.
Why is this happening
The cause of a cuff tear should be understood at the very beginning. It will become clear whether it makes sense to carry out such home renovations, as well as how to avoid a similar situation in the future. There may be several reasons that caused the gap.
- Cracks that occur as a result of strong vibration of the machine drum. Repairs can be made, but the issue with vibration must be resolved, and this is much more difficult.
- Sometimes rubbing of the cuff occurs if something in the mechanism is broken and the cuff rubs against some part. Drum displacement can lead to such a breakdown. Before carrying out repairs, the cause of the damage must be eliminated.
- A tear or cut that can be caused by small items forgotten in pockets.
- “Incurable” damage, the repair of which does not make sense.
The latter can arise for a number of reasons, for example, poor quality of the cuff initially or cracks from old age that will appear again and again. Such damage cannot be repaired, and there is no point.
Purpose of the seal
Why do you need a rubber seal? In almost all models of popular manufacturers, for example, Indesit, Samsung and LG, it plays the role of a sealant between the drum of the washing machine and its body. If the rubber band breaks, water may enter the electrical part of the device. As a result, the machine will fail.
Another rubber seal is located on the door. It serves to tightly close the washing machine after laundry has been loaded into it. If such a rubber band breaks, water will flow out of the drum, and this can lead to a short circuit.
Preliminary inspection and preparation
If you decide to repair the cuff yourself (for example, there is no money to buy a new one or there is no suitable option in the store, but you need to wash it), then you should carry out a list of preparatory measures that will help avoid unpleasant surprises later.
The first step is to thoroughly inspect the cuff and determine the feasibility of gluing it, as well as the extent and cause of the damage. To do this, you need to remove the spring clamp that holds the cuff itself. In some washing machine models, you will need to remove the entire front cover, and sometimes even remove the drum.
An analysis is then performed to determine whether the cuff needs to be removed. If the damage is accessible and located on top, then you can seal the cuff without removing it. In some models, in order to remove the cuff, you will also need to dismantle the drum, so you need to soberly assess your strength regarding reassembly. It may be better to contact a specialist or a more experienced person.
Finally, the patch and glue are selected. If you don’t have thin rubber on hand, you can use a condom or a medical glove, which should be folded several times. The glue must have good adhesion and elasticity.
Many people are satisfied with the results of using instant rubber and shoe adhesives.
Checking your work
If the cuff is installed and secured with two clamps, all that remains is to check the tightness of the equipment. To do this, select the rinse mode and start the machine. After a few minutes, add water. Next, we tilt the car and examine the bottom, floor and the cuff itself for leaks. If everything was done correctly and the cuff was working, then no traces of water will be found.
You can repair your washing machine yourself. However, if the device is under warranty, it would be better to send it for free warranty service and not replace the washing machine cuff yourself.
Repair process
In order to quickly and efficiently carry out the process of sealing the hatch cuff, you should prepare everything that may be required at such a moment:
- a small piece of thin rubber;
- scissors;
- gasoline or alcohol to carry out degreasing;
- glue for rubber, for example, “Moment”;
- cotton wool or soft cloth.
In order for the repair to be as long-term as possible, and for the patch on the cuff to hold tightly, you need to adhere to the following algorithm.
- At the first stage, the patch itself is prepared. If it is rubber, then it should be carefully cut to the size of the damage. If a condom or rubber gloves are used as a patch, you should glue each layer and then cut out the part to the required size. The patch should be 1.5-2 cm larger than the hole on each side.
- The damaged area should be thoroughly degreased with gasoline or alcohol. The sealed cuff should be kept straightened until completely dry.
- Then a thin layer of glue is applied to the surfaces to be glued. Subsequent steps must be carried out in accordance with the instructions that come with the glue. There may be two options. Sometimes you need to connect the parts right away, and sometimes you need to wait a while and then glue them together.
- The glued surface should be positioned as naturally as possible, and then fixed until the glue dries.
- The part is left for at least a day so that it sticks well.
Well, that's all, the hatch cuff has been repaired. But you shouldn’t hope that there won’t be any more trouble with him. This measure is only a temporary solution, therefore, if possible, it is necessary to purchase a new part and replace it as soon as possible. After all, due to the constant movement of the drum, the patch can quickly fly off.
After the glue has completely dried, you can begin assembly. After installing the part, you should perform a test wash to check the effectiveness of the repair. If you follow the instructions for using the glue correctly, there should be no problems and the machine will work without leaks for some time.
A modern housewife cannot imagine life without her main household assistant - a washing machine, so any unexpected breakdown will be immediately eliminated with the help of some repair actions.
Cleaning methods
When solving such a problem as cleaning the drum seal in an automatic washing machine, the methods involved depend on the nuances of the upcoming procedures.
From dirt and stains
For the comprehensive removal of dirt under the rubber band and yellow spots, specialized formulations with chloride substances are relevant.
Sequence of procedure:
- Use a damp cloth to remove dirt and deposits from the surface of the rubber rim;
- carefully bending the edges of the flexible structure, clean the inside of the cuff from debris;
- soak a damp sponge with a specialized product and wash both surfaces of the seal;
- for better effect of the cleaning composition, close the unit door and leave for half an hour;
- Next, run the washer in idle mode to clean the drum.
Cleaning the rubber band in the washing machine from dirt and stains
After completing the cycle, wipe the rubber seal dry and leave the door ajar for ventilation.
From plaque and rust
Rusty stains will grow along the perimeter of the drum seal if measures are not taken in a timely manner:
- Use a damp sponge to remove the top layer of dirt and rust particles;
- Treat the affected areas with acetone-based nail polish remover;
- leave for 40-60 minutes.
Next, turn on the rinse mode at a temperature of 60°C, after which the rubber ring is wiped dry.
From mold and mildew
If you plan to clean the rubber liner from pathogenic microflora, it is advisable to use monarda extract. To do this, 15 ml of liquid is diluted with 200 ml of distilled water. The substance is sprayed onto the surface to be treated; there is no need to wash off the composition.
To eliminate mold in hard-to-reach places on the o-ring, a solution of copper sulfate will help:
- prepare a solution from 50 g of copper sulfate and 2 liters of boiled water at room temperature;
- treat the rim by spraying liquid using a spray bottle;
- After 6-12 hours, start the unit in idle wash mode, then wipe the cuff dry.
When deciding how to clean the rubber band of a washing machine to prevent the development of microorganisms, hydrogen peroxide is often used. Treat the surface with an undiluted solution. The sponge is soaked in peroxide and surface stains are removed. Next, using a swab moistened with a substance, carefully treat the cuff from the outside and inside. The application does not wash off, just wipe dry.
From an unpleasant odor
Lemon works great as a washing machine freshener:
- remove the zest from the citrus into small shavings, place the aromatic mass in a bag or special container and place it in the drum;
- juice is squeezed out of the pulp, the liquid is filtered through a fine sieve;
- soak the sponge with lemon juice, treat the internal surfaces, including the cuff on both sides, the walls of the drum, and the door;
- pour 2 tbsp into the tray. spoons of citrus juice.
Lemon is a remedy for unpleasant odors in the washing machine.
Start the rinse mode at a temperature of 40°C, after the cycle the seal is wiped dry.
How to seal a hole in the rubber band of a washing machine
Quite often there are situations when it is not the brushes in the tank or the heating element that become unusable the cuff of the washing machine hatch , which cannot always be replaced in a short time.
This will not greatly affect the operation of the washing device itself, but it can very easily ruin a comfortable life, since water will constantly flow near the hatch.
That is why many users increasingly began to ask the question “how to fix a cuff leak?” and is it possible to do this yourself, without contacting a service center?
Repair process
For quick and high-quality repairs, you should prepare in advance and lay out all the tools and devices that may be needed at the most crucial moment:
- Thin rubber.
- Scissors.
- Alcohol/gasoline for degreasing.
- Glue "Moment".
- A soft cloth that you no longer need or cotton wool.
In order for the machine to serve you as long as possible without unexpected surprises after such repairs, adhere to the following algorithm of actions .
- First, prepare the patch itself . If it is rubber, then you should carefully trim it to the size of the patch. If you use a condom or medical gloves as a patch, first glue each layer, and then simply cut out the part to the required size. The patch itself should be about 2 cm larger than the hole on all sides.
- In the area with the hole in the cuff of the washing machine hatch, degrease it using gasoline or alcohol . The cuff with the glued patch should be straightened until completely dry.
- Next, apply a thin layer of glue to the surfaces to be glued . Perform the following steps according to the instructions given with the glue. There may be two options. You will either need to connect the parts right away, or wait a while for the glue to “set” and then glue.
- For the glued surface, ensure the most natural position, and then fix it until the glue dries .
- Leave the part to dry for a day . The machine cannot be used during this time.
And that’s it, consider that the home repair of the washing machine cuff is over.
But you shouldn’t be sure that no more problems will arise. After the glue has completely dried, you can start assembling. When the installation of the parts in their places is completed, perform a test wash to check the effectiveness of your own repairs. If you did everything correctly, problems should not arise and your machine will work for some time without any leaks.
What to do if the tank body is deformed?
First of all, you need to analyze the nature of the damage and the scale of the work.
If the tank is plastic
If the tank is plastic, it may have cracks and cause water leakage.
We immediately dismiss the option of soldering the crack, because this is a conditional repair of washing tanks that will not last long.
If the tank is made of stainless steel
If we consider the possibility of repairing a stainless steel tank, then the option of using welding is quite justified. Of course, it is better to trust an experienced welder who will do everything carefully and quickly. After welding, you can paint over the seam with waterproof enamel to increase the service life of the part.
Keep in mind that sealant, no matter what quality, and cold welding will not solve the problem
Deformation repair
If the tank is deformed, repair occurs as follows:
- You will need a hammer with a block of wood. If the damage is minor without holes, no other tools are needed.
- The dent needs to be heated using, for example, a gas burner. The outside of the tank heats up.
- The block is struck with a hammer not to create a dent, but to create a bulge until the metal has cooled.
Drain repair
If there is a malfunction in the drain system, the action plan is as follows:
- Check the drain hole for blockages. It may be necessary to remove water stone; it is convenient to use sandpaper for this.
- The rubber seal and cuff also require careful inspection. It happens that the rubber band becomes oak and cracks, in this case there is only one way out - replacing it with a new one.
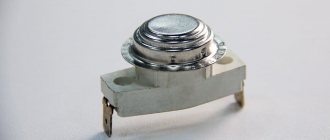
- The drain valve has contacts, it would be good to take a multimeter and check them, after thoroughly cleaning them. If the resistance is equal to one, the part will need to be replaced because it is clearly faulty.
Of course, repairing a washing machine tank with your own hands is not an easy task. Correctly disassembling, repairing and, most importantly, reassembling the unit flawlessly at home is almost a feat!