The washing machine has already been purchased, then the unit must be connected to the water supply and sewerage system. It is easy to carry out such an action by selecting the necessary parts, one of them is the faucet for the washing machine, this is a very important element.
Let's look at ways to select and install a faucet. This part makes it possible to easily regulate the flow of water into the washing machine. We will tell you about the types of devices, advise which choice is best to make and give recommendations for its correct installation.
- Purpose of the crane
- Types and design of locking devices
- How to choose
- Connection
- Additional connection options
- Expert recommendations
- Catalog of washing machines with reviews
Purpose of the inlet hose
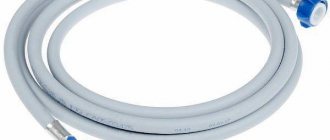
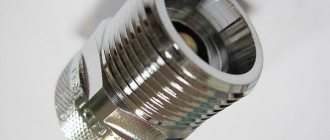
The inlet hose is a device for connecting the washing machine to the water supply system. Through it, water is supplied to the internal elements of the washing machine. Due to work under pressure, cast products are manufactured using a special technology using reinforcement. The usual material for the manufacture of such an element is polyvinyl chloride with a nylon lining. The connecting parts can be made of plastic, aluminum or steel. If the fittings are plastic, you need to tighten and unscrew them by hand, without using wrenches.
Plumbing connection
Steel pipe
What you will need:
- Saddle coupling.
- A drill with a radius equal to half the hole in the coupling.
- Tap.
- Tow.
- Spanners.
What to do:
- Turn off the water supply and drain the remaining residue using the faucet located nearby.
- Select a part of the pipe for inserting the coupling that is freely accessible close to the machine.
- Clean and polish the pipe using a knife or sandpaper
- Try on the coupling by turning it and positioning the tap correctly.
- Install the bolts, tightening with a wrench, and the gasket.
- Place a cloth or container under the pipe to allow water to drain into it.
- Drill a hole in the pipe through the sleeve located inside the coupling.
- Wrap the tap with a piece of tow, wrapping it lengthwise in the direction of twist. Apply sealant.
- Screw the coupling onto the tap.
- Connect the hose from the washing machine to the tap and tighten it by hand.
Pipe tapping
Metal-plastic pipe
What you will need:
- Tee with single internal thread.
- Pipe cutter
- Pipe calibrator.
- Tap.
- Spanners.
- Fum tape.
What to do:
- Turn off the water and drain off the remainder.
- Select a part of the pipe for inserting the coupling that is easy to reach.
- Cut the pipe and spread its ends, bending them carefully.
- Calibrate the two ends of the pipe and remove the chamfers by inserting the device and turning it a small number of times.
- Remove the nuts and rings from the tee.
- Place the nut, and then the ferrule, on both ends of the pipe.
- Screw the pipe into the tee hole all the way and tighten the nuts by hand.
- Hold one nut with a wrench, tighten the second, and then also tighten the first nut.
- Wrap the faucet with fum tape, placing several turns along the entire length in the direction of winding
- Screw it all into the fitting.
Connect the washing machine hose to the tap, twisting it by hand.
Polypropylene pipe
What you will need:
- MPV tee with a thread of the required radius.
- Faucet for washing machine.
- Pipe cutting device.
- Soldering iron.
- Fum tape.
Actions:
- Turn off the water and drain the water.
- Select a part of the pipe that is freely accessible for a soldering iron, close to the washer.
- Cut a piece 3 cm smaller than the tee.
- Wipe the pipes free of water and dry them to prevent defects from appearing during sealing.
- Place a suitable size nozzle on the soldering iron and heat it to the desired temperature.
- Place the soldering iron on the pipe and one end of the tee and wait about 6 seconds.
- Quickly remove the device, connecting the hot elements, and wait approximately 10 seconds.
- Repeat the same steps for the second end of the pipe.
- Wrap the faucet with fum tape, placing the turns on the thread where it will be screwed.
- Combine it with a tee.
Next, connect the washing machine hose to the tap, tightening it.
Useful articles, news and reviews on our Yandex Zen channel
Connecting the water supply hose
Usually, when installing a water supply system, during the renovation of an apartment or house, installation locations for household units whose operation is related to the use of water are provided in advance. These are primarily washing machines and dishwashers. In these places, an experienced installer must install special connection taps. Special hoses for supplying water are subsequently connected to them.
The usual sizes of taps are ½ and ¾ with external thread. Hose nuts also have this dimension. The connection is made with the tap closed.
Before screwing the tube, you need to make sure that there are sealing gaskets. It happens that they come included and require installation. In some cases, they are simply lost during transportation. After making sure that the gaskets are present, you can connect the water hose.
Usually, on the side of the connection to the fitting of the machine, the tube is L-shaped at 90 degrees for easy connection. While holding the tube from twisting, you need to screw the nuts onto the connection tap and onto the fitting. The sequence does not matter in this case. The main thing is that when installing the unit, the pipe does not twist or bend. With the opening of the water tap, the connection can be considered complete.
Selecting a location
It is advisable to decide on a place for the washing machine before purchasing it. An important point is that the dimensions of the washing machine correspond to the free space .
This is especially important when free space is limited or a new machine needs to be built into an existing set.
You should focus on the proximity of sewerage, water supply and electricity. The floor must be level, solid (not sag under the weight of the device), without tilting. In this case, nothing should prevent the machine door from opening freely and the powder receptacle compartment from sliding out.
Based on these requirements, choose for installation:
- bathroom;
- kitchen;
- storage room;
- hallway
In addition to those listed, washing machines can even be installed in places uncharacteristic of their usual location, for example, in a living room. Such options are more typical for hostels and hotels.
The complete set of washing equipment allows you to change its location if necessary.
Bathroom
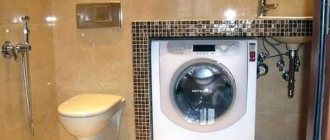
The location of the washing machine in the bathroom is one of the most popular , as it provides good access to communications. If there is little free space, it is better to give preference to narrow models of devices or top-loading machines.
The disadvantage of choosing a bathtub as an installation location is high humidity, which negatively affects the equipment.
Kitchen
Built-in models are most often chosen for placement in the kitchen. At the same time, access to running water and electricity is still important, as well as good ventilation and the availability of free space for the dimensions of the washing machine.
Hallway, storage room
This option is chosen in cases where free space and niches are located in the pantry or hallway. Depending on the interior, the washing machine can even be placed behind decorative panels . The complexity of installation in this case is related to the distance of communications.
Table of the main causes of inlet hose leaks
| Causes of malfunction | Elimination |
| The connection between the hose nut and the unit fitting has become loose and the rubber gasket has worn out. | It is necessary to tighten the nut or replace the gasket with a new one. |
| Damaged water supply hose, external mechanical impact or long service life of the product. | The location of a water leak can be anywhere in the product; most often these are micro cracks that are difficult to immediately detect. It is necessary to remove the product and carefully check it in good lighting. If a leak is detected, do not repair (glue). The best solution is to replace it with a new one. |
Stage #2 - preparation for installation
The purchased machine is delivered to the apartment in packaged form. All rotating parts are fixed with fasteners (bolts, bars, brackets), which protect the device from accidental damage during transportation.
Before starting installation, it is important to remove all fasteners (bolts, brackets, clamps) that protect the machine parts during transportation
The delivered washing machine should be freed from the box, and then begin removing the fixing parts:
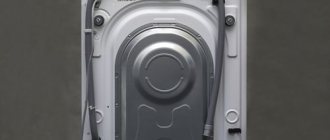
- From the rear wall of the unit you need to remove the brackets , which are installed for the rigidity necessary for transporting household appliances. Such elements also hold flexible parts of the structure, namely the hose and electrical cord.
- Following this, it is necessary to remove the bars placed between the tank and the body of the device. To do this, just tilt the washer slightly forward.
- You should also remove the bolts that are installed on the front of the machine to secure the drum. It is better to immediately insert plastic plugs into the holes from the removed elements (they are usually included with the model).
Released fasteners must be carefully packed and stored: they may be needed when calling for service.
Image gallery
Photo from
Installation points for fastening blots
Loosening the bolts with the supplied wrench
Removing the bolt along with the plastic insert
Collecting shipping bolts for storage
Inlet hose with aquastop
Many manufacturers have turned even such a simple device as a water connection hose into a leak protection system. Devices with aquastop almost completely eliminate leaks as a result of damage to the internal hose.
The design of such elements consists of two shells located one inside the other. When the inner tube breaks, the outer shell retains water. In the part of the hose connected to the tap there is a mechanical valve that shuts off the water. It is powered by a special composition that expands when wet. Most models of products with hitchhiking have devices that signal when the valve is activated. A serious disadvantage of such equipment is the need for replacement after the valve in the protective block is activated. The outer wall is made quite strong and can withstand pressure up to 70 Bar (in a conventional pipeline this value does not exceed 10 Bar).
Technical characteristics of the washing machine
| Specifications | |
| Model | IWSB 5085 |
| Dimensions | width 59.5 cm height 85 cm depth 40 cm |
| Loading | 1 – 5 kg |
| Electrical parameters | see the technical specifications plate on the machine |
| Hydraulic parameters | max pressure 1 MPa (10 bar) min pressure 0.05 MPa (0.5 bar) drum volume 40 l. |
| Spin speed | up to 800 rpm |
| Test programs according to EN 60456 standard | program 2; temperature 60°C; when loading up to 5 kg. |
| The machine complies with the following European Community Directives: - 89/336 /ECC dated 05/03/89 (electromagnetic compatibility) and subsequent modifications - 2002/96/CE - 2006/95/CE (low voltage) | |
Leak-proof hose
Aquastop UDI is a protection system designed specifically to shut off the water supply in the event of water leaks associated with damage to the inlet hose of the washing machine. This type of protection cannot one hundred percent guarantee that water will stop in the event of a leak; be careful.
A modified version is a hose, the valve of the protective block of which is actuated by permanent magnets facing each other with like poles. When water gets in, the magnets rotate and activate a mechanism that shuts off the water. Unfortunately, this device can only be used once.
The third type of flooded products with leakage protection has a protective device with a solenoid valve. If the machine is turned off, the valve (plunger) is closed. When the unit is turned on, voltage is applied to the electrical winding and the valve opens, providing water supply. The electrical control wires in such devices are reliably protected by a waterproof sheath.
Washing machine programs
Program table
| Program | Program description | Max temp. (°C) | Max. speed (rpm) | Detergents | Max. loading (kg) | Continue loop | |||||
| Pre-wash | Wash | Bleach | Rinse aid | Normal | Eco Time | Normal | Eco Time | ||||
| Daily program | |||||||||||
| 1 | COTTON: washable with notes | 90° | 800 | • | • | — | • | 5 | — | 171 | — |
| 2 | COTTON: Heavily soiled laundry. | 90° | 800 | — | • | • | • | 5 | — | 155 | — |
| 2 | COTTON (1): Heavily soiled whites and dyed-dyed colours. | 60° | 800 | — | • | • | • | 5 | — | 153 | — |
| 2 | COTTON (2): Heavily soiled whites and delicate colours. | 40° | 800 | — | • | • | • | 5 | — | 147 | — |
| 3 | COTTON: Heavily soiled whites and dyed-dyed colours. | 60° | 800 | — | • | • | • | 5 | 2,5 | 130 | 104 |
| 4 | COLORED COTTON (3): Lightly soiled whites and delicate colours. | 40° | 800 | — | • | • | • | 5 | 2,5 | 92 | 71 |
| 5 | SYNTHETICS: Heavily soiled, heavily dyed colored laundry. | 60° | 800 | — | • | • | • | 2,5 | 1,5 | 85 | 72 |
| 6 | SYNTHETICS: lightly soiled, permanently dyed colored laundry. | 40° | 800 | — | • | • | • | 2,5 | 1,5 | 71 | 60 |
| Special programs | |||||||||||
| 7 | WOOL: for wool, cashmere, etc. | 40° | 600 | — | • | — | • | 1 | — | 55 | — |
| 8 | SILK/CURTAINS: for silk, viscose and underwear. | 30° | 0 | — | • | — | • | 1 | — | 55 | — |
| 9 | Jeans | 40° | 800 | — | • | — | • | 2,5 | — | 70 | — |
| 10 | Express 15: for quickly refreshing lightly soiled laundry (not wool, silk and hand-washed items). | 30° | 800 | — | • | — | • | 1,5 | — | 15 | — |
| Additional programs | |||||||||||
| 11 | Sport | 30° | 600 | — | • | — | • | 2,5 | — | 78 | — |
| 12 | Sports intensive | 30° | 600 | — | • | — | • | 2,5 | — | 68 | — |
| 13 | Sport shoes | 30° | 600 | — | • | — | • | (max. 2 pairs.) | — | 50 | — |
| Additional programs | |||||||||||
| Rinsing | — | 800 | — | — | • | • | 5 | — | 36 | — | |
| Spin | — | 800 | — | — | — | — | 5 | — | 16 | — | |
| Drain without spin | — | 0 | — | — | — | — | 5 | — | 2 | — | |
For all testing institutes: 1) Control programs according to Directive EN 60456: set program 2 with a temperature of 60°C. 2) Long program for cotton laundry: set program 2 with a temperature of 40°C. 3) Short program for cotton laundry: set program 4 with a temperature of 40°C.
Special programs
Express 15 (program 10): designed for quickly washing lightly soiled laundry, the cycle lasts only 15 minutes, which saves time and energy. This program (10, 30°C) can wash clothes made from different fabrics together (except wool and silk) with a maximum load of 1.5 kg. Sports (program 11): designed for washing very dirty sportswear fabrics (tracksuits, socks, etc.); For best results, we recommend not to exceed the maximum load limit indicated in the “Program Table”. Sports intensive (program 12): designed for washing not very dirty sportswear fabrics (tracksuits, socks, etc.); For best results, we recommend not to exceed the maximum load limit indicated in the “Program Table”. We recommend using liquid detergent in the appropriate quantity for a half load. Sports shoes (program 13): designed for washing sports shoes; To achieve best results, we do not recommend washing more than 2 pairs of shoes at a time.
Partial protection against leaks
To protect against leaks, a special tray with a built-in float can also be used. When water enters the pan located under the washing unit, the float rises and closes the switch contacts. A signal is sent to the control unit, the washing process is interrupted, and the pump begins to pump out water.
Replacing the inlet hose
If the water supply hose has visible damage and is leaking water, there is no need to repair it. These attempts will lead to nothing. You need to buy a new one and replace it. Before purchasing, be sure to check the length of the filler tube and the dimensions of the connection elements. It’s even better to take the old hose with you and the sales consultant will select an analogue. Before replacing, it is necessary to turn off the connection valve to reduce the pressure in the hose. To do this you need to wait for a few minutes. If this is not done, the forces applied to unscrewing can lead to damage to both the tap and the fitting. After dismantling the damaged element, a new one should be installed as described above.
Walk-through taps for washing machines
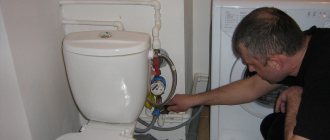
This method of connecting to the water supply system is the most accessible and economical of all possible. The tap is placed on the hose-pipe connection. It is used in the place where water is supplied to the hose for the drain tank, water heater, or in the bathroom.
Walk-through valves come in different directions. You need to choose one so that its lever is not facing the wall, but to the right or left.
When there is already a tap in front of the hose (for example, for draining to a tank), then we install (before or after - it doesn’t matter) a through tee to connect the washing machine. However, if the hose is directed to the water heater, and you also plan to connect an additional washing machine, then the tap must be placed between the pipe and the tap on the water heater. This measure will allow you to wash at any time, and not just when the hot water is turned off.
If the washing machine will be located in the kitchen, and the mixer is of an outdated design (i.e., not on hoses, but on pipes), then rather than buying a mortise clamp, it is better to buy a new mixer. In this case, you will need one pass-through valve.
You will need a gas wrench to unscrew the locknut. If the nut becomes loose with force, you need to tighten it in the opposite direction from time to time. Next, remove the coupling - after the nut it should go easily, but it can be hampered by the flax acting as a seal. Here the principle is the same - we go in the opposite direction, get rid of the flax, then continue to remove the coupling.
The edges of the pipes pulled out from the coupling most often have torn edges due to corrosion processes. We correct the situation with the help of a file, since the hose must fit neatly to the pipe.
You can also install an extension cord. If you do this, you don't have to worry about torn edges. The pass-through tap will act as an extension cord for flexible wiring.
How to extend a water hose
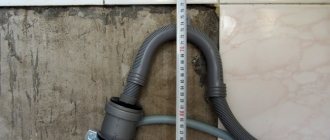
Sometimes situations arise when the washing machine needs to be moved to another location, and the filler tube is not long enough for connection. You can immediately buy a sleeve of the required length, but you can also lengthen an existing one. To do this you need:
- by measuring, determine the length of the missing part;
- purchase a product of the required length (direct female-to-female connection);
- buy an adapter or connector with an external thread (“male-male”) and the required dimension (½ or ¾);
- disconnect the old hose from the connection tap;
- connect the products through special adapters (to seal the connection, you must use fume tape for water connections);
- connect the extended hose to the tap and install the machine in place.
When installing the filler hose, you should always ensure that it is not installed under tension. If the washing machine vibrates or moves, the hose may break. If such a nuisance happens in the absence of control, it may be necessary to repair both yourself and your neighbors.
On a note! If you are going to lengthen the inlet hose, you will most likely have to extend the drain hose as well. To avoid going to a plumbing store twice, it is better to prepare all measurements and a list of necessary parts for connection in advance.
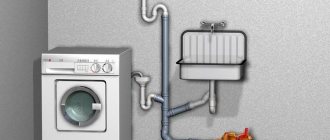
Sewerage
There are also several ways to connect the washing machine drain hose to the sewer system.
On the edge of the bathtub or sink
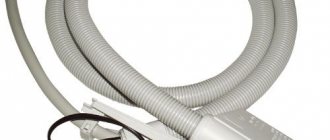
The simplest solution is to hang the hose fixed in the standard fasteners on the edge of the kitchen sink or bathtub. The obvious disadvantage of this solution is that the plumbing fixture cannot be used during washing.
The simplest solution is to attach the drain hose to the edge of the bathtub.
But frequent draining of hot water with detergent dissolved in it guarantees the absence of blockages: in 4 years of living in a service apartment with just such a scheme for draining water from a washing machine, I have never encountered sewage problems.
Tee under siphon
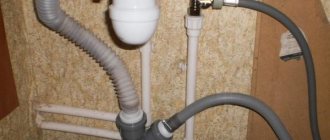
The drain hose can be directed into a tee installed in the sewer socket at the connection with the siphon of any plumbing fixture. Installing a tee in the case of a prefabricated plastic sewer takes no more than a couple of minutes.
A couple of nuances:
- The connection between the hose and the tee must be tight. Otherwise, sewer odors may enter the apartment through the gap between them;
All drain connections to the sewer system must be sealed. Otherwise, the sewer aromas will spoil your appetite.
- Use a skew tee with the side outlet pointing upward. Even if the connection is depressurized, the wastewater will flow into the sewer by gravity.
Connecting the drain hose to the oblique tee between the sink siphon and the comb.
Tee in comb
The most civilized solution is a separate tee for connecting a washing machine, embedded in the sewer comb (indoor sewer system). In this case, you can safely use a straight tee.
I strongly recommend extending its upper outlet with a pipe at least 40-45 cm long: some washing machines do not have a shut-off valve between the tank and the drain hose, and if the hose is lowered too low, water can pour out of the tank by gravity.
The most correct scheme for connecting to the sewer is with a separate insert into the comb and a water seal.
Life time
Filling hoses from well-known manufacturers can serve properly for 5 years or more. During operation, it is necessary to ensure that there is no risk of mechanical damage and contact with aggressive acid- and alkali-containing substances on the surface. In addition, you should not save on the connection tap. The best option is to turn off the tap after using the washing machine until the next wash. This will relieve internal pressure and extend the life of not only the filling product, but also the solenoid valve responsible for shutting off the water.
If the water supply system does not have a connection tap installed, it can be integrated into the system using tees and adapters. If installing plumbing is not your thing, it is better to entrust such work to the experts. An experienced plumber will not only install the faucet, but will also be able to correctly connect both simple hoses and those equipped with leakage protection. The latter option is preferable, especially for residents of the upper floors of multi-story buildings.
Rate this article
( 10 ratings, average 4.3 out of 5 )
Setup and first launch
Proper installation of the washing machine must include leveling it with the floor. To do this, you will need a special tool - a building level. The actual adjustment of the position of the device will be carried out by adjusting the height of the legs.
Procedure:
- place the building level on the top cover of the machine;
- twist the legs of the washing machine to decrease or increase their length;
- it is important to check the stability of the device in the installed position - to do this, you can put your palms on the corners of the machine and try to rock it slightly without using force;
- if the washing machine is not level and sways slightly when pressing on the corners, you need to adjust its position again by rotating the legs;
- If the position is stable, then using a wrench you should fix the position of the legs, otherwise the position of the device may be disturbed during operation as a result of vibration.
The first start of the washing machine is carried out without loading items into the drum; the washing duration must be at least 60 minutes.
At the testing stage, it is important to ensure correct installation and reliability of connections. To ensure the stability of the device, it should be started with maximum spin.
The first start should be without things in order to wash the factory lubricant from the components without fear of staining things.
