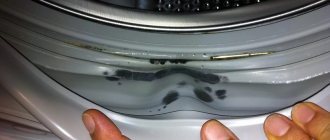
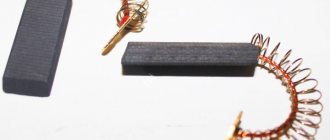
Nowadays, a washing machine is not a luxury, but a necessity. And when it breaks, you don’t want to spend money on repairs, especially if you can fix it yourself. Most often problems arise with the drum. It breaks and becomes clogged with debris. Of course, entrusting the repair to a master is an easier option, but it requires more financial investments, which during a crisis cannot be called superfluous.
Removal process
Therefore, if you want to save money, you don’t need to immediately run to a service center; you can fix your washing machine yourself at home. The main thing is to act carefully and according to the instructions. This information is relevant for such manufacturers as: Indesit, Zanussi, Kandy, Samsung, LG and other popular companies.
Preliminary actions
Surely, every owner has a small drawer with the most important tools: a hammer, drill, pliers, screwdriver, screwdrivers and hexagons. To disassemble Kandy's automatic machine, the listed devices will be sufficient. The only thing, in addition to this, in order to repair the unit, you will have to prepare a hacksaw for metal.
It is better not to order parts that need to be replaced in advance. You can confuse the markings of components and purchase unsuitable parts. It is advisable to first get the elements, and only then buy new ones, similar to the ones removed. Having prepared the tools, you can start working on the automatic machine itself. The repair process will take a lot of time, so it’s better to immediately arrange a comfortable workplace for yourself. Ideally, take the washing machine to a garage or workshop.
If this is not possible, the device should be moved to a spacious room where nothing will interfere with the disassembly procedure. The floors in the room must be covered with fabric. You also need to ensure that free access is provided to all sides of the washing machine. After preparing the workplace, you can begin repairs.
Required Tools
You won’t be able to get to the bearing without special tools, because you first need to disassemble the washing machine. In order not to damage the spare parts, it will not be possible to arm yourself with only one screwdriver. For this purpose you will need a whole list:
- pliers;
- screwdrivers - slotted and Phillips;
- chisel;
- regular hammer;
- waterproof sealant;
- a set of keys;
- rubber mallet (optional).
Changing a bearing yourself is a labor-intensive and responsible process at every stage. In fact, you will have to completely disassemble the washing machine and then reassemble it. It is advisable to photograph each step, and write down the sequence of actions. Only in this case will it be possible to carry out the replacement successfully.
Important! You will need to purchase waterproof bearing grease for your tool kit. If it is unavailable, lithol can be used.
Let's remove the parts that prevent the drum from being removed
When performing repairs, it is important to follow safety precautions. Before starting work, be sure to turn off the power to the washing machine and turn off the water supply tap. Having done this, you can begin further manipulations.
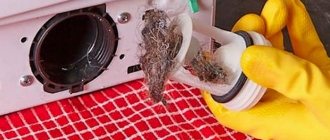
Next, you need to drain the remaining fluid from the system. To do this, prepare a low container, place it under the machine, and unscrew the garbage filter. Water will flow into the basin. The removed filter element must be washed, dried and set aside.
When disconnecting elements, take photographs of the connection diagram of the wiring, sensors and components; this will help in the future to accurately assemble the automatic machine.
To remove the drum of a Candy washing machine:
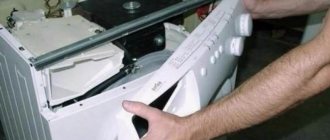
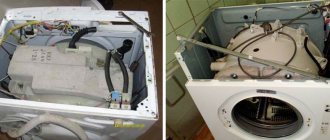
- disconnect the “top” of the housing. Unscrew the bolts holding the panel, then slightly push the cover back and pull it up. Place the element aside;
- Unscrew the screws securing the rear panel of the case. Remove the wall;
- remove the drive belt;
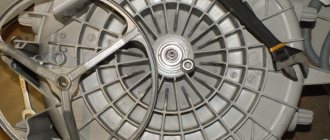
Rusty smudges on the back surface of the tank indicate a breakdown of the bearing assembly.
- Disconnect the wiring from the washing machine tank. Specifically, the contacts of the heating element and thermostat;
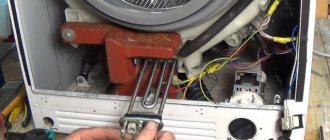
- loosen the central nut of the heating element. Using “rocking” movements, remove the heater from the socket;
- unscrew the bolts securing the engine of the automatic machine;
- remove the counterweight. The block is located on top and is easy to see immediately after removing the cover. Please note that it weighs quite a lot. To disconnect the element, you will need a hexagon. Unscrew the fasteners holding the part and remove the weighting material from the body;
- Disconnect the wiring and hose from the water level sensor. Then carefully remove the pressure switch from the machine;
- get the powder receptacle;
- loosen the hose clamps connected to the detergent cuvette, remove them and remove the dispenser “hopper” from the body;
- Place the washing machine on its right side. If there is no bottom pan, that’s good; if there is a bottom, you will have to remove it by unscrewing the fastening bolts;
- Unscrew the screws located on different sides of the drain filter. Next, push the snail, in which the filter element is located, into the housing;
- disconnect the chip with wires from the drain pump;
- loosen the clamps and unhook all the tubes from the pump;
- remove the drain pump from the automatic machine;
- pull the engine out of the housing. Grab the motor, move it back slightly and pull it down;
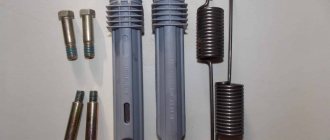
- disconnect the shock-absorbing elements supporting the washing machine tank from below.
This way, all parts that interfere with removing the drum will be removed. Next, all that remains is to take out the tank and start sawing it to gain access to the “centrifuge”. We'll tell you what actions to take at the next stage of work.
Step-by-step replacement of worn bearings
The matter is gradually moving towards completion, and soon it will be possible to get rid of the faulty bearings, but there are still a few preliminary steps ahead.
Stage #1 - preparatory work
Now you need to carefully disconnect the drum from the back of the tank - a responsible operation that requires special attention.
First you need to free yourself from the fasteners holding the pulley. The tank is turned over with the pulley up, and the bolt securing it to the shaft is disconnected. When the pulley is removed from the axle, the unscrewed bolt is returned to its place to avoid damage to the shaft when the drum is knocked out.
The shaft is removed gradually, by carefully tapping with a hammer. Some experts advise inexperienced craftsmen to use a rubber mallet in this case, so as not to inadvertently flare the bearing seat.
If the shaft moves little by little, the work continues patiently. If the result is negative, before increasing the effort, the standard bolt should be replaced with one that you don’t mind throwing away if it becomes deformed.
When the position of the shaft is equal to the head of the bolt, the latter is unscrewed and the drum is removed out.
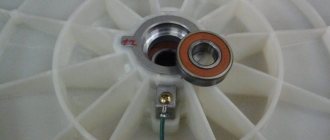
It is necessary to carefully inspect the shaft and bushing for their integrity. To check, you can put a new bearing on the shaft to make sure there is no or no play. If flaws are found, the shaft with the cross will have to be replaced.
Such a drum shaft must be cleaned until it shines and only then returned to its original place. You can additionally treat the surface with anti-corrosion paint
The bushing located on the shaft should also be free of wear and tear defects and mechanical damage.
Pronounced transverse grooves eloquently indicate that the oil seal on such a bushing will not be able to protect the bearing from moisture, and, therefore, repeated repairs are inevitable.
Before removing the bearings, the seal must be removed. The operation is simple: pick it up with a flat screwdriver and remove it. If it doesn’t work right away, you’ll have to soak it with a penetrating lubricant.
It won't be a problem if the seal breaks, it still needs to be replaced.
Stage #2 - removing the damaged part
The tank is placed on wooden blocks, and it’s time to work with a metal rod or a blunt chisel. Place the pin on the worn bearing and hit the part with a hammer.
Subsequent blows are applied in a circle until the part is knocked out. During operation, care must be taken to ensure that the bearing does not become distorted. The outer bearing is removed first.
The tank is a rather fragile part, so many craftsmen, in order to avoid breakage, knock out the bearing by placing the container on their knees or a soft base
The second bearing is also removed using the same method. The blows should be careful and not strong. And yet, this procedure is quite noisy, so the neighbors will be grateful to the home craftsman if he finds the opportunity to do it outside the walls of the house.
The landing sites must be thoroughly cleaned of dirt using an anti-scale agent and a soft cloth, until they shine, to prevent clogging of new parts.
Removing and sawing the tank
Now you need to put the washing machine on its feet. Carefully return the machine to the vertical position. This must be done carefully, as the tank is now held in the housing only by a pair of springs.
Take a close look at your washer. The control module may interfere with removing the drum. If this is the case, you will have to disconnect the board. Unhook the wiring from the block, unscrew the bolts securing it, and, having mastered the latches, pull out the part.
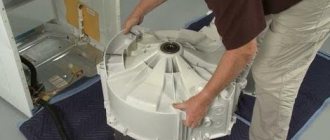
The tank-drum assembly is heavy, so it is better to pull it out with two people. Together with an assistant, remove the mechanism through the top of the housing, removing the reservoir from the shock-absorbing springs.
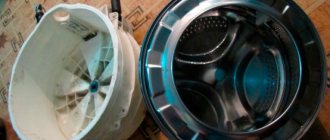
After removing the assembly, it may seem that the work has come to an end. This is wrong. Candy washing machines is non-separable, so to get to the drum, you will have to saw the container. Such a misfortune as a “monolithic” tank greatly complicates equipment repair.
It is very simple to understand why the supplier equips washing machines with a non-separable unit. At a minimum, this allows us to reduce production costs, and therefore the cost of production, as well as the assembly time of units. As a maximum, the manufacturer hopes that if the components “hidden” in the tank break down, the consumer will most likely buy an automatic machine in a store rather than repair the equipment, since the cost of repair is usually equivalent to a new purchase.
However, the masters found a way out of this situation. They discovered a way to split the tank in half and remove the drum from it. The body of the container is carefully sawed with a hacksaw, and after repair work is completed, it is connected back together using silicone waterproof sealant.
To cut a non-separable tank of a Kandy washing machine and carry out repairs, you must:
- carefully inspect the container;
- understand where the factory weld goes;
- using a marker or pencil, mark the line along which the cut will be made;
- make small holes in the tank with a drill with a thin drill bit along the entire length of the cut line, at a distance of 3-5 cm;
- cut the plastic container along the intended line using a hacksaw;
- separate the upper part from the half with the drum;
- remove the drum. To do this, turn over half of the tank, find the wheel connecting the parts and remove it;
- to solve a problem. If the bearing assembly breaks down, remove the worn-out components, replace them, and install a new oil seal. If the process started due to “interference” stuck between the tank and the drum, remove the object and make sure that the plastic walls are not damaged.
When all the planned manipulations are completed, all that remains is to assemble the container. Moisture-resistant silicone sealant is used to connect the tank halves. First, the area of the new seam should be degreased, then apply the product around the entire circumference and connect the parts.
Experts recommend not only “gluing” the tank halves together with sealant, but also strengthening the structure with self-tapping screws.
This is where the main difficulties end; all that remains is to assemble the Candy washing machine. The parts are attached to the housing in the reverse order. Refer to the photographs you took. Securely fix the elements inside, connect the wiring and sensors, and carefully check the connection diagram.
The process of removing the drum is very labor-intensive. This is why the cost of repairs carried out by specialists is so high. By doing the work yourself, without resorting to service, you can save a large amount of money.
Interesting:
- How does a Kandy washing machine work?
- Review of Candy washing machines
- How to remove the drum from an Ardo washing machine?
- Washing machines Candy
- Removing the drum of an Indesit washing machine
- How to disassemble the drum of a Beko washing machine?
Reader comments
- Share your opinion - leave a comment
If the machine is top loading
Top-loading units offer several advantages. First of all, they are easy to use and easy to download. In addition, the drum of such models is fixed in two places. This significantly increases the service life of the device. This technique is analyzed as follows:
- It is necessary to unscrew all hardware located on the front and rear walls.
- The right side panel should be moved back a little and then carefully removed.
- After this, you need to disconnect all the wires and remove the hardware located around the plastic cover.
- The same must be done with the second side.
- After this, you need to unscrew the hardware that holds the shaft.
- That's all. All that remains is to close the tank doors and then remove the tank itself.
It’s worth taking pictures during the process so you don’t get confused when assembling the unit. If the plastic cover is soldered, you need to pull it towards you and then trim it with a drill.
See also:
- 6 best Bosch washing machines according to customer reviews
- 7 best Indesit washing machines according to customer reviews
- 7 best LG washing machines
- 7 best Gorenje washing machines according to customer reviews
- 7 best washing machines under 20,000 rubles according to customer reviews
How to disassemble the washing machine: preparation
To completely disassemble the equipment you need enough free space. Unplug the machine and move it to the center of the room. If possible, you can take the SMA to the garage and start working there.
To repair any vertical “Ariston”, “Whirlpool”, “Ardo”, “Candy” you will need a set of tools:
- Phillips and slotted screwdrivers;
- open-end wrenches;
- set of socket heads;
- pliers;
- WD-40 lubricant.
You will also need a container to collect water and dry rags. To remember the placement of wires and contacts, it is better to arm yourself with a camera. This will allow you to reconnect the wiring correctly.
Tips for use
Do not overload the detergent hopper. This may cause the detergent hose to become clogged with excess powder. Apply exactly the amount of detergent required for a specific wash program.
Don't forget to clean the drain filter. It is located at the bottom of the machine and collects all large fractions that can harm the pump. If this is not done, then sooner or later it will clog to such a state that water will stop draining from the tank.
