Any breakdown of a washing machine can be safely equated to a natural disaster, which can be quite difficult to cope with due to expensive repairs in specialized workshops. However, owners of these household appliances who want to save on calling a technician can, in some cases, try to fix the problem themselves. For example, anyone who carefully reads this article can replace a bearing on an automatic machine.
Causes of breakdowns
The new washing machine operates almost silently and hardly vibrates during washing. However, during operation, the “noise” of this household device increases sharply due to bearing wear, which increases significantly if the owners of the automatic machine:
- the tank is often overloaded;
- wash “heavy” items (shoes, sports equipment, etc.) without a protective net;
- do not monitor the condition of the seal (water may get in);
- do not check clothing pockets and accessories for the presence of sharp objects or edges that could damage the rubber seal.
In addition, such a malfunction quite often appears due to wear and tear of equipment or poor quality water. In the latter case, it is necessary not only to repair the device itself with replacing the tank and bearings, but also to install water purification filters.
Any of the above options can lead to serious damage in the form of failure of the electric motor, as well as other important components and parts of the device. There is only one way to avoid such problems - timely change the damaged bearing on the washing machine yourself or call a specialist to repair these household appliances.
Removing the tank
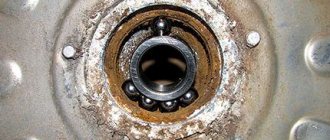
The bearing is pressed into the rear wall of the tank. No one has ever managed to pull it out without removing this unit. Before replacing the bearing in the Indesit washing machine, we need to perform the following steps in the specified sequence:
- remove the back and top panels of the case;
- remove the drive belt from the pulleys;
- We wedge the pulley on the tank with a wooden insert and unscrew it;
- remove the spacer bar and counterweights;
- disconnect the heating element;
- remove the tank clamp;
- Unscrew the bolts securing the bearing bowl to the tank cover.
The last operation can cause serious difficulties due to oxidation of the bolts. After treating parts that cannot be dismantled with WD-40, wait at least half an hour. Then we try again.
By the way, all the above operations will need to be carried out before replacing the bearing in the LG washing machine.
Signs of bearing problems
To begin with, it would be nice to understand the main symptoms of the problems that have arisen. You don't need any special knowledge for this. After all, an automatic machine will independently “tell” the owner about impending troubles:
- The car is humming. This symptom appears when the washing mode is activated, when the electric motor is running (very noisy) and the drum does not rotate.
- Strong vibration. The appearance of strong noise and vibrations of the machine body during washing is a clear indication of future breakdown.
- Spin does not work. If at the end of the process the laundry in the drum remains damp, then it’s time to take emergency measures.
- The drum sways when loading. The car owner can identify this sign even when storing dirty laundry.
The appearance of any of these signs requires an immediate response, as this is a clear indication that the drum bearings have already failed or this can happen at any time.
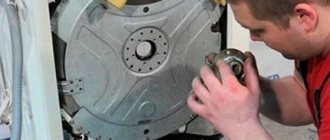
How many and where are the bearings in cars?
The silent operation of the new machine is ensured by two bearings (upper and lower), which are located behind the drum. Replacing these parts is a very labor-intensive process, since during the repair you will have to almost completely disassemble the washing machine.
The cost, time and complexity of replacing bearings directly depends on how quickly owners of household appliances notice signs of a problem and take measures to eliminate it.
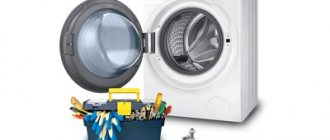
What you need to have on hand
Before replacing a bearing in your washing machine, make sure you have the following tools:
- a puller or a heavy hammer (the first is better);
- flat and Phillips screwdrivers, screwdriver;
- set of open-end wrenches;
- set of hexagons;
- side cutters;
- pliers.
In addition to the tools, it is necessary to find out in advance the brand of the machine being repaired. This is not only the company logo. On the back panel there is the full model name. This will help when purchasing parts for repairs.
They can be purchased on the market or ordered from an online store that specializes in such products.
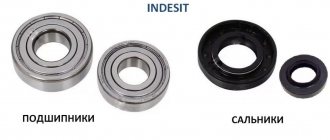
Before replacing the bearing in your washing machine, you must purchase the following in advance:
- a set of bearings (for machines with vertical loading, assembled calipers are purchased) corresponding to the model being repaired;
- oil seals (they are also different for each model);
- grease for oil seals;
- kerosene or a special liquid like WD-40.
After making sure that all of the above is present, disconnect the machine from the power supply, disconnect the inlet and drain hoses from the water supply and drainage systems. Prepare your camera and notepad. They will help you quickly and correctly assemble the machine after repair. This is not irony. You don’t disassemble household appliances every day, and it’s quite logical that you might install something incorrectly. This point, of course, is purely personal for everyone. If you have a phenomenal visual memory, then there is no need to record your actions in shorthand.
Tools required for repairs
It is at least unreasonable to begin work on dismantling and replacing bearings with your own hands without the appropriate set of tools. Therefore, you need to stock up in advance:
- open-end wrenches;
- hammer;
- special puller;
- pliers;
- a non-ferrous metal rod (no thinner than a pencil) or a blunt chisel;
- convenient screwdrivers (phillips and slotted) or a screwdriver with replaceable bits;
- a camera or smartphone to film the sequence of work.
In addition, the master will need consumables in the form of silicone sealant and waterproof lubricant, as well as spare parts - new bearings and oil seal.
Assembling the machine
The last step in replacing bearings on an automatic machine will be to assemble the structure, which is carried out in the reverse order. This is where a recording of the disassembly of a washing unit will come in handy for novice craftsmen and professional repairmen.
Assembly is carried out very carefully, and vulnerable areas, especially in the area where the two halves of the tank are connected, must be treated with silicone sealant.
Before carrying out a test wash, you must wait until the sealant has completely dried.
The nuances of performing work on machines from different manufacturers
Let's look at some of the features of dismantling and replacing damaged bearings on automatic machines of popular brands in Russia.
Hotpoint Ariston
Hotpoint Ariston washing machines often have a non-separable tank. Therefore, when replacing bearings, you will either have to change the drum at the same time, or cut it into two halves. In the latter case, we proceed according to the following scheme:
- disassemble the washing machine and remove the tank from the body;
- We take a drill in our hands and make holes along the entire diameter of the weld near the tank in increments of about 5 centimeters;
- we cut the tank with a hacksaw or jigsaw along the seam line into two halves (distortions are simply unacceptable);
- change bearings;
- generously lubricate the sawn halves of the tank with silicone sealant, and then firmly connect them with bolts through the drilled holes.
Stages of disassembling a washing machine
First of all, the washing machine must be disconnected from the communications that supply it with water and electricity, and provide drainage. To get to the broken bearing, you will have to remove the tank, and to do this, virtually disassemble the entire car.
It would be a good idea to have a camera or cell phone with a similar function to record all stages of disassembly.
When assembling, such forethought can be of invaluable help, because relying 100% on memory is more than risky. As a last resort, the entire process needs to be recorded, especially the order in which the wires are connected.
Step #1 - remove the cover and dashboard
First the cover is removed. To do this, unscrew 2 screws on the back wall and lift it, moving it slightly back.
The next task is to remove the washing powder tray. It will leave the grooves quite freely if you pull it towards you by extending and pressing a special latch.
In models not equipped with such a button, the powder receptacle can be pulled out by slightly pressing it down.
Before removing the upper instrument panel, you need to determine where the bolts securing it are located. Their location and number may vary depending on the model, but in the place where the powder tray was removed, some of the screws are located exactly.
Another one is always placed on the right side of the washing device. If after unscrewing them the panel does not want to be removed, you need to continue searching for the missing fasteners.
In principle, the panel can be left hanging, but it will not be very convenient to work, and besides, the wires can be accidentally damaged
Before disconnecting a whole bunch of wires going to the control board, be sure to photograph them - this will be very helpful when reconnecting.
Next you need to remove the bottom panel: after pressing with a flat screwdriver on the latches holding it, it is easily released.
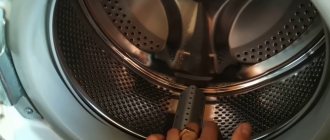
Step #2 - release the hatch, remove the front wall
The next step is to release the cuff, that is, the rubber gasket, one side placed on the tank and the other on the front panel of the washing machine. It is fixed with a spring and a clamp. We discussed the removal process in more detail in this instruction for replacing the cuff.
By running your hand along the perimeter of the cuff, you can find a spring holding the ends of the clamp together. The spring together with the clamp is taken out into the light by prying it off with a flat screwdriver. The cuff is carefully disconnected from the hatch hole and tucked into the tank
It was time to dismantle the front wall. To do this, with the hatch latched, remove the bolts holding the panel and carefully remove it from the hook, remembering the wire connecting the panel and the hatch lock.
As soon as possible, the wire should be disconnected. There are no obstacles left to remove the wall.
Step #3 - remove the heating element, wiring and tank
First of all, the internal top panel is removed, for which the screws securing the water supply valve are found in the back of the device and removed. After this, the bolts on the panel begin to twist.
But you shouldn’t rush to remove it right away - before this action you should disconnect it, not forgetting to take pictures of the wires and pipes with the camera.
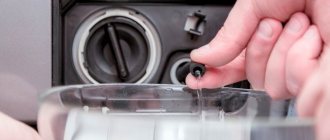
Next comes the dismantling of the drain pipe, connected to the tank using a clamp. The clamp is unscrewed and the pipe is removed. It’s a good idea to have a rag on hand, as remaining water may leak out of the nozzle.
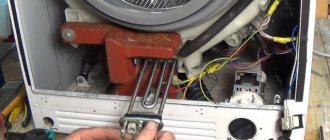
The heating element must also be removed. To do this, disconnect the wires leading to the heater.
In different models, the location of the heating element is possible both in the front and in the rear of the automatic washing machine, so you need to be prepared to dismantle the back wall.
After disconnecting the wires leading to the heating element and unscrewing the nut, the electric heater is pryed up with a screwdriver and carefully removed from the tank
At this stage, the wiring is completely dismantled. It must be borne in mind that sometimes it is attached to different parts of the unit using different types of fasteners. For example, it can be attached to the tank with ties or wire.
Next, the wires from the engine are removed. You can also disconnect the wiring from the pump and put it outside so that it does not create unnecessary interference when it comes time to remove the tank.
To make it easier to remove the tank, you should remove the counterweights - lower and upper. Depending on the model, they can be found both in the front part of the case and in the back.
Using a wrench, remove the bolts that secure the shock absorbers and water level sensor in the desired position.
After removing the belt and disconnecting the engine and shock absorbers, the work of removing the tank from the bowels of the car is nearing completion. The tank was left hanging only on the springs; it weighs little, so it doesn’t require much effort.
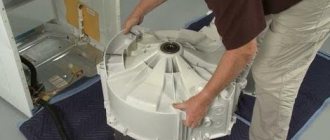
You need to lift the tank with one hand, and with the other unhook it from the retaining springs and remove it from the car. The tank has been removed, the next task is to remove from it everything that will interfere with further work or is accidentally damaged
For convenience during future disassembly, the released tank is usually placed on a durable table with the pulley facing up.
Step #4 - disassemble the dismantled structure
To avoid accidentally damaging the rubber cuff during work, it is preferable to remove it, remembering to mark the correct location with a marker.
The tank is usually made of 2 parts fastened together. Fastenings, depending on the brand of the machine, can be special latches or bolts. These halves need to be separated. There are, however, solid tanks that need to be cut.
In traditional cases, after the front part of the tank is removed, you can see a drum on its rear half, which can now be easily removed.
Often, after opening the tank, debris, dirt and other long-term accumulations are found in it - you need to get rid of them
Step #5 - open the solid tank
In some models, especially the Ariston and Indesit brands, there are not collapsible, but solid polycarbonate tanks.
In such cases, in order to get to the faulty bearings, the container will have to be cut with a regular hacksaw.
To keep the thickness of the cut as small as possible, the saw blade is tapped with a hammer to minimize the setting of the teeth.
In models where the seam along which the cut is made passes through the pressure switch chamber, the situation becomes more complicated. A hacksaw is too cumbersome for such an operation, so you have to make do with one blade
The cut halves are coated with sealant and twisted using self-tapping screws according to pre-applied marks.
Different brands have their own nuances in disassembling the washing machine. On our website we have detailed disassembly instructions using the example of models from popular brands - LG, Electrolux, Samsung, Ariston and Atlant.