Replacing bearings in an automatic machine is a rather labor-intensive process, because in order to replace them, you have to disassemble the plastic tank. But a serious problem that may arise already at the first stage of the procedure is the non-separable design of the latter. Today, owners of modern SMA brands such as Zanussi, Samsung, Ariston, and Siemens are increasingly faced with a similar situation. Therefore, in order to replace the bearing, you have to cut the washing machine tub. How to disassemble a non-separable part and the best way to do it, says the author of the video on the MasterPlus channel.
Why do you have to glue it?
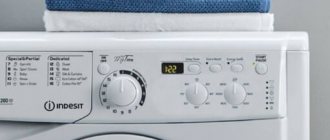
Sealing and gluing the washing machine tank is a forced process that owners of some SMA models have to deal with. Washing machines with a non-removable tank are offered, for example, by brands such as Ariston and Indesit. Manufacturers, making this element monolithic, do not intend to disassemble it. If the bearing breaks, the unit must be completely replaced. But such a replacement costs a lot of money and our people simply cannot agree with this order of things. As it turned out, you can halve the drum, remove the bearing, replace it with a new one, and then connect the halves. It is important to know how and with what to seal the tank.
Features of replacing drums in washing machines
The main difference between automatic washing machines with vertical and horizontal loading is the method of attaching the drum, which is attached on one side for the “front” machine, and on both sides for the “vertical” machine. It is this circumstance that must be taken into account when disassembling a specific model.
In conclusion, I would like to note that repairs that involve replacing the tank, removing the drum, bearings, oil seal and cross take a lot of time. Therefore, be patient and be sure to film the process of disassembling the unit on your mobile phone camera, so as not to make a mistake or forget anything while assembling an expensive device.
Requirements for glued joints
When new bearings are installed, the question arises - how to repair a plastic tank that has been sawed in half. How to seal the drum to prevent leaks? What to choose - glue or sealant? It is better to use glue, since no sealant can provide the necessary strength characteristics of a glued structure.
Reliable connection of parts requires two operations:
- The halves are connected using bolts and nuts. To do this, holes are made in the plastic - evenly along the entire seam.
- The gap between the parts to be joined is filled with glue or sealant.
Not every composition will work. It is important to know what sealant to glue the halves together with. In this case, the operating features of the unit are taken into account:
- Strong vibrations - the connection must withstand severe mechanical loads.
- Extreme temperature conditions - the unit either heats up or cools down.
- Contact with aquatic environment. Including water supplied under pressure.
If the purchased composition fails you, leaks are possible. Then you will again disassemble the machine and fix the problem.
Preparatory work
Before getting down to work, you should prepare your workplace and stock up on the necessary tools. We need to start with the car. Removing the drum is a large-scale undertaking; the machine must be moved away from the wall, preferably installed in the middle of the room to gain access to all its parts.
Immediately you need to worry about lighting. Even if you have a bright room for work, it would be a good idea to prepare a portable lamp or lantern.
In order not to be distracted by searching for tools during work, everything you need must be prepared in advance. The list can be adjusted depending on the brand and model of the device, but in any case you cannot do without the following:
- screwdriver or universal screwdriver with a set of attachments,
- pliers, preferably several with different jaw widths,
- metal and wooden hammer (mallet),
- a set of keys or sockets with a knob,
- car bearing puller.
If the task is to disassemble a non-separable drum, you will have to prepare something else:
- electric drill and drills,
- metal hacksaw,
- hot melt adhesive.
As a result of prolonged use in a damp room, the bolts are guaranteed to be covered with a thick layer of oxide; to remove them quickly and painlessly, you must also stock up on WD-40 or its equivalent. A blowtorch or gas torch will help you quickly and easily dismantle the bearings. Of course, you should not work with open fire in the house. It would be better to go out into the yard or work in a ventilated workshop.
How to glue a plastic water tank?
Below are adhesives and sealants that are suitable for bonding the drum. These compositions easily withstand the difficulties characteristic of SMA - temperature extremes, vibration attacks, high pressure, contact with water.
Permatex 81730
This is a flowable adhesive-sealant designed for hermetically sealing headlights and glass in a car. The composition is characterized by transparency. Frozen seams do not allow water to pass through and are not afraid of extreme temperatures. The operating range of the composition is from minus 62 to plus 232 °C. Great for the task. Costs on average - 175 rubles.
Kraftool
The composition is highly elastic. Withstands strong vibrations and heating up to plus 250 °C. Its main purpose is to seal connections in electric motors. Reliably fastens the halves of the product even without bolted connections. One tube can glue 4 tanks together. The cost is about 200 rubles.
Glue F
This is polyurethane glue. If you use it, then you won't need bolts. But it is so strong that if you need to disassemble the machine again, you will have to saw it again. The second disadvantage is the price, it costs much more than sealants, a 310 ml can costs almost 700 rubles.
ABRO 11AB-R
An ultra-resistant sealant that can withstand the harshest conditions. He is not afraid of very high temperatures, and is not afraid of chemically aggressive substances, including acids. The cost is approximately 350 rubles.
How to glue the halves?
There is nothing complicated here. The main thing is to properly prepare the parts for gluing. Before sawing, you need to make 30–40 small diameter holes across the seam. They are then precisely aligned when gluing, and the halves fit together flawlessly.
The joint of the halves is smeared with the selected composition, and then the bolts are screwed on. Moreover, they tighten the bolted connections without waiting for the glue/sealant to dry. The seam will dry completely in about two hours.
The cuff is leaking
Very often, users of washing machines forget to take small things out of their pockets; it even happens that they come across sharp objects that, when washed, can damage the cuff of the washing machine, which, in turn, causes leakage through it.
In such cases, there are two options to solve the problem:
Cuff Repair If the damage to the cuff is minor, you can simply seal it with waterproof glue and a patch. The patch can be made from rubber or you can buy a patch for boats at a fishing or travel store. After you have sealed the hole, it is best to turn the cuff over so that the patch is on top - this way there will be less stress on it and, accordingly, it will last longer.
Replacing the cuff Of course, if the cuff is damaged, it is best to completely replace it. To do this, you need to remove the old cuff and put a new one in its place. You can see how to do this in the video below.
How to get it?
Disassembling and cutting the tank may be necessary when:
- bearing faults and seal wear;
- bearing wear, which leads to shaft deformation.
To cut a product, it must first be removed. Disassembly of SM from Indesit:
- Disconnection from the mains.
- Dismantling the panels - top and rear, by unscrewing the bolts.
- Removing the drive belt from the pulley.
- Disconnecting the wiring connected to the heating element.
- Loosening the clamp holding the drain pipe. Eating the last one.
- Unscrewing the shock absorber nuts.
- At the top of the SM, unscrew the suspension fasteners.
- Removing the powder container - unscrew the screw.
- Removing the panel and removing the detergent tray.
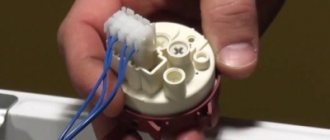
- Removing the cuff and pressure switch.
- Removing the product from the hangers and removing it.
Causes of failure
It would seem that something could break in the tank, since clothes are washed in a drum. However, moving elements often fail or walls become deformed.
Causes:
- Bearings and seals are faulty.
- Due to bearing wear, the shaft becomes deformed.
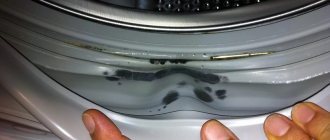
- Wall deformation also occurs due to bearing wear. Sometimes their tightness is broken, since the drum comes into strong contact with the walls, causing friction. In this case, you will have to think about how to repair the hole in the washing machine tank.
There are two types of tank designs that are used in modern cars: collapsible and non-dismountable.
In the first case, the two halves are fastened with bolts, which just need to be unscrewed for disassembly.
In the second case, the parts are soldered using ultrasound, which combines them into one solid structure. To disassemble, you will have to cut the washing machine tank into two parts and then glue them together.
Before we figure out how to saw and halve the tank of a washing machine, let’s consider the sequence of removing it from the body of the washing machine.
How to cut?
- The element intended for cutting is placed on the floor. The surface must be flat.
- Place marks under the screws.
- Drill holes in the plastic - 3 mm in diameter. Only 15–20 pieces.
- Place the product on its side. Using a metal file, they start cutting from the top.
- The maximum depth is 5 cm. A large cutting depth can damage the drum.
- As sawing proceeds, the seam is sprayed from time to time to make sawing easier and prevent the plastic from heating up.
- Having cut the product into two halves, pull out the drum. For this purpose, unscrew the fastening bolt and disassemble the shaft - the drum is attached to it. Remove the pulley and remove the drum. Now you can change the bearings and seals. After replacing the parts, gluing begins.
Prevention and cleaning
Prevention of breakdowns:
- Don't overload the equipment. Do not put more laundry inside the drum than recommended by the manufacturer.
- Use high-quality automatic laundry detergents for washing.
- Promptly remove scale and other deposits that have formed inside. For this, household chemicals designed for this type of equipment can be used.
- Check the horizontal level from time to time. The washing machine must be level to avoid distortion of internal parts.
- Remove trash, coins, etc. from pockets before washing.
- Clothes decorated with loosely fastened metal accessories are best washed by hand.