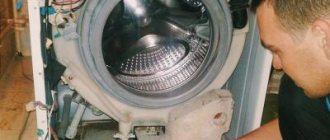
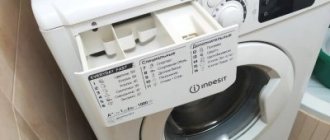
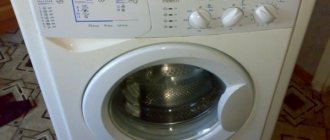
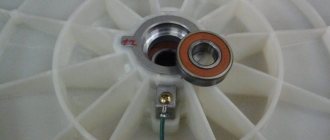
Not a single automatic washing machine is insured against various malfunctions. And Indesit machines are sometimes characterized by breakdowns that require almost complete disassembly. For example, replacing bearings. Of course, the disassembly process is quite labor-intensive, but quite accessible for doing it yourself.
Often there is simply no point in paying money to the service (and a lot of it). Therefore, we will consider the process of disassembling an Indesit automatic washing machine with our own hands. Everything point by point.
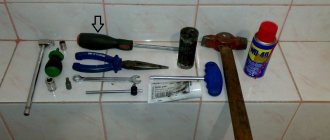
List of required tools
- First, prepare the necessary tools. Everyone has most of them in their home; if one of them is missing, they turn to neighbors for help or go to the store.
- Then a well-lit, spacious place is prepared, the floor is covered with rags or paper so as not to lose small parts and bolts.
For disassembly you will need:
- a screwdriver with a set of bits or a set of Phillips screwdrivers;
- wrench;
- flat screwdriver;
- hexagonal wrench 8 mm;
- multimeter;
- pliers, pliers;
- hammer;
- colored markers;
- transparent sealant;
- CV joint lubricants, VD-40;
- clean rags.
When cutting a tank, a fine-toothed hacksaw, a drill with a long drill bit, bolts or self-tapping screws, and a sealant gun will be useful. It is advisable to stock up on tools in advance.
Removing panels for top-loading appliances
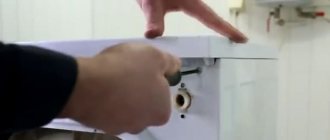
This device is even easier to disassemble than a front-loading machine. To remove the top cover, use a screwdriver: pry the part on both sides and pull it up. After this, tilt the plastic part towards you and remove it.
Often, in addition to dismantling the top panel, you need to remove the rest. Let's look at how to remove the front and side panels for this type of loading. Basic actions:
- unscrew the screws, keeping the removed washers for grounding the case;
- bend the wall at the bottom, moving it vertically towards the floor;
- remove the side panel;
- Having done similar actions, remove the second side;
- To dismantle the front panel, unscrew the screws to which access is freed.
To reassemble the machine, take the disassembled elements and repeat the steps in reverse order.
You can disassemble equipment with front or vertical loading with your own hands, the main thing is to use the recommendations and do the preparatory work slowly. You can also watch the video if you have any doubts or questions about how and with what tools to remove the top plastic cover of the washing machine. The correct operation of the equipment and washing without failures depend on coordinated actions. If after the video you still cannot dismantle, use the services of a professional technician.
Replacing an element
Once the drum is removed, you can begin installing the new part.
Algorithm of actions:
- Using a metal rod, gently tapping, we knock out the bearings from the outside and inside of the tank.
- We clean the shaft and seat from debris and dirt.
- Lubricate the seat and insert new bearings. To do this, they are carefully tapped along the outer edge through an insulating washer made of getinax (preserves parts from damage). We drive the bearing all the way (until the characteristic dull sound of the bearing hitting the side of the tank).
- Just like on the outside, we install bearings on the inside of the tank. Additionally, a new oil seal (pre-lubricated with silicone) is inserted on the inside above the bearing.
- We insert the new drum into the tank. The rod should fit into the bearing.
- We put the pulley ring on and secure it with a screw.
After installing the new drum, the two halves of the tank are connected (the edges are pre-lubricated with sealant) and tightened with fixing bolts and nuts.
How to dismantle the front one?
After the washer cover has been removed, you can begin disassembling the front panel.
The work is carried out in several stages. First, remove the lower part of the front cover. To do this, open the hatch hiding the garbage filter and unscrew the screws located in the corners of the niche. Then, using a flat screwdriver, carefully pick up the latches on the right and left sides of the decorative strip and pull it towards you.
To remove the upper part of the front panel of the LG washing machine, you need to carry out a number of sequential actions:
- Remove the detergent dispenser (press the special lock inside the tray and pull the powder receptacle towards you).
- Remove the control panel. To do this, unscrew two self-tapping screws (one is located in the opened niche of the powder receptacle, the second is in the right corner of the control panel). Once all the fasteners are unscrewed, the control panel is carefully set aside (in some washing machine models, the manufacturer provides a special hook). Do not touch the wiring on the control panel!
- Remove the rubber cuff clamp (the element securing the rubber cuff of the hatch on the front cover). In order to quickly remove the clamp without damaging the rubber seal, you need to feel for the small spring on the steel ring of the clamp and pry it off with a flat screwdriver.
- Unscrew the UBL fastener, disconnect the wiring and remove the lock from the washing machine body.
The final step is to unscrew two screws on top and four at the bottom of the front panel, and then remove the cover from the washing machine body.
Cuff
The hatch cuff is vulnerable to debris and plaque. As a rule, washing particles, lint and dirt settle in the lower part of the seal between the folds. To remove accumulated debris, you need to open the drum, pull back the rubber band and thoroughly clean all hard-to-reach places. For these purposes, use a dish sponge or soft cloth.
After the initial surface cleansing, we move on to the second stage: treatment with a cleaning agent. Apply white, vinegar or lemon solution to the sponge, and then go over the entire cuff. Then the door is closed for 30-40 minutes, during which the drug will complete the process: dissolve deposits and disinfect the gum from fungus. After half an hour, the drum is washed with clean water and wiped dry.
When cleaning the cuff, it is important to choose the right cleaning product. The use of caustic and overly aggressive acids is prohibited: these compounds damage rubber
How to save the situation
If you need to remove something from the drum or you have set the wrong mode by mistake, you need to know how to cancel a program on your washing machine. Follow the general recommendations.
First option. In many SM models, the “Start” key also performs the “Pause” function. Press the button once to stop operation. After waiting a bit for the door lock to unlock, you can add laundry or pull out a forgotten item.
Second option. A complete reset of the washing machine program is also performed by pressing the “Start” or “Pause” key. In this case, you need to hold the button for 5 seconds. This way you can reset the error on your Bosch washing machine. Depending on the settings of the washer, you will get the following result:
- The water drained and the door unlocked.
- The water did not drain, but the lock still unlocked.
Sudden power outage
It happens that the power goes out while the washing machine is running. Or the users themselves solved the problem of how to clear the errors and stop the machine by disconnecting from the network. This approach is unacceptable, as is turning off the voltage supply in principle. Modern models are equipped with a memory that allows you to resume settings after power is supplied. But earlier washing machines do not have such a function - if you do not want to get problems with the electronic module, use other ways to stop SMA.
Individual approach
There are certain car models in which the manufacturer has provided special methods for emergency stopping. Let's look at how to reset the program on an Indesit washing machine. Depending on the selected model, the pause or program stop button may be indicated by a diamond. Hence, hold the key for a few seconds.
Another option is to turn the mode selection switch to its original position. If there is still water in the drum, turn on the spin or drain mode.
How to reset program settings on a LG, Samsung, Ariston washing machine? Earlier models were equipped with a mode selection toggle switch, and they did not have the “Start” and “Stop” buttons. To start resetting the washing machine program, return the toggle switch to its original position.
Then follow these steps:
- Hold the On/Off key for five seconds.
- After 30 seconds, start the washing machine again using the desired program.
The recommendations mainly apply to washing machines of earlier years of production. In modern SM models, when you press the “Program Reset” button, the water drains automatically.
SMA is frozen
How to reset the program when the system is frozen and the keys do not respond to pressing? A reboot will help. To do this, unplug the machine for 15-20 minutes. Now connect and try running the program again.
Now you know how to restart the machine. If you need to return the washing machine to factory settings, you may need the help of a technician because there will be work to be done on electronics. But such situations arise infrequently, so first try restarting the washing machine to cope with the critical situation yourself.
Source
How to disassemble the unit yourself: step-by-step instructions
To properly disassemble a Samsung washing machine, we recommend following the following sequence of actions. You need to start the process by removing the top cover, for which you need to take a screwdriver and unscrew the two screws located at the back of the machine. Then carefully slide the cover forward a little and remove it from the body. If you need to inspect the motor pulley and belt drive, simply pull the counterweight towards you.
The washing machine begins to be disassembled from the top cover
The next step is to remove the detergent tray. Open the container, press the locking tab and pull the compartment towards you as you would when removing it for cleaning. It is a little more difficult to remove the cuff - the rubber drum seal. Helping yourself with a screwdriver, carefully disconnect the fixing ring and remove it from the cuff. Perform the procedure slowly so as not to accidentally damage the rubber. Next, wrap the rubber part inside the drum.
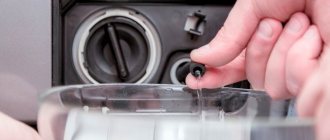
Removing the bottom panel, under which there is a drain hose and filter, is easy. In Samsung machines, the part is fixed with latches, so you just need to disconnect it from the body. As a result, the drain pump becomes accessible. To get it, you will need to remove the clamps using pliers and unscrew several screws with a curly screwdriver.
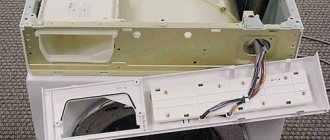
Next, go to the dashboard, under which the electronic control unit is located. To remove the part, you need to unscrew the screws located in the niche of the detergent dispenser and on the opposite side of the panel. Then unfasten the latches and separate the control unit from the machine body. The part can be left hanging on the wires or placed on the top of the unit, but it is better to disconnect it from the wires and put it aside.
The control panel can be left hanging during disassembly
After the above manipulations, begin dismantling the facade surface. How to remove the front panel of a Samsung washing machine? To do this, simply unscrew the fasteners and lightly separate the panel from the body.
To remove the back panel, unscrew the 4 bolts from the back and move the part to the side. Now you need to disconnect all the hoses that are attached to the unit’s tank: filler and drain, as well as the tubes leading to the pressure switch and the detergent compartment. Use a screwdriver to first remove the clamps.
Next you should deal with the tubular electric heater (TEH): dismantle it or simply disconnect it from the wires. Typically the heating element is located at the bottom of the tank under the drum. If you need to replace the heating element, unscrew the nuts and completely remove it from the socket. At this point, also disconnect the wires from the motor. There are quite a lot of contacts, so you need to photograph or write down the sequence of connections so as not to confuse anything during assembly.
To dismantle the heating element completely, you need to unscrew the fasteners in the middle and carefully pull the heater towards you
You also need to remove the counterweights that are located on top and bottom of the tank. Unscrew the bolts with a suitable size wrench and set the weights aside.
Now move on to a more complex process - removing the tank. It is better to do this work not alone, but with an assistant. First, unscrew the bolts that secure the shock absorbers to the tank and disconnect them. Together with an assistant, slowly and carefully remove the part from the springs and remove it out. Next you need to separate the engine from the tank. First, disconnect the drive belt, then unscrew the bolts holding the motor and remove it. Finally, remove the pulley.
This is what a disassembled washing machine tank looks like
To replace the bearings in the drum, you need to disassemble the tank. The task becomes more complicated if the part turns out to be non-separable. In this case, you will have to cut it, repair the bearings, seal the joints and glue the parts together or connect them with bolts and nuts.
In washing machines with a collapsible tank, for example, in the Samsung Diamond 6 kg model, replacement is much simpler: the two halves of the tank can be held together with tie bolts or latches that simply need to be disconnected. Then you can remove the drum on which the bearings are located. To remove the bearing assembly, carefully knock out the metal rings using a hammer and chisel.
By removing the parts one by one, you can easily disassemble the washing machine and get to the parts that require repair. You need to reassemble the equipment in the reverse order, without skipping any of the indicated steps.
How to remove main parts
The washing machine consists of many parts, most of which are hidden inside the body.
Here is a schematic representation of the main parts of the washing machine
We begin to disassemble the case from the top panel, which is secured with two bolts located on the back side of the machine; they need to be unscrewed first. Then, standing at the front of the unit, pull the panel towards you and lift it slightly.
Next we move on to the back panel, which is held on by six self-tapping screws. You can unscrew them using a screwdriver. Directly behind the cover you will see the drive belt; it is better to immediately remove it too, carefully turning the pulley wheel clockwise.
The diagram shows in which direction you need to rotate the pulley to remove the belt from it
To dismantle the dashboard, unscrew several screws located in the niche of the detergent tray. Then we disconnect the wires and the pipe, remove the panel from the latches and put it aside.
At the top of the washing machine there are: a counterweight (stone), a pipe connecting the powder compartment to the tank, a water intake valve and its contacts, as well as a pressure switch, its tube and contacts. We remove all these details.
Before removing the front panel, remove the hatch door and rubber seal. We begin dismantling with the cuff - bend it with a screwdriver and carefully remove it. We dismantle the door by unscrewing several bolts that hold the hinge. Then we remove the screws that hold the front panel in place and move it to the side.
Remove the rubber cuff by carefully bending it using a screwdriver
In the lower part of the unit, it is necessary to dismantle the electric motor, tubular electric heater (TEH), lower counterweight, drain pipe and shock absorbers on which the tank is supported.
The heating element is easy to find by the end, which is visible under the tank. Remove all wiring from the heater contacts. Unscrew the nut located in the center between the contacts. Having loosened the element, remove it from the groove. We remove the power supply and ground wire from the engine, and then unscrew the bolts securing it.
The heating element is located under the tank, to remove it you need to disconnect the contacts and unscrew the nut located in the center
To remove the shock absorbers and drain pipe, you need to place the washing machine on its side. Using pliers, remove the clamp and disconnect the drain pipe from the pump. Then unscrew the shock absorbers.
To dismantle the drain pipe, you need to loosen and remove the clamps holding it
After dismantling all the parts, remove the tank. But what if this is not enough? How to disassemble the drum of an Indesit washing machine located inside a non-separable tank?
How to remove the back panel?
LG front-loading washing machines have a service hatch on the rear wall. It is behind it that provides access to such elements of the internal structure of the washing machine as: engine, tank, pulley and drive belt, heating element. In terms of size, the service hatch occupies almost the entire rear panel.
Removing the back cover is easy. It is enough to unscrew all the screws located around the perimeter of the service hatch.
To prevent numerous bolts and screws from getting lost during disassembly of the washing machine, they must be cut off and put into small boxes after unscrewing. Along with the bolts and screws, a piece of paper indicating the panel for which the fastener is intended is placed in the box.
Front panel and control unit
Removing the cover reveals two screws holding the front panel in place. They are unscrewed in the same way using a figured screwdriver; the screw in the upper plan above the opening for the tray is removed.
Next, you need to be careful , because wires are connected to the board and connected with a connector. They go to the control unit, which is located at the back of the car in the lower left corner. To be honest, this is a completely inconvenient place, because if there is a water leak, then it splashes from the pulley in different directions and ends up right on this block.
To remove the control unit, you can stick your hand through the hatch in the rear wall. The engine is unscrewed using a spanner wrench and a 10mm socket. The connector with the wires is easily removed by pressing on the stopper , and the belt is also easily removed from the pulley, since it does not have rivets.
A heating element is located right above the engine. It is inserted into the tank and pressed with a nut 8, the hole is sealed with a special cuff. First , you should carefully remove the chips supplying power to the spiral and the wires going to the temperature sensor.
Additional devices
The design of the washing machine has a funnel for collecting water into the tank and a pressure switch that controls the water level. To dismantle the drum, these components must first be removed.
The pressure switch is secured with a plastic clip and held in a slot on the side wall. A hose with a diameter of 8 mm is attached to it using a self-clamping clamp coming from the tank.
To remove the fill funnel from the washer, you must first unscrew the back cover, which centers the water fill inlet. Thin wires from the control unit that control the water supply valves are also suitable. A corrugated hose comes from the funnel, attached to it with a rubber loop.
Removing the cover
Often the need for dismantling work arises when there is a breakdown inside the housing. If you are faced with a breakdown of your washing machine, you need to figure out the cause of the malfunction - this is where disassembly will be necessary. In many cases, it starts with removing the cover.
If you are interested in which washing machines have the top cover removed, then the first answer to the question will be: SM with front loading. In the article we will consider whether it is possible to do this yourself.
As for brands and models, it happens that under the same brand there are different model lines, in which the covers are removed in different ways, or maybe not removed at all.
Removing the top cover of the washing machine does not require careful preparation, and all you need is a screwdriver - give preference to the Phillips type.
Remember to be safe: Before removing the cover, unplug the power cord by removing the plug from the outlet. Then proceed like this:
- Pull out the machine for convenience and unscrew the mounting bolts (located at the back).
- Move the panel back slightly by pushing it slightly.
- When it comes out of its grooves, you can easily remove it.
- Now nothing prevents you from getting inside the SM housing to carry out the necessary checks and repairs.
Knowing how to open the top lid of a washing machine automatically gives you the idea of how to close it. To replace the panel, you need to place the front part in the grooves and push it forward. At the very end, the fasteners are screwed in.
What if the slats are worn out?
If checking the winding shows that it is working properly, proceed to checking the lamellas. If the lamella is so worn that it can be seen even without testing, then you don’t have to think about repairs - take the engine to scrap. But if the delamination in the lamellas is insignificant - fractions of millimeters - then there is a chance to save the motor. The lamellas are turned using a lathe and returned to their original dimensions. Only a professional turner can do this kind of work. It's inexpensive. After grooving, all that remains is to remove the chips and assemble the electric motor.
In 50% of cases, a faulty commutator motor cannot be repaired on your own - you need the help of a specialist or the repair is generally useless. Therefore, task number one is to correctly diagnose the cause, so as not to waste time and money on unnecessary repairs.
Disassembling the washing machine motor may be necessary in different positions, for example, to replace bearings or repair the manifold. In the case under consideration, there was a current leak from the brush holder to the housing.
Lock device
Note that there are a large number of variations of locks. Manufacturers of washing machines install different locks on their models, which differ in shape, size, and method of fastening. They also differ in their operating principles. There are mainly two types used:
thermal;
electronic.
One of the UBL options
Thermal UBL
At the heart of the thermal lock is an RTS resistor and (or) a bimetallic plate. After closing the hatch and starting the washing program, a voltage of 220 volts is supplied to the resistor. It begins to heat up quickly and simultaneously heats the plate, which bends.
As a result, it blocks the hatch hook using a latch, preventing it from opening during the wash cycle. The bimetallic plate also closes the control contact, as a result of which the selected program begins to be executed.
The diagram and principle of operation of such a lock is shown in the figure below.
Note that markings in the form of letters: N, L and C are often present on the UBL contacts, which makes it easier to check. Instead of an RTS thermistor, a winding made of high-resistance wire can be used. And also two resistors are used in some models, which does not change the principle of operation.
Let us repeat that locks vary in shape, size and fastening, and if you need to purchase them, you need to select them according to the product number of the machine.
Simple thermal lock
This type of lock opens itself after the wash is completed. This is both a plus and a minus. The main disadvantage is that the opening takes place after 2-3 minutes, since the bimetallic plate needs time to cool and take its original shape, thereby releasing the tongue that holds the door. Most washing machines have a light indicator for holding the hatch.
Expert opinion
I work in the household appliance repair industry. Extensive experience in restoring washing machines and dishwashers.
Ask a Question
Important! Neglecting the cooling time leads to breakage of the lock mate, which is located directly in the door. Such UBLs are used in inexpensive models “Indesit”, “Ariston”, “Beko”, “LGi”, “Samsung”, “Ardo”, “Whirlpool”
Such UBLs are used in inexpensive models “Indesit”, “Ariston”, “Beko”, “LGi”, “Samsung”, “Ardo”, “Whirlpool”.
Electronic lock
An electromagnet is added to such a locking device, which is controlled by pulses coming from the module. And also in such UBLs there may also be an RTS resistor. In this case, the thermistor with a bimetallic plate closes the control wire, and the electromagnet moves the latch that blocks the hatch.
The castle is shown schematically in the figure below.
Such devices are installed on models of the mid-price level and above, such as: Electrolux, Zanussi, Kandy, Bosch, Siemens, AEG. There is only one drawback: the verification is difficult.
A hatch with such a UBL can be opened only if the following conditions are met:
- the machine is connected to the electrical network;
- none of the programs are running;
- there is no water in the drum;
- The engine does not rotate.
Note that washing machines with such locks are equipped with emergency opening devices, which are usually located in the area of the drain pump filter cover.
Burnt electronic lock
Disassembling the drum of the Indesit washing machine (video)
To prevent tank repair from being a constant ritual, you need to ensure that unnecessary objects get into the space of the tank and drum. But if damage could not be avoided and repair or replacement is now necessary, you need to contact a specialist. It is a qualified worker who will be able to select the necessary parts for the machine and install them without worrying about the remaining bolts. Until the technician arrives, you need to stop using the washing machine in order to ensure the safety of repairing your own apartment and the apartments of your neighbors.
Attention, TODAY only!
A washing machine, like any other type of equipment, is subject to wear and tear. Of course, we really hope that breakdowns will bypass your equipment, but if this does happen, then diagnostics and repairs are inevitable. And in order to diagnose some failures of the washing machine, it is necessary to remove the top cover of the washing machine. Most often, repairs begin with this procedure, so almost every owner of a washing machine may be faced with a situation where he will need this knowledge. For example, when the handle on the washing machine door breaks and you need to get to the lock through the top of the machine.
Here we will tell you step by step and explain how to remove the top cover of washing machines LG, Electrolux, Zanussi, Candy, Ariston, Indesit, Samsung, Ardo, as well as older Bosh and Siemens models.
Before starting repairs, be sure to turn off the power to the washing machine.
Preparatory work
Before you begin disassembling the Indesit washing machine yourself, you should prepare the necessary tools. Various types of fasteners are used in the design of equipment, requiring different types of accessories for their dismantling:
- self-tapping screws with a 10-head head,
- clamps with screws for flat and figured screwdrivers,
- pliers,
- spanners or open-end wrenches 10,
- wire cutters,
- screwdrivers.
When it may be necessary to disassemble Indesit washing machines
During operation, the Indesid washing machine is constantly exposed to various unfavorable factors, which gradually disable the equipment until it is completely impossible to wash.
As a result of frequent operation and increased vibrating loads, the following components wear out in equipment:
- Bearings and oil seal. As a result of frequent vibration during high-speed rotation of the drum, the bearing on the drum shaft breaks, which causes a leak from under the seal.
- Heating element - when radial beats occur, the metal drum begins to rub against the heating element, which in the process of further operation can result in a short circuit.
- Control board. Due to an oil seal leak, the controller may fail, which usually occurs due to a short circuit in the tachogenerator on the engine. The fact is that the developers have structurally placed the engine right under the drum, and if a leak appears, it will definitely get to the motor, flooding the armature with the tachogenerator.
- Shock absorbers. If the machine has been in operation for several years, the vibration of the drum increases, which is associated with poor depreciation. The design of the Indesid washing machine uses 2 shock absorbers and springs on which the drum is suspended. Due to frequent vibrating loads, they are triggered, which leads to a deterioration in the quality of work, which is expressed by bouncing.
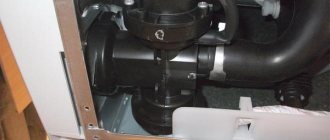
- Pipes. The drainage system of the washing machine has a drain pipe with a shut-off valve. It usually collects debris, which can cause malfunction or leakage.
- Front rubber seal. When closing, the door of the Indesit washing machine rests against a special sealing collar, which closes the opening between the body and the rotating tank. Due to frequent vibration and bouncing of the tank, it gradually becomes deformed, which can lead to tearing. Damage can also be caused by any sharp object that gets into the washing machine along with clothes.
In addition to the above, there are a lot of other problems in Indesit machines that can arise in washing machines for one reason or another. In any case, to eliminate them, you will need to disassemble the equipment, and this can be done according to the instructions presented below using the example of the Indesit wisl 86 or wisl 104 model.
Almost all produced types of washing machines of this brand have a similar device, since their design was copied from the equally famous world brand Siemens with some modifications. However, it is precisely in these modifications that breakdowns most often occur.
Basic information about disassembling equipment
First of all, it’s worth mentioning that disassembling the Indesid washing machine yourself will not take much time. As practice shows, it will take no more than 4 hours to completely dismantle all units. Unless, of course, you resort to disassembling the plastic tank to replace the bearings, oil seal or drum.
But if you still have to remove the tank to replace the bearings, the time may increase by several more hours, because in budget models, which are increasingly being offered on the market, it consists of two welded halves.
From the point of view of service centers, the tank is non-separable and therefore must be completely replaced. But the craftsmen found a way by sawing it along the glued seam with an ordinary hacksaw for metal. We’ll talk about how to disassemble the drum of an Indesit washing machine later in the article, but for now we’ll dismantle the components in sequential order.
Removing the drum
The next step is to remove the drum, but the first step is to remove the rubber seal. It is clamped around a special protrusion with a tight spring, which can be removed using any flat and blunt object.
After manipulating the spring, we proceed to unscrewing the shock absorbers. But the first step is to remove the balancing weights . In the presented limit there are 2 of them: above and below. They are secured to the drum body using 10mm screws.
This is interesting! How to open a washing machine yourself if it is locked
After dismantling them, the car becomes several times lighter, so we turn it on its side to disconnect the shock absorbers . They are attached using brackets and 10mm nuts to the side lower bars. It is necessary to release the springs on top of the tank and remove it through the hole in the casing.
Drum disassembly:
- The first step is to remove the pulley; this will require a medium-sized sprocket.
- Next, you need to knock out the bearing. This can only be done by removing the drum from the tank. To do this you will need to disassemble it. In more expensive models it consists of two halves, screwed together. But in this model they are welded using thermopress equipment. Therefore, it will have to be sawn along the seam. After spending several hours on this, the front part of the tank is removed and the drum shaft is knocked out.
- Then, using inserts commensurate with the size of the bearings, the bearings themselves are knocked out, after carefully squeezing out the oil seal.
Hatch locking device
When starting to check, it is important to understand what type of lock is installed in your model of automatic washing machine (WMA). In older SM releases, manufacturers installed blockers with an electromagnet. However, they were ineffective without electricity
If the electricity was turned off during washing, the hatch automatically unlocked
However, they were ineffective without electricity. If the electricity was turned off during washing, the hatch automatically unlocked.
Another thing is the hatch door lock based on bimetallic plates. They are used everywhere due to their efficient operation.
The structure consists of three main elements:
- thermoelement;
- bimetallic plate;
- fixing device.
How does UBL work? Everything is tied to electronics. The electronic board supplies current to the thermocouple, which heats up quickly. This, in turn, is applied to the plate, which, increasing in size, pushes out the latch. Typically, when you start a cycle, you will hear a click, which means the door is locked and ready to draw water.
The principle of operation of the lock has been disassembled. Now let's talk about its problems: for what reasons does a breakdown occur?
Reasons for the malfunction of the lock in the washing machine
There are two main causes of breakdowns: physical wear and tear and electronic problems.
- Constant deformation of the plates when heated leads to damage and destruction of the element. In such cases, fixation does not work at all.
- Power surges in the network can lead to breakdown of the thermoelement. Then it does not heat up, therefore, the plate remains in place. The short circuit of the control triac results in the door not opening. Current is continuously supplied to the parts, so the latch does not turn off.
What should I do if there is a problem? Check the lock of the washing machine and replace it if it is faulty.
How to check the UBL of a washing machine with a tester?
The first thing that catches your eye when a breakdown occurs is the abnormal operation of the equipment. Here are the signs that indicate problems with UBL:
- The hatch does not open even several hours after the wash is finished.
- A code was displayed on the display of the washing machine, which indicates a problem with the blocker.
- The door will not unlock even after disconnecting the appliance from the power supply.
- During startup, the lock does not work and the hatch does not close.
Most often, either the element itself or its wiring and control module fail. A multimeter will help you accurately determine the cause of the breakdown.
To perform diagnostics, you will need the electrical diagram of the device. It may be different for each model, because manufacturers arrange the contacts differently.
What you need to find out:
- Where is the “neutral” contact located?
- Where is "general" located?
- Where is the “phase” located?
Prepare a multimeter and adjust it to measure resistance. You can get to the lock the same way in all front models:
- Open the door.
- Unscrew the two mounting bolts.
- Bend down the sealing collar.
- Place your hand behind your body.
- Get the UBL.
- Disconnect the wiring.
Now place one tester probe on the neutral contact and the other on the phase contact. Three-digit values are considered normal.
Next, place one probe against the neutral contact, and the other against the common one. The device is considered broken if the values are 1 or 0.
The tester did not find a fault, but the lock does not work? Inspect the lock itself; perhaps the reason is the wear of the bimetallic element. The lock cannot be repaired; it must be replaced immediately. Buy an identical part from the store, connect the wires and install it in its original place. Watch the video for details:
How to perform diagnostics if the sunroof is blocked? There is an easy way to open it:
- Take a thin ribbon.
- Pass it between the door and the SMA body.
- Pull firmly on both ends.
- The latch should give way.
Lastly, the control board is inspected. Its triacs often suffer from oxidation and burns. The reason for this is unstable voltage in the network and high humidity in the room. It is better to entrust module repair to a specialist.
To maintain the functionality of the washing machine electronics, connect the equipment through a voltage stabilizer. Before starting repairs, unplug the plug from the outlet.
Bad7
Interesting18
Super
How to remove main parts
The washing machine consists of many parts, most of which are hidden inside the body.
Here is a schematic representation of the main parts of the washing machine
We begin to disassemble the case from the top panel, which is secured with two bolts located on the back side of the machine; they need to be unscrewed first. Then, standing at the front of the unit, pull the panel towards you and lift it slightly.
Next we move on to the back panel, which is held on by six self-tapping screws. You can unscrew them using a screwdriver. Directly behind the cover you will see the drive belt; it is better to immediately remove it too, carefully turning the pulley wheel clockwise.
The diagram shows in which direction you need to rotate the pulley to remove the belt from it
To dismantle the dashboard, unscrew several screws located in the niche of the detergent tray. Then we disconnect the wires and the pipe, remove the panel from the latches and put it aside.
At the top of the washing machine there are: a counterweight (stone), a pipe connecting the powder compartment to the tank, a water intake valve and its contacts, as well as a pressure switch, its tube and contacts. We remove all these details.
Before removing the front panel, remove the hatch door and rubber seal. We begin dismantling with the cuff - bend it with a screwdriver and carefully remove it. We dismantle the door by unscrewing several bolts that hold the hinge. Then we remove the screws that hold the front panel in place and move it to the side.
Remove the rubber cuff by carefully bending it using a screwdriver
In the lower part of the unit, it is necessary to dismantle the electric motor, tubular electric heater (TEH), lower counterweight, drain pipe and shock absorbers on which the tank is supported.
The heating element is easy to find by the end, which is visible under the tank. Remove all wiring from the heater contacts. Unscrew the nut located in the center between the contacts. Having loosened the element, remove it from the groove. We remove the power supply and ground wire from the engine, and then unscrew the bolts securing it.
The heating element is located under the tank, to remove it you need to disconnect the contacts and unscrew the nut located in the center
To remove the shock absorbers and drain pipe, you need to place the washing machine on its side. Using pliers, remove the clamp and disconnect the drain pipe from the pump. Then unscrew the shock absorbers.
To dismantle the drain pipe, you need to loosen and remove the clamps holding it
After dismantling all the parts, remove the tank. But what if this is not enough? How to disassemble the drum of an Indesit washing machine located inside a non-separable tank?
We list possible malfunctions
You can’t wash things dry in a machine, so you can’t put off solving the problem with filling - it’s better to immediately start looking for a possible cause. Fortunately, an empty drum does not always indicate a breakdown; sometimes it is due to a missing central water supply or a blocked water supply.
There is a third “non-repairable” reason - a door that is not tightly locked. Before washing, the control board must ensure that the drum is sealed. If the hatch is not slammed shut, the electronic lock does not work, which means the system rejects the start of the cycle.
Quite often, quite noticeable breakdowns and malfunctions lead to problems with water supply. The difficulty of diagnostics is that their list is long: from the inlet valve to hoses and the control module. So, users often encounter eight problems.
- Damaged intake valve. This device controls the water supply to the machine. If it fails, the membrane stops responding to the signal supplied by the board - the “entrance” to the machine will remain locked. Confirming a valve sensor malfunction is simple: just connect to the power supply and apply voltage to it. A working system will close and make a characteristic click, while a broken one will remain silent.
- Clogged filter mesh. The Zanussi inlet hose has a special filter attachment, on which a noticeable part of the dirt and impurities found in tap water settles. Naturally, over time, the part becomes too clogged and does not allow the water flow to pass into the machine under the necessary pressure. In this case, the machine hums when trying to fill the drum, but to no avail.
- Overfilled inlet filter. Like the mesh, the coarse filter, which was installed even earlier - right in the water pipe - also suffers from dirty water. This is where the main “dirty” impact comes in, and without regular cleaning, a blockage is possible, followed by stopping the intake into the machine.
- Broken pressure switch. This is a water level sensor, which controls the degree of filling of the drum. If the device fails, the electronic unit, not receiving information about the fill, shuts down the system for safety reasons and to prevent leakage. To test the pressure switch, you need to remove the top cover of the case, find the device, unscrew the bolts holding it, remove it and blow into the tube. There should be a few clicks in response to the air flow. Their absence will prove the fact of breakdown or blockage.
- Problems with the pressure switch hose. Sometimes it is not the sensor itself that fails, but the pipe connected to it. It becomes damaged, leaks and prevents the device from monitoring the water level in the drum.
- Problems with the inlet hose. If the sleeve is crushed by the body or broken, then the water will not be able to reach the machine.
- Non-functional pump. Before collecting a portion of clean water, the machine always drains some of the old water remaining in the tank after the previous wash. If the pump cannot pump out liquid, then the board does not give the command to fill.
- "Hung" control board. It is the electronic module that is responsible for issuing commands and collecting information from the main components of the washing machine. If there is a problem in a block with triacs, microcircuits or tracks, the system cannot cope with the task and stops Zanussi.
Modern Zanussi machines make it easier for the user to find the cause by displaying an error code on the display after automatic self-diagnosis of the system. In this case, you just need to remember the combination that is displayed and decipher it according to the instructions. The rest will have to look for the breakdown manually, checking all the problems leading to an empty drum.
We cope with the task correctly: detailed instructions
To quickly figure out how to remove the top cover of a washing machine from LG, Bosch, Indesit, Whirlpool, Samsung and Ariston, first you need to disconnect the equipment from the electrical network. Next, we proceed in accordance with the detailed instructions:
The washing machine moves away from the wall so you can access the back of the equipment. This need arises because in most units the bolts that secure the cover are located in this area. If the washing machine is located under the sink, the procedure will require more time and effort.
- Depending on the model of the washing unit, the cover can be attached to a different number of screws - 2 or 3. To unscrew them, use a Phillips screwdriver. Rotation should be done until completely unscrewed counterclockwise. You should be careful, as there may be plastic washers under the screws that should not be lost.
- As soon as the lid is completely unscrewed, carefully remove it, moving it backwards in relation to the washing unit. Then it rises a little up and is set aside.
- Once you have access to the internal contents of the washing machine, you need to carefully inspect it and determine the cause of the breakdown. If any spare part fails, it must be replaced with a new one. There is also a special lock under the cover, which can be used to open a jammed appliance door.
It is not only important to know how to remove the top cover of an Ariston, Bosch, Indesit, Whirlpool, LG and Samsung washing machine. The procedure for returning it to its place will also require attention and scrupulousness.
This procedure should be performed in the reverse order as described in the instructions. After screwing in all the screws, make sure that the cover fits tightly and securely. Only after this can the unit be installed in its usual place.
Other removal recommendations
Certain manufacturers of washing equipment use a different method of attaching the top cover. To remove it, as in the previous instructions, you first need to turn off the power to the equipment and give yourself access to the back wall. Then the mounting bolts are unscrewed. Next, the method of removing the cover is slightly different from the previous one:
After unscrewing the screws, the back cover lifts up. Having lifted it, you need to move it forward relative to the washing machine.
You can only do this at an angle that you need to determine yourself.
There is another way to fix the cover, which is found in older Siemens and Bosch units. This technique is already a little outdated, but if you have just such a device in your house, then you also need to know about the procedure for removing the back cover from it:
- The fastening bolts in such models are located on the front side of the top cover on the sides. To gain access to them, you first need to remove the plugs. Next, you can begin to unscrew the bolts themselves.
- After unscrewing, the lid itself rises slightly and stretches forward in relation to the equipment. In such a situation, you also need to perform the procedure at an angle that you determine yourself.
With the right approach, washing machines existing on the modern market with a removable top cover can be repaired independently, the main thing is to remove this piece of equipment correctly.
If you have any questions about how to remove the top cover of a Samsung washing machine or units from other manufacturers, you should carefully watch the video. If doubts remain after this, it is better to call a professional technician who will handle the task quickly and efficiently.
Nuances when working with washing machines
Removing the top cover is usually not difficult, but certain points should still be taken into account. Indesit WISL 105 and other models are easy to handle because they have the same disassembly principle. Rarely can you come across models that are understood a little differently. Let’s say the manufacturer Ardo produces cars that have untypically removed top covers. You need to remember this, as you may encounter an unusual model.
As always, you will have to first disconnect the device from the network. Just in case, it is better to wear rubber gloves to avoid electric shock. After this, the unit will need to be moved away from the wall. You need a place to work, otherwise it will be difficult and even impossible to unscrew the screws.
The lid will have to be moved forward rather than backward. That is, if a person is standing behind the unit, then you need to move the element away from you. The cover can only be moved at an angle. Otherwise, nothing will work. You will have to determine the angle yourself, as it may differ. It is worth trying different slopes until you achieve the result.
On older washing machines, there are sometimes bolts attached to the front panel. This is even more convenient, because there is no need to move the unit. All screws are covered with plugs, which must first be removed. After this, you will need to unscrew the bolts, remove the fasteners and lift the cover, pushing it forward.
As a rule, Indesit machine models are disassembled according to the standard scheme. People have no problems interacting with the device
You should act carefully so as not to damage the plastic element. In addition, you need to try not to leave scratches
It will be difficult to remove them from the front panels later. If you follow the instructions, you will be able to remove the lid from the Indesit washing machine yourself. The main thing is to correctly return it to its place, so that later there are no problems with the functioning of the device.
