The possibility of repairing a washing machine yourself is always considered first. Indeed, with a certain approach, the home master has the prerequisites for independently restoring the functioning of household laundry appliances. Below we will describe the main technical recommendations regarding repairs.
The repair of Siemens washing machines can be entrusted to specialists. As a rule, repair operations are carried out directly at the home of the owner of the household appliance. However, it is important to understand that the technician may need to take the equipment to the workshop for repair if restoration at home is impossible for some reason.
How to use the washing machine?
Let's skip the various background stories and start with the main one. Let's look at the steps that need to be taken in order to use a Siemens washing machine.
- Insert the plug of the machine into the socket and open the water supply tap.
- Let's open the hatch door and put the laundry sorted in advance.
Don't pack too much laundry. Overloading the machine has a bad effect on the quality of washing, and it can also become a prerequisite for a system error.
- Close the door, pressing it until it clicks. There is no need to put too much pressure. If the door does not lock, contact an authorized service center.
- Turn the selector to select the appropriate program.
- Press the “start washing” button and wait until the process is completed. The end of the wash will be indicated by “END” on the screen.
- Return the selector to the initial position and close the water supply tap.
Where should I add the powder?
IQ500 washing machine has one of the most common powder cuvettes, based on the beliefs of the device. Its powder receptacle slides out comfortably and is easy to pull out. Well, its sections are very ordinary, without any bells and whistles. Behind this simplicity you can effortlessly feel German reliability and solidity.
- The central cell of the cuvette is indicated by the ubiquitous flower icon. It follows from this that conditioner should be poured into this compartment or starch should be poured.
- To the left of the cell with the flower there is a compartment with the Roman numeral II. According to the factory instructions, you should put the product in this compartment if you are going to run the main wash mode, bleaching, or simply soften the water with salt.
- To the right of the compartment with the flower, there is a compartment in which powder is placed if it is necessary to soak the laundry. Obviously, for this you need to turn on a mode that involves preparatory washing.
When should you start disassembling yourself?
With all of the above malfunctions, extraneous noise appears during washing: grinding, creaking, whistling and other sounds. Hard objects, buttons, cufflinks, small change, paper clips, pins, and nails torn from clothing can seriously damage the drum, bearings or its seal. Although all the malfunctions described above can be eliminated on your own, to do this you will first have to almost completely disassemble the entire machine, and then put it back together.
You should only disassemble the drum yourself if the service center refuses to carry out repairs.
This refusal is most often due to the fact that some washing machines Indesit, Ariston, Samsung and others may have welded, that is, non-separable tanks that can only be replaced entirely. You may also be forced to carry out repairs on your own due to a tight financial situation or an expired warranty. Otherwise, it is better to trust a qualified specialist.
Instructions for washing machine Siemens IQ500
The factory instruction manual for the Siemens IQ500 is written in an easy-to-understand language. In it you will find a lot of information regarding the operation of the washing machine. Specifically, the abstract provides answers to standard user questions about the Siemens machine, but users are not particularly keen to read it. We will try to improve the situation by offering you the main and shortened versions of this important document.
Useful tips
Using a washing machine for a long time, the user notes a bunch of aspects that she didn’t even think about when she first bought the new “home assistant.” This knowledge would be very necessary at first and would allow us to avoid many mistakes. And this is another reason for carefully reading the annotation, because most of these aspects are directly or covertly described there. Let's summarize them briefly.
- Be serious about sorting dirty laundry before washing. When arranging things in piles, consider: the type of fabric, its color, the nature of the dirt, the quality of dyeing. And be sure to study the markings on clothes for washing (signs, badges, signs).
- Before putting dirty laundry into your Siemens , check the pockets. They must be empty. In addition, if the clothes have loose buttons or holes, this needs to be corrected.
- Before washing, shirts, blouses, etc. must be fastened with all buttons or zippers and turned inside out.
- Before adding one or another product to the powder tray of the washing machine, make sure of its quality and strictly follow the manufacturer’s advice regarding the dose and application features.
- Place washing powders and gels directly into the machine drum only as a last resort. If necessary, dissolve the powder in a small amount of water, and then add the solution to the drum. This way there is less chance that the product will damage your clothes. The same recommendation applies to washing gels.
- There are special laundry bags for small and thin items of clothing. Throwing them into a drum just like that is not dangerous. They can get stuck between the walls of the tank and drum, or get into the pipe and cause a blockage.
- Hooks from curtains and curtains should be removed, or such textiles should be washed in a bag.
- Do not wash old textiles together with new ones.
Here is a shortened version of the annotation for the Siemens IQ500 . In most cases, the information we provide is sufficient. But if you absolutely need instructions from the manufacturer, you can download them from our website (the link is located immediately below the text of the article). Good luck!
Washing machine Siemens IQ 500: washing programs
The basic set of washing modes, in addition to standard programs for cotton and synthetics, includes the following programs:
- washing mixed textiles;
- jeans (washing denim and dark fabrics);
- sports/fitness (washing items used once during training);
- business shirts (daily washing of shirts and blouses);
- wool;
- fine linen/silk;
- super 15/super 30 (fast washing programs without loss of quality).
READ Clean the powder compartment in the washing machine
These programs are available in all Siemens IQ 500 washing machines without exception. In addition, depending on the specific model, the list of modes may be supplemented with the following items:
- outdoor (outerwear for sports with microfiber fillers);
- sensitive (anti-allergenic washing, which allows you to more completely remove detergent residues and microorganisms from the fibers);
Washing machine Siemens IQ 500Washing machine Siemens IQ 500: Outdoor/Impregnation program
- lingerie (especially delicate items made of lace and silk);
- impregnation (washing clothes made of membrane fabrics with a special water-repellent impregnation; after washing, the water-repellent and waterproof properties of the fabrics are preserved);
- blankets (various large items with artificial or natural fillings);
- pillows.
Additionally, the selector contains the standard “rinse” and “spin and drain” modes. They can be turned on without going through the main loop.
Siemens washing machine repair
Siemens IQ 500 washing machine: iSensoric intelligent control system
Most machines in this series are equipped with an intelligent control system iSensoric, which allows you to implement several “smart” functions at once.
The system itself consists of a processor, a set of ultra-sensitive sensors and special software.
Sensors send data about various washing parameters to the machine’s brain, where they are processed, and the processor decides to make adjustments to the washing process, ensuring its high quality with minimal consumption of water, electricity, time and detergent.
Washing machine Siemens IQ 500
We offer our readers several video reviews on Siemens IQ 500 washing machines. We hope that the information received was useful and helped them make their choice.
Main malfunctions of Siemens washing machines
Considering that almost every modern equipment used for washing clothes is equipped with a special self-monitoring system for faults, error codes displayed on the display will help you quickly identify breakdowns and solve the most complex problems in the shortest possible time. These codes are marked accordingly, indicating a particular problem:
- There is a problem with the supply or drainage of water as a result of a clogged filter, breakdown of the electronic controller or drain pump;
- There are problems with water heating caused by a malfunction of the Tubular Heater, temperature sensor or as a result of low voltage in the network;
- The temperature sensor malfunctioned due to a short circuit;
- Malfunctions in the operation of the engine, it does not rotate at all or rotates only in one direction;
- The functional protection system and the washing program are broken;
- There has been a leak, a breakdown of the Aqua sensor, pressure switch or other components and mechanisms.
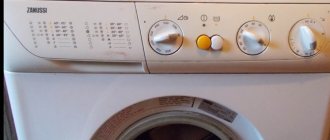
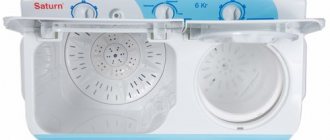
Washing machine Siemens IQ 500: design
Siemens machines have a classic design.
The top panel is visually divided into three blocks, the right of which is given over to the cuvette for washing powder, the middle one is for the mode selector, and the right one is for the display.
The models are made in classic white color. The line includes modifications in which the hatch edging is made in gray or black-gray, which is in harmony with the same design of the buttons. The program selector is chrome plated.
In narrow models, the hatch handle protrudes beyond its outline; in full-size models, it merges with the rim, which makes the design of the cars even more strict and laconic.
The side surfaces of the cars have an unusual appearance. Instead of standard stiffening ribs in the form of longitudinal stripes, concentric circles are knocked out here, like a stone thrown into water. This is not done for beauty: the circular form of stamping dampens vibration much better than the longitudinal one.
Washing machine Siemens IQ 500: anti-vibration protection
i-Dos function
Washing machine Siemens IQ 500. i-Dos system
One of the functions that I-Sensor provides is the i-Dos program for precise dosing of detergent. It works as follows. A special cuvette is filled with liquid detergent for twenty wash cycles.
Special sensors collect information about the degree of loading of the drum, the level of water pressure, the composition of the fabrics loaded into the drum (cotton, synthetics), and even the degree of soiling of the laundry, which is determined by infrared sensors based on the turbidity of the water in the drum.
In accordance with these parameters, the machine releases the required amount of detergent, adjusted down to the milligram, accurately dispenses water and regulates the intensity and duration of washing and rinsing.
The i-Dos function has been implemented in the WM14T691OE model.
Opening access to details
Removing the dampers will require partial disassembly of the machine. Therefore, the repair begins with preparing the equipment: we disconnect Siemens from communications, fix the hoses and cord on the back wall, and then move the washing machine to the center of the room. Next we follow the instructions:
Before disassembling the washing machine, you must make sure that the equipment is disconnected from the power supply, water supply and sewerage!
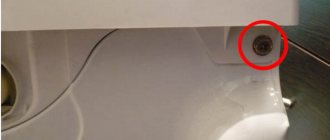
- unscrew the top cover;
- take out the dispenser;
- we unscrew the bolts and other fasteners “hiding” behind the tray that hold the dashboard;
- disconnect the board from the case (be careful with the wiring - it must not be damaged);
- lower the machine onto the back wall;
- loosen the screws securing the bottom;
- open the hatch and remove the outer clamp from the cuff;
- thread the cuff into the drum;
- We unhook the “end” from the body, while simultaneously disconnecting the wiring from the UBL.
After removing the front panel, you can see the dampers - two posts on which the tank is fixed. Ideally, to disconnect the shock absorbers, it is necessary to continue disassembling the machine until dismantling the washing container. But self-taught masters allow us to simplify the task and remove the pistons now that Siemens is in a “lying” position with the drum not removed. Yes, it will be more difficult, but much faster.
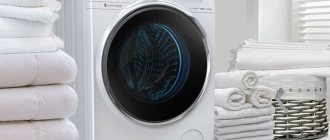
Washing machine Siemens IQ 500: detailed review of the series
The Siemens washing machine is a series of modern front-type units that can satisfy almost all user needs at a very reasonable price, ensure proper cleanliness of the laundry and delight the owners with convenient controls. The machines in the line feature a number of innovative technologies, each of which makes washing easier, better, and more economical.
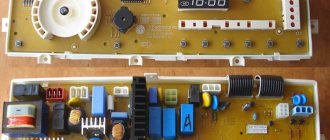
No water heating, Tubular Heater failure in Siemens machine
Siemens machine breakdowns . The reason for this is scale or short circuit. Scale prevents the heater from releasing heat, causing it to overheat and burn out.
Siemens washing machine , check it with a multimeter before replacing it.
To remove the Tubular Heater, remove the front panel of the CM as described above. Attach the multimeter probes to its contacts and compare the readings with the photo.
If there is a malfunction, replace it yourself:
- Disconnect all wires.
- Loosen the central nut and push the bolt inward.
- Prying up the edges, remove the element.
- Install the working Tubular Heater in reverse order.
Malfunctions of Siemens washing machines (Siemens)
If you encounter problems with your Siemens washing machine, you do not have to immediately call a technician. A modern self-diagnosis system allows you to quickly determine the cause of a malfunction.
Having figured it out, you can try to carry out independent repairs or replace the element in the Siemens .
Drain tract clogged, pump malfunction in a Siemens machine
Poor drainage of water after washing or its complete absence indicates a blockage in the drain pipe or filter, or a breakdown of the pump - in 30% of cases.
The pump in a Siemens washing machine is located behind the front panel. Therefore, to get to it, you will have to work hard:
- Unplug the washing machine and turn off the water supply.
- There is a drain hatch at the bottom of the front panel.
- Open it, insert the container and pull out the filter.
- Clear it of any blockage.
- Remove the top panel by removing the screws at the back.
- Remove the dispenser tray.
- Remove the metal clamp securing the cuff.
- Disconnect the UBL wiring.
- Unscrew the front panel mounting bolts.
- Removing the panel, you will see the pump below.
Check the pipe and pump for blockages. To clean, simply remove the pipe and rinse under running water.
To remove the pump, disconnect the connectors and unscrew the fixing bolts.
Water leak in Siemens machine
Water leakage problems account for 10% of all breakdowns.
Leakage occurs due to depressurization of seams or damage to parts and connections. The hatch cuff may also be damaged or worn.
We'll tell you how to replace the cuff on a Siemens washing machine with your own hands:
- Open the hatch door.
- Having bent the rubber cuff, pry off the metal clamp with a screwdriver.
- Carefully remove the clamp, then remove the front body of the machine.
- Disconnect the pipe leading to the cuff.
- Remove the cuff.
Inspect the cuff at the time of damage: can it be repaired or repaired? If not, then a new part is installed.
READ How to put powder in a washing machine
The most common malfunctions
It’s hardly worth describing how to replace the filter yourself in this article. There is absolutely nothing complicated in this procedure. In addition, it is described in the user manual for the washing machine.
The most common technical malfunctions include:
Replacing the sunroof collar is the easiest part of the restoration. The fact is that due to incorrect use, moisture remains in the cuff. Naturally, over time, fungus develops in the moisture.
This becomes the main reason for the disgusting smell from the washing machine. To replace the cuff yourself, purchase it first! Finding the right one is not so easy. Especially if your washing machine is imported.
The change is carried out after removing the o-ring. You can do this with your bare hands (after prying off the O-ring). However, there is often another O-ring. To gain access to it, you will need to dismantle the facade of the washing machine.
Washing machine fault codes Siemens
Before we begin the repair, let's look at the error codes of the Siemens washing machine. Their meanings will tell you where to look for a breakdown.
| Error codes | Meaning |
| F01, F16 | The door is not tightly closed. |
| F02 | Water does not fill up. |
| F03 | No water drainage. |
| F04 | There is a leak. |
| F17 | The water has not reached the minimum level within a certain time. |
| F18 | The timeout has occurred and the water is not draining. |
| F19 | The water did not heat up during the allotted timeout. |
| F20 | There was an unexpected heating of the water. |
| F21 | The engine is not working correctly. The main module has failed. |
| F22 | Thermostat failure. |
| F23 | The Aquastop system has activated. |
| F25 | The turbidity control sensor has failed. |
| F26 | There is a problem with the pressure switch or the additional pressure sensor. |
| F27 | Incorrect setting of the pressure switch or pressure sensor. |
| F28 | The flow sensor is not working. |
| F29 | The flow sensor is clogged. |
| F31 | Water exceeds the norm in the tank. |
| F34 | The door lock is faulty. |
| F36 | There is a problem with the door locking system. Electronic module malfunction. |
| F37, F38 | Thermostat malfunction. |
| F40 | Problems in the electrical network. The voltage does not match the set level of the Washing machine. |
| F42 | The electric motor or its control triac has failed. |
| F43 | Engine failure. |
| F44 | No rotation in the other direction. |
| F59 | The 3D sensor has failed. |
| F60 | The flow sensor received an incorrect value that does not correspond to the norm. |
| F61 | Door closing data error. |
| F63 | Problems with security functions. |
| F67 | Incorrect coding of the power and main units. |
| E02 | Error in the operation of the electric motor. |
| E67 | Electronic module malfunction. |
Problems with the Siemens CM inlet valve
If you notice that the washer does not fill or overflows water, the intake valve is probably broken. You can repair and replace the valve in a Siemens washing machine yourself:
- Disconnect the intake hose from the Washing machine.
- Remove the rear screws and remove the top panel.
- Disconnect the valve coil connector wires.
- Remove the hoses leading to the valve.
- At the back of the housing, unscrew the two bolts that secure the valve. Get it out of the car.
You can install the new element in reverse order.
Worn brushes, motor malfunction
Another 10% of breakdowns are problems with the washing machine motor. At the time of a short circuit, the motor winding could burn out, and the commutator brushes could also wear out.
How to make DIY repairs and replace electric brushes:
- Remove the top and rear covers of the SM by unscrewing the bolts.
- Remove the belt from the engine pulley.
- Disconnect the wiring.
- Unscrew the fixing bolts.
- With the motor removed, slide the terminal plate and pull out the brush.
After dismantling, inspect the brushes: if they are too worn, it is better to install new elements. Then reinstall the motor on the Siemens washing machine.
It happens that electronic components fail: the electronic board and its components. This is a complex repair that a beginner cannot always do. To understand the issue, you will need a wiring diagram for a Siemens .
We recommend that if the board breaks down, contact a service center—do-it-yourself repairs in this case are not justified and can only cause harm.
Error codes for Siemens washing machines
Modern technology itself informs the owner about the presence of certain malfunctions. True, she does this not in ordinary human language, but using special character codes on the device’s display. You can easily determine what each of them means from our list.
Error F23. The Aquastop system was activated, signaling the presence of a leak in the machine parts. Until the error is corrected, using the device is strictly prohibited. It is necessary to check the pan in the center of which, as a rule, water begins to accumulate. The main causes of leakage may be damage to the hose or drain pump, or a crack in the tank. After eliminating the malfunction, the error goes away, and the Aquastop system is switched back to monitoring mode.
Error E18. There is a malfunction in the drainage system. The drain filter may become clogged, a problem may arise in the drainage channels, or some small part may simply fail. If this error occurs, you should immediately stop the water supply and unplug the device from the electrical network. First you need to remove and clean the drain filter, then check if the drain pump is clogged, then return all the parts to their place and try to turn on the machine. If the error remains, the problem is in the control module.
Error E23. Like error f23, it indicates the presence of leaks. Also, the occurrence of this error may indicate a malfunction of the aquastop system itself - damaged contacts, for example. The repair procedure here is the same as for error f23 - it is necessary to identify and eliminate the reason for the operation of the machine’s protective system.
Error F18. Problems with draining water. It also warns the owner that the device cannot properly drain the waste fluid. The reason most often lies in blockages; in more serious cases, the control unit is to blame.
Error F18. Tells us about a breakdown in the drive motor control system. It is necessary to diagnose the engine control relay and replace failed parts.
Error E17. It usually occurs due to a lack of water at the inlet valve. It is necessary to check the functionality of the solenoid valve by measuring the resistance of the coil.
Error F04. And again the machine tells us about a leak. The procedure here is the same as for similar errors - we find the leak and fix it.
What to do if the Siemens washing machine does not spin?
To ensure that the laundry is not wet when removed from the washing machine, a spin function is provided. But what should you do if the machine suddenly, for some reason, stops spinning clothes?
You must first check whether the spin program is set; as a rule, during gentle washing, machines do not spin the laundry. If this is not the problem, you should turn to troubleshooting.
Check if the water drains normally after rinsing. (In the event of a drain malfunction, it is necessary to remove the hose and drain filter and rinse them thoroughly, and, if possible, clean the adjacent elements)
Is the drum rotation speed sufficient? (Here it is necessary to check the motor - remove the drive belt, disconnect the terminal with the power supply wires and the ground wire, unscrew the fastening screws and pull the engine off the skids. We check whether the graphite brushes are worn out and if they do not fit tightly to the engine commutator, replace them.)
Are electronic error codes showing on the display? (If an error code appears, look through the list above in the text and follow the described procedure).
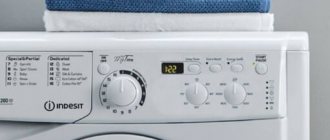
Controls and indicators
Each instruction manual contains the basic designations of each indicator on the control panel - it helps to effectively, and most importantly, correctly interact with the unit.
First of all, you should pay attention to the selector where the washing programs are provided - this is a rotary relay that has a black circle and determines its position. The panel always displays all the washing programs you specify, and all the necessary functions that will allow you to choose what you need.
Next, it’s worth highlighting 7 buttons that help you set the desired temperature for a particular wash, the spin speed of the drum, and certain functions. Also on the display there is a button to launch the selected program - on the right side of the panel itself.
The machine is also equipped with an information display - on it the system displays all the necessary information required for control. And yet, the panel itself has only one indicator - located above the button itself, labeled “Start/Stop the program”.
An element in the control panel of a washing machine is also a small drawer of a retractable type - a dispenser. It is into this that a portion of gel or washing powder is loaded.
What to do if the Siemens washing machine does not turn on?
In a situation where the Siemens washing machine does not show any signs of life and does not respond to button presses, you should check the serviceability of the power cord. Disconnect the cord and measure the incoming voltage from the outlet.
READ How to clean a washing machine tray
The cause may also be a malfunction of the power button. In this case, it must be tested with a multimeter in the on and off state. When the machine is plugged in, you will hear a characteristic sound indicating that the button is OK.
The interference filter that protects the machine from power surges may also break. It is checked with the same device.
If the above checks do not produce results, most likely the control module has failed. It should be replaced.
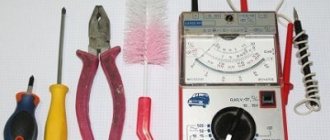
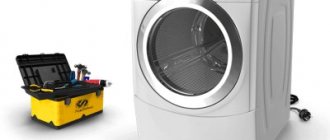
Do you need a lot of tools?
At first glance, the procedure does not seem particularly complicated. It does not require the use of a large number of tools. To get started, just one screwdriver is enough. To disassemble the equipment, you will need a few more things:
- screwdriver;
- slotted and Phillips screwdrivers;
- a small hammer, preferably a mallet;
- pliers;
- hexagons.
Sometimes joints and fasteners may become stuck. To unscrew a stubborn screw, it must be treated with universal anti-corrosion penetrating lubricant WD-40, often used by motorists. And to drain dirty water from a hose, you will need a large container. A smartphone with a camera is useful for disassembling it yourself. During repairs, take step-by-step photographs, this will greatly help in the reassembly process. This way you can avoid mixing anything up and start the machine without any problems after completing the repair work.
Let's get to the "main" node
At the very beginning, disconnect the washing machine from the electrical network. Turn off the water supply. Unhook the supply hose and drain hose, lowering the latter into a previously prepared basin. This will ensure safe work and not flood everything around with water.
We remove the hatch door by unscrewing two screws and removing it along with the metal hinge. Remove the upper part of the body. Usually the cover is fixed with various screws, which are unscrewed with a Phillips screwdriver. The fastening elements are located on the back side under the top of the panel on the eyes. Unscrew them and press firmly on the front end of the cover, then lift it up.
How to remove the detergent dispenser yourself? Feel for a separate plastic button in the center of the drawer. Press it and pull the tray towards you.
Next step: dismantling the control panel. The latter is secured to the washer body with two screws. The first is located under the tray for washing powder and other products. The second one is in the opposite direction. When unscrewing the panel, be careful, as it is very fragile.
Life hack: after removing, hang the panel on a hook or place it separately on a table/window sill so as not to accidentally damage it.
Step number four is disassembling the service panel. To do this, simultaneously press the two locking clips and then the latch located in the middle. Remove the panel.
To remove the front wall, remove the metal clamp holding the washer door seal. You can easily pick it up with a screwdriver, the main thing is to act carefully so as not to pierce the cuff. A rubber cuff seal is installed inside the loading hatch. The clamp itself is secured with a small spring; Just push it a little and the clamp will be removed. Now place the cuff inside the drum. Do not try to pull out or pull out the seal - it is held in place by an additional internal lock.
Now it's time to dismantle the front panel, but there may be some difficulties. You will need to complete the following steps (be especially careful with the panel, there are chips inside):
- remove the front panel;
- unclip the latches responsible for securing the protective cover;
- Lift the panel and remove the hooks holding it in place.
To remove the back cover, unscrew the screws with a screwdriver. They are usually located along the entire perimeter of the rear wall of the car. According to the manufacturer's idea, this allows you to securely fix the housing element, which, in fact, protects the drive mechanism.
We disassemble the SMA to remove the tank
First of all, turn off the power to the washing machine by unplugging it from the network. Turn off the water supply.
This method makes disassembly very easy, since you do not need to disconnect the front housing of the washer. For machines with a vertical type of loading laundry, the steps are almost the same, with only minor differences:
Next, all parts are removed, as on a front-loading SM. Then, after you have unscrewed the drum and tub of the washing machine, begin to disassemble them.
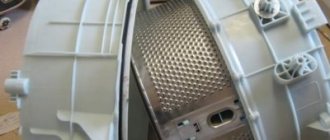
Remove the drum from the tank body
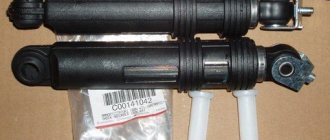
The washing machine tank weighs up to 10 kilograms. But removing it with your own hands alone is a dubious undertaking, so we recommend calling a friend/neighbor for help. Together we remove the tank from the springs and pull it out. We unscrew the front counterweight (this part most often looks like a massive half ring) and remove it. We turn the tank with the open side down, providing ourselves with access to the pulley.
To prevent the pulley with the drum shaft from spinning, block it with a block. Unscrew the bolt in the middle of the pulley with a hex screwdriver. If the bolt does not budge, lubricate it with WD-40. After waiting a little, try again. During manipulation, be careful not to tear off the hexagon.
The bolt is unscrewed counterclockwise. The process is difficult, since the fastening element is filled with a special compound, which gives the connection special strength so that it does not fall apart from vibration. Some craftsmen recommend heating the bolt with a gas torch to make work easier. We still recommend using WD-40 lubricant, since using a torch can cause damage to other parts of the machine. Grab the pulley with both hands. Pull the piece up, rocking it from side to side. After removing the spare part, disassemble the tank body into two halves.
Important! The tank of Siemens washing machines is collapsible; it consists of two parts, fastened together with long screws.
Analysis of the Siemens IQ300 washing machine. Removing the panel and eliminating the leak.
Now take an 8mm socket wrench and unscrew all the screws that hold the tank together. After this, the latter splits into two halves. But we still have the back part, connected to the drum using bearings mounted on the shaft.
They will have to be removed with the tank itself. We select any old bolt suitable for the shaft thread (where we unscrewed the screw holding the pulley) and screw it in. Then we substitute a small wooden block and lightly hit it with a hammer until the back wall of the tank comes off the bearing. So, we removed the wall, and we were left with part of the drum with the cross and shaft installed on it. The shaft is fitted with an oil seal and a bearing. Let's get to the hardest step.
- We drive the puller's grips under the bearing.
- By slowly tightening the thread of the puller, we create a certain tension.
- Lubricate the bearing thoroughly with WD-40.
- We wait about half an hour.
- After this, we continue to unscrew the thread and, as a result, remove the bearing, and then the oil seal.
Now you know all the intricacies of disassembling a Siemens washing machine with your own hands. By removing parts one by one, you can easily get to the components and elements that need repair. When reassembling, carefully follow the instructions without skipping any steps.
Sources:
https://stiralkaman.ru/drugoe/instruktsiya-dlya-stiralnoj-mashiny-siemens-iq500.html https://cosmo-frost.ru/neispravnosty-stiralnyx-mashin/neispravnosti-stiralnyx-mashin-simens-siemens/ https ://SIM-studio.ru/news/pravilnaya-ekspluatatsiya-stiralnykh-mashin-siemens.html https://mashmaster.ru/razobrat-sm-siemens/
Step-by-step instruction
Let's say you have already pulled out the tank and partially disassembled it, if it turned out to be collapsible, or sawed it with a hacksaw along the welding seam, if not. What's next?
First you need to remove the rear forecastle from it, to which it is still connected by a shaft to the drive belt pulley. For different models of washing machines, the design of the tanks may differ slightly, but the sequence of actions when disassembling them is approximately the same for all.
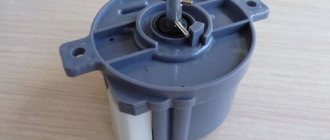
Holding the pulley from turning with a stick, unscrew the pulley bolt with an open-end or hex wrench, depending on which one is suitable. We remove the pulley, then screw the bolt securing it back until it stops.
Removing bearings will most likely require a special automotive puller and a gas torch to heat them, although sometimes they will come off the shaft without much trouble. It's also a good idea to have WD-40 lubricant on hand, which will help you quickly deal with various stuck parts.
Unscrewing the pulley bolt (nut) can be a difficult task, since its threaded hole is filled with a special compound that prevents it from spontaneously unscrewing during vibration.
Next, knock out the shaft with light blows of a hammer. You should hit through a wooden block so as not to damage the bolt head. Removing the back of the tank will also require a couple of hits with a hammer. The main thing is not to break anything.
After we have taken out the drum, we can begin to directly repair or replace it. The drums of collapsible and soldered tanks are constructed in the same way . Reassembly should be done in reverse order. The sawn-off part of the tank can be installed back by fastening its halves with hot glue and bolts, having previously drilled small holes for them.