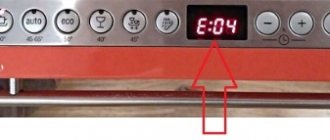
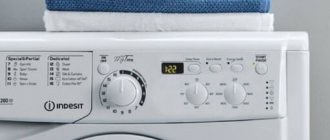
F31 Error codes Meaning F01, F16 The door is not closed tightly. F02 Water is not drawn in. F03 No water is drained. F04 A leak has occurred. F17 The water has not reached the minimum level within a certain time. F18 A timeout has occurred, the water is not drained. F19 The water has not heated up during the allotted timeout. F20 Unexpected heating of the water has occurred .F21The engine is not working correctly. The main module has failed. F22 Thermostat failure. F23 The Aquastop system has worked. F25 The turbidity control sensor has failed. F26 There is a problem with the pressure switch or an additional pressure sensor. F27 Incorrect setting of the pressure switch or pressure sensor. F28 The flow sensor does not work. F29 The flow sensor is clogged. F31 Water exceeds the norm in tank..F34 The door lock is faulty.F36 There is a problem with the door locking system. Electronic module malfunction. F37, F38 Thermostat malfunction. F40 Problems in the electrical network. The voltage does not correspond to the specified MCA level. F42 The electric motor or its control triac is faulty. F43 Motor failure. F44 No rotation in the other direction. F59 The 3D sensor is faulty. F60 The flow sensor received an incorrect value that does not correspond to the norm. F61 Error in door closing data. F63 Problems with protective functions. F67 Incorrect coding of the power and main unit. E02 Error in the operation of the electric motor. E67 Malfunction of the electronic module.
Typical faults
Let's look at the breakdowns that most often occur, as well as the possibilities of repairing Siemens washing machines with your own hands.
Drain tract clogged, pump malfunction in a Siemens machine
Poor drainage of water after washing or its complete absence indicates a blockage in the drain pipe or filter, or a breakdown of the pump - in 30% of cases.
The pump in a Siemens washing machine is located behind the front panel. Therefore, to get to it, you will have to work hard:
Check the pipe and pump for blockages. To clean, simply remove the pipe and rinse under running water.
To remove the pump, disconnect the connectors and unscrew the fixing bolts.
Problems with the Siemens CM inlet valve
If you notice that the washer does not fill or overflows water, the intake valve is probably broken. You can repair and replace the valve in a Siemens washing machine yourself:
You can install the new element in reverse order.
No water heating, heating element failure in Siemens car
Heating element malfunctions account for 15% of all Siemens machine breakdowns. The reason for this is scale or short circuit. Scale prevents the heater from releasing heat, causing it to overheat and burn out.
Having reached the heating element in the Siemens washing machine, check it with a multimeter before replacing it.
To remove the heating element, remove the front panel of the SM, as described above. Attach the multimeter probes to its contacts and compare the readings with the photo.
If there is a malfunction, replace it yourself:
Water leak in Siemens machine
Water leakage problems account for 10% of all breakdowns.
Leakage occurs due to depressurization of seams or damage to parts and connections. The hatch cuff may also be damaged or worn.
We'll tell you how to replace the cuff on a Siemens washing machine with your own hands:
Inspect the cuff at the time of damage: can it be repaired or repaired? If not, then a new part is installed.
Worn brushes, motor malfunction
Another 10% of breakdowns are problems with the washing machine motor. At the time of a short circuit, the motor winding could burn out, and the commutator brushes could also wear out.
How to make DIY repairs and replace electric brushes:
After dismantling, inspect the brushes: if they are too worn, it is better to install new elements. Then reinstall the motor on the Siemens washing machine.
It happens that electronic components fail: the electronic board and its components. This is a complex repair that a beginner cannot always do. To understand the issue, you will need a wiring diagram for a Siemens washing machine.
We recommend that if the board breaks down, contact a service center—do-it-yourself repairs in this case are not justified and can only cause harm.
Repair video to help you:
Source
Changing details
To replace the dampers, you need to remove the old ones - unhook them from the body and the washing tub. From below everything is simple: just loosen the fasteners. On top, special plastic holders are used to fix the racks. They cannot be unscrewed in the usual way, so when dismantling the shock absorbers we proceed as follows:
- take a 13 mm drill;
- insert the drill into the screwdriver;
- Carefully drill through the fasteners, freeing the pistons.
Old shock absorbers cannot be repaired. They are disconnected and disposed of in the prescribed manner. Afterwards, the vacated seat is cleaned and treated with a lubricant-sealant. Then new dampers are mounted: they are bolted from below to the machine body, and from above they are attached through previously drilled holes to the tank.
Algorithm for diagnosing breakdowns of Siemens washing machines
If you want to diagnose a Siemens washing machine yourself, you need to arm yourself with error keys. These keys on models with a display are displayed in the form of letters and numbers, and in the case of indicators - in the form of indicator combinations. If, for example, the error code signaled by the washing machine is “F04,” this means that water has entered the tray of the machine and the Aquastop protection has tripped. In this case, it is necessary to check the integrity of the pipes, the strength of their connection with the components, the hatch seal and the integrity of the tank.
Rating of the best models
Siemens WS 12T440
Will serve as a good gift for the whole family. It saves energy and water. One wash requires only 39 liters of liquid. This saving does not negatively affect the positive functions of the unit, since the laundry is washed perfectly.
This unit is class “A” with the following characteristics.
- The machine is equipped with 15 programs, including washing items made from delicate materials, down jackets and denim items. A special program allows you to adjust the intensity of drum rotation. The presence of a digital screen allows you to easily set the desired parameters.
- Reliability. The equipment is equipped with a child protection system, has a regulator for imbalance and foam level, and protection against leaks.
- Cleaning the drum. The device cleans the drum itself, getting rid of unpleasant odors.
- The presence of a ceramic heater. This is the latest material that does not fail for a long time.
- Delayed wash. The presence of the option provides for programming the washing of clothes at a convenient time.
- This machine belongs to the Siemens iQ series, which is characterized by the presence of a program for simultaneous washing and impregnation of microfiber items, which ensures the saturation of the fabric with molecules of water-repellent particles.
Siemens WS 10G140
The washing machine is distinguished by high build quality, a variety of functionality, attractive appearance, and comfortable use.
The equipment has a number of positive characteristics.
- Enhanced security, completely eliminating the possibility of apartment flooding.
- Has the ability to additionally load laundry.
- Delayed start, which allows you to delay washing for up to 24 hours.
- Quick wash mode. Linen is washed in 15 minutes.
- Protection against negative skin reactions. You should set the extra rinse mode and all particles of detergent will be washed out of the fabric.
- This option will become an assistant in the household and will not fail for a long time.
Siemens WS 10G160
The washing machine has 12 washing programs and a leak protection function. Not a bad model for daily use.
The main features of the model are the following factors.
- 3D-Aquatronic function. It is used to wet laundry from three sides due to the cascade flow of liquid into the drum. The powder penetrates the fabric better and washes clothes better.
- Availability of WaterPerfect. This is a function of controlling the liquid level, which depends on the intensity of the drum loading.
- AquaStop protection. Reliable protection against leaks.
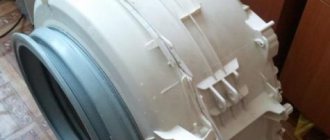
Remove the drum from the tank body
The washing machine tank weighs up to 10 kilograms. But removing it with your own hands alone is a dubious undertaking, so we recommend calling a friend/neighbor for help. Together we remove the tank from the springs and pull it out. We unscrew the front counterweight (this part most often looks like a massive half ring) and remove it. We turn the tank with the open side down, providing ourselves with access to the pulley.
To prevent the pulley with the drum shaft from spinning, block it with a block. Unscrew the bolt in the middle of the pulley with a hex screwdriver. If the bolt does not budge, lubricate it with WD-40. After waiting a little, try again. During manipulation, be careful not to tear off the hexagon.
The bolt is unscrewed counterclockwise. The process is difficult, since the fastening element is filled with a special compound, which gives the connection special strength so that it does not fall apart from vibration. Some craftsmen recommend heating the bolt with a gas torch to make work easier. We still recommend using WD-40 lubricant, since using a torch can cause damage to other parts of the machine. Grab the pulley with both hands. Pull the piece up, rocking it from side to side. After removing the spare part, disassemble the tank body into two halves.
Important! The tank of Siemens washing machines is collapsible; it consists of two parts, fastened together with long screws.
Now take an 8mm socket wrench and unscrew all the screws that hold the tank together. After this, the latter splits into two halves. But we still have the back part, connected to the drum using bearings mounted on the shaft.
They will have to be removed with the tank itself. We select any old bolt suitable for the shaft thread (where we unscrewed the screw holding the pulley) and screw it in. Then we substitute a small wooden block and lightly hit it with a hammer until the back wall of the tank comes off the bearing. So, we removed the wall, and we were left with part of the drum with the cross and shaft installed on it. The shaft is fitted with an oil seal and a bearing. Let's get to the hardest step.
Now you know all the intricacies of disassembling a Siemens washing machine with your own hands. By removing parts one by one, you can easily get to the components and elements that need repair. When reassembling, carefully follow the instructions without skipping any steps.
Interesting:
Varieties
Siemens washing units amaze with their diversity. There are free-standing, built-in, narrow, and drying devices.
Freestanding
Such machines are suitable if there is no desire to buy built-in models. One of the popular models belonging to this category is the Siemens WS 10X163, which is small in size, which allows it to fit well even into a relatively small room. The maximum load of laundry is 5 kg. A wash cycle requires 40 liters of water. The rpm is 1 thousand.
This model is budget and lacks many features.
Let's name them.
- Child protection.
- Drying.
- Screen is missing. However, this model has an LED indicator for program operation.
- There is no delayed start function.
- At the end of the wash there is no signal indicating the end of the process.
Built-in
These models meet all the requirements for modern washing machines. They are well suited for a small room.
One of the popular similar models is the NEFF W6440X0 washing unit. The main feature of this machine is the VarioDrum with cleaning and disinfection functions. The number of revolutions per minute is 1.4 thousand. It fits up to 8 kg of laundry, uses liquid and electricity economically, there are many programs, a night-time function, and delayed start.
Narrow
Washing machines of this type are very convenient in terms of placement. In addition to their intended purpose, they can be used as shelves due to the upper surface. This equipment can accommodate no more than 4 kg of laundry (due to the small size of the unit). The package for a narrow washing machine usually includes spare parts.
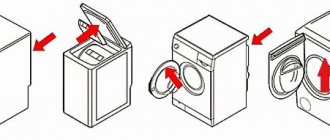
Front loading
Siemens front-loading washing machines are options where items to be washed are placed in a round hatch located on the front of the device. This makes it possible to control the washing process.
Top-loading washing machines have a loading hatch (lid) on top.
With drying
Such units are equipped with an automatic drying mode, which processes laundry to a certain degree of humidity. There are functions for drying delicate materials.
A popular dryer model is the WD14H442OE. It is equipped with a VarioSoft drum with a ribbed surface and asymmetrical grips.
The inverter motor used in Siemens equipment is reliable when compared with a conventional one. In addition, it provides energy savings and also has reduced noise and vibration levels. The device can operate in biophase mode. During this, a low temperature is maintained, which allows the active substances present in detergents to be preserved.
We repair a Siemens washing machine with our own hands
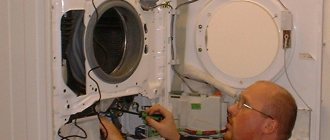
In order to independently repair a Siemens washing machine, if leaks occur, you need to remove the top and right panels. If possible, then the back one. The front panel with the loading hatch should not be removed, as this involves removing the hatch cuff. It is not recommended to remove the cuff again, unless, of course, it is damaged and requires replacement. But its integrity can be checked before repair work begins.
The integrity of the pipes and their connections is checked by removing and inspecting them. To do this, use pliers to loosen the self-clamping clamps and remove the pipes from their mounting points. Entire pipes are blown out and reinstalled.
If damage to the tank is detected, it must be repaired, since replacing the tank is very expensive. In order to seal the tank, you need to perform the following operations:
This gluing method allows you to create a “patch” that is resistant to detergents, high temperatures and increased vibration.
To perform these operations, you will most likely have to remove the dashboard. It is secured to the top edge of the washing machine. On one side it hangs on wires that do not need to be disconnected, and on the other side it hangs on a service hook. To repair a Siemens washing machine with your own hands, it can be made from soft steel wire 30 cm long. A plastic cambric is put on the wire, and it is bent at both ends.
Replacing the fill valve
There can be many reasons for the failure of the filling valve of a washing machine, from poor quality water to wear. One way or another, this part will have to be changed, since in 99% of cases its repair is not practical. How to replace the fill valve of a Siemens washing machine with your own hands?
- First, disconnect the washing machine from the water supply and electrical communications.
- Unscrew the inlet hose from the washing machine.
- Take a Phillips screwdriver and unscrew the fasteners of the top cover of the machine.
- In the place where the inlet hose fits, there is an inlet valve installed, several wires with terminals go to it, they need to be disconnected.
- Disconnect the pipe from the fill valve.
- Unscrew the fastenings of the filler valve and remove it.
- We put a new valve in its place, connect the wires and pipe, and put the top cover of the machine in place. Fill valve replacement is complete.
Important! On some models of Siemens washing machines, the valve is additionally held in place by a plastic plug. It is easy to remove using a flathead screwdriver.
Let's get to the "main" node
At the very beginning, disconnect the washing machine from the electrical network. Turn off the water supply. Unhook the supply hose and drain hose, lowering the latter into a previously prepared basin. This will ensure safe work and not flood everything around with water.
We remove the hatch door by unscrewing two screws and removing it along with the metal hinge. Remove the upper part of the body. Usually the cover is fixed with various screws, which are unscrewed with a Phillips screwdriver. The fastening elements are located on the back side under the top of the panel on the eyes. Unscrew them and press firmly on the front end of the cover, then lift it up.
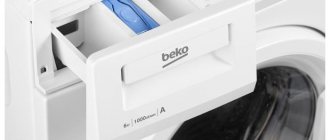
How to remove the detergent dispenser yourself? Feel for a separate plastic button in the center of the drawer. Press it and pull the tray towards you.
Next step: dismantling the control panel. The latter is secured to the washer body with two screws. The first is located under the tray for washing powder and other products. The second one is in the opposite direction. When unscrewing the panel, be careful, as it is very fragile.
Life hack: after removing, hang the panel on a hook or place it separately on a table/window sill so as not to accidentally damage it.
Step number four is disassembling the service panel. To do this, simultaneously press the two locking clips and then the latch located in the middle. Remove the panel.
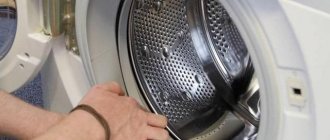
To remove the front wall, remove the metal clamp holding the washer door seal. You can easily pick it up with a screwdriver, the main thing is to act carefully so as not to pierce the cuff. A rubber cuff seal is installed inside the loading hatch. The clamp itself is secured with a small spring; Just push it a little and the clamp will be removed. Now place the cuff inside the drum. Do not try to pull out or pull out the seal - it is held in place by an additional internal lock.
Now it's time to dismantle the front panel, but there may be some difficulties. You will need to complete the following steps (be especially careful with the panel, there are chips inside):
To remove the back cover, unscrew the screws with a screwdriver. They are usually located along the entire perimeter of the rear wall of the car. According to the manufacturer's idea, this allows you to securely fix the housing element, which, in fact, protects the drive mechanism.
Advice from professionals, preventive measures
If you want to wash the outside of the washing machine, you must turn off the power to the unit and do not use a stream of water or chemical detergents containing solvents or abrasive components. It will be better if you simply wipe the case with a damp cloth.
It is necessary to remove scale from the elements of the washing machine using special means, using them in accordance with the recommended dosages.
The detergent drawer should be inspected regularly. If there is dirt or powder residues in it, remove it, rinse thoroughly, and return it to its original place.
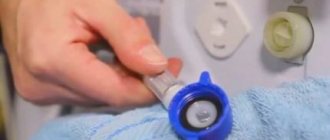
The condition of the water pump should be checked several times throughout the year. For this procedure, the base wall is removed, the drain hose is pulled out, and the liquid is drained. After this, the pump is cleaned and the impeller is checked for rotation. Then the pump cover is installed in its place and the panel is attached.
At least once a year, it is necessary to remove and check the filter located in the water intake hose of the washing machine.
The main mistakes when repairing Siemens yourself
When repairing Siemens machines yourself, you must have a removed spare part when purchasing a new one. If they say that a spare part with the same performance parameters from another brand, for example Bosch, is suitable for Siemens, you should not buy it. We need parts with exactly the same markings. Such “cooling” of the seller is usually caused not by a great desire to help, but by a desire to sell. In specialized workshops, the purchase of “similar” spare parts is practically excluded. Experienced specialists know what this can lead to in the process of self-repairing washing machines, and sell strictly prescribed spare parts according to the catalog.
Also, when repairing washing machines with your own hands, you need to choose the right tool. The bit or Phillips screwdriver must fit tightly into the screws and self-tapping screws, otherwise the slot may “slip off” and you will have to drill out the damaged fastener. And this is no longer saving, but creating problems for yourself. For the same reason, you should not use screwdrivers.
Typical breakdowns
German washing machines are truly distinguished by the high quality of all components. Service center technicians note that compared to other washing machine manufacturers, Siemens machines have the most reliable motors, control modules and bearings. These parts break extremely rarely. Among the weaknesses, the following faults were identified:
Replacing pipes and drain pump
Replacing the pipes and drain pump is perhaps the most difficult job of the frequently occurring faults we have listed. The fact is that in German Siemens washing machines you can only get to the pump through the front cover , and to do this you will have to disassemble almost the entire machine yourself. Prepare a free workplace, a set of screwdrivers, pliers and get to work:
Important! Don't forget to drain the remaining water from the machine by unscrewing the drain filter.
Now let's carefully examine the internal parts of the machine. You can start with the pipes coming from the tank. They must be intact and tightly connected. To get a faulty pump, you need:
The pump is checked for blockages and performance. If it is in good condition, then wash the volute, the pipes and reassemble everything in the reverse order. If the pump malfunctions, you need to purchase a similar one and replace it.
Door mechanism
Another weak point of Siemens washing machines is UBL. The door mechanism of German technology has plastic fasteners and not fully thought out latches. Therefore, problems with opening the hatch are often observed. Usually the door lock is affected. Burrs form on its lever and chips appear. This interferes with the coordinated operation of the mechanism. You can fix the problem yourself by doing the following:
- remove the door;
- take a file with a small notch;
- insert the tool into the hole and grind off the bumps on the lever;
- treat the surface of the lock with graphite lubricant;
- clean off excess graphite;
- put the hatch in place.
This way you can organize the work of UBL. If you can’t fix the blocker yourself, it’s better to invite a specialist.


