Diagnostics with repair - free, without repair - 300 rubles.
1.5 year warranty. If the equipment breaks down again during this period, the technician will repair it again free of charge.
The master leaves at a convenient time for the client, 7 days a week, including holidays
The exact cost will be announced BEFORE work begins.
Parts are original, with a guarantee
Stock. We have a cool promotion “For a photo of a breakdown – 500 rubles!”
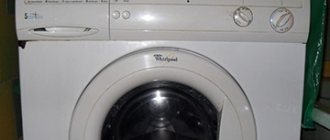
provides a full range of services for servicing household appliances. Our specialists successfully repair Whirlpool washing machines.
During the production of Whirlpool equipment, European assembly standards are observed, due to which it is characterized by durability and reliability. Breakdowns happen quite rarely. They usually arise as a result of non-compliance with operating recommendations or due to natural wear and tear of equipment.
| from 300 rubles | ||
| Diagnosis of a fault reported by the customer | 0*rub. subject to repair | 0*rub. subject to repair |
| Complete equipment diagnostics | From 300 rub. | From 300 rub. |
| Cleaning the heating element and the inner surface of the tank from scale | From 200 rub. | From 200 rub. |
| Carrying out a test wash or waiting for the equipment to reach temperature conditions | From 200 rub. | From 200 rub. |
| Maintenance, preventive maintenance (inside the housing) | From 100 rub. | From 150 rub. |
| Training, instruction in the operation of equipment | 0*rub. subject to repair | 0*rub. subject to repair |
| Adjusting legs, cleaning | From 300 rub. | From 300 rub. |
| Repair | from 300 rubles | |
| Minor repairs (replacement of buttons, surge protector, indicator lights, capacitor, power cord, control knobs) | From 400 rub. | From 400 rub. |
| Replacing the on/off buttons for equipment or the program selector | From 300 rub. | From 300 rub. |
| Replacement/repair of drain pump | From 500 rub. | From 500 rub. |
| Replacing the drain or inlet hose | From 200 rub. | From 200 rub. |
| Removing blockages from the drain pump, circulation pump, hard-to-reach pipes, sewer drains or siphons | From 300 rub. | From 300 rub. |
| Cleaning the water inlet filter | From 300 rub. | From 300 rub. |
| Cleaning the water drain filter | From 200 rub. | From 200 rub. |
| Replacing the command block (with block connection) | From 700 rub. | From 700 rub. |
| Replacement/repair of electric motor, circulation pumps, restoration of main components, systems and units | From 1200 rub. | From 1200 rub. |
| Electronic module repair | 50% of the cost of new | 50% of the cost of new |
| Replacement el. control module (with programming) | From 1200 rub. | From 1200 rub. |
| Replacement el. control module (without programming) | From 500 rub. | From 500 rub. |
| Replacing the command block (with pin connection) | From 600 rub. | From 600 rub. |
| Replacement el. display (button block for program selection) | From 650 rub. | From 650 rub. |
| Electronic programming/reprogramming client module | From 700 rub. | From 700 rub. |
| Replacement, disassembly/assembly of the door, loading hatch or door body (replacement of glass, door body) | From 400 rub. | From 400 rub. |
| Opening the loading hatch door (without repairing equipment) | From 550 rub. | From 650 rub. |
| Replacing the loading hatch door with built-in display | From 1100 rub. | — |
| Replacement of hatch fastening (hinges), hatch door handle, water lifts | From 550 rub. | From 550 rub. |
| Replacing the hatch cuff and door seal (for SMA with drying) | From 800 rub. | From 800 rub. |
| Replacing the hatch cuff and door seal (for SMA without drying) | From 700 rub. | From 700 rub. |
| Electrical repair or restoration diagrams, wiring (with replacement of harnesses, terminals, wires, blocks) | From 300 rub. | From 300 rub. |
| Electrical repair or restoration diagrams, wiring (without replacing harnesses, terminals, wires, pads) | From 400 rub. | From 450 rub. |
| Replacing the front panel | From 350 rub. | From 350 rub. |
| Belt replacement (drive or tension adjustment) | From 200 rub. | From 200 rub. |
| Replacing the drying heater (heater) | From 400 rub. | From 400 rub. |
| Replacing a water heater (heater) | From 300 rub. | From 300 rub. |
| Drum pulley replacement/repair | From 700 rub. | From 800 rub. |
| Replacing the timer | From 500 rub. | From 500 rub. |
| Replacing the drying fan motor | From 700 rub. | From 900 rub. |
| Replacing or repairing a shock absorber pin | From 700 rub. | From 700 rub. |
| Replacing suspension springs | From 650 rub. | From 700 rub. |
| Replacing the shock absorber/shock absorbers | From 750 rub. | From 1050 rub. |
| Replacing the shock absorber/shock absorbers on plastic tanks | From 1000 rub. | From 1200 rub. |
| Cleaning the drying condenser | From 950 rub. | From 1150 rub. |
| Replacing temperature sensors (one/two) | From 650 rub. | From 900 rub. |
| Replacing or sealing pipes | From 300 rub. | From 300 rub. |
| Replacement or repair of the dispenser (hopper) | 40% of the cost of new | 40% of the cost of new |
| Replacing the level sensor, fill valve, valve block | From 400 rub. | From 400 rub. |
| Replacing the thermostat | From 700 rub. | From 700 rub. |
| Replacing the switch/switches | From 500 rub. | From 600 rub. |
| Replacing the hatch (door) delay unit | From 800 rub. | From 800 rub. |
| Installation/removal of end counterweight (weighting material) | From 750 rub. | From 750 rub. |
| Installing/removing the lower counterweight (weighting material) | — | From 650 rub. |
| Installing/removing the upper counterweight (weighting material) | From 700 rub. | From 700 rub. |
| Equipment repair in hard-to-reach places | From 200 rub. | From 200 rub. |
| Delivery to the client’s home of large-sized parts (glass, tank, door frame) | 0*rub. subject to repair | 0*rub. subject to repair |
| Consumables (clamp, sealant, glue) | From 50 rub. | From 50 rub. |
| Installation and dismantling of built-in equipment: partial/complete disassembly of furniture | From 300 rub. | — |
| Removing free-standing equipment from furniture | From 350 rub. | From 350 rub. |
| Removing foreign objects from the tank without completely disassembling the equipment | From 700 rub. | From 800 rub. |
| Standard hour (for work not specified in this price list) | from 1100 rub./n.h. | from 1100 rub./n.h. |
| Overhaul and restoration | from 1600 rubles | |
| Replacing the hatch cuff, which requires complete disassembly of the machine | From 1600 rub. | From 1600 rub. |
| Removing foreign objects from the tank, requiring complete disassembly of the equipment | From 2200 rub. | From 2200 rub. |
| Replacement of tank, drum, housing, repair of tank or housing (welding work) | From 1700 rub. | From 1800 rub. |
| Replacement or repair of tank supports, housings, crosspieces (without removing the tank)/SMA with drying | From 2700/5700 rub. | From 2800/5200 rub. |
| Replacement of tank supports, crosspiece (associated with complete disassembly of the machine/SMA with drying) | From 3250/5550 rub. | From 2750/5700 rub. |
| Paperwork | from 100 rubles | |
| Registration of a package of documents by bank transfer (for one product) | from 100 rub. | from 100 rub. |
| Drawing up a product quality inspection report (for one product) | from 400 rub. | from 400 rub. |
| Transport services | from 100 rubles | |
| Departure of a specialist to the customer’s address | 0 rub. | 0 rub. |
| Departure of the master beyond more than 40 km from the Moscow Ring Road is serviced with payment for the departure of the master for each km from the Moscow Ring Road. | from 20 rub. | from 20 rub. |
| Transportation costs when checking the quality of a warranty product, if no defects are found | 0 rub. | 0 rub. |
| Removing the transport fasteners | from 150 rub. | from 150 rub. |
| Transportation costs when re-visiting a warranty or paid application due to the absence of the client or an incorrectly specified address. Lack of warranty documents for equipment. | 0 rub. | 0 rub. |
*a technician’s visit and fault diagnosis are free of charge, but if the repair is refused, you will need to pay 300 rubles.
We will quickly repair everything in an hour, except motors, bearings, and electronic boards! Spare parts available.
Stages of work
Application
Telephone consultation
Visit of a specialist for diagnostics and cost calculation
Carrying out work with the consent of the customer
Acceptance of work and calculation
What should you protect Whirlpool washing machines from?
The need for servicing of the presented household appliances arises for the following reasons:
- Power outages and power surges can lead to failures of the software unit, damage to boards and electrical connections;
- due to careless operation, leaks occur, buttons are pressed through, the hatch cuff is damaged, the lock and other components fail;
- the mechanisms of a Whirlpool machine, like any other equipment, are subject to natural wear and tear, so sooner or later they require replacement;
- The drain hose, pump, drum, and pipes become clogged with dirt and foreign objects, which require professional tools to remove.
What is this part, why is it needed?
The drain pump is designed to pump waste water out of the tank. During the washing process, it turns on several times, this happens at the command of the control module.
A pump is a single mechanism that consists of several structural elements:
- motor with magnetic rotor and stator;
- shaft and bushing;
- impeller;
- seal.
All moving and stationary elements of the pump are enclosed in a housing from which branch pipes emerge: inlet and outlet.
It is through them that water enters the pump and is discharged first into the drain hose and then into the sewer pipe. An impeller is responsible for its movement, the rotation of which creates a vortex flow.
In what situations may a Whirlpool washing machine need repair?
It is advisable to diagnose the machine if:
- after washing, a fairly large amount of liquid remains in the tank;
- washing modes “freeze”, programs run incorrectly or do not start;
- all operating modes are carried out using only cold water;
- Leaks form in the hatch area.
At first glance, it may seem that such malfunctions are not critical. Practice shows the opposite: such malfunctions can hide serious breakdowns that can completely disable the machine.
| Problem | Possible cause of the problem | Repair cost |
| The machine fills water without stopping | Water level sensor | from 1100 rub. |
| The machine does not heat the water | Water temperature sensor | from 1400 rub. |
| Heating element (heating element) | from 1600 rub. | |
| The machine does not spin the drum and does not start the wash | Motor (drum drive) | from 3700 rub. |
| The machine does not turn on | Power button | from 200 rub. |
| Relays spin constantly | Command device (programmer, timer) | from 2000 rub. |
| The machine does not fill or drain water | Water fill valve | from 450 rub. |
| Drain pump (pump) | from 1600 rub. | |
| The hatch door seal is leaking, has fallen off, has become black or torn, and also has an odor. | Hatch cuff | from 1890 rub. |
| The machine is noisy, rattling, or grinding | Tank bearings + oil seal | from 3000 rub. |
| The machine does not spin the drum or is noisy | Motor (drum drive) bearings | from 2700 rub. |
| There is a sound of the car engine running, but the drum is standing still | Belt | from 800 rub. |
| The door does not open | Door handle | from 700 rub. |
| Car door won't close | Hatch blocking device (UBL) | from 1000 rub. |
| The pipes or the filter itself need to be cleaned and the machine does not drain | Water drain filter | from 800 rub. |
| The machine display blinks or does not turn on (lights up), and may also show an error | Electronic control unit (module) | from 2700 rub. |
According to experts, the most vulnerable elements of Whirlpool brand appliances are:
- thermoelectric heater. Repairs may be required due to hard water. Heating elements not only constantly come into contact with water, but also withstand sudden temperature changes;
- motor, as well as its moving elements. We are talking about electric motor brushes, bearings, shock absorbers, belts, etc. The drive is one of the most critical components, and it is also one of the most loaded. The more intensive the use and the lower the quality of the components, the faster the wear;
- pipes The main threat is leaks. Repair comes down to checking the connections, strengthening them or completely replacing the pipe;
- hatch cuff. Problems arise due to rough handling, clogging, constant contact with water, body vibrations, improper cleaning, loose clamps, etc.;
- control module. The technician determines the exact cause of the problem after reading the error codes. Whirlpool washing machines, like any other equipment, are vulnerable to network overloads, power surges, short circuits, etc. Breakdowns can be the result of damage to control circuits, disconnected contacts, etc. All cables located inside the body must be checked.
How to repair?
Repairing the pump is only possible if it is dismountable. Then its components can be removed and replaced, or cleaned:
- If the impeller is clogged, remove the pump, open the housing and remove objects that interfere with its normal rotation. If the blade breaks, the impeller is replaced completely.
- If the filter is clogged, there is no need to remove the pump. It is enough to move the false panel, take out the snail and rinse it under running water. You can use a toothpick to remove small dirt and hair.
- If the motor breaks, it is twisted and a new part is installed.
When replacing components, use only original components.
Entrust the repair of Whirlpool washing machines to professionals!
The decision to repair a washing machine yourself rarely leads to good results. Without specialized equipment, it is almost impossible to identify existing faults, as well as to discover the cause of their occurrence. It is much more convenient to seek help from specialists.
Improperly performed work to restore the above components can lead to even more serious consequences. It's not just about trying to fix the problem yourself. It also implies the involvement of “craftsmen” from dubious companies.
Knowledge of instructions, reference literature, and technical documentation of the manufacturer is a mandatory requirement. Repair of Whirlpool washing machines should be performed by specialists who have devoted many years to studying and servicing Whirlpool equipment.
In addition, what distinguishes a good master from a mediocre one is his working tools. It is impossible to diagnose a software module, test cables and connections, replace a valve, pump and other components without the proper tools.
Is the pump really broken?
The pump is not always to blame for the lack of proper drainage. In addition to the pump, other elements of the drainage system could also fail: from the garbage filter to the central sewer system. Sometimes it’s a simple clog in the drain hose, and sometimes the expensive control board breaks. There is only one way out - to sequentially check all the key drainage units.
The first thing you need to pay attention to is the display. Many modern machines, thanks to the self-diagnosis system, can automatically determine the nature and location of the malfunction, displaying an error code on the screen. In this case, it is enough to open the factory instructions and decipher the combination that appears. Sometimes a breakdown is reported by the corresponding “emergency” indication.
It is prohibited to operate a washing machine with a non-functioning drain - leaks and short circuits are possible!
If the self-diagnosis system does not work, then we move on to the second step - a comprehensive diagnosis of drainage. That is, a sequential check of all drain elements. Several questions need to be answered.
- Was the drain or spin mode turned on? Perhaps it is not provided in the program or has been reset. It is necessary to repeat the cycle and make sure that the water is not pumped out.
- Is the sewer connected correctly? The drain hose must not be pinched, crushed or placed below the level of the tank.
- Is the drain clogged? Disconnect the drain hose from the pipe or siphon, and then lower it into the bathtub or toilet. Perhaps the problem is an external blockage.
When a positive answer is received to all the above questions, there is only one option left - the breakdown lies inside the washer. Most often this is a clogged garbage filter. To eliminate it, you need to remove the technical hatch door, place a container under the black plug and slowly unscrew the “trash can”. The removed nozzle must be thoroughly cleaned of dirt.
The seat freed from the filter must also be washed. You also need to illuminate the “nest” with a flashlight and inspect nearby elements for the presence of stuck objects. It is advisable to try to spin the impeller - if the blades rotate, then everything is in order. A blocked screw or a screw that has fallen off the axis will confirm that the drain pump needs to be replaced.
Why is it worth ordering Whirlpool washing machine repair in ?
Our service center specialists have extensive experience working with Whirlpool equipment. This allows them to successfully solve problems of any complexity. The technicians perform diagnostics and only after that determine the optimal repair plan for the Whirlpool washing machine, the required spare parts and the cost of the service. This approach allows you to fully restore the functionality of the equipment with minimal financial costs.
All work performed is guaranteed. You can call a technician to repair a Whirlpool washing machine at home by phone in Moscow.
Disassembling a household appliance
The interior of a Whirlpool top-loading washing machine can be accessed through disassembly.
A competent analysis begins with the preparation stage:
- Disconnecting the device from electricity (the plug must be removed from the socket).
- Turn off the water to the device.
- Disconnect from the sewer.
- Pull out the device so that you can approach it from all sides.
- Drain the remaining water from the tank.
In addition to these measures, you need to ensure that you have the tools to disassemble the Whirlpool machine and a multimeter to measure the condition of components and rags. The latter will be needed if water remaining in the washing machine spills on the floor. The main point of disassembling equipment is to gain access to the desired node.
How to remove the cover and disassemble the tank?
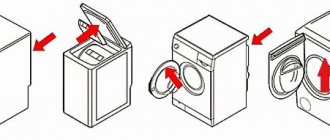
To get to the Whirlpool tank and drum, you need to remove the top cover. The work is carried out with the removal of the clamps . The top cover slides forward until the latches click.
How to remove the top cover can be clearly seen in the video:
You can watch the video on how to disassemble the tank:
Parsing from above
If the pressure switch or control module is a priority, then the analysis starts from the top . The control panel is removed carefully so as not to break the latches that hold it in place.
A narrow, durable object, such as a spatula, can help with this, with which you need to lift the control panel. The part is lifted. Electrical wires come from it, which are fixed with terminals.
To avoid confusion during reassembly, it is advisable to photograph the location of the contacts before disconnecting.
How to remove the control panel and gain access, for example, to the fill valve - in the video:
From below
If the goal is to gain access to the drain pump or motor, then you will have to literally put the washing machine down . This must be done in compliance with all precautions, since there is still a risk of residual water getting into the electronic components of the washing machine.
You will also need to remove the left side of the housing to gain easy access to the pump. Before removing the motor, you need to remove the drive belt.
Whirlpool awe 2221 machine DIY repair
Hi all! I want to share with you information about how I repaired the Whirlpool awe 2221 washing machine. Well, first, a little background). We used it for almost 4.5 years and one fine day, the washing machine stopped working. The symptoms were as follows: the machine was plugged into the outlet, but not a single LED or light bulb was lit, and it did not react in any way to pressing the buttons - in general, it seemed that the machine was not plugged into the network.
First of all, I checked the socket for serviceability in the simplest way by plugging in a hairdryer - it worked. I started looking further for the reason, I thought maybe there were fuses in the washing machine somewhere and they just failed, but in the end there are none in this model. Having started to think logically and search for information on the Internet, I realized that the fault was most likely in the control board.
And there were several options:
1) Call a specialist and entrust him with the repair
2) Repair the board yourself
3) Buy a new one
I have some experience in electronics repair, so I decided to disassemble the machine myself, try to find the problem and fix it. Of course, I first looked at the cost of a new control board on the Aliexpress site, it cost about $80, and in our online spare parts stores it cost about $100.
Important!
I do not advise anyone who has no experience in repairs to repair the washing machine themselves. It’s better to entrust the work to a master, it’s both safer and more reliable.
To get the job done you needed the following:
- Torx T15 (star key)
- Multimeter
- Soldering iron with thin tip
- Solder, rosin
- Alcohol, ear stick or just a piece of cotton wool
I was glad that I didn’t have to disassemble the entire machine to get to the board; you just need to open two latches.
Having taken out the board, I inspected it visually and noticed that one resistor had a crack.
Then, taking a multimeter, I checked the diodes - they were working, the resistor with a crack, of course, was not working. After talking with people on forums, I found out that the resistor in this circuit acted as a “fuse” and on its own it was unlikely to fail. Therefore, we came to the conclusion that it is necessary to change the LNK304PN microcircuit and resistor.
I ordered the following parts:
- PWM controller (designation on the board U002) - LNK304PN (marking)
- Resistor (designation on the board R020) - 22 Ohm / 1W
Regarding the resistor: on the forum they advised to use 2 W. I ordered 1W and 2W just in case. So the first one was just the right size, and the more powerful one was larger compared to the original, so I didn’t experiment and installed a 22 Ohm/ 1W resistor.
The necessary parts were ordered from the online store. A few days later I received them and started soldering. Everything was simple with the resistor, but with the microcircuit we had to tinker a little, because... the legs are nearby and it was inconvenient to solder the part. I wiped the areas where I soldered with alcohol, checked again to make sure nothing was shorted to each other, and began assembly. So I turn on the washing machine and... everything works)), I put the washing in to check, the machine worked a full cycle - everything is in order.
And I almost forgot, the cost of repairs was about $1.
That's all for me, if you liked the article, go to the site, I will periodically post something interesting.
