South Korean washing equipment from the LG brand is very popular due to its reliability and functionality. It contains complex technical components and simple parts that you can replace yourself. It is not necessary to immediately run to the service center after detecting irregularities in operation. After all, saving where you don’t have to spend is always useful, right?
Those who want to repair an LG washing machine with their own hands will learn from us all about common types of breakdowns and methods of dealing with problems in the operation of the washing machine. With our help, independent repairmen will solve any technical problem without any problems or difficulties.
The article presented to your attention thoroughly examines the types of problems that occur when using LG machines. Options for eliminating them are described, taking into account the manufacturer’s recommendations and design features. Visual videos and photo applications will assist in mastering a difficult topic.
Operating principle of the washing machine
What does a washing machine do? In fact, it pours water into the body, heats it and spins a drum filled with dirty laundry. This happens in a certain way, which ultimately leads to cleaning the laundry from dirt.
Now a little more detail. As soon as the washing program is started, the first thing to do is open the water supply valve. Water flows through the dispenser into the tank.
Typical faults for LG washing machines, which most often occur during operation, are listed in the instructions for the unit
Important parts of the machine you need to know:
- Dispenser - a drawer for detergents.
- Tank is a plastic container in which there is a drum and a heating element (heating element). Water is poured into it.
- Pressostat is also a pressure switch. Monitors the water level in washing machines.
- TEN - tubular electric heater. Heats the water.
The pressure switch gives the signal to stop the water supply as soon as the required volume is reached. Then the heating element is turned on. thermostat next to the heating element . As soon as he reports that the water has heated up strictly to the required temperature, the motor comes into play and rotates the drum.
Towards the end of the wash, the pump - this is what is most often called the water drain pump. This is where the “production cycle” of the washing machine ends and the analysis of typical faults of LG brand machines begins with it.
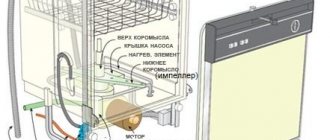
Schematic diagram of a horizontal loading washing machine. To begin repairs, you need to get acquainted with all the details and their purpose.
Call the master
If you cannot repair the control board yourself, you need to seek help from a specialist. Masters can be found by ad in the newspaper or on the Internet .
The average cost of repair work is 2,600 rubles, excluding the price of the module itself. You will have to buy it separately (if a part needs to be replaced).
You need to pay for the services of the master only upon completion of them. The specialist must be required to provide a document indicating the warranty period for the repaired part.
Common types of breakdowns
The components of a washing machine are electromechanical devices that move under the influence of current. They work under load and are exposed to tap water and temperature changes.
Here is a list of what can break:
- electric door lock;
- fill valve;
- pressure switch;
- heating element;
- temperature sensor;
- electric motor;
- speed sensor (“Hall sensor”);
- drum bearings;
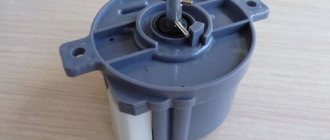
- water pump;
- electrician (wire connections);
- seals and hoses.
If the machine has drying and steam processing functions, then several more items are added: a steam generator, an air heater, a fan, an air temperature sensor.
The modern generation of washing machines is equipped with direct drive. The engine in such systems fails much less often than other components
But the most popular reasons for calls to service centers are the failure of the pump, heating element, fill valve, pressure switch, electrics and bearings.
In general, LG washing machines are very reliable and, compared to other brands common in Russia, break down much less often.
Advantages
Traditionally, machines are equipped with commutator motors with a belt drive. The use of a motor combined with a drum allows torque to be transmitted directly and gives the units a number of advantages.
Differences in the design of belt and direct drive motors
Among the advantages it is worth noting:
- reduced noise levels (models without direct drive are equipped with a belt and pulley that create noise when washing);
- no vibration (good balancing);
- reduction of engine breakdowns and increase in the service life of the device;
- high quality washing and spinning;
- economical energy consumption during the washing process.
You can get more complete information about the direct drive device and the advantages of such units by reading our article “Inverter washing machine”.
The introduction of new technologies has increased the reliability and durability of washing machine engines. However, experts note that innovations have not affected all important components and systems of equipment, so it is not immune from breakdowns. In addition, direct drive machines have other disadvantages, for example, the high cost of both the units themselves and repair work.
Diagnostics and repair of main machine components
Washing machines are not fundamentally different from each other. The descriptions given here will help you navigate their design (even if your machine is not LG).
The first stage of repair work is diagnostics. You should not start replacing parts without being completely sure of the cause of the breakdown. The failure of one or another element is signaled by special signs. New generation machines have a system of hint codes that help determine the location and cause of the failure.
To assemble/disassemble the body and dismantle the washer’s parts, you need to prepare in advance an easy-to-use tool. If you suspect problems in the electrical part, it is advisable to stock up on a multimeter
For most operations, a Phillips screwdriver will suffice. In some cases, pliers and wire cutters will help, but in others you will have to use wrenches and sockets 10 and 14. For more complex repairs (for example, replacing bearings), you will need more cunning devices.
To make the task easier, it is recommended to take paper tape and markers. Before disconnecting the wires, mark them with tape labels with different colored numbers. Take a photo so you can be sure to assemble it correctly later.
A building level will help a lot. After the repair, you will need to make sure that the machine is level and, if necessary, adjust the legs
Most components and individual devices of the washing machine cannot be repaired. For example, when a heating element burns out, it needs to be replaced entirely. To find the right model for sale, find out your machine's model number (“ Model No ”) and its serial number (“ S/No ” or “ Serial No ”). They are written on a sticker or plate. Look for it on the body: under the drum door, behind, on the side.
Before installing a new part, make sure to turn off the plug again. Many units operate on deadly 220 volts.
Replacing the drain pump according to the rules
The washing machine does not drain water, the display shows the error code “OE” . It's simple - it's a pump, and it's not necessarily broken.
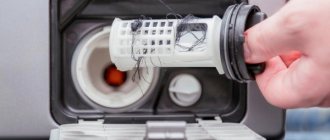
Usually, during draining, a characteristic sound is clearly heard - the pump impeller is rotating. You can see it in action without even disassembling the car. To do this, you need to open the large round plug - it is located in the lower right corner, under the hatch or plastic panel with latches. Be careful: water will flow!
The pump plug is integral with the filter. The purpose of the filter is to prevent debris from entering the impeller. It is recommended to clean it after two or three washing sessions, and in old machines, every time after completing the work process
Even if the impeller does not spin, it could simply be clogged. First of all, drain the water. Near the large round plug you may find a thin tube closed with a small plug. Using a large flat container, carefully pull out the tube and open it. And be patient.
Another way to drain the water is to lower the drain hose to floor level. Most likely it is secured with clips on the back wall. When the tank is empty, you can safely open the pump cap and take out everything foreign that you find there.
It is possible that all the problems were associated only with a clogged drain system. It will just need to be cleaned, for which detailed video instructions will help:
If the pump does break, you will have to disassemble the car a little:
- Remove the plug from the outlet.
- Take out the dispenser. You will need to tilt the machine, and there is usually water left in the dispenser that can spill.
- Remove the bottom plastic panel. It is secured with two self-tapping screws and latches around the perimeter.
- Tilt the machine or place it on its left side (the pump is usually on the right).
Now you can test the pump with a multimeter and remove it. Even if the electrical circuit is working properly, the pump could be worn out mechanically. In such cases, the machine does not always agree to drain the water, and the impeller may dangle on its axis.
The drain pump requires careful examination of the condition of both the mechanical and electrical parts. True, practice proves that the vast majority of breakdowns are associated with clogging of the device
So, you've diagnosed a pump problem or you're not sure it's working. You can take the device to a home appliance service to be sure to find out if it is working properly.
If you are sure that the washing machine pump is faulty, change it, to do this:
- Remove the dispenser - there may be water left in it.
- Remove the bottom plastic panel: unscrew the two screws and carefully pry up the edges, starting from the top. It is better to do this with a chisel than with a screwdriver - there will be less damage.
- Place the car on its left side.
Wires and hoses are connected to the pump. The wiring terminals are pulled out by hand (don't forget to mark and photograph them). To remove the hoses, you need to loosen the clamps with your fingers or pliers. When everything is turned off, unscrew the three screws around the filter plug.
Pump without filter - front and side views. Most often, there is no need to buy a pump complete with filter, since the filter does not need to be replaced
You may not find the exact same part for sale. But there are very few types of drain pumps, and almost each one fits dozens of different models of washing machines. Perhaps the easiest way is to contact your nearest service center for a new spare part.
Before installing the new pump, clean off any dirt and deposits. These can greatly affect the life of the impeller.
It will be more convenient to first screw the pump with self-tapping screws, then connect the hoses and wires. Don't forget to close the cap. Place the machine in place and run the shortest cycle “idle”, for example, “Rinse and Spin”. After making sure that everything works, you can finally assemble the car.
After replacing the drain pump, you should not immediately reassemble the housing. First you need to check how the newly installed device works. You can verify its functionality by running one of the short programs
Installing a new water heater
The error code is “HE” . Another sign is that the door glass is cold, while according to the program the water should be 40°C.
To make sure that the water heating device - heating element is faulty, you need to remove the back cover, for this you will need a Phillips screwdriver. First, remove the plug from the socket, then unscrew the four screws and pull the cover up slightly.
The heating element is located at the very bottom of the tank, three wires go to it. The middle one is grounding, and the extreme ones are power, 220 volts. Disconnect these terminals and test the heater with a multimeter.
Measure the resistance at the power terminals - it should be within 200 Ohms, but above zero. If the device shows one, it means the spiral has burned out.
Disconnect the wires. To remove the heating element, you need to unscrew the nut in the middle and “sink” the pin. Using a screwdriver, pull out the heater as far as possible.
Now remove the rubber seal by prying up its edges with a flat-head screwdriver. Do not touch the edges of the hole with it! The slightest notches will break the seal.
After unscrewing the nut and removing the seal, the heating element should come out freely. Take care of the plastic visor over the heating element - it breaks easily
The new heating element is sold complete with a seal. When buying it, you will probably notice the absence of an internal elastic band: do not let this bother you. It formed over time as the seal was sandwiched between the heater and the inner plate.
Your heater may have a built-in temperature sensor. If it is working properly, then it is not necessary to change it. There is a bracket inside the tank - the heater must fit into it. After inserting it all the way, rotate the drum by hand. If a scraping sound is heard, the heating element has passed above the bracket.
There is also a danger of missing lower, and then the tank will suffer from the high temperature. Now tighten the nut, but without much effort. Pour water into the tank. You can directly through the drum, for example, from the shower. Make sure that the seal does not leak, if necessary, tighten the nut slightly.
Professional guidance on replacing the heating element is presented in the video:
Fill Valve Repair Options
Intake valve problems can manifest themselves in a variety of ways.
If there is little water flowing into the machine, the inlet filter may be clogged. To clean it, disconnect the inlet hose, remove the mesh and clean it mechanically, for example, by rinsing under running water or using a toothpick.
Problem #1. The water is drawn slowly, the powder in the dispenser is not completely washed off. Maybe the weak water pressure is to blame. If not, it means the filter is clogged.
- Turn off the water supply to the washing machine.
- Unscrew the inlet hose directly at the entrance to the machine.
- Use pliers to remove the filter.
Most likely, the plastic mesh is clogged. It can be cleaned with a toothpick under running water.
Problem #2. Water is not being collected. “IE” error code may appear
First check the filter as described in the previous paragraph. If cleaning doesn't help, you need to get to the valve and check it with a multimeter. To do this, unplug the plug from the socket and remove the top cover - it is secured with two screws at the back. After unscrewing them, move the cover back a little, and then it will come off without effort.
The inlet valve, as you might guess, is located immediately in the place where the inlet hose was screwed on. There can be from one to five valves, but most often there are two
Double check that the power cord is not plugged in. Now disconnect the terminals from the valves. Use a multimeter to check the resistance: it should be between 2.5 - 4 kOhm.
Problem #3. The machine does not wash, but water is bubbling inside. There is no point in checking the electrical part of the valves - this is mechanical wear. The valve is not a very expensive part and is not usually repaired. Just in case, mark the wires and take pictures of how they were. Replacement procedure:
- Remove the plug from the socket (most often 220 volts are supplied to the valves).
- Turn off the water.
- Remove the top cover by unscrewing the two screws on the back and sliding it back a little.
- Disconnect wires and hoses from valves.
The valve is secured with self-tapping screws or special latches. In the second case, you need to turn it while simultaneously pressing on the plastic protrusions from the outside. There shouldn't be any difficulties installing a new spare part.
Replacing the pressure switch yourself
When the pressure switch fails, the machine takes in too much water. It happens that water is constantly being collected and drained at the same time. Sometimes a breakdown of this sensor manifests itself in poorly wrung out laundry. The display may show an error code “PE” .
The pressure switch is located under the cover itself, usually in the right corner. A thin hose and electrical wires are connected to it.
Removing this sensor is easy. Unplug the plug from the socket, remove the top cover by unscrewing the two screws on the back and sliding it back a little.
It is attached with one self-tapping screw. First, disconnect the terminal, then remove the sensor, and finally disconnect the hose from it. To check the pressure switch, you need to blow into it. In a working pressure switch you will hear a click. Install the new pressure switch in reverse order.
Recommendations for electrical repairs
The hardest thing to diagnose is wiring problems. The washing machine's electrician is responsible for the operation of all systems, and contact failures lead to a variety of consequences.
If you're not sure what's wrong, check the electrical system. Remove the plug from the outlet and open the back and top covers. You can remove the bottom plastic panel if there are problems with the drain.
Systematically inspect all wires and their connections:
- The terminals must be clean and shiny.
- The color of the wire insulation should be bright and uniform.
- Water should not get on wires and contacts.
When inspecting the inside of the washer, you may find problems with the wiring.
It can be:
- oxidized contacts (white or green rough coating);
- darkened or whitened insulation;
- partially destroyed, cracked or burnt insulation;
- wet contacts.
If water gets on the contacts, they need to be wiped or dried. Be sure to fix any leaks. It is not enough to clean oxidized terminals. Perhaps they are constantly exposed to moisture, so you will have to find and eliminate the cause.
Darkening on the wires is a sign of overheating. The reason is again poor contact. The insulation must be intact, as well as the clamps that secure the wires
It is better to replace oxidized contacts. If possible, locate the opposite end of this wire and replace the entire wire. For such repairs, you will have to make friends with a 60-watt soldering iron. You can clean the contact as a temporary measure, but inspect again after a couple of weeks.
If the insulation is damaged, the wire definitely requires replacement. Darkened insulation is also a sign of poor contact and, as a result, overheating of the wire. Sooner or later the insulation will melt, causing a short circuit and fire.
Bearing replacement instructions
These are perhaps the biggest workers in the washing machine. They bear the entire load of rotating wet laundry and the weight of the drum. A damaged bearing can be heard immediately: an unpleasant hum appears, especially loud during spin cycles.
The bearings are protected from water by a seal, which can also wear out. In this case, water will seep into the bearings, and then they will face a slow but certain death. Humming is a completely reliable indicator. As soon as it appears, start repairing it without delay. Delay can lead to more costly consequences.
Two bearings are the only thing that keeps the drum horizontal. If the bearings are heavily worn, wear of the tank and crosspiece (bracket) begins.
The most difficult operation described here is replacing bearings. But by ignoring the buzz, you risk complicating things even more.
Due to damaged bearings, the drum rotates with difficulty. The bearings begin to break the tank and the power element of the drum - the cross. There is a possibility that the bearings have begun to rust due to wear of the seal. In this case, water from the tank will flow onto the engine. Imagine the consequences.
If you delay replacing the bearing, you risk completely losing the spider, tank, and even the engine. Repairs will cost much more
To replace the bearings you need to disassemble almost the entire machine. The idea is to remove the tank, disassemble it and remove the drum from it.
In addition to screwdrivers, you will need:
- head at 10;
- key or head 14;
- pliers;
- wire cutters;
- wiring clamps (polypropylene ties);
- simple silicone sealant (not glue!).
Gloves and a flashlight will also help a lot.
Remove the plug from the outlet. Remove the back panel and disconnect the wires going to the motor and heater. Remove all the fasteners that secure the wires to the tank, cut the clamps with wire cutters. The tank itself hangs on two springs and is supported from below by two shock absorbers.
How to remove the dispenser drawer: press the latch in the middle. In general, it is useful to sometimes take it out and wash it so that mold does not form.
Most likely you have a direct drive machine. This means you will have to remove the washing machine motor. Unscrew the center screw while holding the drum with your hand.
Be careful not to cut yourself on the edge of the case. Remove the rotor (the moving part of the motor), then unscrew and remove the stator (respectively, the stationary part).
In washing machines with a belt drive, you must first remove the belt: pull it towards you and turn the pulley (wheel). The belt can be removed easily. The pulley also needs to be unscrewed
There is a large elastic cuff around the hatch into which the laundry is loaded. It is wrapped around a clamp with a spring. Find this spring and, using a screwdriver, remove the clamp.
After removing the clamp, proceed as follows:
- Now you can remove the front panel. It is held in place by self-tapping screws along the top and bottom edges. Pull the panel up slightly. Disconnect the wires going to the lock.
- Remove the pipes from below (water may remain inside!) and the thin hose going up to the pressure switch.
- Remove the jumper that supported the front edge of the top cover.
- Remove the dispenser and fill valve.
- Using a 10mm socket, unscrew the counterweights - one on top and two in front.
All that remains is to disconnect the shock absorbers. They are secured with plastic pins; press the spring latches on the pointed ends of the pins and remove them (you can use pliers).
Make sure you disconnect everything. Now you can lift the tank and unhook the springs. Carefully pull the tank forward. Don't forget that there is a water level control tube screwed to the bottom, which can be accidentally broken. For peace of mind, you can remove it.
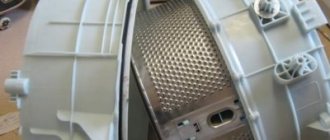
Next, it will be more convenient to work on the table. At this stage, you need to disassemble the tank and remove the oil seal and bearings from it. The tank consists of two parts, twisted with self-tapping screws under the head 10. Disassemble the tank.
The drum is simply removed from the rear half of the tank without much difficulty. Next, we only need the rear half (forecastle). When working with it, remember about the heating element - do not bend or break it.
A puller for the internal bearings will make the task much easier. If you do not have such a tool, knock them out with a hammer and a punch. Any rod of suitable length will be suitable as a punch.
In the center of the forecastle, on the inside, you will see an oil seal. It also definitely needs to be replaced. It will not be difficult to pull it out using something as a lever (for example, a flat-head screwdriver). Place the forecastle with the outer side up and insert a punch through the outer bearing - first knock out the inner one.
Strike carefully! If the bearing becomes misaligned, it can damage the forecastle. The blows should not be strong. Alternate the places of impact according to the “criss-cross” principle: first hit the left edge, then the right, then the top, then the bottom, and so on in the same order. Make sure that the bearing comes out smoothly, without distortions.
When driving the bearing, proceed carefully. Hit only the outer ring. Instead of a punch, it is better to use a pipe of the appropriate diameter
The outer bearing is knocked out using the same principle, only the forecastle needs to be turned over and supported so that the bearing “hangs” above the table.
Installing new bearings and seals requires even more care. You can only hit the outer ring of the bearing. Using a punch, constantly check that the bearing is not warped.
A comprehensive instruction on replacing bearings with all the nuances will be presented in the video:
You should also install the new oil seal carefully - it can be easily bent. Don't try to straighten it, better buy another one.
The slightest mistakes when installing these parts will lead to leakage - water will get onto the bearings and then onto the engine. Before assembly, try to clean the drum axle. Do not scratch it or use sandpaper.
The drum should fit easily into the bearings. Before assembling the tank, apply silicone sealant to the joint. When connecting the forecastles, make sure that the heating element fits into the bracket intended for it. Do not tighten the screws as hard as you can - this is not necessary. Thanks to the sealant, the connection will be quite reliable.
If all steps to replace the bearing were carried out correctly, the tank will easily attach to the unit. After installation, the connection must be treated with sealant
Screw the water level control tube to the tank. Next, you just have to assemble the car. There shouldn't be any difficulties. It is more convenient to work in this order:
- Hang the tank on the springs and attach the shock absorbers.
- Connect the pressure switch hose and secure it to the tank. The “extra” length of the hose should remain at the top.
- Install counterweights.
- Connect the lower pipes.
- Screw the motor stator, connect the connectors to the stator and heating element, secure the wires with clamps and brackets.
- Install the dispenser and fill valve, connect the pipes and wires.
- Screw on the top front bridge.
- Install the large front panel after connecting the lock connector.
- Pull out the edge of the cuff and place it on the edge around the hatch. Place the collar on the cuff.
- Install the motor rotor (or pulley). While tightening the center screw, hold the tank with your hand from the front.
- Connect the wires to the top panel and install it.
Check again that everything is connected and secured.
Before installing the remaining panels, you can run a short dry program to check the tightness of all connections. Once the machine is in place, level it.
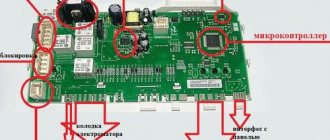
How to repair a board yourself
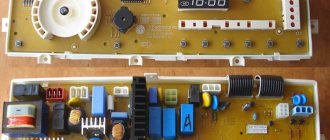
To determine the breakdown, inspect the board for traces of damage and burnout of elements.
When to change the entire module
A complete replacement of the control board is required if it cannot be repaired. Controllers for popular models are sold in hardware stores. You can purchase and replace it yourself. In all other cases, it is better to contact persons competent in this matter.
The most common types of controllers: Arcadia / Arcadia, AKO, Computime / Computertime, Invensys / Invensis, Samsung MFS.
Where is the controller located
The control unit is located behind the front panel of the washing machine. You can see it when you remove the top cover. The location may vary depending on the type of laundry load, but in general it should not be difficult to find.
Dismantling
To remove the processor from the machine body, you need to perform several steps:
- be sure to unplug the power cord from the outlet;
- turn off the water supply;
- remove the top cover;
- remove the powder compartment;
- disconnect the chips with wires;
- unscrew the fastenings of the board to the case;
- get the part.
To facilitate the subsequent installation process, we recommend taking photographs and notes on the parts.
Functionality check
It is impossible to check the board's functionality when removed, without special instruments. You can only visually assess the presence of burnouts, oxides, and mechanical damage. Any part can fail. Most often these are diodes, resistors, thyristors, relays and other small components.
An example of checking a board with a multimeter:
We fix soldering ourselves
Due to the enormous vibration load on the machine during operation, the soldering of electronic elements may fail. To eliminate defects you will need a soldering iron, solder, flux and the ability to solder.
Capacitors
The capacitor performs voltage stabilization. You can determine the breakdown by swelling of the element or with a multimeter. If the device displays:
- "0" - short circuit
- "1" - break
When replacing, be sure to note that the capacitor has polarity.
Resistors
Checking resistors is divided into two stages according to the order of the elements:
- 8 Ohm, up to 2 A - first order resistors,
- 10 Ohm, up to 5 A - second order resistors.
If the specified parameters do not comply, mandatory replacement of the elements is necessary.
Thyristor block
The unit fails due to frequent changes in the network or impulse noise. Carry out the test only after you are sure that the capacitors are working properly. For the operation, you will need to install a negative resistance. The voltage of first order diodes should not exceed 20 volts. The burnout of the output contacts is checked with a multimeter in continuity mode. The voltage on the filter should be within 12 volts. Observe the polarity of all elements and handle the thyristor ports with care, otherwise repairs will result in large financial expenses.
Checking trigger status
Often its failure is also due to problems with capacitors. The trigger itself breaks quite rarely. Poor or vibration-damaged soldering leads to problems with the assembly. To eliminate them, solder the output contacts. The output voltage should not deviate too much from 12 volts. If the module has been replaced, before commissioning, measure the threshold voltage and output resistance, which should fluctuate within 12 volts 20 ohms, respectively.
How to re-flash the controller of an automatic machine
If the control board is intact, but problems remain, you can try to reflash the machine program. To do this, the module must have connectors for connecting equipment (if they do not exist, new firmware will be installed only in a service center, but directly into the processor).
You will also need a program or driver for flashing. They can be downloaded from the official websites of manufacturers or special resources - for example, bineep.ru and eeprus.ru.
To flash via USBDM:
- Connect the programmer to the appropriate connector and then to the computer.
- Install the driver that comes with the programmer on your computer.
- Open Windows Device Manager. Find the ESBDM item.
- Select the Target tab. Click Detect Chip to have the system detect the board model. If the model is not recognized, check the controller, semiconductors, triacs and other elements again with a multimeter - perhaps it is damaged after all.
- If everything is fine, click Load Hex Files... and select the program for the machine.
- Click Program Flash and wait for the process to complete.
https://www.youtube.com/watch?v=qaIXqShtdZQ
Conclusions and useful video on the topic
Replacing spare parts in a washing machine is a responsible undertaking. To take into account all the nuances and perform the work perfectly, we suggest studying useful information on the nuances of assembling and disassembling an LG machine, presented in the video:
So, you have become familiar with the most common malfunctions of LG washing machines. Repairing them with your own hands is not always easy, but it is quite possible. Try it! Good luck with your renovation!
Please leave comments in the block form below, ask questions and post photos on the topic of the article. Tell us about how you repaired a washing machine with your own hands. Share useful information and technological nuances you know that will be useful to site visitors.

