The time when everything you needed was a total shortage is behind us, and today you can buy everything you need, from building materials to equipment. There are no problems with a concrete mixer, but it is quite expensive, which stops many developers. After all, its necessity is justified during construction and renovation, and there is no particular point in purchasing it. True, there is one way out, and today we will look at how to assemble a concrete mixer from a washing machine at home.
Advantages of a homemade concrete mixer with a washing machine engine
It should be noted that if you have the necessary materials, it is possible to make an inexpensive and useful item that will serve not only you, but also your relatives for a long period. Many are distrustful of such devices, but this is a mistaken opinion, since there are quite a number of arguments in favor of a homemade concrete mixer:
- a concrete mixer with a washing machine engine is inexpensive, but brings great benefits;
- it can be manufactured according to individual drawings, so that you can place the equipment in the body or trunk of your vehicle for ease of transportation;
- if a homemade concrete mixer fails, it will be easier to deal with the breakdown, since you assembled the device directly;
- parts from an old washing machine will find a worthy use, and they will no longer take up space in the garage.
It is fair to say that there are certain obstacles in making a concrete mixer. The fact is that installation will require a lot of free time, the ability to work with hardware and the corresponding desire for this. In addition, you must understand exactly what you plan to get in the end.
Mixing options
In the simplest case, you can “quickly” prepare a solution without auxiliary devices. The solution is poured into any container and mixed with an ordinary shovel while gradually adding water. In some cases, with a small volume of solution, you can do without a container entirely and prepare the mixture on a hard, flat surface. It is ineffective, tedious and poor quality as the mixture dries out quickly.
Sometimes they use a drill with a special mixing attachment and mix the solution in a bucket in a circular motion. In this case, a power tool that is not designed for such loads quickly breaks down, and the mixture is not completely mixed. Dry voids usually remain in areas near the edges.
Therefore, it is advisable to assemble a simple homemade concrete mixer.
There are three ways to mix concrete mortar:
- Gravitational.
- Vibrating.
- Combined.
We prepare everything necessary for assembling a concrete mixer
The design of equipment for mixing concrete, powered by a washing machine engine, does not have any particular difficulties. It includes three main elements - a container for mixing concrete, a base on which the concrete mixer is mounted, and an electric motor.
When choosing suitable materials and components, you should know what size concrete mixer you need. A large concrete mixer will have a spacious capacity for mixing concrete, but its operation will require a motor with a large power rating, and you will not find such from washing machines. And you can’t put such an installation in the trunk of a car; to transport it you will have to rent a small truck, which will require additional costs. Therefore, it is recommended to install a concrete mixer with a small capacity using a Malyutka washing machine.
The first stage is preparing the necessary tools. To work, you will need an electric drill and a step drill, a grinder with a cutting wheel for metal, a welding machine, sets of screwdrivers, files and wrenches, and pliers.
Now you should prepare all the materials:
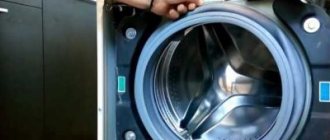
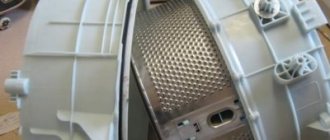
- The container for the concrete mixer can be a drum from a washing machine, in which all the holes are sealed, or a tank. Some craftsmen use old flasks or cans as containers;
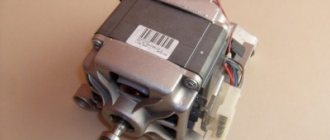
- the main element is the engine from the washing machine, which sets the concrete mixer in motion;
- a steel corner, the dimensions of which are 5 by 5 cm. The base for the future concrete mixer will be formed from it;
- internal spare parts from old washing machines of the Siberia, Oka or Vyatka brands. Some elements are allowed to be used from top-loading washing units;
- a pair of wheels. They can be taken from a wheelbarrow or cart. The main condition is that they must withstand significant weight and be able to move the concrete mixer around the construction site;
- 45 mm steel rod. A wheel axle is to be made from it;
- strips of metal, the width of which is 5 cm, thickness - 4 mm;
- a piece of pipe with a diameter of 3 cm.
Making from a barrel
This design has an unusual line of movement. In it, the rotation axis passes obliquely through the container. Therefore, the solution in it turns over from one wall to another. The design is simple and effective.
The important thing is that there are no difficulties with welding joints of different types of metal.
Consists of elements:
- Metal barrel;
- Base made of metal corner;
- Pipe shaft;
- Bearings;
- Handle with handle;
- Manhole cover;
- Locks, seals.
In the upper section of the frame, bearings are mounted in the center, into which the handle is threaded. Thanks to them, a 200 liter barrel rotates with ease.
It is advised to select a barrel with thicker walls, then it will last longer.
- In the middle, the additional blades are not welded: they are able to hold the ingredients, preventing mixing and making unloading difficult.
- The device contains a loading hatch in the bottom.
- This is a section cut off by 1/3, secured with loops to the bottom, equipped with a sealing elastic band along the plane and closed with 2 locks.
- To load the barrel, turn it in such a position so that the hatch is on top.
- For unloading, it turns with the hatch down.
- The solution itself is dumped into the container located below, and the adhering material is removed by hitting the barrel with a sledgehammer.
Sequence of installation work
First of all, a durable and comfortable frame is prepared from steel corners. The entire structure of the concrete mixer must be stable and easy to move to the desired location. The recommended option for the frame base is the “Swing” option. This element performs three functions - it is a powerful base that can withstand significant loads, it moves the concrete mixer without much difficulty, and it makes it possible to quickly remove concrete from the container when it is ready for use.
The working algorithm looks like this:
- Two pieces of sixty centimeters long are cut from the metal corner. They will be the bases for a pair of triangles;
- From the same corner we cut off four segments of eighty centimeters each - the hips of the triangles. Now you can fold two identical geometric shapes and securely connect the corners with a welding unit;
- we install both triangles in parallel, overlap and weld a couple of fifty-centimeter-long pieces of angle iron onto the hips to create a stable structure;
- on a pipe with a diameter of 3 cm, cut the ends so that the workpiece lies strictly at the upper corners of the triangles;
- on each vertex of the triangles we weld one nut, the diameter of which exceeds the same parameter of the pipe by 1 mm;
- the pipe is inserted into the nuts, the ends are pressed in so that it has the opportunity to rotate freely and there is no chance of slipping out. At this point, half of the frame base (lower part) is ready;
- the upper part of the frame, to get a swing, is prepared from corners 140 cm long, laid parallel at a distance of forty centimeters;
- we prepare three pieces of corner 400 mm each, we make the connection according to the ladder principle;
- On the prepared structure we find the middle, apply this part to the tube across, and weld tightly. The final result should be a swing.
Thus, we have prepared the basis for the future concrete mixer. Now it’s time to install the container in which the concrete will be mixed. At one end of the ladder, we lay the barrel so that the main part of the body rests on the steel corners, and we secure it securely by welding. Please note that the bottom of our container should be directed towards the top of the triangles.
Many people recommend using an Oka washing machine as a container for concrete, because it contains an activator that can mix concrete. However, before using the concrete mixer, the activator will have to be upgraded by removing the plastic element:
- we prepare a pair of steel strips measuring 50 by 4 by 900 mm in width, thickness and length, respectively;
- from each we bend an oblong bracket;
- We pass the pre-prepared axle through the activator thread so that one end protrudes five centimeters into the washing machine tank. A nut of suitable diameter is put on it;
- in the central parts of the brackets, we drill holes along the diameter of the axis, put the brackets on the end that looks out in the tank;
- The staples should be positioned in such a way as to form a cross, put a nut on top and weld it to prevent it from slipping off.
If you grab the axis of a homemade concrete mixer from the opposite end, you can check how well the mechanism designed for mixing concrete rotates. If all assembly rules are followed, the blades will rotate synchronously in a circle in the container. In order for the concrete to be mixed efficiently, the ends of each bracket should be unscrewed half a turn in a spiral using pliers.
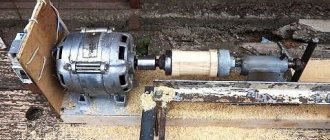
Now it’s time to connect the electric motor from the washing machine to the free end of the axle, if your plans did not include a manually driven concrete mixer. You can do this work with your own hands, but you will have to understand the principle of connecting the engine to the electrical network.
Its installation does not end with connecting the engine; it should be fixed on the frame of a homemade concrete mixer and a casing should be installed to protect it from moisture. In the corner of the ladder we drill holes for fasteners intended for fixing the engine. There are mounting holes in the motor housing that should be aligned with the drilled ones, insert the bolts and tighten the nuts. To make a protective casing, it is best to use an old car inner tube.
The electric motor from the washing machine is mounted on the frame part in such a way that the pulley does not reach the tip of the axle two to three centimeters. To connect these elements you will have to use a flange:
- We put a piece of pipe with a diameter of 32 mm with one end on the axle, and the other on the pulley of the electric motor;
- on each side we drill holes with a diameter of 4 mm, passing through both the flange and the pulley with the axle;
- We thread suitable size bolts through the prepared holes and screw on the nuts.
The connection between the motor and the axle is completed, all that remains is to connect it to a 220 V electrical network and check the concrete mixer in action by preparing a test batch of concrete.
Please note that if the electric motor is connected not through the central axis, but directly to the shaft, then the container will not be able to tilt. In this case, unloading of concrete will have to be done manually.
Recommendations from experts
To create a high-quality concrete mixer from a washing machine, it is better to use large Soviet equipment to create it. These models have a cylindrical shape, which is ideal for solving the problem. The presence of a smooth surface and the absence of corners will allow you to unload concrete from the container without any problems. If there is no such equipment on the farm, then you can take a drum from modern front-type or even vertical equipment:
- Install the shaft with blades for mixing the solution. The device must be installed in place of the former engine. The shaft can be made from a metal pulley with welded parts.
- Secure metal brackets on the inside of the container with nuts.
- Ensure that the tank drain is sealed to avoid leakage of the solution during mixing.
- Place the cylindrical container on the iron frame and connect the motor. Start up and test the unit
If the concrete mixer from the washing machine successfully passes the exam, it can be safely used.
Why is an old washing machine preferred?
If we consider feasibility, it is most convenient to mix concrete in a cylindrical container. And unloading the ready-made concrete is easy - there are no mixture residues left in the corners of the container, which, when hardened, reduce the free space.
To prevent concrete from flowing out of the barrel while mixing, it is enough to insert a plug into the drain hole, which works best when using the body of a regular washing machine.
The engine is considered the most vulnerable element, because the work cycles for producing concrete are quite long. Older washing machines are equipped with motors that are suitable in power and do not overheat during the first batch. And if you sat down to use the entire washing machine to construct a concrete mixer, its electrical parts will be reliably protected from moisture, and additional precautions will not be required.
Advantages and disadvantages of the design
Figure 1. Concrete mixer from a washing machine
Many users of branded equipment believe that a homemade product made from scrap materials is not always justified. However, a concrete mixer from a washing machine also has its advantages:
- Old equipment parts that are in the way in the house will disappear.
- Your own construction equipment will appear. With its help you can do a lot of things - lay a path in the garden, repair the foundation, make outdoor flower pots. The presence of such a tool will save the owner from searching for equipment to perform tasks on his site. The equipment will always be at hand.
- You can make a concrete mixer according to your own drawing. This will make it easier to repair it if it breaks, as well as calculate the dimensions for transportation in a car.
- The quality of mixing in such a unit cannot be compared with manual mixing with a shovel.
A concrete mixer from a washing machine also has some disadvantages:
- inconvenient loading of dry ingredients into a container;
- It is impossible to obtain a large volume of ready-made solution in one batch.
The principle of operation of devices with various methods of mixing concrete
The preparation of concrete can be carried out using shaft blades in a container fixedly placed on a support in a horizontal or vertical position.
But to make it more convenient to work, the barrel for mixing concrete is located on a hinged support so that the prepared concrete can be poured out on its own. True, this is also possible in a permanently installed barrel, if there is an option for tilting it.
The forced option is effective in terms of the quality of concrete preparation, and it is used quite often. But sometimes difficulties arise with it if components of large fractions are used to prepare concrete.
Note that a homemade structure for preparing concrete can work on the gravitational principle, you just have to tightly close the container and set it in motion manually.
How to assemble a concrete mixer with your own hands?
It is best to start work with the manufacture of a frame frame, the reliability of which is subject to fairly high requirements, since it must be able to withstand serious mechanical loads.
You can use a metal corner with dimensions from 45×45 mm, and connections can be made using a welding machine or, in its absence, with bolted connections.
1. Initially, you can provide an angle of inclination for the container, the most optimal is 35-40°. This design solution will greatly facilitate the operation of the device.
2. The next stage is the installation of an engine, which can be used as gasoline ( diesel)
) or electric models, for example, suitable from a pump or ventilation system.
The main thing is to correctly calculate its power, which on average should be 1 kW of power per 50 liters of volume. But, if the electric motor for a concrete mixer is installed on a model with a horizontal axis, then the power requirements can be reduced, and 1 kW will be enough for 70-75 hp.
3. Installing a motor is not necessary if the volume of the barrel does not exceed 150-200 liters; in this case, you can use a manual drive and, although this mixing option requires physical effort, their intensity is not comparable to the completely manual method of preparing concrete using conventional shovels.
4. A mandatory element is a gearbox that imparts rotation to the shaft; a gear from an engine is suitable, which should be installed in the lower part of the unit. The barrel is installed directly to the gearbox mounted on the frame.
5. First, the blades should be made in the barrel on the reverse side; they can be secured either by welding or with bolts. A small gear pulley will be responsible for transmitting rotation, the role of which can be played by a regular gear or, more reliably, a car anchor.
6. At the very end, the engine is installed on the frame and secured with brackets.
Additionally, it is possible to provide for tilting the barrel, for which you will need to manufacture and install a lever. For example, a piece of pipe with a metal corner or rod inserted into it is quite suitable.
This entire structure will need to be connected to an additional ( second
) with a gearbox and fix it to the frame and barrel.
How to make a concrete mixer with your own hands from a barrel, video:
Combined mixing principle
In this case, the principle of mixing concrete components is used by pouring them into a barrel using gravity, but this is also supplemented by the breaking of lumps with strong pins or blades welded to the inner surface of the barrel. It takes a long time to prepare the mixture, but the method has a number of undeniable advantages:
- the simplicity of the gravitational method is used, the design is unpretentious in operation, and rarely fails;
- the shaft used for torsion of the concrete barrel does not receive the entire load, therefore the requirements for engine power are reduced compared to the forced method, and there is less wear of parts;
- allows you to organize the mixing of coarse-grained concrete, while crushed stone will not get stuck in the spaces between the blades.
The solution can be mixed manually; if significant force is required, an electric motor is attached.
