An emerald lawn is an excellent decoration for a suburban area, but without maintenance it quickly turns into impenetrable thickets.
A lawn mowing machine is required, and if you have an old household appliance with a motor, you can assemble the device yourself. Next, we will tell you how to make a lawn mower with your own hands from a washing machine.
Lawn mower blade
This is the most important detail on which the result of work and the durability of the device depend. Making a quality knife is easy. It comes in two types: solid and composite.
Solid knife
The first one looks like a plate, the working surface of which is sharpened along its entire length, with a hole in the middle. The plate is made of solid steel
If the knife is two-bladed, it is important to carefully balance it so that vibration cannot quickly destroy the shaft of the power unit. To make the knife dull more slowly, the sharpening angle should not be less than 60 degrees.
To ensure uniform placement of weeds during mowing, the back side is bent (like a propeller). The steel is “tempered” before processing using a gas torch, after which it is hardened again and sharpened.
Since the mechanical part of the lawn mower operates under extreme conditions, the rotating parts of the shaft must be protected from winding up the weeds being cut. To do this, you need to install a casing in the center (a tin can will do).
The described knife works flawlessly until the first “collision” with a stump or stone hidden under the grass. A knife with a folding blade is more durable.
Composite knife
To make it, you can use less hard steel, and sharpen the working surface of the knife not over the entire frontal surface, but only in sections 5 cm long. When struck, a blade made of high-quality steel will simply bend at a right angle, and the knife will not deteriorate, nor will the drive shaft.
The fastening of the propeller on boat engines works on this principle: it is not the entire mechanism that breaks, but the boat key, when it collides with an obstacle.
The shape of the knife can be curved, figured, in the shape of a trapezoid, which protects the part from winding up weeds during work. Its length should not exceed 50 cm. It should be sharpened on both sides. The sharpened solid disc is considered unusual.
In practice, chassis from old baby strollers are often used to attach parts, which solves several problems at the same time - you get a frame, wheels and a handle all at once. If there is no stroller, the handle is made from shovel cuttings or welded from pipes. The power cord is suitable for any household appliance. An extension cord is needed to help you reach anywhere.
Video: Homemade lawn mower with a washing machine engine
Process of creation
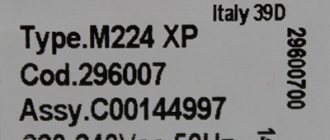
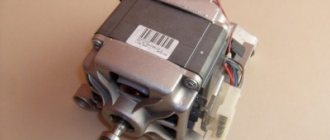
Manufacturing a lawn mower begins by removing the electric motor from the washing machine.
Preferred engines:
- powerful;
- heavy (provide stability);
- asynchronous type (no noise).
These requirements are best met by motors from Soviet-made washing machines, and even better - from centrifuges.
If the engine is low-power, install the shortest knife: a long one will cut the grass evenly only if it is constantly sharpened.
Electric lawn mower application
And yet, it helps to make a neat lawn, which is not just a well-groomed area that attracts the eyes of neighbors, but also speaks of the status of its owner. Finding an electric lawn mower that suits your preferences is not a problem these days.
However, such a pleasure will cost a lot, so for many, a do-it-yourself electric lawn mower is a more attractive option. To assemble the much-needed home-made electric structure, you need to spend only a few evenings, easily finding a medium-power motor on the farm: from a chainsaw, vacuum cleaner, drill, even a washing machine.
This is interesting: Drilling machine for a home workshop: we tell you in detail
Electrics
To start the engine, it is best to use the “native” control system from the washing machine.
In its absence, the same starting circuit is used for asynchronous motors as for conventional single-phase motors: the windings are connected to each other using a starting capacitor.
It is advisable to place the capacitor and other components of the electrical circuit in a plastic box, where they will be protected from dust and pieces of grass.
A regular plastic bottle can serve as a blank for such a box.
Friendship from a chainsaw
The first method is that we will use an old and long-needed chainsaw under the world famous name “Friendship”; you will learn about the technical characteristics of the Friendship chainsaw here. But if you do not have this model, then you can quite safely take a Ural chainsaw, for example, or another other model, there is no significant difference. Why domestic chainsaws, and not, say, imported models?
Chainsaw mower
So, before starting to understand the aspects of “creating” a lawn mower, it’s worth clarifying what main parts and so-called components it will consist of, so:
- Our main and effective mechanism will be the engine;
- the frame will provide a kind of support for installing all the necessary components of the device;
- protective casing;
- knives;
- wheels;
- parts and handles converging into the spectrum of the control system.
So let's get started. In this lawnmower, we will take the engine itself from an old chainsaw, complete. However, if the device is not working, then it will not suit us. You must remember that it is under no circumstances unnecessary to change anything in its mechanism. Simply take it out of the chainsaw and install it in a movable cart.
Now let’s figure out how we can make this cart that we need so much? To do this, you need to take 25x25 corners, which will have dimensions equal to 500 mm and 600 mm. Weld them together to form a frame.
Assembly instructions
After this, you must unscrew the “steering wheel” and tire from the old chainsaw. As for the handle of our trolley, it can be made from water supply pipes with the direct possibility of height adjustment
Naturally, this adjustment is not such an important need, but it is worth noting that it will be much more convenient to work with the device, especially if it is used by different people with different height coefficients
You need to screw the so-called “steering wheel” to the manufactured handle, then extend the gas cable, as well as the fuel hose
The important thing is that the gearbox, together with the engine itself, must be rotated ninety degrees. This is done so that the shaft itself is located in the lower part, and for this it must also be rotated onto the frame
This can be done by using a special hole that is located on the gearbox, but in a chainsaw it is used for fastening the bar, and also use two fastening studs of the flywheel casing, which is located in the lower part. In fact, we have completed the basis for our device; there is very little left, namely to install the cutting direction tool.
Chainsaw mower on video.
In order to make it, you will need a chainsaw “star” on which you actually need to install in a coaxial position a small piece of pipe with the following dimensions: length - 80 mm, diameter - 50 mm. After this, it is necessary to process this segment on a lathe.
By performing these manipulations, you will get a kind of telescopic shaft made of pipes that need to be connected with special M6 bolts, which actually have locknuts. They must be in a position diametrically parallel to each other. As for the holes, you need several of them, since this way you can easily adjust the height of the cut of the grass itself.
Through work, the movement of labor will be carried out relative to each other, thereby, in a certain coefficient, they will be able, let’s say, to compensate for the imbalance itself.
And now the last thing you need to do is make a knife base. To do this, you need to weld a special disk made of metal to another pipe, and which has a dimensional indicator of 180 mm in diameter, made of 4 mm sheet steel.
How to mow grass with a grinder
What skillful hands and restless heads have not done with power tools since their appearance in the world. Here, let’s take a simple angle grinder, popularly called a “grinder”. And they made a miter saw from it, and they removed the snow with difficulty, but the population of our country found many alternative uses for this tool.
Bulgarian woman at work. Today we’ll look at one example of how, with the help of this tool, we can, for almost nothing, clean up the garden or lawn of a dacha or other property. First, let's take a piece of steel strip, measure it and bend it into a rectangular bracket, so that we can subsequently put it on the gearbox housing.
We make a bracket. After this, you need to mark and drill a couple of holes on the bracket in the places where the holes for the handle are located on the body of the same gearbox. In this case, the diameter of the holes must be no less than the diameter of the holes for the handle.
We make a couple of holes. Then, we take the rest of the strip and weld it perpendicular to the bracket. It will serve as an additional fastening and reinforcement element for the structure itself. It turns out to be a kind of frame.
Cook the piece crosswise. We will weld a piece of steel water pipe to the frame at an angle of fifty degrees. It will serve as a handle and cable hanger.
We weld the pipe. We move on, and we are close to the final. We find on our or a neighboring site long-abandoned but carefully preserved side wheels from a children's bicycle. We put the bracket on the grinder, and screw the wheels and bracket through to the body.
We assemble the device into one. The matter remained a trifle. we thread a couple of pieces of cable into the key holes on the clamping nut, and screw it into place. We fix the wire to the handle along its entire length.
The new lawn mower is ready. Plug it in, start the grinder and roll it along the surface to mow the grass. Such a simple and cheap braid will be very useful at the opening of the new summer season.
We are putting things in order on the site. Source
Pen
In this capacity, you can use one of the following elements:
- stroller handle;
- plastic water pipe;
- cutting from an agricultural tool.
A U-shaped structure is assembled from these elements.
The optimal length for a user with average height is 90 cm.
A rubber hose is placed on the metal handle in the hand grip area for electrical insulation. An emergency button is attached at the top, in close proximity to the user’s hands, to stop the engine in an emergency.
Lawn mower blade
This is the most important detail on which the result of work and the durability of the device depend. Making a quality knife is easy. It comes in two types: solid and composite.
Solid knife
The first one looks like a plate, the working surface of which is sharpened along its entire length, with a hole in the middle. The plate is made of solid steel
If the knife is two-bladed, it is important to carefully balance it so that vibration cannot quickly destroy the shaft of the power unit. To make the knife dull more slowly, the sharpening angle should not be less than 60 degrees.
To ensure uniform placement of weeds during mowing, the back side is bent (like a propeller). The steel is “tempered” before processing using a gas torch, after which it is hardened again and sharpened.
Since the mechanical part of the lawn mower operates under extreme conditions, the rotating parts of the shaft must be protected from winding up the weeds being cut. To do this, you need to install a casing in the center (a tin can will do).
The described knife works flawlessly until the first “collision” with a stump or stone hidden under the grass. A knife with a folding blade is more durable.
Composite knife
To make it, you can use less hard steel, and sharpen the working surface of the knife not over the entire frontal surface, but only in sections 5 cm long. When struck, a blade made of high-quality steel will simply bend at a right angle, and the knife will not deteriorate, nor will the drive shaft.
The fastening of the propeller on boat engines works on this principle: it is not the entire mechanism that breaks, but the boat key, when it collides with an obstacle.
The shape of the knife can be curved, figured, in the shape of a trapezoid, which protects the part from winding up weeds during work. Its length should not exceed 50 cm. It should be sharpened on both sides. The sharpened solid disc is considered unusual.
This is what craftsmen recommend choosing. Firstly, it is much stronger than a knife made in the form of a strip, which can break if it hits a hard object - a stick, a stone, and injure you.
In practice, chassis from old baby strollers are often used to attach parts, which solves several problems at the same time - you get a frame, wheels and a handle all at once. If there is no stroller, the handle is made from shovel cuttings or welded from pipes. The power cord is suitable for any household appliance. An extension cord is needed to help you reach anywhere.
Video:
Video: Homemade lawn mower with a washing machine engine
Principles of using electric motors
The electric motor can be single-phase, operating from a 220 V network, or three-phase. When connecting the motor, you must follow all safety rules when working with electrical appliances. RCD protection for a single-phase electric motor must be provided, and a powerful three-phase motor must have capacitors in the circuit corresponding to the capacitance.
For a DIY electric lawn mower, you can use a powerful, low-speed drill with a speed of 1500-3000 rpm. You need to choose the right ratio of power and swath width so as not to overload the motor. Installed on the platform, a corded or corded drill will create the necessary torque and the grass will be mowed. During operation, do not forget to observe rest intervals to cool the brush motor. This tool will help clean the local area, folds easily and does not require much storage space. The platform on which the engine is installed must be narrow so that the wall area can be processed. Stability depends on the location of the center of gravity. The lower it is, the lower the tipping moment of the platform. How to properly price a lawn mower with your own hands, watch the video:
https://youtube.com/watch?v=HSzh7bGykq8
More complex models with an engine with a power of 1.5 to 6 kW are installed on a specially made sole. It is better to use an asynchronous motor, it is less noisy. The chassis consists of metal rubber-coated wheels with a wide tread so that the grass wrinkles less. Bearing units in bushings on the axle are more reliable than plastic liners.
You can make a deck and a knife using an old frying pan and a tool steel plate. The design, when knives are attached to the mandrel, is more efficient
It is important to observe the proportions and profile of the sharpened edges, using the drawings in the photo of the lawn mower with your own hands
Correct alignment is of great importance for the performance of a high-speed unit. A slight runout can create strong vibration, destroy connections, and create backlash due to the wear of seats.
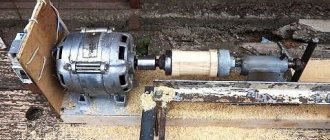
Households always accumulate old mechanisms and parts. Some things can be found in household landfills of old things. Unfortunately, such cemeteries surround any residential area. The wheels from a baby stroller are perfect, and the handle from it is also useful. Here's an example of a DIY lawn mower from a Soviet-era washing machine. They were then made of strong metal. The engines from these machines are perfectly suited in terms of parameters and power for use in a lawn mower.
A high-quality steel body will serve as a protective skirt and guide when throwing grass to the side. In addition to the motor, two pulleys and a belt are used to transmit rotation from the engine to the blade drive. The motor is fixed on the platform and connected to one phase.
A similar homemade mower works in the local area, as it is connected to the network with a power cord. You can use a special coil extension wire, selecting a cross-section that matches the engine power. Such a device is produced in a length of at least 40 meters and should provide mobility.
How to make a mobile lawn mower with your own hands? A tool made on the basis of a drill depends on the battery capacity and requires recharging from the network. In the absence of electricity, all that remains is to build a lawn mower based on an internal combustion engine. All small equipment that is fueled with gasoline or a combustible mixture can become a donor for a homemade lawn mowing machine.
Making a knife for a homemade lawn mower from a washing machine
The cutting element of the lawn mower must be secured to the electric motor shaft. Such an element can be a fishing line or a thin cable (bicycle, from a brake mechanism), but it will not be as effective as a full-fledged knife. Let's not hesitate, and let's start making the knife.
STEP 1: choose the material. To make a lawn mower blade with your own hands, we need an old hacksaw blade. The hacksaw has hardened steel. This is great for making a knife. A blade made of hardened steel will remain sharp longer, which means that you can cut more grass without any intervention in the structure of the lawn mower and sharpening the knife.
STEP 2: make a knife shape. We take a canvas and draw a diagram of the future knife on it. The length of the future knife should not exceed the width of the lawn mower body. Based on this, the length of the lawn mower blade with your own hands will be 250 mm. Don't forget about the mounting hole in the middle of the knife. To drill through hardened steel, you need to use a drill or machine with low speed, while constantly adding oil to cool the drill and the hacksaw blade. The shape of the lawn mower blade should be something like this:
STEP 3: sharpening the knife. Of course, in order to be able to mow the grass without problems, you need to sharpen the lawn mower blade. This should be done at an angle of 45°. You can sharpen a knife either with a file or with a special grinding machine.
STEP 4: attaching the knife. To securely attach the blade to the lawn mower shaft, we need to make a special adapter. You can't do without a lathe here. If you do not have this opportunity, then use the method that was used in the article entitled “Lawn mower from an old vacuum cleaner.” This method is simple and quite reliable in its time.
STEP 5: connection. We connect our electric motor via a starting relay to the network. We take out the wires and fix them on the handle of the lawn mower, where we install the socket and the on and off button.
The final step in the step-by-step instructions on how to make a lawn mower is to make a protective cover. It will protect your feet from grass and stones that fly in all directions. Also, the casing will limit the scattering of grass throughout the area, and will form some kind of windrow, which will make it easier to remove the mown grass from the area.
Cutting part
A homemade mower can be equipped with a purchased knife - this will not greatly affect costs. If you decide to do this element yourself, consider the following:
- Geometric parameters of the knife: length: 30 – 50 cm, width: 2 – 3 cm and thickness: 2 – 3 mm. The longer the blade, the more productive the mower will be, which is important for large areas. But we must not forget about power: a knife of maximum length works properly only with engines with a power of 1.5 kW or more.
- The hole must be drilled strictly in the center so that the knife is balanced. At high speeds, the imbalance will cause vibration with subsequent destruction of the shaft and engine.
- A short tin cylinder is attached in the center of the knife, coaxially with the hole; a suitable blank is a tin can. Without such a casing, the grass will wrap around the shaft.
- The cutting edge is ground at an angle of 60 degrees; at a smaller angle it will quickly become dull.
- The edges without cutting edges, that is, the back side of each half of the knife, are folded in order to ensure that the mowing shield is cleared of grass using airflow.
Two knife options are used:
- Solid strip: made entirely from a strip of tool steel. To process it, it must be softened by tempering: the workpiece is heated in an oven and then allowed to cool slowly along with the oven. After processing, the part is hardened and then the cutting edges are sharpened.
- Composite: only the end parts of the knife, 5 cm long, are made of tool steel, that is, its working part. The middle part, that is, the base, is made of ordinary inexpensive steel. All components are bolted together.
The second option is more difficult to implement, but has advantages:
- costs less;
- when hitting a stone, one bolt is sheared and the cutting part bends, whereas a solid-strip knife in such a situation can damage the shaft and engine.
Lawn mowers are also equipped with disc-shaped knives. When they meet a stone, they do not break, but only become dull.
Build process
When making a homemade lawn mower, proceed in the following order:
- The mowing shield is attached to the chassis. If it was not possible to obtain a ready-made chassis, they proceed differently: axles are welded to the mowing shield and wheels with bearings installed in them are pressed onto them.
- A hole is cut out in the mowing shield with a diameter several millimeters larger than the diameter of the electric motor shaft.
- An electric motor is placed on the shield, passing its shaft into the hole just made. Having thus determined its correct position, it will be possible to select the optimal dimensions of the support frame.
- Using electric welding, a frame for an electric motor is made from a corner. Its design can also provide space for a plastic box for electrical parts.
- Screw the engine to the frame, and attach the knife to the shaft.
- Next, a tin casing is screwed to the frame to protect the motor from dust. Many holes are drilled in the casing for ventilation.
- A handle made in the shape of the letter “P” is attached to the mowing shield or chassis.
- A protective grille or arc is welded or bolted in the front part. The grid has more advantages: it holds the grass, ensuring an even cut, prevents the knife from slipping off the shaft and holds it in case of a break.
- A bolt is welded to the mowing shield to connect the grounding conductor.
- A wire is connected to the terminals of the starting device, and its third core in yellow-green insulation (grounding) is connected to a bolt on the mowing panel.
The lawn mower is ready, you can start testing.
How to make a grain crusher from a grinder
The process of producing a homemade device for grinding grain should begin with preparing a pan for attaching to the body of the grinder. To do this, a mounting hole is drilled in the center of the bottom of the pan. After that, 2 furniture corners are secured to the angle grinder using suitable bolts. In this case, you should not drill the body of the tool. It already has suitable holes with internal threads for installing an angle grinder handle.
Having completed the indicated operations, you need to accurately measure the 4 places where the pan is attached to the corners. Holes of appropriate diameter are drilled in these places. After which you can mount the pan in place of the standard installation of the grinder’s protective casing and, using bolted connections, ensure that the pan is fixedly fastened to the corners. Practically at this step, the manufacture of a bunker for filling grain can be considered ready.
The second step is to make a knife for chopping. To do this, a workpiece of the required size is made from a prepared iron plate using a metal cutting wheel. A landing hole is made in its center. Using emery, the iron plates of the knife are sharpened on one side, which should correspond to the direction of rotation of the grinder.
After which the device is ready for use. The grain is poured into the pan and covered with a lid. Due to the rotation of the grinder, high-quality grain grinding occurs. The purchased feed is poured into a container or bag prepared in advance. The process is repeated according to the principle of a coffee grinder.
What should a homemade knife be like?
So that the knife does not need to be sharpened often, it is recommended to make it from stainless steel. Sharpen it unevenly to protect the motor shaft from damage: sharpen the edges without touching the place where it is next to the shaft, because the grass in this place is practically not cut, but only wound around the knife.
Tool steel strips 20-50 mm wide and 2-3 mm thick are a suitable starting material for the manufacture of this part. A thin blade is thicker than stronger and cuts weeds better.
The knife can be:
- A strip at the ends of which knives are sharpened and held;
- Consist of two knives attached to each other at an angle of 180 degrees. They can be located straight or at an angle.
In the first option, the length of the knife and the working width are 30-50 cm. The length of the knives used in the second case does not exceed 50-80 cm. There are several ways to secure the knives. One bolt or two. The second option is, of course, more reliable. But knives secured with a single bolt can develop without deformation or breakage if obstructed.
The knife can have a folded design, that is, it can be attached to a steel strip by welding or bolts with a pointed segment. The most unusual knife will be a sharpened solid disk.
Safety precautions
The likelihood of an accident for a homemade lawn mower is higher than for a branded one, so it is recommended to adhere to the following rules:
- Do not mow a wet lawn or leave the device outside during rain. It does not provide protection against moisture, so short circuits and electric shocks are likely.
- There should be no children or animals within a radius of 30 m from a working mower: a stone or a broken knife may fly out from under the device.
- The user should wear long trousers and closed shoes.
- In the event of a knife jam or other breakdown, repairs can only be made after the device has been de-energized.
- Do not leave the mower without turning it off.
Before mowing, inspect your lawn for rocks, toys, and other objects.
We make a motorbike
Home craftsmen managed to make a more practical vehicle out of an ordinary bicycle - they replaced it with an engine from a lawn mower. At the same time, options with both a gasoline engine and an electric motor are practically implemented.
Required tools, materials and parts
The electric motor for a bicycle is powered by a battery, which, depending on the power of the unit (it is taken 0.35-1.2 kW), lasts from 30 minutes to 2 hours.
To convert a bicycle, two- or four-stroke gasoline engines are used. The latter option consumes less fuel and is less noisy during operation. The recommended power is from 1.5 hp, and the optimal option is 2 hp. When using a motor with a lower parameter, the motorbike will barely move or will not be able to move at all.
The rotational movement from the gasoline engine to the bicycle wheel occurs through the use of a belt or chain drive. Because of this, you will additionally need to make the following details:
- a metal suspension in the form of a frame with sides to secure the motor to the bicycle frame;
- driven and driven pulleys or sprockets for attachment to the engine and wheel, respectively.
To implement the project, you will need to select a suitable gearbox. After installing the pulleys, select the belt of the desired size.
The dimensions of the frame for the engine depend on its dimensions. The suspension itself is secured to the frame of the motorbike:
- bolted connection;
- using welding.
The last option is the best in terms of strength if the welder is good. If the design of the bicycle frame allows, then the suspension is replaced with a clamp that secures the engine. This mounting option is more practical. The method of fixing the motor should be convenient, reliable and allow it to be quickly removed if necessary.
Doing all the work yourself with an old, functioning trimmer, a bicycle and a small set of tools will require time and patience from the performer.
Sequence of assembly of the structure
To independently assemble a bicycle with a gasoline engine, you will also need, in addition to the materials and parts considered, the following:
- controller;
- cable for adjusting motor operation;
- fuse;
- welded exhaust pipe;
- sleeve;
- washers;
- bolts;
- chain tensioner.
The motorbike is assembled according to the following algorithm:
- put a sprocket on the rear bicycle wheel;
- use a clamp to fix the engine (with a sprocket on the shaft) on the frame behind the seat or on the trunk, if the design features of the bicycle allow, otherwise you will need to choose another convenient place for this purpose;
- put the chain on the sprockets of the wheel and motor;
- attach the tensioner;
- adjust chain tension;
- fix the throttle;
- stretch a cable from it to the engine;
- secure the fuel tank;
- install the carburetor.
For the purpose of personal safety when operating a motorbike, the braking system is modernized, the wheel tires are replaced with non-slip products, and the integrity and stability in motion of the created structure is checked. After the entire structure is assembled, it is tested, having previously been inspected for defects.
Lawn mower made from a washing machine engine
List of materials:
– an engine from an old washing machine (more powerful is better); – iron corners; – bolts with nuts; – profile pipe; – iron plates; – 3 wheels for carts; – round timber; – sheet of iron (for the shield); – cable, electrical tape.
Lawn mower manufacturing process:
Step one. Frame
First of all, we will make the main part of the frame; it will be square or rectangular. To make the frame you will need an iron corner, cut it, and then weld the structure. We clean the welds with a grinder so that everything looks neat.
Now the frame is ready, let's install wheels on it so that the lawn mower can ride. It is better to choose wheels with a large diameter, so the mower will be able to pass obstacles better. We drill holes for mounting the wheels and fasten them with bolts and nuts. Each wheel is capable of rotating through an angle of 360 degrees. However, only the front wheel can be made rotating.
Step two. Knife
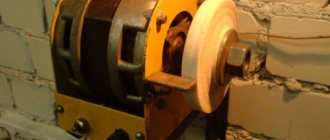
Next, we make a knife, and we will start with an adapter that will allow you to remove the knife for replacement or sharpening. We remove the pulley from the engine shaft and grind an adapter from round timber. You need to drill a hole in the round timber and cut a thread for the bolt that will be used to fasten the knife.
Well, then we make the knife itself, here the author used an iron plate, but it is better to use steel so that the knife retains its sharpness longer. We drill a hole in the center of the workpiece and then you can sharpen the knife. We work with a grinder using a thick sharpening disc or a flap attachment.
Step four. Handle and assembly
Let's make a handle for a lawn mower; here we will need a piece of round pipe and a piece of profile pipe. We just weld the steering wheel in the right place depending on your height to make it comfortable.
Also at this step you can install the engine in its place and attach the knife to the engine
It is important that the knife is securely fastened and does not fly anywhere if it suddenly comes off
Step five. Finishing touches
Finally, we make a guard for the lawn mower; it is absolutely necessary so that pieces of grass, sticks, or even stones do not fly at you. A piece of sheet metal is suitable for the shield; install it on the lawn mower.
Next, we run the cable along the frame of the lawn mower to the steering wheel. We choose a good cable with good insulation so that you do not get an electric shock. It is also useful to install a switch on the handlebar so that the lawn mower can be quickly turned off if something happens. The author installs the socket as a switch.
Required tools and materials
You need an arsenal like this:
- welding machine with electrodes;
- drill with drills for metal;
- Bulgarian;
- soldering iron;
- spanners;
- screwdriver;
- tape measure, ruler;
- core and scriber;
- marker or pencil.
Materials also needed:
- Blank for mowing shield: in the homemade version, this element is made from a large frying pan, a shallow bowl, or the bottom cut off from a large pan. In the absence of such, a steel sheet with a thickness of 2–4 mm is used.
- Chassis or wheels: the mowing shield is mounted on a ready-made chassis from a wheelbarrow or baby stroller, and if they are not there, axles are welded to it and wheels are put on them. They are borrowed from the same cars or strollers or made independently from plywood or plastic.
- Fastening hardware: bolts with nuts, studs, screws.
- Copper 3-core wire with plug.
You will also need a steel equal-flange angle with an arbitrary shelf width.

