Do you want to have your own lathe and milling machine? You don’t have to go to the store to buy one; you can make a homemade lathe from a washing machine engine.
In this article you will learn how to manufacture the main parts of the device, assemble them and connect the machine.
What will be needed for production?
To make a circular saw from a washing machine engine, you will need the following materials and tools:
- Washing machine motor.
- Wooden beam.
- Plywood sheets.
- Fastening elements: screws, bolts, nails.
It is necessary that the motor shaft has no play or noise during operation, and that the electrical wiring is insulated and in good working order.
Tools you will need:
- Jigsaw.
- Screwdriver.
- Drill.
Since you don’t have to spend money on tools and an engine separately, all other costs will amount to up to 5 thousand rubles. A high-quality and productive circular machine itself costs no less than 10 thousand rubles.
Which engine to choose?
Let's consider the requirements that apply to the engine from a washing machine in order to effectively use it to equip a circular saw.
You will need a motor with a power range from 120 to 2000 W. It all depends on the amount of work planned for the circular saw.
Circular saws have the following power characteristics.
| Characteristic | Power range, W |
| Lightweight | 120 to 1000 |
| Average | 1000-1500 |
| Heavy | 1500-2000 |
120 W is the minimum limit for the power of a circular saw. To equip it, miniature disks with a diameter of up to 10 centimeters are used, which allow cutting a bar of 5-7 centimeters. Motors of this power were installed on top-loading washing machines of the “Malyutka” type.
For higher performance, it is recommended to select motors with a power rating that matches the category of medium and heavy circular saws. In this range, among Soviet and Russian cars, the “Vyatka” and “Vyatka-Avtomat” models have proven themselves to be excellent.
In addition, the engine must have the following configuration and design:
- A BRNO, that is, a cable gland, is mounted on the engine. It will be needed to equip the circular saw with a control system.
- The motor has a straight shape, the shaft directly receives movement from the gearbox without hypoid gears. Other designs complicate installation.
- The shaft should “extend” from the gearbox by 5-7 centimeters.
The engine from the car is automatic
For a homemade circular saw, an engine from any modern washing machine—an automatic machine—is suitable. The manufacturer does not matter, you can choose any: LG, Samsung, Bosch, Ariston.
Such an engine has good characteristics, for example, a large number of revolutions, up to 15,000 rpm and sufficient power, up to 700 W. Also, many models are equipped with a built-in tachometer - revolution counter. By the way, you can use it to regulate the speed of the circular.
It is worth noting that 15,000 revolutions for a circular saw is a lot and is therefore life-threatening if the blade jams. In tools of this type, the number of revolutions per minute should not exceed 6,000 - 7,000 rpm. In a homemade tool, it is necessary to reduce this indicator using a rheostat or the same tachometer.
It is better to choose the simplest engine (without tachometers and protective devices), which can be started using a regular start-stop button through an automatic starter. For this task, motors with the least number of wires going inside it are suitable.
Useful ideas from a broken washing machine
I had an old Soviet washing machine at home for several years. My mother did not allow me to throw it away because it was convenient...to do repairs in the hallway. The ceilings are high and the corridor is narrow; the stairs would not fit. So, with the help of a washing machine on wheels, my mother painted the ceilings several times.
Only last year they took her to the dacha, because “What if it comes in handy?” I decided to look on the Internet for ideas on what to make out of an old car, and it turns out there are a bunch of them!!!
If your machine is dead and cannot be repaired, do not rush to throw it in the trash.
After all, even from a broken washing machine you can benefit by disassembling it into parts and making new functional things.
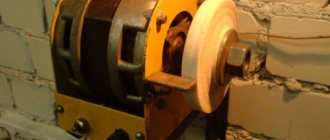
From an old machine you can use the engine, drum, body... If the engine is still working, then it is used for other equipment. For example, a motor can be used to make a sharpening machine.
Or a lawn mower, a generator...
The drum is made of high-quality stainless steel and such a good thing should be thrown away? Well, I do not!
They make everything from the drum, even lamps and furniture.
Ottomans.
Beautiful stylish ottoman made from a drum. You are ready to make a seat and an ottoman in a modern style.
The drum of the washing machine can be painted and decorated with a thread pattern.
If you don’t like the look of the drum, you can cover it with fabric.
Step-by-step manufacturing instructions
The following will provide detailed instructions on how to make a step-by-step circular saw driven by a washing machine engine.
Manufacturing of the bed
The table for a circular saw is a wooden box made of plywood, or in some cases a workbench knocked together from boards. The main requirement for the frame is stability and the ability to attach circular saw mechanisms.
If the circular saw will be used for long longitudinal cuts, then it is necessary to make a rectangular table, and mount the saw blade almost at the very end of the table at a distance of 20-30 centimeters from the edge.
Perforations are made in the table cover for a saw blade, which will be located under the tabletop of the station.
The frame must have a mass that will not allow the structure to move when cutting. This is very important because the kinetic energy from the rotation of the blade can resonate with the force of movement of the cutting board. As a result, the bed may move, creating a traumatic situation.
The circular saw table can be fixed to the floor, but for this you will have to install special mounting points and this will deprive the structure of mobility.
By the way, it is not necessary to make the table in the form of a box; a benchtop version is also possible.
Which drive should I use, direct or belt?
A circular saw with a washing machine motor can have two drive types: direct or belt. Both designs are valid, but direct drive circular saws are more reliable.
The absence of belts prevents them from breaking. Also, to mount the disk, you will need an additional driven shaft, to which torque will be transmitted from the engine through a belt drive. In this case, the rule applies: the fewer spare parts, the more reliable the mechanism. In addition, the presence of belts leads to increased vibration during operation.
Direct drive is reliable and easy to install, but it requires reliable fastening, since loosening the fasteners will lead to movement of the motor, and therefore to distortion of the disk, which is absolutely unacceptable.
We recommend using a motor with the ability to mount the saw blade directly onto the shaft.
Selecting a disk and mounting it on the engine or separately in the table
As already mentioned, it is better to use a direct drive in a circular saw. This will significantly simplify the design, while the functionality and performance of the saw will not deteriorate.
Disk selection
It is best to choose a universal-type carbide saw blade that has a medium tooth size.
These discs are different:
- Long service life with proper use.
- You can sharpen them yourself using a round file and a special template.
- Aluminum profiles can be sawed in small quantities.
Motor mount
It is best to place the engine under the bed because:
- It is safe for the operator of the circular saw.
- Electrical wiring is located at the bottom, which means it cannot enter the work area.
- You can make a reliable mount on one of the walls of the frame, and also fix the engine to the tabletop from below.
If for some reason the disk breaks or bends, then in 80% of cases it will remain under the table, and if the disk is located at the top, it will fly out along the rotation path.
How to attach?
The engine must be placed in brackets that will securely tighten it. The brackets themselves are attached to the wall and cover of the frame.
You can also make a small remote platform on brackets on which the engine will be mounted.
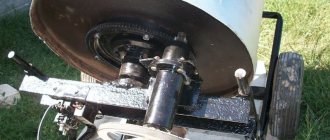
The figure shows the mounting of a motor with a belt drive on the metal frame of the future table.
And this way a direct drive engine can be mounted.
The main thing is that the mount is reliable and does not allow the engine to vibrate or move.
Motor connection
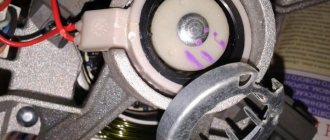
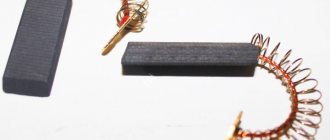
Old washing machines such as “Malyutka” or “Vyatka” have commutator-type motors in their design. Inverter, that is, brushless motors, are equipped with modern automatic washing machines. They are much more reliable than motors with a commutator (analogous to an electric drill motor), in that they do not contain current-collecting brushes and a graphite commutator.
The image shows a commutator motor with a remote power button.
It is necessary to remove wires from the cable entry point; there will be four of them: two supplying from the 220V network and two closed to the control (disconnecting) relay. It is through him that control is carried out.
A typical electrical circuit looks like this.
If you do not have knowledge in the field of electrical engineering, then you can connect the motor as follows - the “selection method”.
- Two power cables are output. They usually have the same color.
- The remaining two cables are routed to the side.
- The power cables are “connected” to the outlet with their bare ends. If the motor starts rotating, then the power cables are being used.
- A power button is mounted on the remaining two wires.
It is necessary to look at the actual connection of the motor cables while it is mounted on the washing machine. This will help you understand which ones supply power and which ones are mounted to the control relay.
Electrical part
The electrical part, in addition to connecting to the network, can be divided into two components.
Electronics:
- Start-stop button.
- Actuator.
The starter is a small box with an input, a stabilizer and a collector for current. Essentially, it delivers a charge of the required capacity to the engine. The starter is connected to a start-stop button, which makes or opens a contact.
Automation:
- Automatic shutdown relay.
- Rheostat regulator.
The relay is connected to the input of the electric motor and immediately turns it off in the event of a short circuit and voltage surges.
A rheostat is needed to regulate the speed. For small low-power circular machines, there is no need to connect it. In a homemade circular saw, it is necessary to reduce the number of revolutions when diagnosing engine operation.
To assemble the starter circuit and connection, special education at the level of an electrician is required. If you don’t have the necessary knowledge, it’s better to contact a specialist.
We recommend watching the video for more details on how to connect the motor from a washing machine. The author explains everything in great detail.
Home dough mixer - the best models and tips for choosing and setting them up
Every housewife bakes flour products at home, and smart kitchen appliances can be an ideal assistant for this.
This includes a dough mixer for home use. It is not so easy to choose a device, because you need to know important nuances. Once you try to knead dough with it, you will understand how necessary a dough kneading machine is and how it makes the job easier. It is difficult to knead the dough by hand so that it becomes a soft and uniform consistency, so manufacturers of household dough mixers have made sure that the process of working with the dough does not take much time.
How does a dough kneading machine work?
The kitchen device actually works on a simple principle. First, you should put the necessary products inside the compartment; it acts as a kind of bowl.
Next, the button is pressed and the motor starts. Thus, the machine begins its work and the kneading mechanism starts. He thus moves the dough in one direction and it is processed.
The job of a dough mixing machine is to knead the dough. The kneading lever inside the bowl helps to obtain the required consistency. The dough is kneaded, and after a few minutes it becomes elastic and ready for further preparation.
How to choose a dough mixer
To purchase a reliable kitchen assistant, you should consider a number of factors when choosing it. One of the most important points is the nature of kneading the dough, because it can be continuous and kneaded periodically.
The speed of rotation of the lever itself is no less important; it can also be slow, fast or ultra-fast. A kitchen machine will run fast or slow depending on how powerful its motor is. The minimum power can be about 300 W, and the maximum reaches the limits of 1900 W.
Let's look at what types of dough places there are.
Dough mixer with planetary rotation
The device differs in that with the help of a motor the nozzle rotates twice, first it goes around the bowl in a circle, after which it rotates around an axis. This type of dough mixing apparatus is considered the most popular today, as it has many capabilities in the process of kneading dough.
The set of such a machine includes several attachments, namely, a spatula, a whisk and a hook-shaped attachment. In addition to this, the dough mixer attachment can be supplemented with other useful items for dough. For example, some models may have additional attachments for preparing yeast or protein dough.
Dough mixer rotating in a spiral
In order to decide which dough mixer is better for home use when comparing models, let’s consider this version of the machine. Such a dough mixer is ideal for kneading yeast dough, and, as you know, such dough can be kneaded well only with the help of such a device.
In addition, such a dough mixer will be ideal for kneading shortbread or puff pastry. In these models, the nozzle itself does not move, only the bowl itself rotates. This method of kneading allows you to easily knead the toughest dough.
In such dough mixers you can regulate the temperature of the dough.
Manual dough mixer
This kind of dough mixer for home is considered practical and easy to use. It kneads even the toughest dough without difficulty. Some models also have attachments for kneading pasta. Thanks to various attachments for preparing pasta, you can prepare products of various shapes.
The dough mixer is completely manual; it does not work from the mains. The plastic in such devices is usually of high quality and lasts a long time.
Electric dough kneading machine
The dough mixer, which operates entirely from the mains, is represented by a huge range of models. When choosing a particular model, you should carefully study the characteristics for comparison. The most common models are dough mixers from such manufacturers as Moulinex, Bosch, Kenwood.
In addition, you should also pay attention to the country of manufacture; Germany has long been considered the highest quality; it is in first place in the production of electric kitchen dough mixers.
A less reliable device is considered to be one that was produced in China, but do not take into account the fact that similar units from Bosch can be made in China.
This company is a well-known brand with a big name, so you should confidently buy products from such a manufacturer, even if they are made in China.
But you should think a thousand times about buying a purely Chinese brand. As practice shows, such devices do not last long. Many people choose a dough mixer based on the photo and do not pay attention to its characteristics. Experts believe that the first thing to consider is the power of the dough mixer and its dimensions.
Photo of a home dough mixer
What is the benefit, maybe it’s easier and cheaper to buy a ready-made circular machine?
Even the simplest models of stationary circular saws start at 10 thousand rubles. Considering that the price of a homemade product costs no more than 5 thousand, and after our article it is easy to assemble it yourself, the benefits of producing a circular saw yourself are obvious.
In addition, a homemade circular saw has a number of advantages:
- The ability to create a tool with a convenient configuration “for yourself.”
- Saving money.
- Possibility of equipping with a homemade electronics system.
- Maintainability.
The disadvantages include such nuances as the lack of warranty service, since the circular machine is homemade, as well as preliminary wear and tear on the motor from the washing machine, since the machine was previously used for its intended purpose.
The article presented the main nuances and stages of manufacturing a convenient, functional and reliable circular saw, which is also equipped with a push-button starter and an automatic shutdown system in case of short circuits.
Connection and launch
When dismantling the electric motor from the washing unit, it is recommended to make special marks on all its wires. These steps will help you connect the motor directly to the electrical network in the future (this is especially true for asynchronous electric motors from old washing units, which require connecting starting capacitors). Other types of motors also have their own characteristics.
Therefore, to correctly connect each type of electric motor, it is best to search for information on the Internet or use special reference books for this. And if during dismantling all contacts were marked, then starting the motor from the washing device will not be difficult. To do this, you just need to follow the instructions for connecting a certain type of engine to the network and adhere to safety rules.
First of all, to make a generator, you need to remove the rotor from the working electric motor from the washing machine.
The anchor needs to be ground down, reducing its diameter. This can be done by clamping its shaft in a drilling machine and grinding the core with a grinder with a flap wheel. This is even easier to do on a lathe.
On the machined anchor you need to install 8 rows of 2 neodymium magnets. The polarity of adjacent pairs must alternate.
Now you need to fix the magnets with resin. To do this, formwork is assembled at the anchor from a CD and a piece of plastic pipe. It can be glued with hot glue. Then resin is poured into it.
Creating a mold for pouring epoxy resin
After the resin has hardened, the formwork is cut off. Then you grind the anchor to balance it. As a result, it should fit into the motor stator without any problems.
The engine is reassembled with the rotor already modified. Now you need to determine its working winding with a multimeter, since 220V can be removed from it when spinning up the generator. In this case it is the yellow and red wire. The blue core of the starting winding is not needed.
Mountings are welded to the generator. It is then screwed to the board. You need to attach a gasoline engine to the side; you can install a motor from a brush cutter.
You need to install a pulley on the generator shaft and the motor shaft and put on a belt.
Now, when starting a gasoline engine, it will spin up the generator, which allows you to receive 220V. The frequency of the current is not as stable as in a regular network, so it is better not to connect sensitive electrical appliances to it without a voltage regulator. However, such a generator is capable of powering construction power tools, a water pump, lighting lamps, etc.
