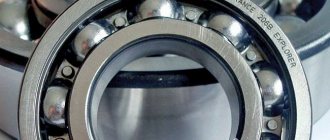
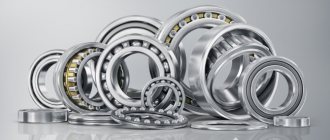
Heavy loads or intensive use for a long time of an Indesit automatic washing machine can lead to such troubles as bearing wear. The only possible way to correct such a problem is to replace it.
It is not difficult to determine that something is wrong with the bearing. You just need to listen to the sounds the washing machine makes when spinning at high speeds. A faulty bearing will definitely remind you of itself with extraneous noise or knocking.
You can unplug the machine and rotate the drum in different directions manually - characteristic sounds will confirm the “diagnosis”. Replacing a bearing is a rather labor-intensive process, but for people who have an understanding of working with various equipment and have the right hands, it will not be very difficult. So, everything in order. If you have any difficulties disassembling the equipment, then read the article - How to disassemble Indesit.
What bearings are included in the Indesit SMA? Symptoms of a problem
It must be said that the main reasons for wear of moving components are improper operation and natural wear. So that you can avoid unpleasant breakdowns in the future, we list these reasons:
- Drum overload with laundry. If your washing machine is designed for a load of 5 kilos, this does not mean that you need to fill it to capacity. Correctly load 2/3 of the total volume of the drum. Otherwise, the parts are subject to increased load, which leads to rapid failure.
- Incorrect housing installation. When the MCA is not level, it shakes violently during the spin cycle and the vibration increases. All this negatively affects the moving parts of the machine. Make sure that the washer is stable on the surface.
- Seal wear. Manufacturers claim that the oil seal service life is on average 5 to 6 years. When the O-ring loses its seal and leaks, water washes away the lubricant, causing the internal components on the shaft to begin to wear out.
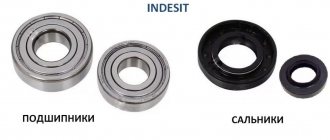
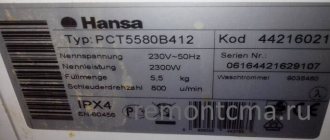
Before replacing a part, select a new replacement. So, for the Indesit models IWSB 5085, IWSC 5085, bearings with different serial numbers can be used. To figure out which SM is suitable for your SM, look at the table.
You can find out how much a repair kit costs on the Internet or on the manufacturer’s website. It is best to select original spare parts. They will definitely fit your model. The kit includes 1-2 bearings and an oil seal. All elements are replaced at once, otherwise there is no point in carrying out repairs.
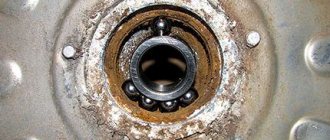
The wear of the driving units on the shaft is difficult to confuse with something else. Its companions are creaking and grinding sounds when the drum rotates. There may be signs of wear on the back wall of the tank. Let's start disassembling.
Replacing the bearing in the drum of an Indesit washing machine with your own hands
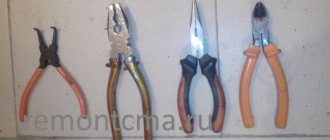
Before changing a part, prepare for disassembly. What tools are needed:
- Phillips and slotted screwdrivers.
- Open-end wrenches.
- Socket heads and wrenches.
- Wooden block.
- Bit.
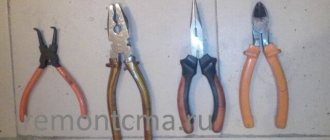
- Pliers.
WD-40 fluid will also come in handy. It will help deal with stuck fasteners.
Replacing the bearing of an Indesit washing machine requires complete disassembly of the equipment. For this you need free space. If it is not possible to take the machine to the garage, then move the body to the center of the room.
- Remove the plug from the outlet, unplugging the machine.
- Close the water supply valve.
- Disconnect the inlet hose from the housing. Immediately place it in a sink or container to drain the water.
Place the SMA in the center of the room. Take out the powder dispenser because moisture will accumulate inside it. Also remove the drain filter.
It is located under the loading hatch. Wait for the liquid to drain and proceed to disassembling Indesit IWSC 5105, WISL 102.
Remove the top cover by unscrewing the two screws from the back. Slide it back, move it to the side.
- Use a 10mm socket to remove the upper counterweight bolts.
- Remove the control panel mounting screws. Leave it hanging on the wires or place it on top of the case.
- At the rear, unscrew the solenoid valve bolt. Take it out along with the detergent bin. At the same time, release the pipe clamp and remove it from the tank seat.
- Disconnect the interference filter by twisting the rear fastener.
Go to the back cover of the Indesit WISL 103, WISL 83 or other model.
- Remove the drive belt from the pulley.
Spare parts table for Indesit washing machines
ATTENTION! The table is for informational purposes only and is not the final authority in choosing spare parts. The manufacturer may change the characteristics of the product. Some washing machine models may have different sets of bearings and seals (select by model serial number). Tables of spare parts for other washing machines are here.
| Model | Stuffing box | Bearing | Belt | heating element | water pump |
| Indesit AB 1056 TXEX | 1270 J4 | ||||
| Indesit AB 845 TXE | |||||
| Indesit AL 748 TX | |||||
| Indesit W 104 T EX | 25x47x10 | 203 — 204 | |||
| Indesit W 105 TX EX | 25×47/64×7/10.5 | 815798 | |||
| Indesit W 105 TX EX | 35×52/65×7/10 | BA2B 633667 | |||
| Indesit W 146 X | 1046/1051 | ||||
| Indesit W 43T EX | 25x47x10 / Tank assembly (97236) | 203 — 204 / Tank assembly (97236) | 1265J5 | 3406117 | P000 |
| Indesit W 43T EX | 22x40x8/11.5 | 202 — 203 | |||
| Indesit W 63 T | 25x47x10 | 203 — 204 | |||
| Indesit W 63 T | 22x40x8/11.5 | 202 — 203 | |||
| Indesit W 63 T EX | 25x47x10 | 203 — 204 | 1279 J4 | ||
| Indesit W 83 TK | 3406054 | ||||
| Indesit W 83 TECH | 25x47x10 / Tank assembly (97236) | 203 — 204 Tank assembly (97236) | 1221 H7 | P000 | |
| Indesit WISL 83 (CSI) | Tank assembly (109633) | Tank assembly (109633) | 1195 H8 | ||
| Indesit WIUL 83 (CSI) | Tank assembly (118020) | Tank assembly (118020) | 1195 H7 | ||
| Indesit WIL 83 (CSI) | 30x52x8.5/10.5 | 204 — 205 | |||
| Indesit WE 8 X EX | 25×47/64×7/10.5 | 203 — 204 | 3406117 | ||
| Indesit WIU 81 | 1195 H7 | 3406054 | |||
| Indesit WIU 81 (CSI) | Tank assembly (118020) | Tank assembly (118020) | P000 | ||
| Indesit W81 EX | 25x47x10 | 203 — 204 | |||
| Indesit W 84 TX EX | 1181 H8 | P000 | |||
| Indesit W 84T X EX BG | 25×53.5×10/14 | ||||
| Indesit WS 84T X EX 0802335500101/11/079211201272 | 35×52/65×7/10 | BA2B 633667 | |||
| Indesit W 93 T EX | 25x47x10 | 203 — 204 | |||
| Indesit W 101 | 25x47x10 | 203 — 204 | |||
| Indesit W 104 T EX | 25x47x10 | 203 — 204 | |||
| Indesit W 105T XR BG | 30×53.5×10/14 | 204 — 205 | 1195 H7 | 815798 | |
| Indesit W 105T X EX | 25×47/64×7/10.5 | 203 — 204 | 1195 H7 | 815798 | |
| Indesit W 125T X EX | 35×52/65×7/10 | 204 — 205 | |||
| Indesit W 125T X | 35×62/75×7/10 | 205 — 206 | |||
| Indesit W 421 TX | 25x47x10 | 203 — 204 | 815798 | ||
| Indesit WD 125 TEX | 35×62/75×7/10 | 205 — 206 | |||
| Indesit WDN2296X WU | 35×62/75×7/10 | 205 — 206 | |||
| Indesit WDN 2296 | 1194J5 | ||||
| Indesit WDS 1000 UK | 1270 J4 | 3406054 | |||
| Indesit WDS 1040 TX | 30×53.5×10/14 | 204 — 205 | |||
| Indesit WDS 1045 TX | 30×53.5×10/14 | 204 — 205 | |||
| Indesit WE 8 XR | 25×47/64×7/10.5 | 203 — 204 | |||
| Indesit WE 8 X EX | 25×47/64×7/10.5 | 203 — 204 | |||
| Indesit WE 105 X | 25×47/64×7/10.5 | 203 — 204 | 1195 H7 | 815798 | |
| Indesit WE 105 XR | 25×47/64×7/10.5 | 203 — 204 | 1195 H7 | 815798 | |
| Indesit WES 9 XR | 35×52/65×7/10 | VA2V 30X60X37 | |||
| Indesit WG 437 T | Caliper assembly (55317) | Caliper assembly (55317) | 1118J5 | 3406054 | P000 |
| Indesit WG 421 TX | 25x47x10 | 203 — 204 | 815798 | ||
| Indesit WG 421 TPR | 25x47x10 | 203 — 204 | 1260/1258/1265 J4 | 815798 | |
| INDESIT WG 420 S | 25x47x10 | 203 — 204 | |||
| Indesit WG 622 TP | 25x47x10 | 203 — 204 | 1279 J4 | 815798 | |
| Indesit WG 622 TPR | 25x47x10 | 203 — 204 | 1279 J4 | 815798 | P000 |
| Indesit WG 633 TX | 25x47x10 | 203 — 204 | |||
| INDESIT WGS 634 TXR 780897500211200 | 30x55/68x8/11 | 204 — 205 | 1061 J3 | 815300 | P000 |
| Indesit WG 635 T | 25x47x10 | 203 — 204 | |||
| INDESIT WGS 638 TXU | 35×52/65×7/10 | VA2V 30X60X37 | 1090J4 | P000 | |
| INDESIT WS 642TX EX s/n 211051177* 80233540100 | |||||
| INDESIT W 642TX EX s/n 103223193 46255480000 | 25x47x10 | 203 — 204 | |||
| Indesit WG 824 TP | 25x47x10 | 203 — 204 | 815798 | ||
| Indesit WG 835 TX | 25×47/64×7/10.5 | EL 1310 | P000 | ||
| Indesit WG 835 TXC | 1270J5 | ||||
| Indesit WG 835 TXR | |||||
| Indesit WG 1030 TXDE | 204 — 205 | 1270J5 | |||
| Indesit WG 1030 TXD | 1270 J4 | ||||
| Indesit WG 1031 TXR | 35×52/65×7/10 | 204 — 205 | 1270J5 | ||
| Indesit WG 1031 TPR | 25x47x10 | 203 — 204 | 1221 H7 | 3406054 | |
| Indesit WG 1035 TXC | 35×52/65×7/10 | 204 — 205 | |||
| Indesit WGD 1236 TXR | 35×62/75×7/10 | 205 — 206 | 815798 | ||
| Indesit WGD 1030 TXS | 1270 J4 | ||||
| Indesit WGD 1034 TF | |||||
| Indesit WGD 834 TF 13550 | 35×52/65×7/10 | 203 — 204 | 815798 | ||
| Indesit WGD 834 TR 14496 | 25×47/64×7/10.5 | ||||
| Indesit WGD 834 TR 18063 | |||||
| Indesit WGD 835 TX | P002AR | ||||
| Indesit WGD 835 TX IT | |||||
| Indesit WGD 934 TXR | |||||
| Indesit WGD 934 TXR | 35×52/65×7/10 | 204 — 205 | |||
| Indesit WGS 632 TX | 25x47x10 | 203 — 204 | |||
| Indesit WGS 636 | 25x47x10 | 203 — 204 | 815798 | ||
| Indesit WGS 636 TX | 25x47x10 | 203 — 204 | 815798 | ||
| Indesit WGS 834 TX/TXR | 30x55/68x8/11 | 204 — 205 | 1192 J3 | 815300 | P000 |
| Indesit WG 834 TX | Caliper assembly (46971) | Caliper assembly (46971) | 1288J5 | 815798 | |
| Indesit WGS 1038 TXU | 34×52/65×7/10 | VA2V 30X60X37 | |||
| Indesit WDN 867 WF | 35×52/65×7/10 | 204 — 205 | 1270J5 | 815798 | P002AR |
| Indesit WGT 837 T | 34×52/65×7/10 | 204-204 | |||
| Indesit WI 81 | 22Х40Х10/11.5 | 204 — 205 | 3406054 | ||
| Indesit WI 81 | 22x40x8/11.5 | 202 — 203 | |||
| Indesit WI 81 EX | 25x47x10 | 204 — 205 | |||
| Indesit WI 81 EX | 22x40x10/11.5 | 202 — 203 | |||
| Indesit WI 84 XR | 25×47/64×7/10.5 | 203 — 204 | |||
| Indesit WI 101EX | 22x40x10/11.5 | 202 — 203 | |||
| Indesit WI 104 X | 25×47/64×7/10.5 | 203 — 204 | P000 | ||
| Indesit WIL 82 XR | 1181 H8 | ||||
| Indesit WIL 85 XEX | |||||
| Indesit WIL 85 EX TE | Tank assembly (113810) | Tank assembly (113810) | 1195 H8 | ||
| Indesit WIL 85 EX BG | 22Х40Х10/11.5 | 202 — 203 | |||
| Indesit WISL 85 (CSI) | 30x52x8.5/10.5 | 204 — 205 | |||
| Indesit WIL 105 EX | 22Х40Х10/11.5 | 202 — 203 | |||
| Indesit WISE 107 X EX | 34×52/65×7/10 | 204 — 205 | |||
| Indesit WISE 107 S EX | 34×52/65×7/10 | ||||
| Indesit WISI 105X | 34×52/65×7/10 | 815798 | |||
| Indesit WISL 10 FR | 30×52/65×7/10 | ||||
| Indesit WISL 62 CSI | Tank assembly 109633 | Tank assembly 109633 | 1195 H7 | 3406054 | P000 |
| Indesit WISL 83 | 25x47x10 | 203 — 204 | |||
| Indesit WISL 85 EX | 30×52/65×7/10 | 204 | 1194J5 | ||
| Indesit WITL 86 IT | Caliper assembly (87966) | Caliper assembly (87966) | 1213 H8 | P000 | |
| Indesit WISL 86 IT | 30×52/65×7/10 | 204 — 205 | |||
| Indesit WISL 103 (CSI) | 30x52x8 | ||||
| Indesit WISL 105X | 30×52/65×7/10 | ||||
| Indesit WISL 105X EX | 30×52/65×7/10 | 204 | 815798 | ||
| Indesit WISL 106 IT | 30×52/65×7/10 | 204 — 205 | |||
| Indesit WISL 1000 OT EU | 30×52/65×7/10 | 204 — 205 | 3406054 | ||
| Indesit WIT 60 FR | Caliper assembly (87966) | Caliper assembly (87966) | 1124J5 | 3406054 | P000 |
| Indesit WITL 103 | 1195 H8 | ||||
| Indesit WITL 106 | 1213 H8 | ||||
| Indesit W 81 EX / WI 81 EX | Tank assembly (97236) | Tank assembly (97236) | 1195 H8 | 3406054 | P000 |
| Indesit WIU 82 (CSI) | 1195 H7 | ||||
| Indesit WN 461 WU | 25x47x10 | 203 — 204 | 815798 | ||
| Indesit WN 421 X WU/S | 25x47x8/11.5 | 203 — 204 | 3L 504 | 815798 | |
| Indesit WN 663 WU | 25x47x8/11.5 | 203 — 204 | 815798 | ||
| Indesit WN 671 X WU | 25x47x10 | 203 — 204 | |||
| Indesit WN 668 WO | 25x47x10 | 203 — 204 | |||
| Indesit WP 1030 TTK | 1270 J4 | 815798 | |||
| Indesit WP 1031 TXTK | 1270 J4 | 815798 | |||
| Indesit WS 105 TX EX | 35×52/65×7/10 | VA2V 30X60X37 | 1195 H7 | 815798 | |
| Indesit WS 84 TX | 35×52/65×7/10 | VA2V 30X60X37 | 3406054 | ||
| Indesit WS 84 TX EX | 35×52/65×7/10 | VA2V 30X60X37 | 1181 H7 | 3406054 | |
| Indesit WS 84 TX EX | 35×52/65×10/12 | VA2V 30X60X37 | 3406054 | ||
| Indesit WT 90 CSI | 35×52/65×7/10 | 204-204 | |||
| Indesit WT 102 EX | 1213 H8 | 3406054 | P000 | ||
| Indesit WT 80 | |||||
| Indesit WT 80 CSI | Caliper assembly (55317) | Caliper assembly (55317) | |||
| Indesit IWSD 5085 | 22x40x8/11.5 | 202 — 203 |
Preparation of the workplace
To replace a bearing in an Indesit washing machine, you first need to stock up on new bearings and an oil seal corresponding to the model that needs to be repaired. By the way, wear of the oil seal may be the main cause of problems with the bearing.
The best option is to use original components. Next we deal directly with the washing machine. To replace a bearing in a washing machine, you will have to remove its tank, which Indesit’s evil and mercantile designers of this brand managed to make monolithic.
For what? Yes, so that instead of replacing the bearing, you would have to change the whole block along with a new tank. And this “pleasure” will cost a lot (at least half the cost of the entire car). This option does not suit us! Why pay extra money?
We will limit ourselves to only replacing the bearings and oil seal. Well, let's turn directly to the washing machine. You will have to almost completely disassemble it. Therefore, you should be located where there is enough space and nothing will interfere with the process. Well, prepare the necessary tools.
Replacing the bearing of an Indesit washing machine. Replacing bearings for an Indesit washing machine
When choosing bearings for a washing machine in a store, take the worn parts with you first so as not to miss. If you buy online, make sure that the selected bearing actually fits your Indesit. Prices can also be found on the Internet or by phone.
It is important that you need to buy not only the bearing itself, but the entire set: two bearings and two seals, they need to be replaced together, otherwise the replacement will soon need to be repeated.
Tools for disassembling the Indesit washing machine
Replacing the bearing of an Indesit washing machine with your own hands is not so difficult. The main thing is to get the bearings themselves, which will require disassembling the entire machine. Please be patient and have the following tools:
- Phillips and flat screwdrivers;
- socket and open-end wrenches;
- hammer;
- bit;
- hacksaw;
- pliers;
- WD-40 lubricant;
- glue and finally replacement parts.
Step-by-step instructions for replacing a bearing
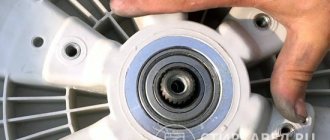
– Remove the back wall of the Indesit washing machine. To do this, just unscrew a few mounting screws. There is a view of the back of the tank with a pulley installed on it.
The pulley is connected to the washing machine motor drive using a rubber belt. We're filming it. Next, you need to disconnect the power and ground wires of the heater and temperature sensor from the terminals located on the tank.
Then we disconnect similar wires on the engine. That's it - the wiring is separated from the tank. We remove the motor by unscrewing two bolts and separate it from the tank.
The next step is to disconnect the drain hose pipe. We put the car on its side and, using pliers, loosen the clamp and remove the drain pipe. After this, we find two nuts at the bottom of the washing machine body and unscrew them. These are shock absorber mounts.
We move their freed racks closer to the center. We check visually that the lower part of the tank is no longer connected to anything.
– Now we remove the rubber cuff of the washing machine hatch. You need to pull out the spring holding it to the body and remove the cuff.
– Next, the top cover of the machine is removed. The screws are unscrewed from the back and the cover is pulled out towards itself. It is important not to overdo it so as not to break off the plastic stoppers. We will remove the tank from the bowels of the washing machine through the top. Unscrew the fasteners and remove the balancing concrete weight located directly under the cover.
The next step is removing the powder cuvette. It just pulls out all the way, lifts up a little and pulls out with a little effort. Unscrew the screws securing the front panel and remove it. Next, remove the dispenser by first disconnecting the rubber water supply pipe and wires from it.
It's time for the reverse process
A rather important point on which the entire outcome of the event will depend is to correctly and hermetically connect back the two halves of the tank of the Indesit washing machine.
First you need to carefully and accurately align and clean the edges of the halves. You can use sandpaper. It's better to degrease it too. We put the two halves of the tank next to each other. In order to do this accurately, we previously marked them with a marker. Remember?
But now you need to drill about 20 holes for the bolts at the joints. Accordingly, you need to choose places for drilling in such a way that nothing interferes with tightening the nuts later.
You should not use self-tapping screws; our task is to tighten the tank halves well. In order to ensure tightness we will use silicone sealant. Carefully coat the joints and tighten with bolts. Who did the Indesit developers want to confuse?
In general, the further assembly process occurs in the reverse order and there is no point in describing it. The main thing is that everything falls into the right places and there are no excess parts left.
And finally, in conclusion. There is nothing that a person with the right head and hands cannot fix on his own. Any problem or trouble is just an additional challenge and incentive to prove to yourself and others that everything is possible and everything is real. You just need to try a little.
