Bosch is a recognized leader in the production of household appliances and is constantly improving the quality and ease of use of its products.
Bosch washing machines are distinguished by a well-implemented control system, intelligent modes and a system for self-diagnosis of breakdowns.
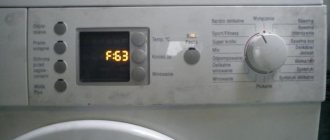
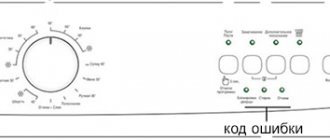
If a malfunction occurs, the corresponding error of the Bosch washing machine is displayed. If the device is not equipped with a display, the code is issued in the form of a flashing combination of light indicators.
Sometimes errors in a Bosch washing machine may not be displayed, for example, if the heating element is faulty, if it is broken, there will be no error, and the machine will fully carry out the washing program, but with cold water.
In cases where there is a fault in a single component, the Bosch washing machine error is detected only in diagnostic mode, in the so-called service test.
The service test is launched by pressing certain buttons and manipulating the program selector and is not intended for the average user.
In such cases, to repair the machine, it is recommended to follow the instructions in the operating instructions, which advise you to contact a service center. But if you are confident in your abilities and are ready to repair your machine yourself, then I hope this article will be useful to you.
Error codes for Bosch Maxx washing machines 5,6,7.
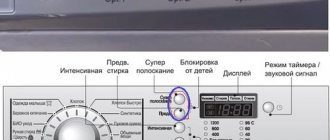
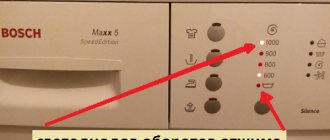
Let's start with error codes for Bosch Maxx 5,6,7 washing machines. The table below shows the main errors of the Bosch washing machine, which are available to the user in the event of a malfunction. Error codes for Bosch Maxx 5,6,7 washing machines are displayed in the normal washing mode, so the user can identify the malfunction of his machine. Fault codes are displayed on the display, and if it is absent, they are read by the combination of blinking spin indicators. Both options are in the table.
| Code on display | Code without display, read by spin speed indicator | Description of the error | Cause and elimination |
| F16 | The laundry hatch is not closed | Close the hatch more tightly and restart the mode. | |
| F17 | The water filling time has been exceeded. | Check: if the tap is open; Is the inlet hose filter clogged? The pressure in the water supply may be too low. | |
| F18 | Draining takes too long. | We check: whether the drain pump is working (working resistance of the winding is 170-200 Ohms); is there a blockage in the filter and drain hose; serviceability of the level sensor (pressure switch); serviceability or blockage of the rubber hose of the pressure switch. | |
| F19 | Heating up too long. | Check: is the heating element in good working order (operating resistance 25-30 Ohms); voltage in the electrical network (must be at least 200 V); heating element wiring and connections. | |
| F20 | Heating does not occur according to program. | Out of order: NTC temperature sensor; relay for turning on the heating element on the board. | |
| F21 | The problem is in the engine control system, the engine does not rotate the drum. | The serviceability is checked: tacho sensor; triac on the control board; motor reverse relay on the board. | |
| F22 | The NTC temperature sensor is faulty. | We check: the NTC sensor, if it is closed or broken, then replace it; NTC wiring and terminals. | |
| F23 | AQUA STOP triggered and a leak occurred. | Water has accumulated in the pan, a leak has occurred, we check: The tightness of the tank and MAS pipes; Aqua Stop sensor and its wiring. | |
| F40 | The network voltage is not normal. | We check the voltage in the electrical network, operating voltage 220 V | |
| F63 | Software malfunction. | Checking: memory firmware; board processor. If necessary, we change the board. |
Bosch Logixx service test
You can diagnose a malfunction in a Bosch Logixx washing machine using a service test. (Models WAS 20441 OE, BOSCH WAS 2875 BOE, BOSCH WAS 2874 BOE, Bosch WAS 32741AU, WAS 28440AU, WAS 20442 OE) The display shows all the necessary information to determine the breakdown. In test mode, errors are not saved, but are overwritten in the EEPROM memory of the electronic control board.
- To run the test you need:
— Close the hatch door — Set the program selection knob to “0” (“OFF”), wait two seconds
— Turn the selector knob clockwise to the “spin” position (6:00 o’clock position), the Start/Pause indicator will start flashing — Press and hold the “<” button — Program selection knob to the “drain” position — release “<”, the last one is displayed: P1: Errors last program F: xx (code) Select the test program using the “<” and “>” buttons P1: Memory codes P2: Safety test P3: Automatic test P4: Drive motor P5: Card coding P6 : Screen P7: Button and program selector test P8: Water level sensor P9: Water turbidity sensor P10: Flow sensor P11: 3D sensor P12: Load detection test P14: Water inlet valve P15: Sound test P16: Drain pump P17: Heating element To start check, press “Start/Pause” This is what initiation looks like on the display
- F16, F34, F36 - drum hatch open, UBL:
- F17 - water intake time exceeded more than 10 minutes:
Check the water supply, valves, aquastop, pressure switch.
Serviceability of the solenoid valve, measuring the resistance of the coil and the supply of 220 volts to it:
Pressure (level) sensor, its performance and its connection with the control module:
- F18 - drain time more than 10 minutes:
When replacing the drain pump, you will have to remove the front wall of the washing machine: F19 water heating, checking the pump, input voltage, relay and heating element, control board F20 unintentional water heating. Inspecting the heating element, NTC sensor
- F23 - aqua-stop activated, water leak:
If the aquastop is damaged, water flows through the drainage hose into the pan. When the float in the pan is raised, the protection function is activated. The magnetic valve stops the flood. Technical data of the aquastop: — Resistance: 4.13 kΩ ± 10% — Amount of incoming water: 10 l/min ± 10% — Pressure: 1.0 – 10 Bar F25 aquasensor, pressure switch F26, F27 “jamming” pressure sensor F28, F29 flow sensor, EM valve, pressure switch, water pressure F31 water level exceeded, inspection of level sensor, valves, pump F37, F38 NTC sensor, heating element
- F42, F43, F44 - engine malfunction:
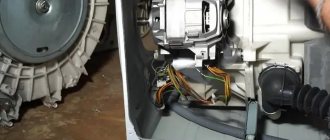
Carbon brushes are the first to suffer during operation; remove the connector to check for corrosion of the contacts, check the connection between the motor and the module:
If the engine immediately reaches high speeds, pay attention to the tachogenerator! F59 3-D sensor, power module inspection. 3-D sensor F60 flow sensor F61 false signal UBL
Service test of the Bosch Maxx 5,6,7 washing machine.
A service test is necessary to fully check all components of the machine and to verify the correct performance of functions. Also in this mode, all previously encountered errors are reset, but before that, of course, you need to eliminate the cause, the malfunction due to which they arose.
To enter the service mode, you need to perform a number of actions; we will describe them below.
- First, close the loading hatch.
- Turn the mode dial to the “off” position and wait a few seconds.
- Turn the regulator 180 degrees and wait for the “start” button to start flashing.
- We hold down the “rev” button and wait for the “start” button to start flashing.
- While holding the “revolutions” button, turn the program dial one notch clockwise and release the “revolutions” button.
- The display shows the latest fault code. If there is no display, the fault will be displayed as a combination of flashing spin indicators.
- At this moment, information about the last fault will be erased from the processor memory.
Now we can test each of the components of the machine, or we can run an automatic test.
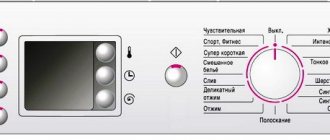
The test program numbers correspond to the positions of the regulator, as can be seen in the photo above. When we select a test, the regulator must be rotated without passing through the “off” position.
Below is a list of test modes.
- Not used.
- Not used.
- Engine.
- Drain pump.
- Ten.
- Hot water inlet valve.
- Fill valve "main, pre-wash".
- Fill valve "main wash".
- Pre-wash fill valve.
- Checking audio signals.
- Auto test FCW.
- Auto test for masters.
- The auto test is not for FNW experts.
- Quick auto test.
- Quick auto test.
To enter the test program, set the regulator to the desired position and press “start”. To exit, press “start” and turn the knob to another position.
To exit the service mode, set the mode selection knob to the “off” position.
Launch on Bosch Classixx
Now let's see how self-diagnosis starts on Bosch Classixx machines. First, according to tradition, we turn on the machine and set the program selector to OFF. Find the leftmost button on the control panel of the machine and hold it down. Next, hold down “Start/Pause” and at the same time turn the selector one step to the left. If everything was done correctly, the number 8888 will appear on the display.
We set the program selector to the 12 o'clock position. Set the drum speed switch to maximum speed. Press the first and third buttons for additional functions. Turn the program selector one step to the right. Now click “Start/Pause”. If you did everything correctly, the machine will begin to check the spin speed by rotating the drum at different speeds.
If you want to check other components of the machine, turn the program switching knob one position clockwise. Bosch Classixx will check all its components and assemblies one by one. To exit self-test mode, press Start/Pause and turn the programmer knob to OFF.
Interesting:
- Which Bosch washing machine is better to buy?
- Review of built-in dishwashers Bosch 45 cm
- Review of Bosch 60 cm freestanding dishwashers
- Where are Bosch washing machines assembled?
- How to choose a brand of washing machine?
- Bosch washing machine models - which one to choose?
1 reader comment
- 08/23/2020 at 08:40
Hope:
Are there instructions for eliminating error F23 for all BOSCH washing machines, except BOSCH Logixx7? Why? Where can I find this information?
Answer
Error codes for Bosch Maxx 4 washing machines.
In this series of Bosch machines, some error codes appear when a malfunction occurs when the washing mode is running, and some faults can only be diagnosed in the service mode.
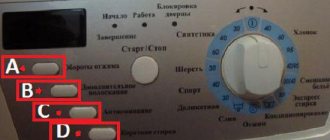
Errors in the Bosch Maxx 4 washing machine are displayed as a combination of lit and off indicators. Three indicators are used: ready, working and finished. They are shown in the photo below.
| Indicator status | Description of the error | Cause and elimination | Where does the code appear: in the normal washing mode or in the service test |
| The laundry loading hatch is not closed. | Close the loading hatch more tightly. | Normally. | |
| The water filling time has been exceeded. | Check: if the tap is open; Is the inlet hose filter clogged? The pressure in the water supply may be too low. | Normally. | |
| The water heating time has been exceeded. | Check: is the heating element in good working order (operating resistance 25-30 Ohms); voltage in the electrical network (must be at least 200 V); heating element wiring and connections. | In a service test. | |
| Drain time exceeded. | We check: whether the drain pump is working (working resistance of the winding is 170-200 Ohms); is there a blockage in the filter and drain hose; serviceability of the level sensor (pressure switch); serviceability or blockage of the rubber hose of the pressure switch. | Normally. | |
| The problem is in the engine control system, the engine does not rotate the drum. | The serviceability is checked: tacho sensor; triac on the control board; motor reverse relay on the board. | In a service test. | |
| Heating problem: heating is not going according to program. | Out of order: NTC temperature sensor; relay for turning on the heating element on the board. | In a service test. | |
| The NTC temperature sensor is faulty. | We check: the NTC sensor, if it is closed or broken, then replace it; NTC wiring and terminals. | In a service test. |
Why is this mode needed?
Why should the user run self-diagnosis of a Bosch washing machine, since this is not necessary for normal operation of the equipment? In fact, a service test allows you to solve two problems at once: firstly, to find out what washing programs and functions a particular washing machine has, and secondly, to determine which components and assemblies of the machine are not working correctly. In some cases, it is the service test that helps identify a serious malfunction , so experienced technicians often resort to it when they first get acquainted with a particular machine.
If you are just about to buy a Bosch washing machine and saw a demo model on a store stand, you can run a service test to find out what this “home assistant” is capable of and whether it’s worth buying at all. In general, test mode is a very useful function that is not needed every day, but you need to run it at least once a year, and now we will tell you how you can do this.
Service test of the Bosch Maxx 4 washing machine.
Now we will describe the process that allows you to enter the service test of a Bosch washing machine. The process description is listed in the table below.
| What we do | How we do it | Indicator status |
| How to enter the service test | Set the wash program selection knob to the “Off” position. We hold down the 2 buttons closest to the regulator and turn the regulator counterclockwise one notch to the “WASH AT 30 degrees” position. | |
| Select the machine unit to be tested | We select the machine unit that we will test. To do this, turn and set the mode selection knob counterclockwise (left) to the desired position. Each position of the mode selection regulator (each washing mode) corresponds to a specific machine unit. We look at what corresponds to what in the following table. | |
| Running the test | To start the Bosch washing machine test, click “Start”. | |
| How to abort a test | To interrupt the test, you must either press “START” or turn the mode selection dial to another position. |
Running on Bosch Logixx
Setting up the test mode on a Bosch Logixx machine is quite similar. First we close the hatch tightly, and then turn on the “home assistant”. We set the program switch to OFF, wait 2 seconds, then set the switch to the 6 o'clock position for spin. As with the Bosch Maxx, the light above the Start/Pause button will blink.
Now we need to pay attention to the display of the machine. To the right and left of the display are the right and left arrow buttons. These are function switch buttons. Press and hold the function button with the left arrow. Turn the programmer knob to the 7 o'clock position (“Drain”). Then you can release the arrow button. If the last error code appears on the screen, it means you did everything correctly.
Next, using the left and right arrows, we need to select the desired fault code that corresponds to a specific component of the Bosch washing machine. Make your choice and click “Start/Pause”. To understand which code means what, study the error codes of Bosch washing machines, then you can make an informed choice.
After testing the machine, you need to turn off self-diagnosis. This is done in exactly the same way as in the case of Bosch Maxx washing machines.
Table of correspondence between washing modes and components of the Bosch Maxx 4 machine.
| Washing mode | Tested machine unit |
| WASH "COTTON 60 degrees" | Drive motor. |
| WASHING “COTTON 60 degrees ECO” | Drain pump. |
| WASH "COTTON 90 degrees" | Heating element, pressure switch, checking the engine in reverse and spin mode. |
| WASH "COTTON 60 degrees with pre-wash" | Hot water inlet valve. |
| RINSING | Fill valve (pre- and main wash). |
| SPIN | Fill valve (main wash). |
| DRAIN | Fill valve (pre-wash). |
