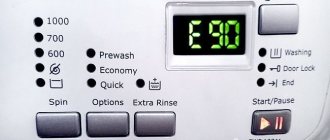
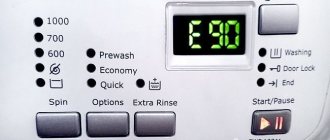
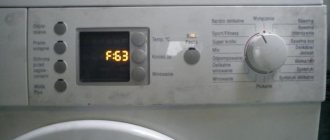
Error table for CM Hansa PC series
| Error code | Error value (will be displayed on the display) | Causes | How to fix a breakdown |
| E01 | Problems with closing the hatch door. |
|
|
| E02 | Water supply error. Waiting time for water collection exceeded: 2 minutes. | Options:
| What to do:
|
| E03 | Error draining water. Timeout exceeded: 1.5 minutes. | Causes:
| Actions:
|
| E04 | The tank is full of water. | What happened:
| To resolve the issue, do the following:
|
| E05 | The time for filling water into the tank has been exceeded: 10 minutes. | Causes:
| How to remove the error:
|
| E06 | Water drain exceeded timeout: 10 minutes. | What's happened:
| Actions:
|
| E07 | Leak. Activation of AquaStop. | Violation of tightness. Leak. |
|
| E08 | Problems with network voltage. | The voltage is not enough for the SMA to operate, or it exceeds the permissible limit. | Checking the electrical network. |
| E09 | Excess foam during spin cycle. |
|
|
| E11 | The UBL (door lock) is faulty. | The UBL triac has failed. | Electronic board repair. |
| E21 | Engine problems. | The drum rotated at different speeds, after which the engine jammed. There may be a problem with the tachogenerator. |
|
| E22 | Uncontrolled rotation of the motor without a signal from the module. | The motor triac on the control board burned out. | To reset the error, you need to repair the board and replace the triac. |
| E30 | The hatch does not lock | The hatch may not be closed tightly or the hatch locking mechanism may be broken. | Press the hatch door tighter and try again to start the wash. If the error recurs, inspect the blocker and replace it if broken. |
| E31 E32 | Thermal sensor short circuit. Contacts are damaged. | Open circuit between sensor and module. | Ringing the temperature sensor wiring tester. Replacement of damaged areas. |
| E42 | The CM door does not open at the end of the wash cycle. | Problems with the electronic module. Broken door lock. |
|
| E52 | Damage to the control unit. | Replacing the block. |
Frequent malfunctions
Although the quality of Hans washing machines is excellent, they still have weak points, the presence of which can be judged by the occurrence of typical faults. Most often, owners of devices of this brand contact us about the following problems:
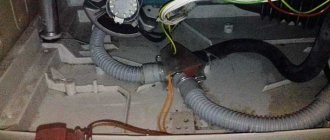
- Drain pump failure. The most common fault with Hansa machines.
- Dirty drain filter and pipes.
- Controller failure. The malfunction is manifested by spontaneous shutdown, failure to complete the selected washing programs, and rotation of the drum in one direction.
- Aqua Spray system failure.
- Temperature sensor short circuit.
- The machine freezes due to voltage surges.
- Worn brushes or bearings.
You can see the repair of the Hansa washing machine control unit in the following video.
SM Hans PA series error codes
| Error code | What does the error code mean (will be displayed on the display) | Reasons for appearance | How to fix a breakdown |
| E01 | Malfunction of the hatch lock. |
|
|
| E02 | No water supply (time exceeded by more than 10 minutes). |
|
|
| E03 | No water drainage. There is a timeout (10 minutes). |
|
|
| E04 | The level sensor gave a command to overflow water in the tank. |
|
|
| E05 |
| Causes:
| How to remove the error:
|
| E07 | The tachogenerator does not work. Three attempts to start the engine. Shutdown. |
|
|
| E08 | There is no tachometer signal during spinning. Restart the engine for 3 times. If it does not start, the program stops. | Malfunction of circuits or such parts: motor, tachometer, control unit. |
|
| E10 | Electrical error. | Excessive voltage in the network. | Checking the electrical network. |
| E11 | Engine malfunction. | The motor triac burned out. Short circuit. |
|
| E12 | There is a leak. Aquastop worked. |
|
|
| E14 | Electronic module malfunction. | Stopping the program due to power problems or control unit failure |
|
| E15 | Controller error. | After startup, an error occurred, which indicates a malfunction of the control board. | Replacing the board. |
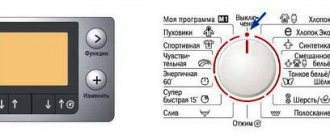
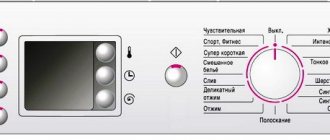
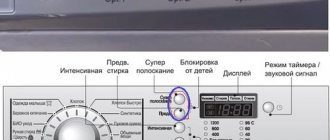
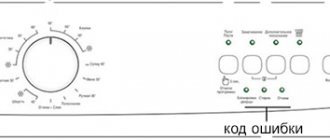
In the photo, the buttons (light bulbs) that are used in decoding errors are indicated in Latin letters A, B, C, D. See the table for how to find out about a breakdown, focusing on the light bulbs:
| Light bulbs | Reasons for the error |
| D (E01, E11) | The hatch is not locked . You need to check the locking mechanism, check whether the hook springs well, and check the lock itself. |
| B (E02) | Water filling time exceeded . Let us note that in Hansa washing machines, manufacturers have provided too much protection, and the maximum water collection time is 2 minutes, which in our conditions (low water pressure in the water supply) is not enough to fill the tank. Try to reset the error by turning off the machine or wait until the pressure returns to normal. |
| B, C (E03) | The machine did not have time to drain the water . In the Hansa SMA, the drain pump breaks down twice as quickly as in appliances of other brands. The problem is that it is assigned two tasks at once: draining water and circulating it through the system - the so-called “aqua spray” option. The breakdown may just be related to this option. It is worth checking the water drain hose, the main pipe and at least cleaning the filter. |
| C, D (E04) | Too much water in the tank . Check the fill valve, level sensor (pressure switch) and the hose of this sensor. |
| A (E07) | Water from the tank leaked onto the tray, AquaSto p was activated. |
| A, B, C, D(E08) | High or low voltage in the electrical network . If the current in the outlet is higher than 250V or lower than 200V, you need to set the stabilizer to 3 kW or 3.5 or even 4. |
| A, C, D (E09) | Too much foam in the tank . Remove the laundry, rinse and restart the wash. |
| C (E21, E22) | The board does not recognize the rotation of the reel . The drive belt could break, the brushes could wear out, the tachometer and other components associated with the rotation of the shaft in the SMA motor could break. |
| A, D (E31-E34) | The water did not heat up within the allotted time . Check: heating element, water heating sensor, electrical wiring and contacts. If that doesn't help, check the heater relay on the control board. |
| D (E42) | The hatch lock will not unlock . Unplug the SMA from the outlet. If this doesn't help, call a specialist. |
| A, B (E52) | The electronic module has burned out. Call a specialist. |
Once you understand the reasons for the breakdown, you will understand why Hans’s washing machine displays an error code. In most cases, repairs can be done yourself.
Checking the operating modes of the washing machine using a service test
The check is performed in the following sequence:
- Set the program selection switch to the position corresponding to the selected test (except “0”).
- Press and release the START button.
- Control the execution of selected operations.
Short service test
A shortened test procedure is provided to check the performance of the main functions of the SM during statistical tests on the production line. CT can also be used to quickly check the SM by service specialists.
To carry out the test, the washing machine must be connected to the water supply network with the ability to manually shut it off.
The procedure for launching a shortened ST is as follows:
- set the program switch to position 1 (see figure above);
- press and hold button 17 (START/STOP). At the same time, the programs are switched as follows: 1 (initial position) - 2 - 3 - 2 - 3. The switch is held in each position for at least 1 s;
- after this, indicator 18 (START/END) should blink;
- release button 17;
- alternately (with a delay of 1 s) move the program switch to the following positions: 16 - 15 - 14 - 13 - 12 - 11 - 10 - 9 - 8 - 7 - 6 - 5;
- press and hold button 17;
- The program switch is moved to position 4;
- release button 17.
If the CT startup is successful, indicators 19 (OPERATION) and 20 (DOOR LOCK) on the front panel of the SM should light up, and indicator 18 (START/END) will flash.
Then perform a shortened ST in the following sequence:
- Move the program switch to one of the positions other than 1 and 4.
- Within 60 s, the drum begins to rotate at maximum speed (for each specific SM model, the rotation speed may be different).
- The water inlet valves are turned on alternately in the following sequence: for 6 s through the pre-wash chamber - pause 6 s - through the softener chamber (6 s) - pause 6 s - and then through the main wash chamber to the first pressure switch level (about 8 l for SM with a laundry load capacity of 5.5 kg).
- Within 35 s, the water heating element is turned on.
- Within 2 minutes, the water in the tank heats up to 30°C. At the same time, the drum begins to rotate as follows (as in washing mode): 12 s clockwise - pause 3 s - 12 s counterclockwise - pause 3 s. Then the cycle repeats.
- The valve for filling water through the softener chamber is turned on until the maximum tank level is reached. After this, the shortened ST is completed.
Note.
- One of the disadvantages of this CT is that after its completion, water remains in the SM tank. Therefore, after starting step 6 ST, manually turn off the water, otherwise you will have to drain more than 8 liters of water (as after performing step 3).
- The execution of ST can be interrupted at any place. To do this, you need to press and hold button 17 for 3 seconds - indicator 19 will go out and indicator 18 will light up.
Full service test
A full service test allows you to check the performance of most modes and functions of the washing machine.
To carry out the test, the washing machine must be connected to the water supply network and to the sewerage system.
The procedure for running a service test is as follows:
- Set the program switch to position 1;
- Press and hold button 17 (START/STOP). At the same time, switch programs as follows: 1 (initial position) - 16 - 15 - 16 - 15. The handle is held in each position for at least 1 s;
- After this, the G1 indicator (START/END) should flash;
- Release button 17;
- Alternately (with a delay of 1 s) move the program switch to the following positions: 14—13—12—11—10—9—8—7—6—5—4—3—2;
- Press and hold button 17;
- Turn the program selection knob to position 2;
- Release button 17.
If the service test has been started correctly, the G2 (OPERATION) and G3 (DOOR LOCK) indicators should light up on the front panel of the washing machine.
- Then the verification operations of the service test are performed in the following sequence:
- Move the program selection knob to one of the positions other than 1 and 11-16.
- Press and release button 17 (START/STOP).
- Monitor the execution of the selected service test operation (depending on the position of the program selection knob - see Table 4). During the test, indicators G2 and G3 are illuminated, but indicator 17 (START/STOP) is not.
Tips and prevention of breakdowns
- External cleaning of the machine body is carried out only with the use of a soft cloth and delicate detergents. Do not wash the machine with abrasives or solvents.
- Since failure due to contamination of the drain filter is a fairly common problem with Hansa machines, it is important to clean the filter regularly. It is recommended to do this approximately every twenty washes.
- Also periodically (once a year) clean the drain hose by removing it from the machine, having first unscrewed its back wall.
- Once a month, clean the compartment where detergents are loaded. After opening the compartment and pulling it by the handle, simultaneously press its stopper. After removing the compartment, wash it under the tap using a rag or brush, and then replace the compartment in its place.
Simple preventive measures described in the Ukrainian program “Everything Will Be Good” will allow your assistant to serve for a very long time.
The lights are on
This situation is also possible. The indicator lights up or blinks, but the machine does not start in any mode. On older models with a command device, the knob turns continuously.
Are you unplugging your washing machine?
Oh yes! No
Crash
First of all, try resetting the program. The machine may have frozen or there has been a power failure. Different brands and models have different reset mechanisms. You must read the instructions. Try unplugging for a few minutes.
On older Indesit models, to reset, do the following:
- put the switch on the point;
- launch;
- wait 3-5 seconds - the lights should blink several times;
- transfer to the washing program;
- turn it on.
Expert opinion
I work in the household appliance repair industry. Extensive experience in restoring washing machines and dishwashers.
Ask a Question
It is very difficult to reset an error in Bosch cars. Different models have their own algorithms.
Error code
On machines without a display, indicators indicate an error code that corresponds to a specific malfunction. It is deciphered using special correspondence tables. For Samsung SMA, the error values can be found here.
If any difficulties arise, it is better to contact a repair specialist.
A leak
Quite often, the reason for the strange behavior of the machine is an electrical leakage to the body. First of all, it occurs on the heating element or motor, but it is necessary to check all elements of the washing machine. To do this, you need a high-quality tester with a high “resistance” limit - 40 MOhm.
Control module
Module
The lights may light or blink due to the module. If the combinations do not match your machine's fault code and there is no leak, then the control board most likely needs to be repaired or replaced.
As you can see, there are trivial reasons why the washing machine does not turn on and which you can fix yourself. But at the same time, a number of breakdowns cannot be eliminated without an experienced specialist from the service center.
Feeding key
After the power cord and FPS, the power button is checked. This key “sticks” and burns out rarely, but when operating the machine in a room with high humidity, this is possible. Especially if the Hansa model does not provide protection for the dashboard from moisture. In this case, water penetrates the case, oxidizes the contacts and disrupts the internal power supply. To check, the button must be removed:
- remove the top cover from the machine;
- Find the power button on the back of the dashboard;
- take a photograph of the location of the wires connected to the key;
- unhook the terminals from the button;
- pry up the plastic with a flat-head screwdriver and, pressing the latches, disconnect it from the body.
First, the button is called for breakdown, then the resistance on it is measured. If there is a deviation from the norm, we diagnose the breakdown and change the key. Sometimes cleaning the contacts helps restore the functionality of a part, but it’s better not to risk it and install a new one right away.
Necessary tool
Before you begin disassembling and repairing Hansa, prepare the following tools:
- screwdrivers – Phillips and flathead;
- wrenches (flat) - 19 and 8/10;
- clamp pliers;
- pliers;
- wire cutters
You will also need a special tool - a service hook.
If you need to replace bearings, stock up on a set of end tools, an extension cord for them, and a screwdriver. You will also need bearing pullers and special lubricant - a repair kit for waterproof bearings.
