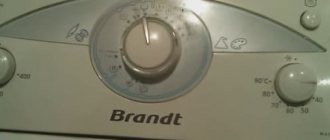
Brandt washing machines have appeared on the Russian market relatively recently. The French manufacturer began supplying its equipment to us in 2011. This is due to the fact that this model is not as well known as other brands. Although at home it occupies up to 40% of the market.
In Russia, this brand is known mainly to those who have selected a top-loading washing machine. The manufacturer has the majority of such machines, although there are also representatives with front-loading laundry. The equipment produced in France is distinguished by high build quality, which means it will last for decades.
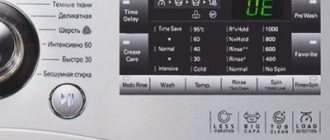
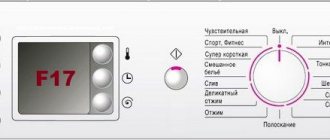
Brandt washing machines are equipped with a troubleshooting system. The diagnostic results are displayed. One of the most common problems is error D07 in a Brandt washing machine.
You will find out where to find a description of this error and how to fix it yourself after reading the article.
Where to look for the correct decoding?
As mentioned above, looking for a description of the fault code in the instructions or user manual is almost useless. Information can be either true or completely false. But don’t call a technician every time you can’t determine the cause of a breakdown using the code yourself. Then forums on the Internet come to the rescue, where people share their observations. If we are talking about error code D07, then first of all you need to check not the hatch and everything connected with it, as stated in the instructions, but inspect the engine brushes.
Why? The thing is that specifically in Brandt machines, the build quality of the engine and the quality of the brushes themselves suffer. Often after 6-7 months they become unusable. If they really are the problem, buy new ones and replace them. And if not, start diagnosing the door.
Review
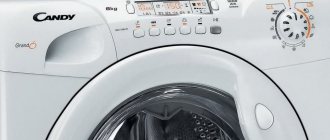
No matter how reliable household appliances are, with prolonged use some components may break down. Cars have been sold in Russia for more than 20 years, and during this time service workshops have accumulated statistical data on what breakdowns occur most often. In the Russian Federation, budget-level models are in greatest demand. The quality of their parts and assembly is not as high as that of elite models. As a result, breakdowns are much more common.
The list of the most common breakdowns in most cases contains the same items.
If there is a malfunction, an error code is displayed on the electronic display.
It should be taken into account that the main parts of branded cars are reliable and rarely break down.
Often the question of repair first arises no earlier than seven or ten years of operation have passed. Although this indicates the high reliability of these household appliances, a serious problem arises. The fact is that dealers bringing spare parts for Brandt cars from Europe to Russia focus on those products that are the most popular on the market. This does not include parts for washing machines manufactured ten or more years ago.
As for current models, units are imported for which consumers have the highest demand.
Here is a list of such spare parts:
Display or control modules are considered the most accessible on the spare parts market. It should be borne in mind that they are not commercially available for all models of branded washing machines. In some cases, finding them is quite difficult. If you had to face this situation, you will have to order these units directly abroad. However, the price will be relatively high.
You can purchase spare parts not only in Europe, but also by placing an order in China. However, although the price will be slightly lower, the quality will not be as high as the original parts.
If the consumer is faced with the need for repairs, it is necessary first to assess its cost. In some cases it may be too high. It is possible that repairs will cost more than the entire car purchased many years ago.
Heating element and temperature sensor in a Brandt car: mutual problem
In vertical Brand machines, checking and changing the heating element and thermistor (temperature sensor) is much easier than in conventional machines. If the water does not heat up or overheats, then you need to check both units - both the heating element and the sensor.
- Unscrew the back panel (use a 10mm Phillips screwdriver).
- Once you remove the panel, you will see a pulley that holds the drive belt. Next is the wall of the tank, the engine and on the side – the pump. Immediately above the motor there is a plug, under which what we need is hidden - both the heating element and the sensor.
- Remove the plug.
- Release the sensor and heater from the wires.
- Take a tester and first check the sensor - first at room temperature, then by heating it in a glass of warm water. A working sensor will display different indicators on the tester screen. Broken will show 0-1.
- Check the heating element if the sensor is working properly. If the resistance value is not in the range of 20-40 Ohms, then the heating element has burned out or shorted. Together with the gasket, take it out of the tank and install a new heater.
- Return the sensor to its place. Connect the wiring.
If you quickly did not find the original heating element for your model, do not install a similar one! It’s better to order an original part and wait for it, otherwise you risk also breaking the electronic module.
The main causes of washing machine breakdowns
Among the common malfunctions of Brandt washing machines that require repairs are:
To accurately determine the breakdown, before repairing a washing machine, technicians always conduct diagnostics. But doing repairs yourself is dangerous, especially if you do not have the relevant experience. To carry out diagnostics, you need to know the features of Brandt machines, otherwise the problem may worsen and the cost of repairs will become higher. It’s better to call a specialist right away - our technicians can come and fix your washing machine on the same day you call.
Description of the work progress
Do not forget that the motor runs on electricity, so before dismantling it, disconnect the SM from the power supply. Then you need to very carefully disconnect the engine from the tank; to do this, remove all wire contacts.
Important! Remember what you do step by step, or even better, record it in any convenient way. This will help in the future to assemble the car correctly, not to mix up the parts and not miss anything.
Before you start replacing brushes, make sure they need it. Look at the rods. The main problem is that the rods wear out and wear unevenly. The brush must be replaced when the length of the handle is 1.5-2 centimeters. If some elements are almost intact, do not touch them, change only those that are really out of order. Be prepared for the fact that you may need to repair the engine more often than once every six months.
Also take a photo or sketch how the brushes are inserted into the grooves, namely: seating depth, bevel direction, etc. This is important, since if assembled incorrectly, the motor may spark after connecting to the network.
Since you are dismantling the motor to replace the brushes anyway, inspect the internal commutator as well. It happens that dirt settles there, or small scratches appear. These defects must be eliminated. Take a rag or dry brush and brush off the dust; scratches can be easily sanded off with a piece of sandpaper.
Now you can begin installing new parts. The brushes are attached to self-tapping screws. Once again, carefully check that everything is installed correctly. If everything is in order, proceed to reassemble your home assistant using the previously recorded data. Don't forget to put the wiring back in place and attach the motor to the washer tank. Now it's time to test your work in one of the following ways:
Note! For the first 10-12 washes, try not to put heavy, bulky items in the drum, since at first the brushes should get used to each other, “get used” to the place, and only then you can use your Brandt washing machine to the maximum.
Don’t forget to periodically inspect the condition of your motor, clean and lubricate it if necessary, and also carry out minor repairs yourself. After all, it is easier to prevent a breakdown than to fix it, and then error D07 will definitely not bother you anymore.
Interesting:
1 reader comment
Hello! Can you give me some advice on how to get to the brushes? I was able to unscrew one, but the second does not have access to the screw - it is blocked by the engine mounting element. I wanted to remove the engine, but I couldn’t get to all the mounting bolts.
How to find a master?
To find a Brandt washing machine repair specialist in Moscow who will correctly diagnose the error code and fix any malfunction without any problems, please refer to our section:
Brandt washing machine repair In the list of companies, choose the one that is as close as possible to your home, or trust our rating and contact one of those that are at the very top. This will save maximum time and troubleshoot problems in the shortest possible time.
Error codes
| Code | Error | What to do? |
| d01 | There is no water flowing into the Brandt washing machine. This may be caused by a valve or control module error. | The valve must be checked for damage. If any are present, this part will most likely need to be replaced. In our price table you can find the cost of valve repair and replacement at service centers in Moscow. |
| d02 | Water does not drain. The most likely cause is an open circuit or a control module failure. | It is recommended to contact a specialist who will check the circuit for functionality and also find out whether the control unit in the Brandt machine is working correctly. |
| d03 | The water in the Brandt machine does not heat up, which may be caused by an open circuit or a failure of the control module. | See recommendation above. |
| d04 | The error is caused by a faulty triac on the control module. | If you haven’t heard the name, here’s the definition: a triac is a semiconductor device, which is a type of thyristor and is used in alternating current circuits. If you are not an electrician, then it is better to call a service center. |
| d07 | Loading hatch is open (locking hatch error). The reason could be as simple as the hatch not being closed tightly, or a problem with the UBL. | Check the tightness of the hatch, find out if any clothing is preventing it from blocking. If the problem is not so obvious and most likely something is wrong with the UBL (hatch blocking device), then it is better to call a technician. Prices for repairing hatch locks are also in our price list. |
| d10 | Excess water in the tank - an overflow probably occurred due to an error in the pressure switch or control module. | The maximum that can be done in this situation is to check the water level sensor for serviceability. How to check the pressure switch - read here . In other cases, it is better to call a specialist. |
| d17 | The car's parking sensor is faulty, or the belt has come off. | In both cases, the right solution is to find a repair specialist. |
| d21 | Problems with the control module of the Brandt washing machine. | There may be several reasons for the malfunction of this module, and all of them are not so simple to identify and repair, so call the specialists - save time and nerves! |
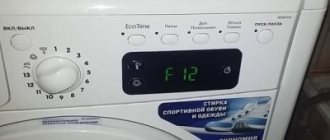
| ER12 | The loading hatch door of the Brandt machine is not tightly closed or open. | Another similar error, but in this case UBL has nothing to do with it. Check the closure of the machine hatch and put the unit back into operation. If it doesn’t help and the error code is still on when the door is tightly closed, then most likely the error can be transferred to d07 (see recommendations above). |
All error codes for Brandt washing machines , which can be seen on the display of your unit, are necessary to make it easier for specialists to diagnose the problem and take the correct set of actions to eliminate it.
Description of the work progress
Do not forget that the motor runs on electricity, so before dismantling it, disconnect the SM from the power supply. Then you need to very carefully disconnect the engine from the tank; to do this, remove all wire contacts.
Important! Remember what you do step by step, or even better, record it in any convenient way. This will help in the future to assemble the car correctly, not to mix up the parts and not miss anything.
Before you start replacing brushes, make sure they need it. Look at the rods. The main problem is that the rods wear out and wear unevenly. The brush must be replaced when the length of the handle is 1.5-2 centimeters. If some elements are almost intact, do not touch them, change only those that are really out of order. Be prepared for the fact that you may need to repair the engine more often than once every six months.
Also take a photo or sketch how the brushes are inserted into the grooves, namely: seating depth, bevel direction, etc. This is important, since if assembled incorrectly, the motor may spark after connecting to the network.
Since you are dismantling the motor to replace the brushes anyway, inspect the internal commutator as well. It happens that dirt settles there, or small scratches appear. These defects must be eliminated. Take a rag or dry brush and brush off the dust; scratches can be easily sanded off with a piece of sandpaper.
Now you can begin installing new parts. The brushes are attached to self-tapping screws. Once again, carefully check that everything is installed correctly. If everything is in order, proceed to reassemble your home assistant using the previously recorded data. Don't forget to put the wiring back in place and attach the motor to the washer tank. Now it's time to test your work in one of the following ways:
Note! For the first 10-12 washes, try not to put heavy, bulky items in the drum, since at first the brushes should get used to each other, “get used” to the place, and only then you can use your Brandt washing machine to the maximum.
Don’t forget to periodically inspect the condition of your motor, clean and lubricate it if necessary, and also carry out minor repairs yourself. After all, it is easier to prevent a breakdown than to fix it, and then error D07 will definitely not bother you anymore.
Interesting:
1 reader comment
Hello! Can you give me some advice on how to get to the brushes? I was able to unscrew one, but the second does not have access to the screw - it is blocked by the engine mounting element. I wanted to remove the engine, but I couldn’t get to all the mounting bolts.
The most common faults
The most common breakdowns will be discussed below. To eliminate them, it is not always necessary to call a specialist. In some cases, the situation can be corrected on your own. It will be explained in detail what needs to be done for this.
If there is a blockage
Many people believe that this is the scourge of washing machines. However, you can handle this on your own. With proper operation and proper correction of what happened, no problems should arise. As you know, some machine models use vertical loading, while others use horizontal loading. Their drainage is located differently, but this does not create problems. First, let's look at what needs to be done in horizontal loading machines. There are two options here:
In the first case, we open the washing machine and see approximately the following picture:
After doing this, the problem will most likely be fixed.
On top-loading machines, the drain hole is at the bottom and is easy to see.
In some cases, the blockage remains. This means that the pipes still need to be cleaned. They are quite wide, but this does not exclude the possibility of clogging.
To do this, we do this.
It is advisable to do such cleaning not only when a problem occurs. If done periodically every two or three months, this will be an effective preventive measure to combat blockages.
Repair of inlet valve filters
Unfortunately, the creators of Brandt washing machines created their equipment, assuming that it would use only purified water. Therefore, inlet filters are designed mainly for such water. However, given that in various cases the incoming water can have not only a high degree of purity, but also a very low one, there are often cases when these filters become clogged. If this happens, they need to be cleaned.
It's not difficult to do this yourself.
Although this filter may become dirty periodically and will need to be cleaned each time, it is not recommended to remove it. In this case, water will flow into the machine of the same quality as flows through the pipes. This risks contaminated water getting into the car.
If there are problems with water heating
If the heating of the water stops during washing, or vice versa, the water is hotter than necessary, you need to inspect the heating element (heating element) and temperature sensor. We'll show you. How to do this in washing machines that use top loading.
You can do this yourself as follows.
It is important to remember that only the original heating element must be installed, specifically for this particular model of washing machine. It is not recommended to use a similar unit, as this may lead to equipment failure. If such a part is not available, you need to order it and wait for delivery.
Faulty drain pump
This part is usually available for all major Brandt washing machines. This unit is relatively expensive, so it makes sense to make sure that it is in fact faulty and needs to be replaced.
This is done in this order.
When inspecting the drain pump, you need to pay attention to the bushing. Debris may accumulate there, which may cause poor performance. If cleaning is done, the pump does not need to be replaced. But such a conclusion can be made only if the values shown by the multimeter correspond to the norm.
Operation of the electronic control module
It may be that a specific fault could not be found, but the machine still does not work. In this case, there is a high probability that the electronics that perform control functions in the washing machine are faulty. In this case, it is not recommended to troubleshoot Brandt washing machines yourself. It is important not only to know how to carry out repair work correctly, but also to have the necessary experience. In this situation, it would be wisest to contact a specialist.
Simple problems
First of all, check that there is actually water in the tap. It is possible that there is a short-term shutdown of the central water supply in the house, which is why the equipment is “capricious”, giving error D 01. If there is a supply, look to see if the shut-off valve on the pipe is closed. What to do if the problem is not simple inattention? Immediately check whether the hatch is tightly closed. The automatic machine will not start drawing water if the system is leaky. Press the door against the body, perhaps the lock will work and the unit will start washing.
If you have not identified any external problems, you can proceed to diagnosing the washing machine. The test should be carried out from simple to more complex. First of all, it is better to inspect the inlet filter, inlet hose and inlet valve.
Before starting any repairs, be sure to disconnect the Brandt from the power supply and turn off the water supply valve.
If the machine makes a loud noise while trying to fill, feel the inlet hose. Loosen the clamp and unhook the “sleeve” from the machine, then rinse it under running water. After cleaning the tube, it is necessary to inspect the filter mesh, which becomes clogged with impurities and dirt and stops passing water. You should proceed like this:
- unhook the inlet hose from the body (which has already been done if you washed the hose);
- find the mesh - it is located next to the inlet valve;
- Use pliers to grab the protruding edges of the filter;
- pull the mesh towards you;
- clean the filter, if necessary, leave it to soak in water with the addition of citric acid;
- install the filter mesh in its original place.
It would also be a good idea to check whether the coarse filter installed in the water pipe behind the shut-off valve is dirty. The nozzle is necessary for the primary filtration of water, so a lot of debris and impurities settle there.
You can clean the coarse filter using two wrenches. One needs to hold the joint, and the other needs to unscrew the nut securing the flywheel. Don't forget to place a basin next to it, as water will rush out of the hole when you remove the fasteners. There is no need to pull out the mesh - the powerful flow will deal with the blockage. Once you see that the nozzle is “like new” again, you need to put everything back.
Inlet valve and heating element
Once you are sure that the cause is not clogged, you can move on. Most often, error D 01 appears due to problems with the intake solenoid valve. This device cannot be repaired, therefore, in order to fix the “home assistant”, you will have to replace it with a new one. The procedure for replacing the fill valve is extremely simple. Even a “newbie” can install the element. Once you have purchased the correct components, proceed as follows:
When purchasing components for a Brandt washing machine, be sure to focus on the model and serial number of the machine.
Another reason for the impossibility of starting the cycle and error D01 is problems with the heating element. The heater often burns out due to a thick layer of scale that interferes with the thermal conductivity of the element. To do the repair yourself, you need to:
You can check whether the heating element is working properly using a multimeter.
Having discovered that the heater is out of order, you will have to buy and install a new tubular element. The algorithm is as follows:
If the situation could not be corrected either by cleaning the filters or by replacing the pressure switch, inlet valve or heating element, and the diagnostics of the drain pump and UBL did not reveal any violations, all that remains is to check the control board. It’s not worth delving into the “brain” of a machine without the necessary knowledge and sufficient experience. You can damage the equipment even more. It is better to entrust electronics repair to service center specialists.
What could have happened?
There are several reasons why an automatic machine cannot fill. The most common ones are a sudden shutdown of the water supply or a closed shut-off valve. The saddest situation is when the semiconductor on the control board fails. Repairing the electronic module will cost the most.
There are also typical problems due to which error D01 appears on Brandt machines in most cases. We are talking about a malfunction of the inlet solenoid valve, water level sensor or pump, or clogging of the inlet mesh filter. Let's figure out how the breakdown of each element can affect the operation of the washing machine.
- The fill valve has failed. This part is responsible for supplying water to the system. After the user starts the program, the membrane opens and the tank begins to fill. If the sensor breaks, the mechanism remains closed and the equipment does not start washing. You can check whether the device is working properly by applying a voltage of 220 Volts to it. A working device should click; a broken device in such a situation will remain “silent”.
- The filter installed in front of the valve at the entrance to the machine is clogged. The mesh in Brandt washing machines is designed to prevent various impurities contained in tap water from getting inside. Over time, the filter element becomes clogged, slowing down the water flow. So, during the next wash, the machine will not be able to fill at all due to the fact that the mesh is clogged with debris.
- The level sensor is broken. The pressure switch closely monitors the amount of water in the tank and transmits information to the main control unit. If the device fails, the normal operation of the machine is disrupted. For example, when the tank is empty, the sensor can signal that the container is full, and vice versa. It’s easy to check the element - just unhook the tube from the body of the part and blow into it. Clicks indicate serviceability, silence indicates a breakdown.
- The pump is faulty. Before starting the cycle, the washer pumps out the water that has accumulated at the bottom of the tank - this checks whether the pump is working. If the “brain” understands that the drain is not functioning, the wash will not start. The module will display error D01 and terminate the program.
- The electronic unit has burned out. Sometimes the reason for the “whims” of equipment lies in damage to semiconductors or tracks on the board responsible for collecting water into the tank. In such a situation, it is better to entrust the repair to a specialist. The technician will perform extensive diagnostics of the module and ring each element.
- The heating element stopped working. Such a problem can also lead to the “whims” of the equipment and cause the impossibility of starting the cycle.
The list of typical breakdowns can be supplemented with extremely rare failures. So, sometimes a Brandt washing machine issues code 01 due to a loose or damaged wire connecting the tank and the water level sensor. Also, washing may not start due to a malfunction of the UBL - the door does not lock, the “brain” understands that the system is leaky and cancels the program.