RECOMMENDATIONS AND TIPS FOR THE USER…
Page 2
- Image
- Text
2
RECOMMENDATIONS AND TIPS FOR THE USER
•
This appliance should be used for washing clothes at home; any other use is considered incorrect and therefore dangerous.
• Any modification or attempt to damage the device may be dangerous and
cause damage to the machine.
•
Given the significant weight of the washing machine, special safety standards must be observed when moving it.
•
Children are prohibited from using the machine without adult supervision.
•
Any changes made to the water or electrical system must be carried out by authorized specialists.
•
When placing the washing machine, you should check that the power cord is not bent or pinched and is accessible for work.
• Before turning on the washing machine, you should completely remove all packaging and any materials used.
transportation of the part (transport bolts). Otherwise, serious damage to both the machine and the premises may be caused.
•
If the appliance is installed on a carpeted floor, make sure that air circulates freely between the washing machine and the floor.
•
Do not overload the washing machine with laundry.
•
While the appliance is operating, do not put your hand under the water flowing from the drain hose, as it may be hot. You should also avoid touching the glass of the door, which also gets hot.
•
Only machine washable fabrics should be washed. If in any doubt, please refer to the manufacturer's instructions on clothing labels (see section “Garment Care Symbols” page 7).
• Before putting clothes in the washing machine, you should check that all pockets are
empty. Hard and sharp objects such as coins, pins, nails, screws or stones can cause serious damage to the machine.
•
Do not wash items soiled with gasoline-containing substances in the washing machine. If such contaminants are removed by evaporating substances, you should wait until these substances completely evaporate from the surface of the fabrics before putting things in the machine.
•
Do not use detergents for hand washing as the resulting excessive foam may damage the internal parts of the machine.
•
After washing rugs, blankets and other fleecy fabrics, be sure to check the filter and clean it if necessary.
•
It is recommended to leave the machine door open at the end of the wash cycle.
•
Do not attempt to troubleshoot the device yourself, as repairs performed by untrained persons may cause serious damage and void your warranty.
•
Repair of the device must be carried out by specialists from authorized service centers. For
repairs, only original spare parts should be used.
When checking and cleaning the machine, be sure to unplug the unit from the electrical outlet.
The washing machine can be opened for at least a minute after the wash cycle has completed or after the machine has been switched off.
If you want to unplug the machine from the electrical outlet, grasp the plug rather than the electrical cord.
After completing each wash, it is recommended to remove the plug from the socket and close the water supply tap.
Do not expose the device to atmospheric conditions.
Do not insert or remove the plug from the outlet with wet hands.
The washing machine must be connected to a safety-compliant, grounded electrical outlet.
Do not connect the washing machine to an electrical outlet through extension cords or tees.
Dispenser and control panel
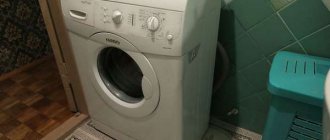
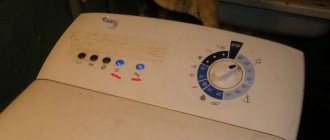
The Ardo A600X washing machine contains a mechanical control panel. There are five buttons on it, as well as two switches.
The selector located on the right is used to select programs. And using the second switch, the required water heating temperature is set.
In the center of the panel there is a warning button indicating whether the machine is on or off.
The leftmost button on the control panel is necessary for additional rinsing. The button located to the right is needed to temporarily stop the wash without draining the water from the drum.
When you press the button located in the middle, the spin is turned off. This means that after washing the water will be drained from the tank. The second button from the right is needed to reduce the duration of the wash cycle. The right button is needed to turn the washing machine on and off.
The Ardo A600X washing machine contains a powder dispenser with three compartments. Pour powder for the main wash into the middle compartment, and for pre-wash into the left compartment. The right compartment is for rinse aids. For washing, you can use not only powders, but also liquid products intended for automatic machines.
Tilt the machine and remove the two inner corners from polystyrene...
Page 4
- Image
- Text
Page 4
•
Tilt the machine and remove the two inner corners from
polystyrene (if available) by pulling two cardboard
tapes “E - F”. First remove cardboard “E” and then cardboard “F” (Fig. 4).
REMOVING THE PACKAGING AND TRANSPORT BOLTS FROM THE MACHINE MOD. B
•
Park the machine close to where it will be installed.
Following the instructions located at the top
packaging (Fig. 1-A), install the supplied
set of lower protection (Fig. 1-B).
Remove the outer packaging (Fig. 1). If you have any doubts about the integrity of the machine, do not use the device and contact a qualified technician.
•
To transport the device, its swinging unit is blocked by 4 plastic spacers with bolts.
Before connecting the machine, use a wrench (Fig. 2) to loosen the transport bolts and remove them together with the plastic spacers (Fig. 2-A). Save the bolts and spacers in case you move.
Close the holes left by the transport bolts with special plastic plugs included in the bag with documents (Fig. 2-B)
•
Raise the machine and remove the polystyrene tray (Fig. 3).
4
CONNECTION TO THE WATER NETWORK…
Page 6
- Image
- Text
Page 6
CONNECTION TO THE WATER NETWORK
•
The pressure in the water supply network should be in the range from 0.05 to 1 MPa.
•
Before connecting the inlet hose to the machine, open the tap and let the water drain so that there are no contaminants such as sand or rust in the pipes (this is especially important when the washing machine is connected to a new water pipe, or when such a pipe has not been used for a long time).
•
Connect the inlet hose to the 3/4″ cold water threaded connection.
• Place a gasket with a filter (included) between the tap and the hose and tighten it tightly by hand (Fig. 9).
•
Check,
to
other
the end of the hose was firmly attached to the washing machine (Fig. 10).
•
During washing, the water supply tap must be fully open.
•
The drain hose must be at a height of at least 60 cm and no more than 90 cm from the floor (Fig. 11).
•
If a stationary drain is provided, the free end of the hose should be inserted into it; The minimum internal diameter of the drain hole must be 40 mm.
•
It is important that the drain hose is not tightly connected to the drain hole. This way, air will not accumulate in the siphon, which will prevent water overflow.
•
If water from the machine must be poured into a sink or sink, hang the free end of the drain hose, the bend of which is fixed with a special holder included in the kit, on the edge of the sink and secure the holder so that it does not fall to the floor (Fig. 12). The sink drain should not be clogged and the water should drain quickly to avoid overflow.
•
Move the machine against the wall, being careful not to pinch the pipes.
6
Note Don't forget to lift the partition when filling the machine...
Page 9
- Image
- Text
Page 9
Note
Don't forget to lift the partition when you pour laundry detergent into the machine.
In areas with hard water, water softeners should be used along with detergents to prevent limescale buildup on the heating element. The water softener is placed together with the detergent in compartment “II”. Attention: use only washing powders or products specifically designed for washing in automatic washing machines.
They
produce
smaller
quantity
foam.
Dosage
The detergents used must correspond to those specified by the manufacturer on the packaging. Too much detergent can cause excessive suds and reduce wash results.
Insufficient detergent may result in unsatisfactory washing results.
CARE
The washing machine is designed to minimize the need for maintenance operations during operation. However, you should not forget to clean the machine regularly. Before cleaning the machine, make sure it is unplugged from the electrical outlet and the water tap is turned off. Power wire:
If the wire is damaged, it must be replaced by a service workshop.
Attention:
do not use chemicals to clean the machine; use only a slightly soapy, damp cloth.
CLEANING THE WASHING MACHINE
Use a soft, damp cloth to clean the outside of the washing machine.
Do not use abrasive compounds.
After finishing washing, leave the machine lid open to allow the rubber parts to dry.
It is necessary to regularly remove detergent residues with a damp sponge. To thoroughly clean the bleach and softener compartments, you can remove the inserts and wash them under running water.
INSPECTION HOLE
To remove objects that have accidentally fallen between the drum and the outer body of the machine, you should remove the plastic cover of the counterweight located in the drum on the opposite side of the hole (Fig. 16), then open the doors and remove the objects from the bottom.
9
Not Anonymous :: Attempt to repair the ARDO TL1000X washing machine
The washing machine has served for more than 10 years, two years ago we started thinking about buying a new one. But why, if this one works for now, a knocking noise was noticed during a small spin cycle two years ago. Then, during the next wash, there was a very loud knocking sound, and when the drum was simply rotating, there was also a knocking sound. I immediately thought that the bearing needed to be replaced. Well, let’s look at what’s going on: And so we have Pull the washing machine out of the bathtub to where there is more space, put plywood so as not to damage the floor Unscrew the screws securing the control unit Remove the cover of the control unit Remove the control unit Unscrew the screws securing the rest of the cover And remove it , you need to move it away and pull it to the back side of the washing machine. And we see that the drum roller is turning crookedly. It turns out that the tank cover is broken, where the bearing is located. We remove the drive belt and use a 13 key to unscrew the drum roller. At the same time, slow down the drum with some kind of board. We see the fastening of the bearing to the tank. We need to bend the locking bends of the bolts and unscrew them with a 10 wrench. We knock the bearing off the drum axis, I put a screwdriver and hit it with a hammer. The bearing looks undamaged, but the axis rotates crookedly. The axle and the bearing seat. We will remove the broken tank cap by disconnecting all the wires that might interfere with us.
We remember their location. We remove the white thing from the front of the tank, as I understand it, this is a connection with the atmosphere and protection against overflow. There was water in it when it started to bloom. Using a size 8 wrench, unscrew the bolts securing the tank cover. The lower support of the tank will go down under the weight. Put something under the engine. We remove the various connections of the tank. We unclip the clamps of the tank cover as shown in the photo. We take out the heating element. We remove the tank cover and see that the fasteners of the drum axle have collapsed and the inside of the tank cover. Then it turned out that the tank still spins crookedly on the other side. Then I tried to knock out the bearing and unscrewed everything. It turned out that you need to remove the plastic plug inside the drum and unscrew the bolt with a hexagon. After which, remove the drum from the tank. Having taken out the drum, I saw that the fastening of the drum axis was also destroyed on that side. I thought about it and considered that the repair here would take a long time, and there were a lot of basic spare parts.
I decided not to do any repairs. Next will be an article about how to completely disassemble it. We unscrew the screws securing the top on both sides. We unscrew the screws that secure the lid seal; they are located under the rubber band. We take out the plastic structure that the rubber band presses on. We disconnect the washing powder intake hoses and take it out; the top cover is attached to the front with latches. We wean off the lid lock when washing. We get this look. The elastic band is attached to the tank with glue and the wire is tightened with a bolt. We unscrew the tank fastenings on the other side. We remove the upper counterweight. We unscrew the water pump. We remove the water drain tube from the tank into the pump. We insert the tube over the plastic structure of the tank fastening. We remove the tank from the springs; then the electrical equipment on the rear wall did not come out of the tank; we remove the water supply solenoid valve; We remove various other sensors, it is not necessary to disconnect the wires. We take out the tank and see the following. We disconnect all the wires from the engine and unscrew the two screws of the engine mounting clamp.
We take out these fasteners and remove the engine. Unscrew the bolts securing the counterweights with a 13mm wrench. You need to be careful as they are heavy. Lower the counterweight down. We unscrew the shock absorber mounting bolts. We remove the plastic structure and counterweights and get the following. Next, we remove what is left and assemble it in the reverse order. Theoretically, the tank with engine and counterweights could be removed from the body without disassembling it. Well, the weight is somewhere around 40-50 kg. If the damage to your washing machine is not so serious, then it can be repaired. All top-loading washing machines have similar designs. If you have any questions, I’ll answer in the comments.
SOLVING EMERGING PROBLEMS If a malfunction is detected…
Page 10
- Image
- Text
Page 10
SOLVING EMERGING PROBLEMS
If a malfunction is detected in the device, before contacting an authorized technical service center, you should check whether the malfunction is caused by one of the reasons listed below. An unreasonable call to a technician will oblige you to pay for his services, even if the washing machine is still under warranty.
The washing machine does not work (the control light does not light up)
• check that:
1
there is voltage in the network.
2
The plug has been correctly inserted into the socket.
3
The programmer knob (P) was pulled out and the stop button was not pressed.
The washing machine does not work (the control light is on)
• check that:
1
the programmer knob (P) is set to the selected program
2
read the section “The washing machine does not fill with water” in the operating manual
The washing machine does not fill with water
• check that:
1
there is water in the water supply
2
the water supply tap is open
3
the hose is not kinked
4
the filter is not clogged.
If necessary, clean it by disconnecting the device from the mains 5
there were no hardened residues of washing powder in the compartment
The washing machine continuously fills and drains water
• check that:
1
the drain hose is at the correct height (60 - 90 cm)
2
the hose opening is not submerged in water
The washing machine does not drain or spin
• check that:
1
the drain hose holder is installed correctly
2
the drain hose is not bent
3
the drain filter is not clogged
4
the non-spin function has not been selected
5
The function of stopping the machine with water in the drum was not selected
The washing machine vibrates and makes noise
• check that:
1
all transport bolts have been removed - see page 6
2
the washing machine is level
3
large items such as sheets or tablecloths are not folded
The lid does not open
1
wait 3 minutes. after washing is completed
Things are not pressed enough
• check that:
1
the items are evenly distributed in the drum
2
the appropriate spin speed is selected
The washing machine stops during washing
1
check that there is current in the network
A large amount of washing powder remains in the container
• check that:
1
the water supply tap is open
2
the filter between the tap and the inlet hose is not clogged
Laundry remains dirty after washing
• check that:
1
the drum is not overloaded
2
the correct amount of washing powder is used
3
the appropriate washing program is selected
Things shrink or fade
• check that:
1
the correct washing program is selected
2
the correct washing temperature is selected
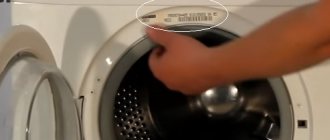
If, after performing the above steps, the device still does not work properly, please report the problem to your nearest authorized service center. In this case, you need to indicate the machine model, serial number and type of malfunction. The technical characteristics of the device are indicated on the marking plate attached to the back of the machine (Fig. 17). Its characteristics give service center specialists the opportunity to find the necessary spare parts and, accordingly, quickly and efficiently carry out maintenance.
10
Comments
Select → I found the instructions for my washing machine here! #manualza
- Click →
It’s bad when laptop repair instructions are stored in the laptop itself.
Manualza!manualza.ru
Still not with us?
Ardo washing machine won't turn on
If your Ardo washing machine for some reason does not turn on or start, do not rush to call the service center. It is very likely that this problem is completely solvable; the main thing is not to panic and act carefully in accordance with the recommendations that we will give in this article.
And you will always have time to spend money on a master!
List of reasons for failure
What caused this behavior of the Ardo brand washing machine. No master will tell you offhand, you need to watch. However, initially it will be useful to determine the range of possible malfunctions that could potentially lead to such consequences. What kind of malfunctions are these?
- Problems with the electrical network, machines, sockets, extension cords.
- Problems with the power cord or plug.
- The FPS - the network capacitor - burned out.
- The hatch locking device has failed.
- The contacts of the on/off button are burnt.
- The control module is broken.
The first two reasons from this list are jokingly called “childish” by craftsmen, although for a housewife who unexpectedly encounters a similar malfunction, they may seem quite serious. The third, fourth and fifth reasons require minor repairs. And finally, the sixth reason is the most multifaceted.
If everything works out by replacing the burnt triac on the control board, then this is a repair of medium complexity. And if several semiconductor parts have burned out along with the tracks, then this is a complex and expensive repair, or replacement of the board, but let’s not get ahead of ourselves.
"Children's" cases
If the Ardo washing machine does not turn on or start, you need to immediately start troubleshooting. Where to begin? And you need to start with the simplest reasons. It is easiest to check them, and the washer will remain in place. At the first stage, it will not have to be disassembled, disconnected from communications, or moved. What should be done?
- Unplug the washing machine from the socket, plug the plug of the working appliance into this socket and turn it on. This is the easiest way to check the functionality of the outlet.
- If the outlet works, check the extension cord to which the Ardo washing machine is connected in the same way.
Be careful! Burnt and exposed wires, as well as damaged sockets, pose a real danger. Observe safety precautions when working with electrical communications.
- The Ardo washing machine may refuse to work due to a damaged power cord. First, inspect the wire and plug visually; perhaps the insulating layer is damaged somewhere or there are traces of melting. If this is discovered, the wire cannot be used.
- If you cannot detect anything visually, check the wire for breakdown using a multimeter. Set the device's toggle switch to check the resistance (minimum value). Touch one probe of the device to the right tooth of the washing machine power cord plug, and the other probe to the left one. If a value in the region of 2 Ohms lights up on the device display, the power cord and plug are working properly; if the value is 9-12 Ohms or more, the wire is faulty, there is a complete or partial break.
If you find problems with the network cable, there is no need to try to repair it yourself, open the insulation, or change individual wire strands.
Change the entire wire along with the plug, this will be more reliable and reliable, and most importantly safer for you and your washing machine.
The mains capacitor burned out
The Ardo brand washing machine does not turn on or start not only because of the power cord and problems with electrical communications at home, such problems can arise due to the FPS, the so-called interference filter or the network capacitor. This semiconductor element is installed in the washing machine in order to suppress significant interference that is present in the household electrical network. And thus protect the sensitive electronics that the washing machine is stuffed with.
The interference filter is located at the end of the power cord inside the washing machine. To get it out you will have to remove the top cover of the Ardo washing machine. Unscrew the two mounting bolts, pull the cover towards you and remove it. Under the cover, in the place where the power cord fits, you will see a capacitor. We disconnect the wires from it and remove the part from the washing machine.
Attention! When performing the above manipulations, make sure that the washing machine is de-energized.
We set the multimeter to the minimum resistance value and call the capacitor. When ringing the part, you will see that the value begins to grow quite quickly until the display shows a large number or -1. This will mean that the capacitor is working. If you start the test, and the number 1 or 0 immediately appears on the display, the capacitor needs to be replaced.
We purchase a new capacitor, put it in place of the old one, connect the wires, put the lid in place, make the connection and see how the washing machine works, how it turns on and starts. If everything is correct, the repair was successful!
The on/off button is broken
The reason that the Ardo washing machine does not turn on or start may be the on/off button. Most often, this malfunction occurs in old washing machines that have already been in use for 10-12 years.
The probable causes of such a breakdown could be:
- wear of the contacts, in this case, before the button breaks completely, it will start to operate every other time, or even twice;
- contact of the button with water, liquid detergent and other chemicals;
- oxidation of contacts due to operation in conditions of high humidity.
What do we need to do? First, let's remove the control panel of the washing machine to get to the desired button. Remove the top cover of the washing machine, unscrew all the fasteners holding the front panel and remove it. Next, we need to inspect the button contacts and test them with a multimeter. In this case, we proceed with the device exactly as described above. When the value 1 or 0 appears on the display, you can assume that the button has burned out and needs to be replaced.
For your information! On some models of Ardo washing machines, the control panel is attached to plastic latches; to remove it, you need to carefully pry them off without breaking anything.
We remove the old button, in some cases you will have to use a soldering iron, and put a new, original one in its place. We install the control panel in place, connect and check the “home assistant”. If the washing machine turns on and starts perfectly, then everything is fine, but if during the test you found that the button is working, then everything is worse than it could be - the control module has failed.
Control module problem
A failure of the control module of a washing machine is a rather serious malfunction that requires the intervention of a good specialist. It doesn’t matter whether you repair the microcircuit or change it, all this must be done by a master. If, after checking all the above details, you are convinced that this is definitely a control board, prepare your money and call a technician. Self-repair of the control microcircuit is possible only as a last resort if you have skills in working with electronics .
The probability of success in this case is small, but in this case we will not focus special attention on this issue.
If you are interested in the question of whether it is possible to repair the control board yourself, read the publication on the topic Is it worth repairing electronic modules yourself? Our advice on this matter is clear - contact a good service center.