Don’t throw pissing rags, as a radio amateur, I fixed it twice...
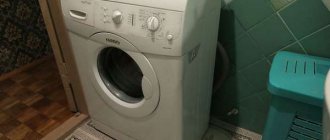
Problem No. 1 - the machine was knocked out during washing, when turned on, all the lamps on the display were on, there was no response to the control.
As the autopsy showed, the Minisel 800 control module failed: - the diode bridge was broken - the track leading to the power winding of the motor was burnt out - the motor control triac was broken. I replaced the elements, restored the track, and after a couple of washes a new problem arose:
Problem No. 2 - after a couple of successful washes, the drum began to spin jerkily (the light was flashing, the belt was eating up, as a result the triac died again and the machine again became a “brick”)
As the autopsy showed, the Minisel 800 control module failed again: - the motor control triac was broken. Replaced the triac with a higher quality analogue from ST with a current reserve (16A instead of 12A)
PS: Taking this opportunity as a preventative measure: - treated the belt with a drive belt tensioner conditioner from Hi-Gear (I have positive experience) - cleaned the heater from scale (in citric acid until factory clean)
The circuit on the Internet turned out to be a button accordion, judging by it - the triac switches the short circuit (phase to ground), and not the motor.
Check out the recommendations for repairing the Ardo washing machine from the master!
Manufacturer (translated from Italian home appliances) is Antonio Merloni.
Standard front-loading models with the FL index. With drying - WD.
GENERAL CHARACTERISTICS OF THE WASH DRYER Washing machine with...
Page 2
- Image
- Text
SM512
2
GENERAL CHARACTERISTICS
WASH DRYER
A washer dryer is an electrical household appliance in which, in a user-selected mode, you can wash and dry any type of fabric, with the exception of down jackets and quilts.
The outer side of the structure is made of metal panels, subjected to special anti-corrosion treatment and coated with paint (9 layers) to give the machine a pleasant aesthetic appearance.
The motor and all moving parts of the device are designed in such a way as to guarantee a minimum noise level during its operation.
The wide drum is made of stainless steel, firmly fixed to the structure and has no sharp parts. This ensures good washing quality and durability of items.
The program panel clearly shows all types of washing and drying. The wide-opening door makes it easy to load and unload things from the car.
The excellent stability of the washing machine is the result of long-term research carried out to find the balance of masses in motion.
Drying things is done quickly and easily through the use of special heat regeneration and recycling systems, which provide significant energy savings.
The device complies with safety standards EN 60335 for the operation of electrical household appliances and standards for protection against radiotelephone interference EEC 87/308 dated 02.06.87.
The device is intended for domestic use and operates at an electrical voltage of 220 V.
The product has a Rostest certificate
In case of contacting
authorized service center inform the factory
the number of the washer dryer indicated on the information plate of the device and
in the warranty book
The machine is intended for household use only...
Page 3
- Image
- Text
SM512
3
✽
The machine is intended for domestic use only.
✽
Any modification or attempt to modify the appliance may be hazardous to the user and may cause damage to the washing machine itself.
✽
Given the significant weight of the machine, special safety precautions must be observed when moving it.
✽
Children are prohibited from using the machine without adult supervision.
✽
Any changes to plumbing or electrical
networks
must
carried out by specialists.
✽
After installing the machine, make sure that it is not standing on the electrical power cord.
✽
Before turning on the machine, remove all packing material and blocks used to transport it (safety
screws).
IN
Otherwise, you can seriously damage both the car and the apartment.
✽
If the appliance is installed on a rug-covered floor, you should check that between the washing machine
And
floor
free
air circulated.
✽
The washing machine must be connected to a grounded electrical network in accordance with safety regulations.
✽
At the end of each wash, you must unplug the machine from the mains and turn off the water supply valve.
✽
Do not insert or remove the electrical plug with wet hands.
✽
Do not overload the washing machine.
✽
Machine wash only machine washable fabrics. If in doubt, refer to the recommendations
manufacturer,
given in the form of symbols on the clothing label (see “Clothing care symbols” page 6).
✽
Before putting items in the washing machine, make sure all pockets are empty. Hard and pointed objects such as coins, pins, nails, screws or stones can seriously damage the machine.
✽
Do not wash items soiled with products containing gasoline in the washing machine.
If stains are removed with solvents, you should wait until they have completely evaporated from the surface of the fabric before putting items in the machine.
✽
At the end of the wash cycle or after switching off the machine, it can only be opened after one minute.
✽
At the end of washing runners, bedspreads and other fabrics made from long fibers, you need to check
filter
And
at
need to clean it.
✽
Before a long planned absence from home or when it is expected that the washing machine will not be used for a long time, it is necessary to remove the plug from the socket and close it.
tap
submissions
water.
It is also recommended to leave the car door slightly open to allow ventilation inside the car.
✽
Do not expose the washing machine to the elements.
✽
Under no circumstances should you try to repair device malfunctions yourself, as repairs performed by non-specialists can cause serious damage to the machine and will deprive you of the right to warranty repairs.
✽
Repairs to the device must only be carried out by service personnel. Only original spare parts must be used for repairs.
NOTES AND TIPS FOR THE USER
Ardo fault codes
Error codes will help determine the location of the problem: E00/E01, E02, E03, F2, F4, F5, F6/F9/F12, F8, F13/F14. The control board diagnoses the system in the event of a breakdown and displays a set of symbols on the display. Each one points to a different problem. Error explanations can be found in the operating instructions and our article.
| Fault code | What does it mean | How to fix it yourself |
| E00/E01 | Water does not drain from the tank | Remove the blockage in the drainage tract (filter, pipe). Diagnose the pump |
| E02 | Problems with spinning and rinsing | The water drains by itself. Check the location of the hose. It should be at a distance of 40 cm from the floor. If necessary, straighten the hose and remove the blockage |
| E03 | 3 minutes have passed, water does not leave the tank | Inspect the contacts from the electronic board to the pump. Diagnostics of the board in the pump control area |
| F2 | Incorrect heating operation | Check what: |
- Serviceability of the heating element and its wiring.
- Temperature sensor performance
- Remove debris from the drain filter, hose, and pipe.
- Replace a broken pump
- Pressostat.
- intake valve
- Replacing motor brushes.
- Winding repair.
- Installing a new module
Typical faults
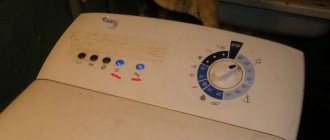
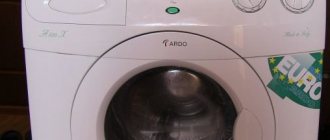
Ardo washing machines are divided into two main categories based on loading type:
- Vertical (Ardo TLN 85 SW, T80X, TLN 106 SA).
- Frontal (Ardo SE 810, FLN 126 LW, A 1033, WDO 1485 L).
The Ardo top-loading washing machine has a compact body that easily occupies the space between the bathtub and sink. But it doesn't come without its drawbacks.
Here's what users are complaining about:
- Machines with a long service life (more than 5 years) spontaneously open the drum doors. This leads to jamming and tearing of the valves.
- The top cover of the drum is often subject to corrosion because the water supply is carried out through the top.
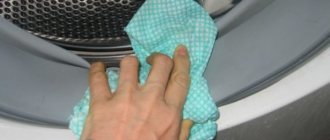
- Close the doors more tightly. Clean the latch from debris and adhering powder.
- Do not overload the tank with laundry.
- Observe the dosage of detergent to prevent foaming.
- Wipe the drum with a dry cloth after washing to avoid corrosion.
depending on the model...
Page 4
- Image
- Text
SM512
4
MACHINE INSTALLATION (depending on model)
V
For transportation, the swinging unit of the machine is fixed with 4 spacers on screws. Before using the machine, unscrew the locking screws and remove them together
With
blocking
spacers. Save the screws and spacers for future moves.
Cover the holes on the back panel with the supplied
V
complete
plugs. Note: If the spacers are still inside the machine, remove the rear panel, remove them, and reinstall the panel.
For transportation, the swinging unit of the machine is fixed with 4 spacers on screws. Before using the machine, unscrew the locking screws with a wrench.
Insert a screwdriver into the holes and remove the 4 plastic locking spacers as shown in the picture. Note: If the spacers are still inside the machine, remove the rear panel, remove them, and reinstall the panel.
Installing and leveling the washing machine Having chosen for...
Page 5
- Image
- Text
SM512
5
Installing and leveling the washing machine
Once you have chosen a suitable location for the machine, level it using the adjustable feet [Fig. 3]. Pay particular attention to the positioning of the machine, its leveling and the tightness of the locknuts. If the washing machine is not leveled correctly, the machine will be unstable and make noise during operation, which can subsequently lead to damage.
If the machine is installed on a rug, you should check that air circulates freely between it and the floor.
It is not recommended to install the washing machine in rooms where the temperature may drop below 0
o
C.
Connection to water supply
➘
The water pressure in the water supply network must be within 0.05 1.00 mPa (0.5 10 bar.)
➘
Before connecting the machine, open the tap and let the water flow to clear the pipes of impurities such as sand and rust (this operation is especially important when the washing machine has not been used for a long time, or when it is connected to a curved water supply pipe).
➘
The inlet hose must be connected to the cold water tap with a 3/4” threaded fitting.
➘
Place the filter mat included with the machine between the tap and the pipe, and then tighten the connection tightly [Fig. 4].
➘
Place the gasket on the other end of the inlet hose and screw it to the washing machine [Fig. 5].
➘
During washing, the water supply tap must be fully open.
➘
The water drain pipe should be at a height of 60 to 90 cm [Fig. 6].
➘
If water is drained directly into the sewer, the free edge of the washing machine pipe must be inserted into a sewer pipe with an internal diameter of at least 40 mm.
➘
Make sure that the drain pipe of the machine is not tightly inserted into the sewer pipe so that the siphon does not fill with air and, accordingly, there is no overflow of water.
➘
If water is drained into a sink or somewhere else, the free end of the pipe must be secured at the point where it bends with a special holder included with the machine. Thus, place the pipe on the edge of the sink and secure the holder so that the pipe does not fall [Fig. 7]. The sink drainage channel must be clean so that water can flow through it freely.
MIN. 60 CM MAX.90 CM
OPERATING THE WASHING MACHINE Attention: before using...
Page 9
- Image
- Text
SM512
9
OPERATING THE WASHING MACHINE
Attention: before starting the first wash, you should perform a short wash cycle without loading laundry. This makes it possible to check the operation of the washing machine and clean the drum. Precautions before starting washing:
Check that the connection to the water supply network is correct: the water supply tap must be open and the drain hose must be in the appropriate position (see the “Installation” section and Figures 4-7). Check that the programmer knob is in the stop position. With dry hands, insert the plug into the outlet. Sort your laundry by fabric type (check the symbols on the labels). Before loading clothes into the drum, make sure that: the pockets of the clothes are empty, torn parts are sewn up, zippers are closed, belts, buckles and hooks are fastened, and stains are previously removed.
Performing a wash cycle: (sequence of operations that must be performed before setting the selected cycle and turning on the machine) 1.
Open the hatch door.
2.
Load the laundry into the drum and close the hatch door. Attention: Do not overload the washing machine. It is not recommended to wash items that absorb large amounts of water, such as carpets.
3.
Pour low-foaming washing powder for automatic washing machines into the appropriate compartments and add conditioner (see section “Using detergents”).
4.
Close the detergent drawer. Attention: To avoid water leakage, do not remove the detergent drawer while the machine is running.
5.
Select the desired program and temperature using the appropriate knobs. ATTENTION!!! Do not rotate the programmer knob counterclockwise. If you accidentally turn the knob past the mark for the selected washing program, it cannot be turned back. Turn the programmer knob further clockwise to the desired position.
6.
To set the required functions, press the corresponding buttons.
7.
To turn on the machine, pull the programmer handle towards you or press the on/off button (if provided in this modification), after which the control light should light up.
At the end of the washing program, the machine stops at one of the STOP/STOP programmer marks: 1.
Turn off the machine by pressing the programmer knob or on/off button (if provided).
2.
Remove the laundry from the machine.
3.
With dry hands, remove the plug from the outlet.
4.
Close the water supply tap.
What breaks most often according to statistics:
- 30% - clogged drainage path, wear and breakdown of the pump:
Open the loading hatch and identify the machine model on the sticker.
Unscrew the drain filter from the front bottom and clean it.
We change the pump, which is located at the bottom right on the back side.
Loosen the clamp on the drain pump pipe.
We check the pump, clean it, and if it malfunctions, replace it.
Over time, mechanical wear appears on the shaft. The impeller dangles and does not pump out water well.
- 20% malfunction of the electronic control board:
MINISEL board:
Ardo models FL1000,FL1202,FLS81S,A800XEL, AE810, AE800X, SE810, FLS81S, AED1000X,TL1000EX, TL1010E ANNA610, ANNA 600X, A410, A610, A500, A1000.
We look at the power source and the level of constant voltages (5 and 12 V) at its outputs. If there is no voltage at the output of the IP, check the corresponding elements - power switch, power filter, power transformer T1, rectifier (D11-D14), microcircuit U1.
module :
Models A800, A804, A810, A814, WD800X, S1000X, T80, T800, TL800X, TL804, etc.
Malfunctions in the DMPU module
By power module:
break in resistance R51 (A, B); stabilizer U3; Zener diode D24 (short circuit); varistor VDR5 is broken.
For engine control:
relay K1, K2; rsimistor TR2. Diodes D1-D6, D9-10, D15, D23.
Legacy DMPA module:
They are used in machines that include an asynchronous drive motor and a mechanical command device.
Models A1000PL, A1000XCZ, A1000XPL, WD1000PL, TL1000X, etc.
The wear of the heating element increases with “hard” water.
Overgrown with scale (scabs), it transfers heat poorly and burns out.
You need to pull out the elastic band and not the heating element. Since when pulling out the heating element you can wedge the elastic band.?
This is important to avoid further leakage under the seal.
- 10% wear on the commutator motor brushes, loose contacts, broken drive belt
Remove the belt, unscrew the screws and remove the engine. There are two brushes on the engine, each secured with two screws. Unscrew the screws and remove the brushes.
Inspect the motor power supply terminal from the board and the ground wire.
Very often the contacts oxidize due to humidity and the machine gives an error because of this.
Each brush is installed in a brush holder. It can be disassembled into two halves. Pay attention to how much the brush protrudes.
This size should be at least 1 cm. The optimal option is 1.5 cm. After that, we assemble everything and install it in place.
- 10% - extraneous noise (bearings, shock absorbers, foreign objects)
Having jammed the pulley, unscrew the upper shaft clamping nut counterclockwise.
If the oil seal is not filled with specialized lubricant and the crosspiece bushing is not lubricated with it during assembly, the oil seal will wear out very quickly, regardless of its quality, this has been proven in practice.
There is no need to save money and improvise with lithol, grease and other lubricants; it is better to purchase specialized lubricants that are used to lubricate oil seals.
Standard sizes of bearings and seals Ardo:
This applies to modern technology - starting from 2000 (models AE800X, AED1000X, TL1ОООEX).
Thanks to it, you can perform diagnostics (DMPU control module):
Close the hatch (without laundry). Set the program selection to 30°C until it clicks. Temperature regulator to 0°C. Turn it on. The drum rotates at 250 rpm. To check the buttons for half load, extra rinse and others, press them. The spin speed increases from 250 to the maximum provided for in this model. If there are no additional functions, press the spin button.
When faults are detected, the indicators will flash.
Ardo Error Codes
- E00 |
E01 – Drain.
Clean the drain filter and drain pipes. E02
– Water flows or drains incorrectly.
The drain hose may not be positioned correctly. E03
– Water does not drain from the tank, and the drain time has exceeded 3 minutes.
F2
– Temperature sensor.
F4
– Displayed on the display if there is no water drain.
A possible cause is the drain pump. F5
– The water is drained and immediately refilled.
The problem is usually in the water supply filter. F6 |
F9 | F12 – Electronic module.
F8
– The water in the tank has exceeded the available level.
Suspicion of the aquastop valve. F13 |
F14 – Critical.
Breakdowns are a fairly rare occurrence, usually associated with improper operation. Italian technology is distinguished by its high technology and versatility.
How to carry out a service test equipped with a MINI-SEL board:
The control panels have different appearances. The steps to switch to the test mode are shown in the figures - move the program selector knob to the “6 o’clock” position - press button 4 - POWERFUL WASH and, holding it, press the POWER button. After this, the SM should go into test mode.
DRYING WASHING Washing and drying ATTENTION…
Page 10
- Image
- Text
SM512
10
DRYING LAUNDRY
Washing and drying ATTENTION!!! For washing powders and liquid detergents of some
When purchasing brands, special plastic containers are included that are placed directly into the drum of the washing machine. These containers are only used for washing programs and should not be placed in the drum when using the drying cycle.
1.
Press the half load button.
2.
Do not use the “stop with water in the tank” and “turn off the centrifuge” buttons.
3.
Set the drying time using the drying time selector knob.
4.
Select the washing program and temperature.
5.
Set the washing program and temperature.
6.
Turn on the machine by pulling the programmer handle towards you, or, if the machine has an ON/OFF button, press it (the corresponding indicator light will light up).
7.
At the end of the washing program, the machine will stop at one of the STOP marks on the programmer.
8.
When drying is complete, the drying time selection knob will stop at zero.
9.
Turn off the machine by pressing the programmer knob, or, if there is an ON/OFF button, press it (the corresponding indicator light will go out).
10. Take out the laundry. 11. With dry hands, remove the plug from the outlet. 12. Close the water tap.
Drying only ATTENTION!!! Do not dry items that have previously been
treated with solvents or gasoline-based substances as these substances may cause an explosion. The drying mode does not work when setting the wool washing program. If you use laundry detergent or liquid detergent containers during washing, remove them from the drum before drying. Then be careful not to dry out the laundry. It is better to leave it slightly damp, since when it dries, the linen becomes very wrinkled and then difficult to iron. The following items should not be dried in the machine: sleeping bags, feather beds, pillows and large blankets, as by expanding during the drying process they prevent air from entering the machine. The drying mode can only be set when the programmer knob is in the STOP position.
1.
Load the machine with laundry and close the hatch door correctly. ATTENTION!!! For best results, do not exceed the following load rates: 2.5 kg for durable fabrics (2 kg for extra large or extra small items); 1.5 kg for mixed or synthetic fabrics. If the above loading standards are observed, the laundry will rotate freely in the drum, will not wrinkle, and the result will be excellent.
Comments
Select → I found the instructions for my washing machine here! #manualza
- Click →
If all else fails, finally read the instructions!
Manualza!manualza.ru
Still not with us?
What breaks most often according to statistics:
- 30% - clogged drainage path, wear and breakdown of the pump:
Open the loading hatch and identify the machine model on the sticker.
Unscrew the drain filter from the front bottom and clean it.
We change the pump, which is located at the bottom right on the back side.
Loosen the clamp on the drain pump pipe.
We check the pump, clean it, and if it malfunctions, replace it.
Over time, mechanical wear appears on the shaft. The impeller dangles and does not pump out water well.
- 20% malfunction of the electronic control board:
MINISEL board:
Ardo models FL1000,FL1202,FLS81S,A800XEL, AE810, AE800X, SE810, FLS81S, AED1000X,TL1000EX, TL1010E ANNA610, ANNA 600X, A410, A610, A500, A1000.
We look at the power source and the level of constant voltages (5 and 12 V) at its outputs. If there is no voltage at the output of the IP, check the corresponding elements - power switch, power filter, power transformer T1, rectifier (D11-D14), microcircuit U1.
module :
Models A800, A804, A810, A814, WD800X, S1000X, T80, T800, TL800X, TL804, etc.
Malfunctions in the DMPU module
By power module:
break in resistance R51 (A, B); stabilizer U3; Zener diode D24 (short circuit); varistor VDR5 is broken.
For engine control:
relay K1, K2; rsimistor TR2. Diodes D1-D6, D9-10, D15, D23.
Legacy DMPA module:
They are used in machines that include an asynchronous drive motor and a mechanical command device.
Models A1000PL, A1000XCZ, A1000XPL, WD1000PL, TL1000X, etc.
The wear of the heating element increases with “hard” water.
Overgrown with scale (scabs), it transfers heat poorly and burns out.
You need to pull out the elastic band and not the heating element. Since when pulling out the heating element you can wedge the elastic band.?
This is important to avoid further leakage under the seal.
- 10% wear on the commutator motor brushes, loose contacts, broken drive belt
Remove the belt, unscrew the screws and remove the engine. There are two brushes on the engine, each secured with two screws. Unscrew the screws and remove the brushes.
Inspect the motor power supply terminal from the board and the ground wire.
Very often the contacts oxidize due to humidity and the machine gives an error because of this.
Each brush is installed in a brush holder. It can be disassembled into two halves. Pay attention to how much the brush protrudes.
This size should be at least 1 cm. The optimal option is 1.5 cm. After that, we assemble everything and install it in place.
- 10% - extraneous noise (bearings, shock absorbers, foreign objects)
Having jammed the pulley, unscrew the upper shaft clamping nut counterclockwise.
If the oil seal is not filled with specialized lubricant and the crosspiece bushing is not lubricated with it during assembly, the oil seal will wear out very quickly, regardless of its quality, this has been proven in practice.
There is no need to save money and improvise with lithol, grease and other lubricants; it is better to purchase specialized lubricants that are used to lubricate oil seals.
Standard sizes of bearings and seals Ardo:
This applies to modern technology - starting from 2000 (models AE800X, AED1000X, TL1ОООEX).
Thanks to it, you can perform diagnostics (DMPU control module):
Close the hatch (without laundry). Set the program selection to 30°C until it clicks. Temperature regulator to 0°C. Turn it on. The drum rotates at 250 rpm. To check the buttons for half load, extra rinse and others, press them. The spin speed increases from 250 to the maximum provided for in this model. If there are no additional functions, press the spin button.
When faults are detected, the indicators will flash.
Ardo Error Codes
- E00 |
E01 – Drain.
Clean the drain filter and drain pipes. E02
– Water flows or drains incorrectly.
The drain hose may not be positioned correctly. E03
– Water does not drain from the tank, and the drain time has exceeded 3 minutes.
F2
– Temperature sensor.
F4
– Displayed on the display if there is no water drain.
A possible cause is the drain pump. F5
– The water is drained and immediately refilled.
The problem is usually in the water supply filter. F6 |
F9 | F12 – Electronic module.
F8
– The water in the tank has exceeded the available level.
Suspicion of the aquastop valve. F13 |
F14 – Critical.