One of the most popular manufacturers of washing machines is Indesit. The products of this Italian company are famous for their reliability and affordable prices. But like any complex equipment, it can fail. There are two ways to solve the problem - contact a specialized center or troubleshoot the Indesit washing machine yourself. Repair using the second method is more profitable, as it saves money.
Indesit washing machine error codes - all indicators flash
“Smart” machine technologies allow you not only to wash and dry everything, but also to report problems. True, they only find out about it when something happens. LED light bulbs are the main way of informing.
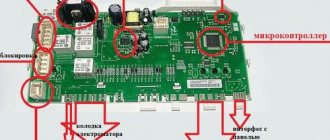
Why are all the lights on my washing machine blinking? Malfunctions are associated with incorrectly selected modes or, most often, breakdowns. Most likely, the malfunction is related to the electronic module (board). In fact, these are the “brains” of the Indesit washing machine, because it is this module that controls the operation of all the main components. Accordingly, if the signals do not pass through the board, the process immediately stops, and the lights on the main panel blink.
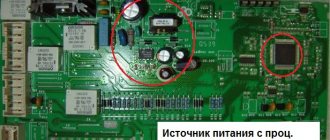
The most vulnerable places on an electronic board are capacitors. They burn out during operation of the washing machine. Sometimes the connecting contacts fail. As a result, automatic blocking occurs. To restore functionality, you will have to contact a specialist or arm yourself with the knowledge to repair it yourself.
If you know how to work with a soldering iron, you can replace the capacitors on the electronic module yourself.
See also -
How to choose a stabilizer for an automatic washing machine
Check what
- The position of the sealing collar, its condition. Due to deformation, the hatch does not occupy the desired position, Indesit generates an error.
- Lock. Damage or debris getting into the gap prevents the hatch from closing completely. Fix the problem, and the washing machine error will go away.
F-18 – processor malfunction
The Indesit does not accept commands and is not controlled. The error can be resolved by replacing the module.
F-20 - problem with water
(absent, deficiency or excess, constant set). It does not affect the spin mode.
If the electronics issues code 20 along with others (combinations F20 and 01, 08), then the reason must be sought in them.
Check what
- Availability of water in the system, pressure.
- Shut-off valves (is the valve fully open).
- Fill valve filter condition. If the grid is clogged, Indesit displays error 20.
- Drain hose position. Correct - above the tank level. Otherwise, spontaneous drainage of water into the sewer cannot be avoided.
Restarting Indesit in some cases clears code 20. Experience in troubleshooting washing machines shows that the main cause of Indesit errors is external factors. If you can’t remove the code yourself, call a technician. Attempting to repair the electronic module will not lead to anything good. The lack of a detailed diagram, experience, dense arrangement of parts - and these are not all the difficulties that will have to be faced. Eliminating serious Indesit faults is the prerogative of a professional.
If you have experience in correcting errors in Indesit washing machines , write in the comments to this article, we will try to consider your option and analyze it in detail in this or one of the following articles . You can also send photos and videos with comments and descriptions.
Did you like the article? A repost will be the best thanks.
Similar errors and malfunctions
All the lights are flashing, what should I do?
Typically the indicators will display an error code according to the Indesit designation, but other symptoms may also appear. For example, the washing modes are reset, and the program is reset, after which the lights begin to blink randomly.
The most vulnerable components are:
- control module;
- capacitors on the electronic board;
- Heating element for drying and heating water;
- electric motor;
- command apparatus (KSMA), etc.
The causes of breakdowns are natural wear and tear, moisture on electronic circuits, and mechanical damage. You can save your washing machine if you diagnose the problem in time. Of course, it’s quite difficult to do this on your own and at home, so it’s worth calling a professional.
Multiple lights blinking can indicate several problems:
- the machine does not heat the water (the heating element does not turn on);
- The heating element does not send signals to the electronic unit;
- there is no voltage supplied to the drain pump, so water does not drain;
- temperature sensors do not give signals;
- control and power modules do not send signals, etc.
More information about the machine codes can be found in the instructions or on the manufacturer’s website “Indesit”.
See also -
How to repair or replace a washing machine cross
Codes and errors indesit (Indesit) wisl
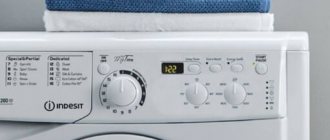
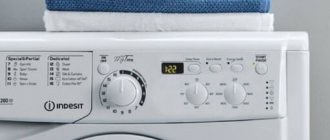
Here are the codes for flashing indicators and errors for indesit (Indesit) wisl series washing machines. The most common models are wisl 62, wisl 82, wisl 92, wisl 83, wisl 103, wisl 102, wisl 105 and wisl 85. These models do not have a screen, but all errors are transmitted by flashing. In the picture above, the LEDs above the buttons are numbered. Below are the numbers of flashing buttons and the meaning of errors.
- LED #4 flashes: An internal short circuit has occurred in the motor circuit due to high humidity or water leakage. It is necessary to disassemble the washing machine, eliminate the leak and dry all contacts.
- LED #3 flashes: There is no signal from the tachogenerator. Disassemble the washing machine and check the integrity of all connections, check for oxides on the contacts. Replace the tachogenerator if necessary.
- LEDs #3 and #4 are flashing: The temperature sensor inside the tank is not working. Check the quality of the contact connections or replace the sensor if necessary.
- LED #2 is flashing: incorrect signal from the water level sensor. Check connections from sensor to main board. If the connection is OK, the sensor must be replaced.
- LEDs #2 and #4 are flashing: the water is not draining from the Indesit washing machine. It is necessary to check whether the sewerage or hoses from the tank are clogged, check the drain pump.
- LEDs #2 and #3 are flashing: The panel with keys is faulty. Try disassembling the panel and wiping the contacts with alcohol. If the damage is severe, replace the keypad.
- LEDs #2, #3 and #4 are flashing: The water cannot be heated. The heating elements have become unusable and need to be replaced.
- LED #1 is blinking: Either the water level sensor or the heater relay is faulty.
- LEDs #1 and #4 are flashing: main control unit is faulty. The module needs to be replaced or re-flashed.
- LEDs #1 and #3 are flashing: The signal from the water level sensor is interrupted. Check the pressure switch and pressure switch.
- LEDs #1, #3 and #4 are flashing: The drain pump is not working. Check the pump connection and the quality of the connection. Replace the drain pump if necessary.
- LEDs #1 and #2 are flashing: The error is due to a poor connection of the wire loops to the main board.
- LEDs #1, #2 and #4 are flashing: The drying temperature sensor is not generating a signal. Check the quality of the connection and replace the sensor if necessary.
- LEDs #1, #2 and #3 are flashing: Both the drying temperature sensor and the drying temperature sensor are not responding. Check the quality of the wire connection, whether there are any oxides on the contacts.
- LED #5 flashes: Drum is locked. The engine cannot turn the drum, inspect the drum.
- LED #4 and #5 are flashing: the door cannot be locked. Check if anything is preventing the door from closing, clean the door lock, check the door close controller.
If you encounter an indication that is not described in the article, write about it in the comments.
f04, f4
If there is no indicator light, “Super Wash”, “Soaking” (model Indesit Wiun 100, etc.) lights up. The liquid level sensor is faulty. The program does not start, water does not flow, or there is too little or too much water. When the rinse mode is turned on, the liquid is endlessly pumped out and refilled.
- The water supply valve is closed, if so, open it.
- Check the fill valve; the filter may be clogged.
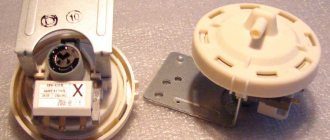
- Check the pressure switch, to do this, unscrew the rear bolts and remove the panel, the pressure switch is located on the side wall, disconnect the hoses and wires connected to it.
Then remove the device itself and inspect it for erosion and oxidation. When you blow on it, you should hear clicks; if nothing is heard, it is not suitable for work. Replace with a new one.
It would also be useful to check with a tester; from the data in the table, the operating value is in the range of 20 Ohm.2%.
f09, f9
The memory in the module is faulty. The device does not start.
- Restart.
- Insufficient current in the network.
- The control module has failed and needs flashing or replacement.
- Call and restore the contacts connecting the electrical controller to the other components.
Troubleshooting and troubleshooting
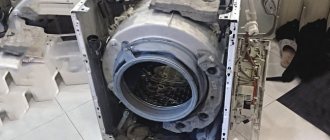
If you are well versed in technology, then you can figure out all the problems yourself. You can check the condition of the electronic board and fix breakdowns at home, but first you will have to disassemble the unit.
To do this you need to do the following:
- de-energize equipment;
- remove the housing cover;
- unscrew the hex screws holding the control board;
- disconnect all wires from the connectors;
- change the capacitors (or the board itself).
In front-loading Indesit models, the electronic board is located at the bottom of the rear. Getting to it won’t be difficult if you have the most common tools. For diagnostics, it is better to use a multimeter, which can be used to “ring” capacitors and contacts.
Unwinding the case usually does not cause problems, but each model has its own design features. The control panel is mounted with two bolts at the back, and the electronic board is held in place with small screws.
Top-loading models have the electronic control panel at the top, while front-loading models have it at the lower rear.
When externally examining the electronic board, look for capacitors that have a round shape. Particular attention is paid to capacitors C16, C17 (capacitance from 680 mF to 1000 mF), C20. If they fail, they usually start to swell at the top. To accurately diagnose a breakdown, you can “ring” them with a multimeter. When replacing capacitors, you must carefully check the markings to select the exact model for your washing machine.
More serious problems that require replacement parts
Let's look at other reasons why the Indesit washing machine takes in water but does not wash. Here it is advisable to involve men’s hands, because you will have to disassemble the car body, ring parts, etc.
Drum belt (except direct drive machines)
It could simply fly off during an intense spin cycle, when the laundry got wrapped up in a ball and shook the drum violently. Unscrew the machine body and inspect the fallen belt. Top-loading machines will have the belt on the side, while front-loading machines will have the belt on the back. If there are no frayed areas or small tears, then simply put it back on.
If the belt is torn or greatly stretched, it must be replaced with a new one. It can be ordered in a specialized online store. Look at the markings on the old belt, measure the diameter and width. Place the new belt on the motor pulley, and then on one side of the large drum pulley. To put the belt on completely, you need to turn the drum counterclockwise.
TEN (tubular electric heater)
The machine, having filled the water, should heat it up to the programmed temperature. If the heating element fails, the wash will not start, and the sensor that starts the motor will not work. In order to inspect the heating element, you need to remove the front or rear panel (depending on the machine model, see the location of the heating element in the instruction diagram). To disconnect the part, you need to disconnect the wires and unscrew the nut in the center. After removing the heater from the tank, remove scale and inspect its surface. Blackened areas clearly indicate that the part is unusable. To do everything correctly, by
Rare reasons for all lights to blink
The visual information system sometimes works for other reasons. Sometimes confusion arises, so first you need to accurately determine the malfunction:
- involuntary drainage of water;
- burnout of the heating element for water and drying;
- motor failure;
- breakdown of the drain pump, etc.
If the washing machine is not working, the indicators will flash accordingly.
The heating element becomes coated with scale over time, causing increased wear. The motor can break down due to worn brushes or entangled hair and fur. The control device fails much less often; usually the cause is burnt contacts.
Check error codes according to Indesit instructions. Accurate diagnostics make it easy to repair the washing machine without major financial investments.
The automatic washing machine in our house often literally wears out. Thanks to the abundance of modes and additional features, it makes our life easier. You can refresh your clothes after a working day, or you can load 6-7 kilograms of things at once. But this cannot go on forever, if all the indicators on the Indesit brand washing machine are blinking, this is a clear sign of problems.
Indesit witl 106 control unit diagram
We continue the series of articles on repairing washing machines with your own hands.
All Indesit witl 106, witl 86, witl 1067, witl 867 models are similar to each other and the repair problems are the same.
Washing machines can be assembled on an ARCADIA or EVO-II electronic board
This depends on your Washing machine product number.
- Deciphering the error code by flashing indicators:
By adding the numbers corresponding to the blinking LEDs, you will receive an error code.
As an example , error F10, we add the sum 82=10 (F10).
- Faults by error code (EVO-II board):
We have already published in a previous article how to troubleshoot a fault on the EVO-II board of WISL models by error code. They are similar to each other.
- Faults by error code (ARCADIA board):
This board is the newest of all, it replaced the EVO-II. Installed since 2007.
Schematic connection of the Arcadia control board with end devices
1. Anti-interference filter (power capacitor) 2. Heating element 3. Pump (pump) 4. Door locking device 5. Tachogenerator 6. Motor stator 7. Electric motor rotor 8. Main wash water intake solenoid valve 9. Pre-wash solenoid valve 10. NTC (temperature) sensor 13. Water level switch (pressostat) 14. Linear water level switch
- When the machine does not display an error code:
— When plugged in, the door immediately locks (a click is heard) and the hatch lock indicator light comes on.
Suspicion of a breakdown of the motor triac, burnout of the resistance, or short circuit of the motor.
It is necessary to remove the top cover by unscrewing the screws:
Visually inspect the board by unscrewing the fasteners:
Next, we use a tester to call the engine block (6 wires, 2 of which are red - tacho, and 4 black are divided in pairs: rotor and stator):
— Frequent malfunctions are associated with the engine. It is a collector type.
For example, after pressing the start button, the hatch lock is activated and “silence” occurs. In many cases, brush wear can be determined by external inspection or by the intensity of sparking on the engine commutator: both under load (there is laundry in the machine tank) and without it - in this case, abundant sparks occur (not along the entire perimeter of the commutator).
If the brushes wear out significantly, there is a loss of engine power - for example, if the drum of the washing machine does not “turn” with the laundry loaded into it.
Engine control circuit via tachogenerator (ARCADIA module):
— It takes an infinitely long time to wash, constantly filling and draining water.
It is necessary to properly organize the drainage system. The tip of the hose should be at a height of 60 to 100 cm.
In addition, a break in the stream must be ensured when draining to avoid water being sucked back into the SM.
-All indicators flash, except for the pre-rinse, main and rinse.
The hero of the occasion is the control unit (module), namely the switching power supply in it. An incorrect signal (voltage) is sent to the board and the lights blink.
With front loading, it is located under the tank on the rear side. In the vertical racks under the top control cover.
What to look for in the power supply is the swollen capacitors C17, C16, C20.
We select new capacitors, maybe 1000 uF. We take a soldering iron and change them.
001.control knob 002 - white on/off/reset buttons 003.white control panel 004 - bitron switch 005 - function keys 007 - display 008 - cover handle 010 - dispenser release lever 011 - dispenser hook spring 012 - dispenser release button 016 - cover support 018 - partition with shock absorber 021 - door locking device 022 - white dispenser 023 - siphon cover 026 - control panel wiring 027 - 8-pos. potentiometer
We continue the series of articles on repairing washing machines with your own hands.
All Indesit witl 106, witl 86, witl 1067, witl 867 models are similar to each other and the repair problems are the same.
Washing machines can be assembled on an ARCADIA or EVO-II electronic board
This depends on your Washing machine product number.
- Deciphering the error code by flashing indicators:
By adding the numbers corresponding to the blinking LEDs, you will receive an error code.
As an example , error F10, we add the sum 82=10 (F10).
- Faults by error code (EVO-II board):
We have already published in a previous article how to troubleshoot a fault on the EVO-II board of WISL models by error code. They are similar to each other.
- Faults by error code (ARCADIA board):
This board is the newest of all, it replaced the EVO-II. Installed since 2007.
Schematic connection of the Arcadia control board with end devices
1. Anti-interference filter (power capacitor) 2. Heating element 3. Pump (pump) 4. Door locking device 5. Tachogenerator 6. Motor stator 7. Electric motor rotor 8. Main wash water intake solenoid valve 9. Pre-wash solenoid valve 10. NTC (temperature) sensor 13. Water level switch (pressostat) 14. Linear water level switch
- When the machine does not display an error code:
READ Microwave Bosch error e 3
— When plugged in, the door immediately locks (a click is heard) and the hatch lock indicator light comes on.
Suspicion of a breakdown of the motor triac, burnout of the resistance, or short circuit of the motor.
It is necessary to remove the top cover by unscrewing the screws:
Visually inspect the board by unscrewing the fasteners:
Next, we use a tester to call the engine block (6 wires, 2 of which are red - tacho, and 4 black are divided in pairs: rotor and stator):
— Frequent malfunctions are associated with the engine. It is a collector type.
For example, after pressing the start button, the hatch lock is activated and “silence” occurs. In many cases, brush wear can be determined by external inspection or by the intensity of sparking on the engine commutator: both under load (there is laundry in the machine tank) and without it - in this case, abundant sparks occur (not along the entire perimeter of the commutator).
If the brushes wear out significantly, there is a loss of engine power - for example, if the drum of the washing machine does not “turn” with the laundry loaded into it.
Engine control circuit via tachogenerator (ARCADIA module):
— It takes an infinitely long time to wash, constantly filling and draining water.
It is necessary to properly organize the drainage system. The tip of the hose should be at a height of 60 to 100 cm.
In addition, a break in the stream must be ensured when draining to avoid water being sucked back into the SM.
-All indicators flash, except for the pre-rinse, main and rinse.
The hero of the occasion is the control unit (module), namely the switching power supply in it. An incorrect signal (voltage) is sent to the board and the lights blink.
With front loading, it is located under the tank on the rear side. In the vertical racks under the top control cover.
What to look for in the power supply is the swollen capacitors C17, C16, C20.
We select new capacitors, maybe 1000 uF. We take a soldering iron and change them.
001.control knob 002 - white on/off/reset buttons 003.white control panel 004 - bitron switch 005 - function keys 007 - display 008 - cover handle 010 - dispenser release lever 011 - dispenser hook spring 012 - dispenser release button 016 - cover support 018 - partition with shock absorber 021 - door locking device 022 - white dispenser 023 - siphon cover 026 - control panel wiring 027 - 8-pos. potentiometer
Indesit 106WITL, W105X, W421WF, WDS1045TX, WI84X, WIDL106EX, WIDL86EX, WISL103CSI, WN421XWS, WDS1040TX
Indesit W43T, W63T, W83T, W84TX, W84TK, W93T, W105TX, W125TX, W145TX
Indesit WIDL106, WIL105, WIL125, WISE127, WISL86, WISL102, WISL103, WITL86, WITL106, WIUN82, WS105TX
Deciphering error codes for Indesit , and action algorithms to solve a problem or defect
A practical example of repairing the EVO-2 control unit in an Indesit washing machine after a power surge is also considered.
In addition, the extra rinse indicator and the door lock LED are flashing.
The indesit machine is designed in such a way that it allows you to spend minimal time on disassembling, repairing and reassembling. The weight of the machine is about 66 kg.
When making repairs, you must use the service instructions and circuit diagram, which you can download from the link just above, but do not forget, since the machines are constantly being improved, differences in their designs are possible.
You must turn on the washing machine and connect it to the water supply and sewerage exactly in accordance with the drawings and descriptions that you can find in the passport.
Usually, troubleshooting in washing machines can be done without disassembling the machine. We invite you to familiarize yourself with possible malfunctions and methods for eliminating them, which are given in the table.
| The machine does not work when turned on | 1. The hatch is not closed 2. Broken circuit 3. Broken connecting cord 4. Faulty plug 5. Faulty hatch locking device 6. Faulty power switch 7. KA handle is set to the “Stop/Dry” position 8. Contacts A4- are not closed A7 KA 9. Pressure switch faulty |
| The drum drive motor does not work | 1. Open circuit in the connecting circuit 2. Drum drive electric motor is faulty 3. KA is faulty 4. EM is faulty 5. Temperature relay sensor 90 'C is faulty |
| When turned on, the electric motor hums, but the drum does not rotate | 1. Open circuit in the engine connecting circuit 2. Open circuit in the EM circuit |
The tightness of parts or connections is broken
Before you begin disassembling the machine or its individual components, it is necessary to determine the location of the defect. The power supply circuit for components and electrical elements (engine, Tubular Heater, solenoid valve, etc.) passes through the plug, cord, hatch locking device, pressure switch, SC and EM contacts. The circuit under study, in which a defect is suspected (determined according to Table 1), is broken by disconnecting the removable contacts of the connecting wires from the contacts of the spacecraft. Next, using an ohmmeter or a special probe, check the integrity of the electrical circuits of the spacecraft.
Here is the procedure for dealing with some of the most typical malfunctions:
The drum drive motor hums, but the drum does not rotate.
Troubleshooting sequence: check the rotation of the drum drive electric motor in both directions (KA is set to pulse position 3), and then in the folding and spinning mode (KA is set to pulse 24) and, based on the behavior of the engine in different modes, determine the faulty circuit.
Water is not poured into the tank in the washing mode: check the voltage on the valve coils EV/F# EV/C, EV/A. If there is no voltage, check the KA contacts AZ-A2 (pulse 1), C4-C5 (pulse 5), C4-C8 (pulse 23); with the spacecraft installed on pulses 1, 5, 23, check the modes of pouring water through the appropriate bath: preliminary, main, special treatment.
Replacement of components. The service instructions cover the details. To provide access to individual components and parts, you must perform the following operations: unscrew the screws securing the top cover, remove the cover, unscrew the eight screws securing the rear panel and remove it.
Dismantling of components
. Noise suppression filter: disconnect the wires from the noise suppression filter, unscrew the nut securing the filter from the machine body, remove the filter.
Hatch locking device
: open the hatch, remove the clamp and cuff from the machine body. unscrew the screws of the hatch lock and flange, remove the hatch locking device, disconnect the wires.
Command apparatus
: remove the KA handle, unscrew the screws securing the KA to the panel, disconnect the wiring harness.
Drying timer
: Remove the drying timer knob. unscrew the screws securing the timer to the panel, remove the drying timer, and disconnect the wires from it.
Push button switch
: Remove the button. Pressing it from the inside with a screwdriver, remove the wires from the push-button switch, unclench the antennae securing the push-button switch to the panel, and remove the switch.
Electric motor
: fix the machine drum with shipping bolts and bushings, remove the belt, lay the machine on its side, having previously placed some kind of gasket under it to avoid damage to the body. Unscrew the grounding screw and disconnect the harness block with wires. Unscrew the bolts securing the electric motor to the tank brackets and, supporting the electric motor, remove it.
Pulley
: remove the belt, unscrew the nut and washer, remove the pulley.
D.H.
: disconnect the wires from the Tubular Heater, unscrew the nut securing the Tubular Heater, and remove it.
Temperature regulator
: remove the temperature control knob, disconnect the wires, unscrew the two screws securing the sensor, and remove it.
temperature sensor
: remove the wires, take out the sensor with the cuff.
Solenoid valve
: disconnect the inlet hose from the tee. disconnect the tee from the valve, disconnect the wires, remove the hoses from the valve fittings, unscrew the two valve mounting bolts, and remove the valve.
Pressure switch
: take out the tray, having previously bent the metal stopper with a flat-head screwdriver, remove the spacecraft without disconnecting it from the harness. Unscrew the screws securing the panel to the machine body (two screws inside the machine body and four outside), push the panel forward and free access to the pressure switch bracket. Unscrew the screw securing the bracket with the relay to the machine body, disconnect the block with wires from the pressure relay, and remove the hose from the relay fitting.
Shock absorber
: unscrew the nut securing the shock absorber to the support, remove the bolt, unscrew the nut securing the shock absorber to the tank, remove the shock absorber.
READ Why you should not pluck your hair after laser hair removal
Drain pump
: fix the machine drum with shipping bolts and bushings, lay the machine on its side, unclench the clamp, disconnect the hose from the pump fitting, remove the clamp, remove the drain hose from the pump fitting. Disconnect the wires, unscrew the two bolts securing the pump to the housing, and remove the pump.
Drain hose
: unscrew the screw securing the drain hose clamp on the pump fitting, disconnect the hose.
Dispenser
: take out the tray by first bending the metal stopper with a screwdriver, remove the hoses from the dispenser fittings, unscrew the screws securing the dispenser, remove the dispenser from the body, unscrew the screw securing the clamp, loosen the clamp, remove the pipe.
Tank and drum
: remove the spacecraft, drying timer, solenoid valves, pressure switch, noise suppression filter, terminal block, temperature controller, front panel with switches, dispenser, fan pipe assembly, having previously disconnected it from the sealing rubber of the hatch door pulley. Disconnect and turn the four screws securing the flange to the upper fan pipe. Remove the fan electric motor with the flange, unscrew the fan mounting nut, and remove the fan. Unscrew the four bolts securing the fan motor to the flange.
Drying thermostat
: disconnect the wires from the temperature sensor, unscrew the screws securing the sensor to the upper casing of the drying air duct, and remove the sensor.
Tubular Heater Drying
: unscrew the screw securing the clamp with the harness to the bracket, unscrew the two bolts and two nuts securing the bracket, remove the bracket. Unscrew the five screws securing the upper pipe with the parts attached to it, and remove the clamp. Disconnect the wires from the Tubular Heater, unscrew the two screws securing the Tubular Heater to the upper pipe, and remove the Tubular Heater.
Checking, adjusting and testing machines after repair
Indesit washing machine error codes - all indicators flash
“Smart” machine technologies allow you not only to wash and dry everything, but also to report problems. True, they only find out about it when something happens. LED light bulbs are the main way of informing.
Why are all the lights on my washing machine blinking? Malfunctions are associated with incorrectly selected modes or, most often, breakdowns. Most likely, the malfunction is related to the electronic module (board). In fact, these are the “brains” of the Indesit washing machine, because it is this module that controls the operation of all the main components. Accordingly, if the signals do not pass through the board, the process immediately stops, and the lights on the main panel blink.
The most vulnerable places on an electronic board are capacitors. They burn out during operation of the washing machine. Sometimes the connecting contacts fail. As a result, automatic blocking occurs. To restore functionality, you will have to contact a specialist or arm yourself with the knowledge to repair it yourself.
If you know how to work with a soldering iron, you can replace the capacitors on the electronic module yourself.
See also -
How to choose a stabilizer for an automatic washing machine
Problems with bearings or control unit
In previously produced models of Indesit washing machines, especially those made in Italy, accessing the bearing assembly is quite simple. This is done as follows:
- After draining the water and disconnecting the device from the power supply, remove the top and rear panels.
- Remove the belt by which the motor rotates the drum and block it with a clamp or block of wood.
- After disconnecting the wires from the thermostat, unscrew the screws securing the bearing assembly to the tank cover. You should be prepared for the fact that they will give in with great difficulty.
- After loosening the clamp, remove the tank cap with the seal, after which you will see the bearing.
- The bearing is pressed onto the drum axis, so to dismantle it you need a special tool - a puller. Along with the worn bearing, the oil seal must also be removed. After installing new parts, the unit is assembled in the reverse order.
Install only original bearings. Among the parts produced by other manufacturers, low-quality parts are often found.
In the latest series of cars, the tank is made of one piece, so it is theoretically impossible to get to the bearings. It is assumed that in the event of such a malfunction the machine should simply be disposed of. But engineers at domestic service centers have found a way to make the Indesit washer repairable again. The tank is cut along the weld, after which all the elements inside become accessible.
After replacing the bearings, you need to assemble the machine and carry out a test run. If everything was done correctly, the unit will operate without extraneous noise. Also, during testing, pay attention to whether water leaks from the housing. If leaks do appear, the machine must be disassembled again and reassembled more carefully. The seals may need to be replaced.
Diagram of the control unit of the Indesit washing machine
Some faults in the control unit can only be corrected by a service engineer. So, for example, if the electronics have gone crazy due to power surges, a flashing will be needed. Sometimes the processor fails and has to be replaced. But sometimes the user himself can “cure” the main board. As in a surge protector, condensation can form on its contacts, causing them to short out.
Damaged contacts are identified using a tester (quite painstaking work), after which they need to be replaced. It is advisable to insulate new contacts with sealant, as described above.
All the lights are flashing, what should I do?
Typically the indicators will display an error code according to the Indesit designation, but other symptoms may also appear. For example, the washing modes are reset, and the program is reset, after which the lights begin to blink randomly.
The most vulnerable components are:
- control module;
- capacitors on the electronic board;
- Heating element for drying and heating water;
- electric motor;
- command apparatus (KSMA), etc.
The causes of breakdowns are natural wear and tear, moisture on electronic circuits, and mechanical damage. You can save your washing machine if you diagnose the problem in time. Of course, it’s quite difficult to do this on your own and at home, so it’s worth calling a professional.
Multiple lights blinking can indicate several problems:
- the machine does not heat the water (the heating element does not turn on);
- The heating element does not send signals to the electronic unit;
- there is no voltage supplied to the drain pump, so water does not drain;
- temperature sensors do not give signals;
- control and power modules do not send signals, etc.
More information about the machine codes can be found in the instructions or on the manufacturer’s website “Indesit”.
See also -
How to repair or replace a washing machine cross
A couple of useful tips to extend the life of your washing machine
- Place the machine level on the floor. It should not become loose during spinning. If this happens, adjust the legs. You can put a rubber mat under them.
- Load laundry correctly. Do not fill the drum to capacity, but you should also not put less than half the required amount of laundry.
- Don't forget to check your clothing pockets before washing. Wash bras with wires in special bags.
- Use washing powders that contain additives that prevent scale from forming on the heating element. Scale will not only increase energy consumption when heating water, but sooner or later it will lead to breakdown.
- To protect the device from voltage surges, install a protective relay.
- Clean the machine filter regularly.
As you can see, there can be many reasons why the Indesit washing machine takes in water but does not wash. To make your task easier and not unnecessarily get involved in complex control elements, go from the simplest. Since modern manufacturers of household appliances make them quite reliable, there is a high probability that the breakdown will be minor or the cause will be a blockage, which you can successfully deal with yourself at home.
Share on social media networks:
Troubleshooting and troubleshooting
If you are well versed in technology, then you can figure out all the problems yourself. You can check the condition of the electronic board and fix breakdowns at home, but first you will have to disassemble the unit.
To do this you need to do the following:
- de-energize equipment;
- remove the housing cover;
- unscrew the hex screws holding the control board;
- disconnect all wires from the connectors;
- change the capacitors (or the board itself).
In front-loading Indesit models, the electronic board is located at the bottom of the rear. Getting to it won’t be difficult if you have the most common tools. For diagnostics, it is better to use a multimeter, which can be used to “ring” capacitors and contacts.
Unwinding the case usually does not cause problems, but each model has its own design features. The control panel is mounted with two bolts at the back, and the electronic board is held in place with small screws.
Rare reasons for all lights to blink
The visual information system sometimes works for other reasons. Sometimes confusion arises, so first you need to accurately determine the malfunction:
- involuntary drainage of water;
- burnout of the heating element for water and drying;
- motor failure;
- breakdown of the drain pump, etc.
If the washing machine is not working, the indicators will flash accordingly.
The heating element becomes coated with scale over time, causing increased wear. The motor can break down due to worn brushes or entangled hair and fur. The control device fails much less often; usually the cause is burnt contacts.
Check error codes according to Indesit instructions. Accurate diagnostics make it easy to repair the washing machine without major financial investments.
In fact, breakdowns often occur in washing machines. Everyone understands that a washing machine cannot last forever; sooner or later, troubles will occur. Then the display may show an error that needs to be corrected. If all the indicators on the Indesit washing machine are blinking, then first of all you need to find out why this is happening. You can do this yourself if you have experience in this matter.
Diagnostics SM automatic
An important step in troubleshooting a breakdown in an Indesit automatic washing machine is identifying the fault. If you correctly determine what is broken in the unit, the success of restoring functionality can be guaranteed in 90% of cases.
First of all, in the event of a breakdown, you should localize the source of the trouble. To do this, you need to clearly determine at what stage the failure occurs and analyze the possible causes.
Primary importance in diagnosis is given to the senses. So, you should listen carefully to extraneous sounds that are not typical for the operation of the washing machine.
For example, if you hear a grinding noise or feel increased vibration, this indicates a problem with the engine. Most likely the bearing has failed. Such a simple breakdown can lead to replacing the entire tank. Often, to increase reliability, the bearing is fused into the housing and is integral with the tank, as in the Indesit WISL 102. Unpleasant sounds can also appear when draining water. It is worth paying attention to the pump, checking all the pipes for blockages.
Do not forget that many models have a self-diagnosis function. In this case, an error code will appear on the machine indicator. Having taken the instructions, you can find the decoding of the code and quickly identify the breakdown. For example, in the Indesit WS84TX machine, the code is determined by four indicators. They can be constantly lit or flashing. Having counted how many times the blinking occurs and having found the decoding, repairing the machine will not be difficult.
So, for Indesit ws105tx, ten times blinking of the power supply LED indicates an error in the operation of the water level sensor. In this case, the reliability of the wiring to the meter is checked and the tube going to it is checked for blockages.
It is more difficult to identify a defect in work if the breakdown occurs at different stages and nothing suspicious is detected.
In this case, the fault is called floating. In order to localize it, you should remove the side covers of the machine casing and run a test wash. In this case, you should carefully study the operation of mechanical components. If their behavior is normal, the electronics board is removed and the soldering is examined, as well as the condition of the radio elements.
Reasons for blinking lights on a washing machine
Only the indicators on the Indesit washing machine can indicate problems. A failure or breakdown of some parts may occur. It happens that there is a malfunction in the modular control. After all, thanks to it, the washing machine works, when the indicators start blinking, then the signal does not pass through the module.
Capacitors often lead to breakdowns, and various contacts on the board may also stop working. If such a problem arises, then the best option would be to call a specialist. You can carry out repairs yourself, but very carefully. But it happens that a faulty electronic module has to be replaced with a new one.
You need to understand the meaning of the codes that may be displayed. If error F01, F02 is displayed or the “extra rinse” indicator and along with it the “Lock” light up, then most likely the problem lies in the electric motor and its incorrect operation.
Error code F03 or “Revolution” and at the same time “Quick Wash” are flashing, this indicates that the liquid is not heating. Code F04 is indicated by the “Super Wash” indicator lighting up. This means that the temperature sensor has failed.
There are cases when a breakdown of the water drain, heating element, drain pump, or electric motor occurs. The heating element can quickly fail if preventive measures are not followed. That is why all the lights on Indesit blink. In order to check the condition of the heating element, you need to ring it with a multimeter. If it does not work, then it must be replaced with a new one.
If it happens that the electric motor breaks down, then most likely the brushes are worn out. There are rarely any malfunctions in it. They will need to be replaced and the problem should be resolved. It happens that the breakdown is in the drain pump. To do this you will need to clean it. If the problem was different, then you will need to purchase and install a pump.
If the lock indicator is blinking, this could be for several reasons. Flashing may occur and washing may not start, and even after a reboot the error most often remains. If the indicators are on and the washing machine is working, then there is a malfunction. The lock on the door may also be damaged. This may lead to a problem in the sensor that controls the volume of washing liquid.
Typical faults of Indesit
Mechanical part
Intake filter
Installed on the water supply to Indesit. Detains debris and prevents contamination of the washing machine mechanisms. Requires systematic maintenance to minimize the risk of breakdowns. The malfunction manifests itself in the slow start of SMA. To remove the filter, disconnect the hose.
Indesit washing machine inlet filter
The mesh is washed under pressure. In case of severe contamination, pre-soak in a solution of citric acid. Softened scale is removed with a stream of hot water.
Drum bearing
The malfunction is typical for washing machines that have been in use for a long time. Signs: creaking, grinding, extraneous noise during drum rotation, metal shavings in the tank. The problem is associated with the depletion and drying out of the lubricant: the bearing crumbles due to overheating. Replacement requires professionalism - call a specialist.
Worn Indesit washing machine bearing
Replacing bearings in an Indesit washing machine
Pump
The malfunction manifests itself in the slow drainage of dirty water or its absence - the tank does not empty. According to repair statistics, the main reason is contamination of the volute and impeller.
Circulation pump 302488 washing machine Indesit
Remove the pump, remove scale, threads, hair, and rotate the shaft by hand. There is no damage, put it back - the problem with the washing machine has been found and fixed.
Drain filter
Irregular cleaning leads to the fact that the element becomes completely clogged with debris from the washing machine tank - fibers, stones, small coins - the liquid removal channel is blocked. Common malfunction of Indesit. The problem can be solved in a few minutes: turn off the SMA, remove the filter, rinse it and put it back.
Indesit washing machine drain filter
Increased vibration
It cannot be considered a malfunction, but Indesit users often encounter this problem. If the washing machine is level, there is only one reason: exceeding the normal load of things, uneven stacking of laundry in the drum.
What to do
- Stop the program. Empty the tank. Rearrange the laundry and take some out.
If you couldn’t cope with the problem of vibration in your washing machine, contact a professional.
Leakage in the hatch area
The malfunction is caused by deformation, damage, or natural wear of the door seal. It will be possible to seal it; when installing it in Indesit, position the cuff so that the problem area is at the top. This will prevent repeated leakage if the repair is performed poorly. Replacement is carried out independently and quickly, rubber goods are inexpensive.
The hatch cuff has failed
No drum rotation
In some Indesit models, the engine is connected to a pulley by a belt drive. Weakening, extreme wear of rubber goods, breakage are the cause of the malfunction. It is easy to put the belt in place by turning the wheel.
Indesit washing machine belt fell off
Electrical diagram of Indesit
Loops
Violation of the integrity of the signal line is the cause of a malfunction of the washing machine. During the washing and spinning process, the drum rotates and the SMA vibrates. Constant dampness also plays a role. As a result, connections are weakened, connectors spark, and the metal of the lamellas burns.
The contacts of the Indesit washing machine are damaged
The search for the cause of a failure in the design of a washing machine should begin by checking the electrical circuits. Breaks, short circuits of wires, melting of wire insulation - defects can be eliminated by the user, no technician is needed. Carbon deposits on the contacts are removed with sandpaper or alcohol solution. Clean, rinse, dry, and the problem will disappear.
Network filter
It’s easy to find - under the top panel of Indesit. The power cord for the washing machine fits into it. The filter is a common cause of malfunctions in the SMA. It fails due to high humidity. Accumulating on the surface, condensation leads to loss of control of Indesit. A washer malfunction can be resolved by replacing the filter.
Surge filter for indesit washing machine
Level sensor
Another name is pressure switch. Failure of the device leads to the fact that the Indesit automation does not record the readiness of the washing machine for the wash cycle (there is no information about filling the tank). The spin mode does not turn on and the drain does not occur. If the sensor malfunctions, the SMA does not work. Installed in the left corner of Indesit, under the top cover of the washing machine.
Replacing the level sensor (pressostat) of the indesit washing machine
Check what
- Electrical terminals (contacts), cables.
- A plastic tube connecting the pressure switch to the tank. The malfunction is caused by contamination of the capillary cavity: blow it out, and the breakdown will be eliminated.
- Testing the device is simple, but it cannot be restored. Remove, connect the probes of a household multimeter to the contacts (mode “measure R, Ohm”), hold the tube with your lips, and perform breathing movements. When you inhale and exhale, clicks are heard, the tester changes readings from 0 to ∞ - there are no complaints about the pressure switch.
If the malfunction of Indesit is caused by a decrease in the mobility of the membrane due to the adhesion of microparticles from dirty water to the rubber rubber, knock the body on a hard object. The garbage will fall off, the elasticity will become the same. But this is only a temporary measure - the sensor should be replaced.
A heating element
The heating element is the “sore spot” of any household appliance that prepares hot water. The surface becomes covered with scale, heat transfer decreases, and the liquid in the SMA tank does not reach the required temperature. If the Indesit hatch is cold after turning on the washing mode, a fault has been found. Mechanical cleaning is ineffective, and overheating causes the coil to burn out. Checked by a tester: at R=∞ the heating element is rejected.
Ten is covered with scale in the Indesit washing machine
RPM sensor
The tachogenerator is located on the shaft of the Indesit motor, which spins the drum. Signs of malfunction: insufficient spin (low speed, things remain damp) or over-drying (increased rotation speed). If the signal lines are not damaged, the contacts are normal, the sensor is replaced.
Engine
Modern Indesit models are equipped with commutator-type motors.
- The “weak” point is the carbon tips of the contacts. Over time, they wear out, spark, and the washing machine drum does not pick up speed or is not controlled. The condition of the brushes should be monitored periodically: height less than 150 mm - change.
Be sure to buy a couple and buy Indesit for SMA. Similar in appearance for other household appliances, they may differ in characteristics - the washing machine motor will not work.
- Winding. Suitability is assessed by measuring resistance: =0 – short circuit, =∞ – internal open circuit. Often, Indesit failure is associated with contamination of the lamellas. Careful cleaning eliminates the problem.
Check the Indesit washing machine motor commutator
Locking device
A protection element that protects the room from flooding due to spontaneous opening of the hatch. The latch locks the door, and the electronic board receives a signal that Indesit is ready to start the cycle.
Check what
- Cuff around the perimeter of the hatch. Deformation of rubber goods is the reason for incomplete closing of the door. Washing machine malfunctions can be eliminated by leveling or replacing.
- Loops. Loosening of the screws, misalignment, and the SMA gives an error.
- Lock connection. Displacement of the pin and trapped debris are the reasons for the door not closing tightly. The UBL contacts do not close, the washing machine does not start.
Closing the door lock (hatch locking device) of the Indesit washing machine
If there is a malfunction, the device itself cannot be repaired, only replaced.
Inlet valve
A unit that regulates the water supply to the Indesit tank. The movable plate covering the channel is controlled by commands from the washing machine board.
Water supply valve for Indesit washing machine
Symptoms of a problem
- During the time set by the program, the Indesit tank is not filled to the required level. If the pressure in the water supply is normal, the cause of the malfunction is the solenoid valve.
- No liquid enters the tank.
- Spontaneous filling when the washing machine is turned off.
If there is a blockage in the channel, the problem can be eliminated by cleaning the pipes and blowing them out. The error does not go away - change the valve.
Control buttons
If there is no indication when you press, check the board. Malfunctions are caused by dampness and vibration of the washing machine. Contacts burn out and signal lines break. You can carefully solder the wires yourself. Visible defects on the surface (dust, condensation) are easy to eliminate. If the result of inspection of the display panel is negative, contact the service center to diagnose the unit.
Power button (ON-OFF) Indesit
Control module
This board is the “brain” of the washing machine: it generates fault codes, gives commands to the Indesit actuators, and in the event of a malfunction, blocks the operation of the SMA. In case of any error, if the cause of the failure is not found, it is necessary to test the electronic control unit. The node diagrams differ in the year of manufacture of Indesit and the model. Therefore, you should not follow recommendations from the Internet or “experts” in your environment, even if someone managed to cope with the malfunction on their own. Testing of the unit is carried out in the workshop, on a stand. Professional diagnostics and troubleshooting are much cheaper than purchasing a board. And this is exactly what users have to do when they are trying to “tinker” with the scheme themselves. The result is a damaged control module that cannot be restored.
Electronic module of the Indesit washing machine
Symptoms of a problem
- Chaotic glow (blinking) of the washing machine indicators.
- Violations in Indesit operating modes: failure to maintain the washing cycle time (extended or shortened), water drainage not provided for by the program (after filling the tank), error code 9 or 18, etc.
- Failure to execute the start command.
Professional board repair involves replacing a faulty part or reinstalling software. You can't do it correctly on your own. But still, the user is able to identify the cause of the breakdown without contacting a specialist.
What to do
- Check the supply voltage. Indesit works flawlessly at Uc ~220-240/50 (data from the passport). A mismatch in value (low value) is the cause of a malfunction of the washing machine.
- Assess the condition of the power cable and the reliability of the contacts in the outlet (extension cord).
- Inspect the control board of the washing machine. To do this, the cables are disconnected and the unit is removed from Indesit. To visually identify the cause of the malfunction, both sides of the panel must be inspected.
- Check that the hatch is closed tightly.
Eliminate blinking indicators
If a person is well versed in washing machines or at least some equipment, then you can troubleshoot Indesit yourself. At a minimum, you can try to detect them in order to roughly understand what the problem is. Be sure to follow clear instructions to avoid making common mistakes.
You will definitely need to check the condition of the electronic board itself so that any breakdowns can be eliminated. To do this you will need to disassemble the unit. The task will be completed by those people who have at least a minimal understanding of technology.
The most rare reasons why a car blinks
If Indesit does not turn on, then it is worth considering even rare causes that could lead to failure. You need to pay special attention to them, because many people ignore them, and, as a result, cannot figure out the machine on their own.
It is important to accurately determine the breakdown. Be sure to check the following points:
- Involuntary drainage of water, which leads to breakdown.
- Electric motor failure. This is a fairly serious breakdown, so you can’t do it without a repairman.
- Burnout of heating element.
- Drain pump malfunction.
Let us note once again that if the washing machine does not work, the indicators will definitely flash accordingly. That is why there is no need to guess, just look at the indicators.
It is important to note that the heating element can become covered with scale over the years. That is why its wear increases significantly. The electric motor can break down due to the fact that the condition of the brushes deteriorates significantly. Fur and hair could also become tangled, which is especially common in apartments where animals live. In this case, the control module may become less likely to leave its normal state. Burnt contacts can lead to this, and this situation is quite rare.
Be sure to follow the Indesit instructions when checking error codes. The most important thing is to accurately diagnose the breakdown, so that you can then fully carry out repair work. If the cause is not correctly identified, significant amounts of money may be required to eliminate the problem. It’s better to do everything right right away so that you don’t have to worry about the problem later.
Less serious breakdowns - faults that can be fixed yourself
- The machine does not turn on. The solution to the problem can be extremely trivial - check the tightness of the plug connection to the outlet.
- Water does not fill. Most often this is due to the fact that the tank hatch is not tightly closed, the water supply tap is closed, or the water supply hose is kinked.
- You have loaded the laundry, added powder, but the washing process does not start. Check that the water supply tap is open and that the delayed wash program is not activated.
- There is a continuous flooding and draining of water. The problem may be due to the fact that the water drain hose is too low above the floor (less than 70 cm) or the drain hose is under water.
- Extraneous noise is heard during washing. Stop the machine and check for foreign objects (such as coins) in the drum.
- Excessive foaming. This problem may be due to the fact that you are using a hand wash detergent rather than a machine detergent.
- The water drain does not work. Possible reasons: the drain hose is kinked or clogged, a washing program has been started without draining the water, the “light ironing” or “spin off” mode is set.
- The vibration is very loud during the spin cycle. Press Pause and try to redistribute the laundry in the drum (this may also be due to overload). Excessive vibration may also be due to the fact that the machine rests against a wall or other objects.
- The indicators for additional functions, Start/Pause, door lock are flashing, spinning does not start, etc. Try simply turning off the machine with the power button, unplug the plug from the socket, wait a minute and turn on the power again.
The hatch lock indicator is flashing
If a person notices that the sunroof lock indicator is blinking, he may think that it is the locking device that has failed. However, this is not always the case, and the thing is that older models had a simpler design. Such models are reliable, but it is quite difficult to detect the exact fault. Machines do not always indicate what specific problem has arisen. For this reason, you will need to consider all possible options.
What kind of breakdowns occur when the lock flashes:
- Heating element malfunction. If the tubular electric heater fails, the machine will wash things as before, but the light will continue to glow. It even happens that the equipment gets confused when functioning, freezes and confuses the programs.
- Board failure.
- Problem with the lock. It is important to analyze this part of the machine first.
If difficulties arise, you should contact a specialist. You should not attempt to repair a machine yourself without the proper experience. This could lead to even more damage.
