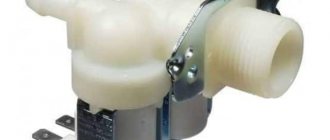
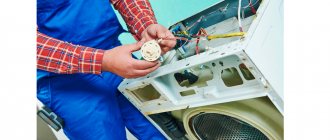
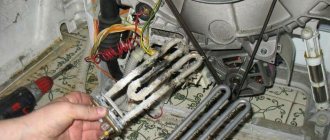
Sometimes your favorite washing machine breaks down. If the water supply solenoid valve for a washing machine malfunctions, this will be immediately noticeable. It is also called filler or inlet. It regulates the water supply. Most malfunctions of household appliances are associated with it. You can fix the breakdown yourself by replacing the worn part with a new one.
Valve design and principle of operation
The water supply valve for a washing machine can be in two states:
- open;
- closed
The washing machine does not drain water: causes and solution to the problem Automatic washing machines have long moved from the category of wonders to the list of essential items...
Most of the time the machine is operating, it is closed. If you take it apart, you will see a small coil inside. The electronic program that controls the “washer” regulates the supply of electricity to the coil. An electrical impulse opens the valve so that it can allow liquid to enter the tank. When the entire chain is functioning normally, the machine fills up quickly.
On a note!
Based on the principle of operation, such devices are called electromagnetic.
After filling the “washer” to the required level, the control program transmits another signal to the coil. The valve mechanism closes. Now his task is to prevent liquid from entering the hoses: it remains in a confined space during the entire wash cycle.
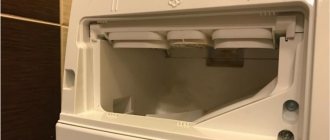
The valve installed on a horizontal-loading washing machine is located in its upper compartment. On top-loading models it is located at the bottom or on the rear wall. In the first case, you need to dismantle the back panel, in the second - the side panel.
How does the filling system work?
The water inlet valve for the washing machine is equipped with a thin membrane on the inside and coils on the outside. The main control module signals that the valve is turned on. Then an electric current is supplied to its coils, which contributes to the appearance of a magnetic field. This causes the membrane to open, allowing water to flow in. After the voltage supply ends, the membrane closes again.
Thus, the water inlet (supply) valve has two positions - open and closed.
Number of coils: what does it depend on?
Their number depends on the model of the washing machine. In modern SMAs, the manufacturer installs from two to three sections, so that each of them supplies water to a specific compartment of the powder receiver.
- 1st section: powder section.
- 2nd section: rinse aid compartment.
- 3rd section: department for other funds.
If there are only two spools available to pick up detergent, they turn on simultaneously.
Older models used a fill valve for a single spool washer. It worked in conjunction with a command apparatus, the lever of which regulated the movement of the flow in a certain direction.
Where is the valve located?
Where is the solenoid valve located in the SMA? It is located under the top panel near the wall. You will see hoses connected to it that carry water to the detergent compartments.
Theory and principle of operation
The shut-off valve on a washing machine performs the same functions as a regular faucet. Only it opens not manually, but with an electric coil at the command of the control unit. When power is applied, water under pressure rushes into the tank or into the powder compartment, depending on the program.
What does the inlet hydraulic valve consist of:
- plastic case;
- solenoid (electromagnetic coil);
- stock;
- spring;
- rubber or polyurethane membrane;
- filter mesh;
- inserts in fittings that reduce pressure;
- seals and fasteners.
When the wash starts, current is applied to the coil and the rod (a metal rod with an elastic band attached) is attracted. The membrane opens, liquid under pressure from the water supply enters the washing machine. When the required quantity is reached, the level sensor (pressostat) signals the control unit and the current is turned off. The spring returns the rod to its original position, closing the water.
Why does the washing machine fill with water and immediately drain it?
This is a fairly common problem, familiar to owners of Samsung, Indesit, Bosch, Candy, LG, Ardo, Zanussi, Electrolux, Beko equipment - the washing machine fills and immediately drains water, and because of this, washing or rinsing does not start. Finding the cause on your own is limited to checking external factors - the correct connection, the condition of the water supply and sewage system, filters and siphon. Internal factors - breakdowns and malfunctions can only be identified by a service center technician when diagnosing the machine at home.
To check the machine, there are professional techniques, technological maps, instruments and various operations with the control panel. Diagnostics remains the main condition for a complete repair, which does not have to be repeated after a short period of time.
The main reasons for water discharge from a washing machine:
- incorrect connection, incorrect position of hoses;
- erroneous operation of the relief valve;
- malfunction of the sensor for the presence and level of water in the machine;
- failure in the control module.
Most of these reasons relate to breakdowns and malfunctions in the machine itself, so a little depends on you. Full diagnostics and troubleshooting are carried out by a service center technician.
When connecting the washing machine to the sewer, the condition from the instructions was not met - the hose was located below the specified level, and the water began to flow into the siphon on its own. This may serve as an indirect sign of a malfunction of the exhaust valve, which should prevent such a development of events.
Valve failure
The water discharge valve is faulty; it does not ensure the tightness of the outlet, and when the pump is turned on, instead of circulating, the water is directed to discharge and leaves the washing machine. As a result, the pressure switch is triggered, signaling a lack of water, and the electronics stops executing the program.
When filling with water at the beginning of the wash or when replacing waste water with clean water, the pressure in the water supply does not allow filling the tank. This may cause water to be discharged and the wash program to stop. If there is excess pressure, the valve will not completely close the inlet, and water will begin to flow into the machine without stopping.
Blockage in the sewer
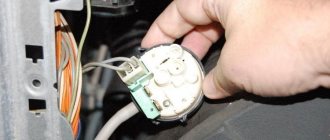
A malfunction of the pressure switch or water level sensor in the tank causes it to send an incorrect signal to the control unit. It reacts with an additional set of water, which overflows the tank and drains into the sewer. In some cases, a malfunction of the pressure switch can lead to the pump being turned on to drain and the valves to urgently empty the tank.
The washing machine does not hold water if the tank leaks, the tightness of the connections is broken, or the pump housing is damaged. In this case, you will find a puddle on the floor, but the service center technician will have to look for the leak. There may be several such damages at different points in the circulation system.
The washing machine drains water without washing if a signal is received from the control unit to the reset valve. This indicates a malfunction in the block itself, which began to generate incorrect commands. When diagnosing, it is necessary to exclude a malfunction of the valve and pressure switch. A glitch in the program can put the machine into a cycle - it will constantly take in and dump water.
Types of valves and signs of their malfunction
There are several types of water fill valves in a washing machine. Any of them is divided into sections. Each individual section has an electromagnetic element. All departments are connected to a common system and respond to signals sent by the control program. Depending on the number of coils, the devices are:
- single-reel;
- two-coil;
- three-reel.
A malfunction is indicated by one of the external manifestations:
- the display displays an error code consisting of two or three digits;
- after filling the tank, water continues to flood the interior;
- liquid does not enter the tank.
Removing the mesh from dirt
The inlet valve can stop functioning properly for many reasons, but the main one is a clogged filter. The element becomes clogged with limescale and simply stops letting clean water into the machine. To clean the mesh you need to:
- Carefully unscrew the plastic nut that secures the inlet hose to the washer body;
- disconnect the filler hose. Looking into the fitting, you can see the filter element we need;
- Using pliers, pull out the filter mesh;
- Use a napkin or sponge to remove dirt and scale. If necessary, it is allowed to remove plaque with a soft brush. Then the element is washed with warm water;
- put the filter in place;
- connect the inlet hose to the washing machine, make sure that the connection is made correctly.
If there were problems with collecting water, then usually, after such manipulations, the automatic machine starts working as before. It happens that cleaning the mesh filter does not help, which means that the reason for the malfunction of the washing machine lies elsewhere.
Troubleshooting
A simple test will help you check the operation of the system. The device is removed from the machine and a hose is connected to it. After connecting the water hose, it should open and let in liquid. As soon as the voltage stops acting on the coil, the mechanism will close. If it doesn't work, it should be replaced. This is an easy test, but you must work carefully to prevent the wiring from coming into contact with a damp environment.
Where can I find the valve mesh?
Cleaning the inlet valve of a washing machine is not difficult; any housewife can handle this task. The sensor is located immediately under the top cover of the machine; you can access it by unscrewing two bolts on the back and removing the panel. To clean the mesh filter, you don’t even need to disassemble the washing machine . All you need to carry out the work are pliers and a screwdriver.
Where is the filter element located that affects the operation of the filling valve? Finding the mesh is easy - just find the place where the inlet hose is connected to the body of the automatic machine. This is where the filter is located. Let's figure out how to remove it for cleaning.
Basic faults
Housing, filter mesh, membrane, spring, winding, pipes - all these parts of the intake mechanism fail over time. Let's look at the main types of faults.
The inlet grid is clogged
There is a metal or plastic mesh at the entrance to the valve. It traps large mechanical debris from the pipes without allowing particles to enter the drum. The dirtier the water in the tap, the faster it becomes clogged. Dirt on the filter is visible from the outside; just remove the supply hose. There is no point in disassembling the entire assembly each time for cleaning.
The mesh is removed using pliers, translational and rotational movements. The inlet filter must be cleaned: rinse under running water and blow through with air.
The membrane is clogged
An elastic and elastic rubber membrane moves with each movement of the rod, opening and closing the tube. When clogged, the rubber does not adhere tightly to the walls of the housing and allows water to enter the tank, even in the closed position.
The membrane should be removed from the housing, inspected for integrity, and elasticity checked. If there are cracks or abrasions, the part must be replaced.
The return spring breaks or becomes clogged
Over time, the return spring compresses and may break. If the part is visually in good condition, it should be slightly stretched and put in place during assembly. If there are defects, breaks, or rust, the spring must be replaced with a similar one.
When disassembling, the return spring itself falls out of the housing - just remove the rod. Be careful not to lose the part.
Damaged hull
The plastic shell contains an electromagnetic coil, inside which the rod and membrane move. If there are cracks, water will constantly leak inside the machine and can get onto electrical components. As a result, the “washer” produces an electric shock the moment it touches the body. This is fraught with a short circuit and fire.
The element is dismantled and inspected, checked for leaks. There should be no dents or traces of impacts. If there are visible defects, there is no need to repair the part; it is easier to buy a new unit.
Cracking due to frost
A washing machine installed in a place of seasonal residence, for example, in a country house, freezes in an unheated room in winter.
Signs of breakdown
The malfunction can be determined by external signs:
- Error code on the washing machine display.
- Water is drawn into the tank without stopping.
- When starting the machine, there is no sound of water intake.
- The tank is overflowing with water.
Read more about how to check and replace the inlet valve of a washing machine below.
How to find the problem yourself
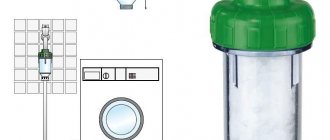
Before checking the solenoid valve, inspect the mesh filter. It is located between the intake hose and the inlet valve and serves to retain particles of debris coming from the water supply.
Since the filter could become clogged over time, we will describe the principle of cleaning it:
- Disconnect the CM from the power supply.
- Close the inlet valve.
- Unscrew the inlet hose and drain the remaining water from it into a sink or other container.
- Behind the hose you will find a mesh. Pull it out using pliers and clean it under running water.
Let's look at how to open and check the inlet valve in a washing machine.
- Remove the lid on the top of the washer. To do this, unscrew the screws from the back that hold the top cover.
- Inspect the valve for damage. If nothing is visible from the outside, remove the device.
- Disconnect the hoses leading to the valve. First you need to loosen the metal clamps, so use pliers.
- Now disconnect the wiring.
- Unscrew the bolts securing the part to the SMA body.
- Pull out the valve.
Inspect the hoses and the device itself for blockages. How to check the fill valve? Check over a container or sink to avoid getting wet on the floor.
Connect the intake hose to the valve and open the water. If the element is working properly, it should not leak water. If it leaks, then replacement is needed.
The next test option must be carried out quite carefully. You must apply a voltage of 220 Volts to the coils of the device. In this case, the section should open and fill the container with water. The danger of this method is that when electricity and water come into contact, a short circuit may occur. Therefore, you need to work very carefully.
You can accurately determine whether the washing machine valve needs repairs using a multimeter. Set the tester to resistance measurement mode. Apply probes to each winding one by one, measuring its resistance. A working part should show a result of 3 kOhm.
Valve replacement procedure
The valve in the washing machine cannot be repaired. If it is broken inside or its coil is burned out, it is replaced with a new one. They do it like this:
- de-energize the machine by disconnecting it from the network;
- shut off the water;
- remove the back or side panel;
- carefully unscrew the water hoses. When disconnecting, you must remember the location of their installation;
- remove the fasteners holding the device;
- remove the valve;
- install a new one;
- assemble the structure in reverse order;
- check the performance of the system.
If everything was done correctly, the machine will work as before. After turning it on, check how the liquid enters the tank and whether the mechanism stops in a timely manner.
How to completely drain the water from a washing machine if it is broken
The role of the washing machine in the life of a modern family cannot be overestimated. These tireless units...
You can fix simple washing machine problems yourself. Typical models are not very different from one another. The main thing is to follow safety precautions when working with electricity.
What filter elements are included in LG?
The machine has two filters: for water supply and drainage. Where to find them:
An inlet (drainage) filter in the form of a fine mesh is installed at the valve that connects the machine to the water supply.
Located at the top right side of the rear of the machine.- The drain filter element, which prevents small fragments from entering the drain pump, is located at the bottom of the washing unit, closer to the left edge.
On modifications with vertical and horizontal loading, the location of the elements is approximately the same.
How to check functionality
An electromagnetic coil drives the rod. The performance of the node depends on its condition. You can check it in different ways.
Connect 220 volts
When connecting a 220 V household current to the electrovalve terminals, a magnetic field is formed in the coil, which attracts the metal rod along with the membrane - characteristic single clicks will be heard. When disconnected, everything returns to its place and the water pipe is closed.
Check resistance
The coil is usually soldered to the body, therefore, it is easier to test the contacts with a multimeter. Depending on the design of the bypass valve, the device will show a resistance of 2-4 kOhm on the working coil.
Intake valves are single, double, triple. The coils in each ring separately.
Sources
- https://hozsekretiki.ru/tehnika/klapan-podachi-vody-dlya-stiralnoj-mashiny.html
- https://ExpertLand.ru/tehnika/stiralki/pochinit-klapan-v-sm
- https://cosmo-frost.ru/stiralnye-mashiny/remont-i-zamena/kak-proverit-i-zamenit-vpusknoj-klapan-v-stiralnoj-mashine/
If the valve is faulty
Cleaning the filter element may not work because the solenoid valve is faulty. Changing an element is easy. For front-facing washing machines, it is necessary to remove the top housing cover. On “vertical” machines, the sensor is usually located at the bottom of the rear part of the machine, and to get to it, you will have to disconnect the side wall of the washer.
Before removing the inlet valve, be sure to turn off the power to the washing machine and turn off the water supply tap.
The further algorithm of actions will be as follows:
- disconnect the wiring from the valve;
- remove the hoses connected to the element. They are fixed with clamps;
- Unscrew the bolts that secure the valve to the washer. On some models, the sensor is held in place with special latches, then you will have to pull the latches, turn the valve, remove the wires and remove it from the machine.
Installation of the solenoid valve occurs in the reverse order. The element is fastened with bolts, hoses are connected to it, which need to be tightened with clamps. Next, the wiring is connected, and the top cover of the housing is put in place. Afterwards, you can check the operation of the machine by running a test wash.
Where does the water come from under the machine? What to do when an emergency is detected?
The washing machine is leaking from below reasons
The washing machine is one of the main household appliances, designed to create comfort in your household. However, as a result of active use, as well as as a result of poor-quality assembly, damage occurs. One of the most unpleasant breakdowns is a leak from your car. And this problem can not only slow down the washing in your home, but also cause problems in the event of a flood on the lower floors of your neighbors, and what is even more dangerous is electric shock. However, if you see a puddle on the floor, do not immediately despair; perhaps you can solve some of the problems yourself.
Determining the cause of leaks and eliminating them
If a leak is detected from below, you need to turn off the power supply, turn off the water supply and turn the machine over. By continuing the inspection, we will be able to discover the cause of the leak. We look at the presence of smudges on the parts and the condition of the clamps, at the connection of hoses and pipes.
Communities › DIY › Blog › INDESIT WITL 86 - water supply valve repair
INDESIT WITL 86 "vertical" age about 7 years. The washing machine suddenly began to fill with water uncontrollably. And with washed things and empty! And since we supply water according to time(, we need to find out who is to blame: the valve or the electronics. While there is no water, turn off the tap on the supply pipe. They gave water, opened the tap - thin streams ran from the holes for flushing the powder (the washing machine was unplugged from the outlet ). Result: “the valve does not hold.” Internet monitoring did not please: “INDESIT WITL 86 WATER SUPPLY VALVE 33390017” price from 800 to 2400 rubles! Plus delivery time. ((((Knowing the quality of our water) I hope there may be dirt (although filter - the coarse cleaning flask is worth everything) or the frog might get stuck).Just in case, I reached into the pumping pump - I earned 1 iron ruble))
Disassembling the machine. It's enough to shoot the left side and that's it, but then it's a bit cramped, you need to have the hands of a surgeon)).
Disconnect and remove the panel with switches (so as not to interfere) Lift the top part up. I didn’t remove it completely - there was too much extra, factory installation, etc...
Disconnect, otherwise you cannot pull out the valve:
1. thick corrugated hose in the center. 2. plugs (2 pcs.) on the valves. 3. spring clamps (2 pcs) on the hoses (all motorists love them)) but it will not be easy to compress them. I used duckbill pliers. 4. remove 2 rubber water supply tubes.
Removing the double valve.
1 - press (with a thick screwdriver one at a time) 2 - turn until the latches disengage. Pull out the water supply valve
Checking valves. Measure the resistance of the electromagnet coils. I got a coil resistance of 3.72-3.77 kOhm. The windings are intact. (from 3 to 5 kOhm) If you blow into the holes, you can hear the characteristic gurgling sounds of passing air. Result: the valve does not hold. Replacement. Nope.
Disassembling valves 1. pry off the coil with a screwdriver.
2. pull out the valve. Unscrew the middle part. Unscrew by pushing with a screwdriver or “platypus”.
Wipe everything away from plaque. Clean the 3 pressure equalization holes.
3. I greased everything lightly with silicone. I don't think it will get any worse.
4. collected. I checked it and it holds perfectly. You can blow and gently press with a blunt object (screwdriver) through the fitting to check the operation of the valve.
5. At the same time I disassembled, cleaned and lubricated the second working valve.
Assembly. Everything is in reverse order. I lubricated the fittings with silicone - it’s easier to put on the hoses.
1. valve 2. plugs 3. film - splash protection 4. thick hose 5. two water supply hoses 6. clamps 7. cover, control panel The valve - the gearbox at the inlet was also coated with silicone.
If you remove it, the machine works better with low pressure (they say), but there should not be a strong water pressure. Left him. I washed it and cleaned the mesh at the inlet.
I sprayed all the rubber bands with silicone - it won't get any worse. Put on the side cover. All. Connection. 1. does not allow water to pass through. Ok 2. erases. OK
All the best to everyone! Happy upcoming MAY 9!
PS: I'm not an expert, so I'll take all the advice)
