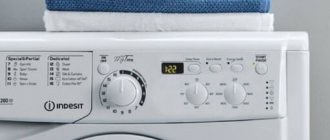
Washing machines under the Ariston brand have been among the most in demand and popular for many years. The brand itself has always been positioned as a premium version of its “relative” Indesit.
Indeed, the functional set and all characteristics indicate a higher level. The company produces a fairly wide range of washing machines, from the most compact (33 cm deep) to full-sized ones.
The main distinguishing feature of modern Ariston machines from products from other manufacturers is a large load of laundry with minimal dimensions. For example, in almost any store you can see a machine of this brand with a top cover depth of 40 cm and a maximum load of 8 kg for this size.
The nominal value for cars from other manufacturers in this size is 5-6 kg no more. Definitely a convenient car for small apartments.
You just need to remember that more intensive use of any washing machine can cause certain problems in its operation. By and large, automatic machines from different manufacturers have similar types of faults.
But still, certain brands have not only their own design features, but also, as they say, “favorite sores.” Washing machines manufactured under the Ariston brand are no exception. Let's look at the possible problems inherent in them and what you can fix with your own hands.
The most common malfunctions. Let's start with something simple.
Error codes for Hotpoint-Ariston washing machines (Hotpoint-Ariston)
Code Malfunction
| F01 | Short circuit in the control circuit section. |
| F02 | No engine rotation signal on the electronic controller. |
| F03 | Indicates a stuck heating element relay or a broken temperature sensor. |
| F04 | Indicates a breakdown of the water level sensor. |
| F05 | Indicates a malfunction of the drain pump or a failure of the water level sensor. |
| F06 | Indicates that there are button errors. |
| F07 | The heating element is not in the water. |
| F08 | Malfunction of the level sensor or “sticking” of the heating element relay when the tank is empty. |
| F09 | Volatile memory malfunction. |
| F10 | Indicates that there is no signal from the water level sensor. |
| F11 | Indicates that there is no connection with the drain pump. |
| F12 | Indicates a lack of communication between the controller and the display module. |
| F13 | Presence of breakdowns in the drying process control circuit. |
| F14 | The dryer refuses to turn on. |
| F15 | Problems with the drying mode. |
| F17 | The washing machine hatch door is open or cannot close. |
| F18 | Microprocessor malfunction. |
| H20 | water supply error. |
Operating principles of drying devices
The installation technology depends on the type of dryer. Manufacturers supply three types of such devices to the market:
- An exhaust-type device, the principle of which is to dry clothes with exhaust air removed through the home ventilation system. Exhaust type dryer
- Condensation machines operate like this: air is heated and supplied to the laundry compartment, where it absorbs moisture, then it is passed through a heat exchange unit. The condensate remains in a special container, which must be emptied after each drying cycle.
Unit with heat pump. The principle of its operation is similar to the previous version. It differs only in that the humidified air is passed not through a heat exchanger, but through an evaporator. The liquid is discharged into a sewer pipe or a specially designed container.
In an apartment or private house, it is better to use an exhaust dryer, which requires connection to a ventilation duct and an electrical network. If it is not possible to remove the air duct, it is permissible to install a condensation device, the water from which is discharged directly into the sewer or the provided tray. Let us dwell in detail on two well-known options for connecting a dryer: to a ventilation duct and to a sewer. Initially, mention should be made of how to place the drying equipment in the room.
How to determine a malfunction on washing machines without a display
New Ariston washing machines with a self-diagnosis system display fault codes on the screen, after which they can be deciphered using the user manual. In older series without a screen, for example, Ariston 2000, the same information is displayed using indicators. The lights flash at a certain frequency; you need to count the number of flashes in a series, and then refer to the instructions, which list all possible types of errors.
If the washing machine is not equipped with a self-diagnosis system, you can determine the malfunction by its characteristic symptoms, and then carry out repair work on your own. Otherwise, you should contact the service center. Professionals have a special diagnostic key that is inserted into a connector on the system board and uses it to read information about the state of the equipment.
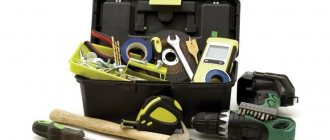
Tools
First of all, it is necessary to provide sufficient space and good lighting. You won't be able to disassemble the car without tools. It should be noted that manufacturers use different solutions in manufacturing.
Set of tools
Do you wash your shoes in the machine?
Oh yes! No
Therefore, let's consider a universal set. It will allow you to disassemble any car. List:
- Socket wrench with ratchet. Size - 10 and 13.
- Screwdrivers - T10, T15, T20, RN1, RN2, slotted SL 2-20.
- Set of socket heads with ratchet - from 5.5 to 13.
- Flashlight.
- Pliers.
- Round nose pliers.
- Wire cutters.
Tools needed
Expert opinion
I work in the household appliance repair industry. Extensive experience in restoring washing machines and dishwashers.
Ask a Question
Important! We recommend taking photographs of all stages of work, as well as the fastening of parts.
Major breakdowns of the Ariston washing machine
The service life of the machine depends on operating conditions. If a problem occurs, you can repair Ariston and Hotpoint Ariston washing machines yourself.
Let's look at the most common faults that appear in machines of this brand.
System blockage in Ariston machine
Clogging is the most common cause of problems with the operation of the SM. It prevents the normal drainage of water from the tank, as a result the washing machine cannot switch to rinse mode. At the same time, the drain pump hums loudly while running idle.
Malfunction of the pump, intake valve of the Ariston washing machine
If the pump (drain pump) breaks down, the hum of the device is heard, but the water does not drain. You will not confuse a malfunction of the water intake valve with anything: even when the Ariston washing machine is turned off, water is drawn spontaneously and a characteristic murmur is heard.
Failure of the Ariston electric heater
As a result of exposure to hard water, scale forms and the tubular electric heater (TEN) fails. Symptoms of failure: the water does not heat up, the laundry is washed in cold water, or the washing program does not start at all.
Signs
The washing machine does not heat the water or knocks out the plugs immediately when turned on or while washing. Ariston models with a display report a malfunction with errors F07, F08.
Failure of fasteners in the Ariston washing machine
A fairly common problem is wear and loosening of mechanical fasteners. For example, the hatch door may not close due to a misalignment or a broken hook. If the door is not closed tightly, you will not be able to start the wash.
Malfunction of the control unit in an Ariston car
A rarer, but still possible breakdown. Appears due to high humidity, foam on the board, or sudden voltage surges.
The control module is the “brain” of the Ariston washing machine, so if it breaks down, any parts of the SMA may fail to function.
Signs
Signs of module failure are very varied. The most common are:
- programs get lost;
- The SMA does not spin the drum;
- the machine does not turn on.
Often the malfunction is accompanied by the appearance of errors F09 and F12 on the display or in the form of flashing indicators (in models without a screen).
How to fix
The electronic controller is sensitive to voltage surges and moisture. Because of this, individual radio elements burn out or tracks burn out.
The technician diagnoses the board and, based on the results:
- solders burnt tracks;
- replaces failed radio elements (resistors, relays, capacitors, triacs, etc.);
- replaces the board completely in case of serious damage, in particular when the processor fails.
If the diagnostic results reveal a firmware failure, the memory is removed from the board, reprogrammed, and soldered back in.
Grinding and crunching noises when the machine is running
This indicates a serious malfunction. Most likely, with such symptoms, the bearing will need to be replaced. Since the tank of the models in question is non-separable, such a malfunction should immediately be addressed to a washing machine repair technician.
If you remove the tank yourself and take it to a service center, replacing the bearing will cost much less.
A simple repair of an Ariston washing machine is not difficult to do with your own hands. A set of the necessary tools, experience in performing plumbing work and basic knowledge of electrical engineering will allow you to perform it no worse than in specialized centers.
Wear of machine fasteners
Operational problems can also arise due to loosening or breaking of the mechanical fasteners with which the machine is equipped. Most often, this is expressed in weakening the fixation of the machine hatch. The problem has the following symptoms: strong noise during operation of the washer and characteristic vibrations. To get rid of this, just tighten or completely replace the fasteners with new ones.
Broken heating element
Due to the fact that hard water is poured into the washing machine, scale forms on the heating element, as a result of which the part breaks. In case of such a breakdown, the wash is performed in cold water or the program does not start at all. To diagnose and perform repairs yourself, you must:
- Disconnect the Ariston washing machine from the network and communications, remove the back cover.
- The heating element is located below. You need to take a multimeter, switch to resistance measurement mode and install the probes on the contacts of the part. If the device is working properly, the display will show 25-30 ohms. A value of 1 ohm is reported for an open circuit, and a value of zero for a short circuit.
- To disconnect a faulty heating element, you need to unscrew the fastening bolt, disconnect the wires and, by shaking, pull the part out of the seat.
- Install the new heating element in reverse order and assemble the washing machine.
Ariston and Hotpoint-Ariston fault codes, their meaning
Washing machines Ariston, Hotpoint Ariston, Aqualtis, Margarita and other models are equipped with a self-diagnosis function. The system displays a fault code, decoding which the user can understand the cause of the breakdown.
The CM with a scoreboard or display will highlight the error code on the screen. Those models that do not have a display (such as “Margarita 2000”) will display an error by flashing the indicators.
How to recognize a code without a display? For example, the indicators will display error F02 like this: the light blinks 2 times, pauses, then displays the code again 2 times. The number of flashes depends on the fault code.
We list the error codes for Ariston SM: F01, F02, F03, F04, F05, F06, F07, F08, F09, F10, F11, F12, F13, F14, F15, F17, F18.
| Code and its meaning | Flashing lights on the control panel | Solution | ||||
| LED1 | LED2 | LED3 | KN1 | KN2 | ||
| F01: A short has occurred in the engine control circuit. | blinks | — | — | — | — | 1. Remove excess moisture from the controller contacts. 2. Replace the controller or motor. |
| F02: The signal about the motor operation does not reach the electronic controller from the tachogenerator. | — | blinks | — | — | — | 1. Check the connections between the motor and the controller for tightness. 2. Check the rotor for locking moment. 3. Measure the resistance of the tachometer winding with a tester. 4. Replace the controller or motor. |
| F03: Temperature sensor failure, heating element relay stuck. | blinks | blinks | — | — | — | 1. Inspect the connections of the temperature sensor to the control unit. 2. Check the sensor with a tester. If it breaks, it needs replacement. |
| F04: Malfunction of the pressure switch (water level sensor). | — | — | blinks | — | — | 1. Make sure the contacts between the sensor and the module are tight. 2. If there is a problem, the pressure switch or controller must be replaced. |
| F05: Problem with the drain pump. | blinks | — | blinks | — | — | 1. Check the quality of connections between the module and the pump. 2. Check the pump and pressure switch with a tester. 3. Remove any blockages. 4. Change the pump or water level sensor. |
| F06: Error in the buttons on the control panel. | — | blinks | blinks | — | — | 1. Inspect the wiring connecting the controller to the buttons. 2. Check the functionality of the buttons on the panel. 3. Replace the panel or control module. |
| F07: The heating element is not immersed in water. | blinks | blinks | blinks | — | — | 1. Make sure the connections between the pressure switch and the module are tight. 2. Check the level sensor and heater. 3. Replace the sensor or heating element. |
| F08: Malfunction of the pressure switch, problems with the heating element relay. | — | — | — | blinks | — | 1. Inspect the water level sensor. 2. Quality control of the wiring between the heater and the control unit. 3. Replacement of the pressure switch, block. |
| F09: Volatile memory error (failure). | blinks | — | — | blinks | — | 1. Flashing the microcircuit. 2. Replacement of the controller. |
| F10: There is no signal from the water level sensor. | — | blinks | — | blinks | — | 1. Check the wiring between the sensor and the control unit. 2. Checking the sensor and block. Replacing a broken part. |
| F11: No signal from the drain pump. | blinks | blinks | — | blinks | — | 1. Checking the pump and the quality of its connection to the controller. 2. Make sure the pressure switch is working properly. 3. Replacement of the faulty element. |
| F12: Communication between the controller and the display module is lost. | — | — | — | blinks | — | 1. Make sure the connections have not come loose. 2. Replace the faulty element. |
| F13: Open circuit or malfunction of the drying temperature sensor circuit (for the AVD and AVL lines). | — | — | — | blinks | blinks (in addition, the KH4 indicator blinks) | 1. Inspect the connections of the temperature sensor to the control unit. 2. Make sure the temperature sensor is working properly. 3. Replace the broken part. |
| F14: The drying heating element does not turn on (for the AVD and AVL lines). | — | — | — | blinks | blinks (additionally KH3 blinks) | 1. Check the connections, as well as the heating element and controller. |
| F15: Drying relay failure (for AVD and AVL lines). | blinks | blinks (KH3, KH4 additionally flash) | 1. Control of CN1 connectors. 2. Check and replace the level sensor. | |||
| F17: The hatch door is not closed. | blinks | — | — | — | blinks | 1. Check the voltage in the network, the door handle, the UBL device. |
| F18: Problems with the microprocessor. | — | blinks | — | — | blinks | 1. Reinstalling the controller. |
Tips for choosing
When choosing a Hotpoint-Ariston washing machine, you should pay attention to the technical characteristics that will best satisfy your personal application needs; All models of this manufacturer are distinguished by their versatility, ease of use and good quality; Instances are available in various sizes, which makes it easy to choose a more suitable option for your home interior; Modern equipment is developed using innovative technologies that preserve the original appearance and color of clothing to the maximum; Additional functions carry out manipulations with minimal water consumption in energy-saving mode; When choosing washing equipment, it is not at all necessary to overpay for functionality that will not be used, especially since many devices from the middle price segment are not very different from premium devices; The compact machines of this company operate quietly and have a long service life.
Watch a video on how to install a Hotpoint-Ariston washing machine
DIY repair
Knowledge of the structure and circuitry of the Ariston automatic washing machine will help you determine the breakdown. The picture shows the location of the main nodes of the MCA.
Let's figure out how to independently repair the Hotpoint Ariston washing machine.
Removing blockages during washing machine repair at home
It is easy to remove the blockage with your own hands. You need to check the drain filter, which is located at the bottom right under the panel.
By cleaning the filter, you will eliminate the cause of the washer malfunction. The drain pipe becomes clogged less often because it is thick.
The pump may become clogged, but this is rare because there is an additional filter in front of it.
The drain hose only becomes clogged if you installed it incorrectly.
Check the drain, it may also be clogged. Disassemble the unit, remove the pipe, loosen the clamps, and wash it. Remove the pump by unscrewing the fasteners and disconnecting the sensors.
Fill valve broken
If the fill valve in Ariston is broken, then water constantly flows into the washing machine, even when it is not working and is disconnected from the network.
To check the fill valve, you need to unscrew the fasteners and remove the top cover. The valve is located where the drain hose connects to the body of the electromechanical unit.
Check the gaskets first. If they have not lost their functionality, measure the valve resistance. Place the probes on the contacts of the filler valve and check the resistance to see if it corresponds to the optimal value (from 30 to 50 Ohms).
If it is less or more than expected, it means that the water intake valve is not working. To replace it, you need to unscrew the old valve from the body and screw in a new one. Be sure to connect the sensors.
Water inlet valve malfunction
If the filling valve of an Ariston washing machine is broken, it does not shut off the water, and it flows into the tank itself, even if the equipment is unplugged from the outlet. This malfunction can be determined by the murmur of water, which is heard when the machine is turned off. To repair the part, you must disconnect the washing machine from the network and water supply and remove the top cover.
The water inlet valve is installed at the top, in the place where the inlet hose connects to the washing machine. First, you should inspect the gaskets for integrity, and then take a multimeter, switch to resistance measurement mode and install the probes on the sensor contacts. If it is working properly, the display will show a value ranging from 30 to 50 ohms. A broken valve cannot be repaired, so the part must be replaced. The process is very simple, just disconnect the wires, unscrew the faulty element and replace it with a new one.
Ariston heating element repair
To get to the heater, you will need to remove the back wall of the Ariston washing machine. There is a heating element at the bottom, as shown in the photo.
Before removing the electric heater, measure its resistance with a multimeter. An indicator of 1 Ohm indicates an open circuit, about 0 Ohm - a short circuit has occurred. A working device will show 25-30 ohms.
Attach the tester as in the photo:
If the part is faulty, replace it. Video to help you:
Bearing repair
The bearing in the drum may break and wear out. It needs to be replaced. You only need to buy a bearing of the appropriate brand in a specialized store or order it on the official website of the Ariston washing machine, or perhaps purchase it at an equipment repair shop.
Using a metal rod and hammer, knock out the bearings. If they are defective, replace them. If the drum is deformed, replace it with a new one.
Reassemble. If the fault is in the plastic fin, then there is no need to disassemble the tank. The washing machine door can be removed. Take a metal rod whose diameter is smaller than the holes in the plastic rib of the drum.
The rod is inserted into one of the holes on the edge, the latch is opened with the help of it, and the plastic part is removed. A new plastic rib is placed in its place. Slide the plastic edge along the groove until the latch fits into the hole and closes.
Bearing replacement: procedure
To replace the bearing, you need to get to the washing machine drum on which it is installed. The car is disassembled, gradually removing all the parts from it.
Emptying the washing machine tank
The body of the unit begins to be disassembled from the cover by unscrewing two bolts located on the top on the far side. To do this you will need a Phillips screwdriver. Once the bolts are removed, the cover must be pushed forward towards the scoreboard and then removed.
To remove the dashboard , open the detergent compartment and remove it by pressing the latch in the center. In the resulting niche you can see several bolts and several more on the opposite side of the panel. The bolts are unscrewed, all the plastic latches are opened, after which the wires are disconnected and the panel is removed to the side.
To get to the washing machine tank, first remove the lid and dashboard
Next, remove the back panel - unscrew the bolts around the entire perimeter and remove the cover to the side. By carefully rotating the pulley wheel, remove the belt that connects the motor shaft to the pulley mounted on the tank.
The next step is to remove the back panel and the belt connecting the motor shaft to the pulley
Then they move on to releasing the top of the tank . Disconnect the pipe that leads from the powder compartment to the tank, remove the contacts of the valve that lets water into the washing machine. Remove the valve and pipe to the side.
Take photographs of the location of contacts, bolts and parts before proceeding with dismantling. After completing the repair, this will help you quickly and correctly reassemble the washing machine in reverse order.
Next, unscrew the bolts that secure the counterweight and remove it. Disconnect the hose connecting the pressure switch to the tank.
To free the washing machine tank, you need to remove all the parts located in the upper part of the body
The next step is to dismantle the front panel . First, remove the rubber cuff from the hatch of the washing machine, carefully prying it off with a screwdriver. Then unscrew the bolts located next to the lock mechanism and disconnect its wiring. The hatch door is removed by first unscrewing the screws that hold its hinges.
To remove the hatch cover, you need to unscrew the bolts that hold its hinge
All that remains is to unscrew the bolts located around the perimeter of the front panel and remove it.
Next we move to the back of the installation . Disconnect the wiring of the heating element and the washing machine motor. The heating element is left in its place, but the motor is dismantled, having first removed all the bolts that hold it in place. Then remove the counterweight installed below.
To get to the washing machine tank, you will have to remove the engine.
Finally, the shock absorbers on which the tank is attached are disconnected and removed from special hanging hooks.
The shock absorbers are disconnected from the tank last.
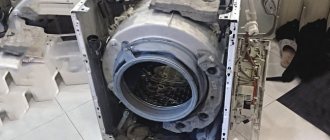
Now the tank can be removed from the body, unscrew the bolts and remove its front part.
In the photo you see the open tank of the washing machine, in which the drum is located
A shaft (metal axis) is inserted into the rear wall of the drum, passing through the bearing, the wall of the tank and connecting to the pulley. To get to the bearing, the pulley must be disconnected.
Usually the bolt securing the pulley is not just tightened, but also additionally set with glue. Before unscrewing, spray it with WD-40. If this doesn't help, you can use a hammer and chisel.
Unscrewing the bolt that secures the pulley can be very difficult
After removing the pulley, unscrew the bolts attaching the drum to the tank, unfasten the latches and remove the tank wall. Now you can proceed directly to replacing the bearings in the drum.
How to open a non-separable tank
Most Ariston washing machine models are available with a non-separable tank. Making a one-piece tank is easier for the manufacturer (no screws and fasteners), but this is not the only reason for producing non-separable parts. If a drum, bearing or other elements located inside a solid tank fail, the manufacturer recommends replacing it entirely.
However, there is a way to replace the bearings in this situation. This allows you to minimize repair costs.
If, when a bearing fails, you are offered to completely replace the washing machine tank, it may be worth turning to other specialists who can save your budget and make a spot replacement.
If you take out the tank and find that it cannot be disassembled (there are no bolts connecting the two halves), you will have to spend time opening it. Let's look at how to disassemble a solid tank, step by step with photo illustration.
First of all, using a drill, holes are made around the perimeter of the weld at a distance of approximately 5 cm from each other.
The next, most important step is to carefully cut the tank along the seam using a hacksaw. In order not to spoil the part, you should not rush when doing the work.
Before closing the tank (after replacing the bearing), silicone is applied to its sawn edges
The two parts of the tank are connected and bolted together using previously drilled holes.
Bearing replacement
When you get to the bearing, you will most likely see signs of deformation and contamination on it. How to change a bearing? First, the old parts need to be removed.
Start with the bearing located closer to the outside of the drum. The part is laid with the hatch hole down, the chisel is placed on the outer rim of the metal ring and hit with a hammer.
Carefully monitor the position of the chisel when knocking out the bearing - if the tool slips and the blow hits the inner ring, it may fly out, and it will be very difficult to remove the remaining bearing from the seat.
The inner bearing is removed in the same way, after which the oil seal is removed.
The bearing housings are treated with WD-40, dirt and rust are removed, and then lubricated with grease.
The new part is driven into place, hitting only the outer edge. The bearing must fit into the seat all the way.
The bearing must fit into its seat all the way
The oil seal is placed on the inside of the tank, having been pre-treated with lubricant.
It is important to correctly install not only the bearings, but also the oil seal. If the latter is not given due attention, it will quickly begin to leak water, which, in turn, will lead to deformation of the bearing.
The oil seal is also treated with lubricant before installation.
Now that the bearing replacement is completed, you can begin reassembling the machine. Before installing the drum, you need to clean the bushing from rust, scale and dirt.
Let us repeat once again that replacing a bearing on a washing machine yourself is a complex process that requires special skills. Proceed with repairs only if you are firmly confident in your abilities.
Repair of fasteners in an Ariston or Hotpoint-Ariston car
Your washing machine's door may not close or lock. The problem may be that the door is skewed, as a result of which the hook does not reach the hole. It is enough to tighten the side loops. If the locking tongue is worn out or the handle on the door is loose, only replacing the elements will help.
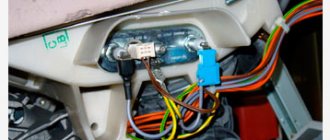
Replacement and repair of the control module
How to remove the control unit:
- Unplug the plug from the socket, turning off the power to the machine.
- Remove the top cover.
- Pull out the dispenser by pressing the latch in the center.
- Unscrew the front panel.
- Release the clamps and disconnect the board.
- Remove the selector and place the new board on it, then reassemble in reverse order.
Installing a new unit is not difficult. It is more difficult to repair and clean contacts. If you decide not to call a specialist, but to do the work yourself, watch the video:
Once you understand the main causes of malfunctions of the Ariston washing machine, you can fix them yourself. Be attentive to details and do not neglect safety precautions.
DIY Ariston washing machine pump repair
To find out if the pump is not working in the unit, the filter is acting up or the drain hose is clogged, you must be familiar with the signs of pump failure.
Signs of pump failure:
- The drain pump hums, but the water does not drain.
- The machine may stop while the system is running.
- Water flows out slowly.
Repairing the Ariston washing machine pump should be done as follows:
- Turn off the power to the washing machine and drain the water completely by lowering the hose to the floor, while placing rags to absorb the liquid;
- You can get to the pump through the bottom, because in models of this brand it is located at the bottom of the washing machine. To remove the pump, you need to turn the machine over onto the side wall and remove the bottom bar of the bottom;
- disconnect the wires going to the drain pump, loosen the clamps and pull out the pump;
- Now we need to disassemble it. To do this, use a Phillips screwdriver to unscrew the screws on the snail. On some models of the Ariston washing machine, clamps, rather than screws, are used to secure the pump. Lightly press the snail while turning it counterclockwise. It will unscrew;
- Mark with a marker the location of the engine in the snail in order to subsequently assemble it correctly. Pull out the engine with the impeller. The impeller in the pump should rotate abruptly, and not slowly and smoothly, because it contains a magnet rotating in a coil. It provides interaction between the rotor and stator of the washing machine;
- If no debris is visible, but the impeller still does not rotate, then continue to disassemble the pump. There are latches on the motor body that need to be pressed a little with a screwdriver to remove it from the reel. Having removed the motor from the body, you will see a monolithic part - a cross. Using a construction hairdryer, be sure to wear gloves, heat the shank of the part (its long part) at low power;
- pry up the crosspiece with a screwdriver and remove it from the body along with the magnet. There is a lot of debris on the magnet and in the case from which the part was removed. Parts must be thoroughly cleaned or washed;
- Next, remove the magnet from the shaft. You will see a bearing, which you will clean from debris and lubricate;
- start assembling the pump. When assembling, make sure that the O-ring under the blades is firmly in place. When assembling the parts, lightly press them until they click.
- Sometimes bearings not only get clogged, but fail. Failure of the bearings causes runout, causing the impeller to rub against the volute casing. We hear the noise and hum of the pump, but no water comes out. The washing machine may stop. Buy bearings at a service center in Moscow, St. Petersburg or other cities of Russia, or in specialized stores. If the seals are not in order, replace them too;
- Reassemble the pump in reverse order, and then the entire washing machine. Ariston washing machine fault repair
If a Hotpoint malfunction occurs, Ariston generates an error that is displayed on the screen. It is important to know the error codes in order to determine what is wrong with the device and find out the reason for its failure.
Ariston washing machine drum repair
The high-quality and durable material from which the drum of household appliances is made also becomes unusable because solid foreign objects get into it, which can damage the unit, forming cracks on it.
The plastic rib located inside the drum may become deformed. To replace the drum, you need to remove it.
To remove the drum yourself, you need the following set of tools:
- a set of screwdrivers, especially a Phillips screwdriver and a slotted bit are needed;
- screwdriver;
- pliers;
- hammer;
- hexagons of different sizes.
Before you begin disassembling the drum, you need to turn off the power to the machine, disconnect the drain hose, and turn off the water supply.
Using a Phillips screwdriver, remove the bolts from the rear, front and top walls, and then remove the panels themselves.
Remove the powder container. Use a slotted screwdriver to remove the module. The control unit does not have to be unscrewed completely, the main thing is that it does not interfere with removing the drum.
Remove the hatch cuff, pull out the bottom bar, unscrewing the screws. Electronics, shock absorbers and other parts must be removed from the loading tank.
Remove the drum from the device and disassemble it. Remove the screws holding the two sides of the drum together. Use a screwdriver to pry off the seals and remove them.
Problems with drum rotation
Another problem that can cause the machine to stop working is the drum not rotating . There are several reasons that can cause this situation: engine failure, electrical wiring problems, control panel malfunction, or filter clog. However, the most common cause is wear or excessive stretching of the belt. In this case, you need to replace it; there shouldn’t be any special problems with replacing it yourself.
If the reason is different, then it is best to call a professional to your home to identify the cause of the machine breakdown.
What to do?
If it turns out that the child protection is not activated and the door still does not open, you should look for other ways to solve the problem.
The door is locked, but the handle moves too freely. It is possible that the reason lies precisely in its breakdown. You will have to contact a specialist for help, but this time you can open the lid and remove the laundry yourself. To do this you will need a long and strong cord. With its help you need to do the following:
- firmly grasp the lace with both hands;
- try to pass it between the body of the washing machine and the door;
- pull to the left until you hear a click.
If there is water in the drum and the hatch is blocked, you need to try to start the “drain” or “spin” mode. If the water still does not drain, you need to check the hose for blockages. If present, the contamination should be eliminated. If everything is fine with the hose, you can drain the water like this:
- open the small door, which is located under the loading hatch, unscrew the filter, after placing a container to drain the water;
- drain the water and pull the red or orange (depending on the model) cable.
After these steps, the lock should snap open and the door should unlock.
If the cause of the breakdown lies in the electronics, you need to unplug the washing machine for a few seconds. Then turn it on again. After such a reboot, the module should start working correctly. If this does not happen, then you can open the hatch using a cord (the method described above).
If the washing machine hatch is blocked, do not immediately panic. You need to make sure that the child lock is deactivated, and then try to restart the wash cycle to eliminate the problem.
See below for the door opening method.
Repair features
Due to differences in design, repairs vary between models.
Ariston Margarita 2000
The Margarita 2000 car has a stainless steel tank. The bearings are installed in a removable crosspiece mounted on the rear wall of the tank - it does not need to be removed to repair the bearing assembly. Repair sequence:
- Tighten the transport bolts.
- Remove the hatch on the rear wall of the device.
- Unscrew the fastening nut and remove the pulley using two screwdrivers.
- Remove the top cover and remove the counterweight.
- Place the machine on the front panel, having first removed the door.
- Unscrew the fasteners of the removable crosspiece of the tank.
- Using gentle blows, remove the cross from the shaft.
- Remove the oil seal and bearings from the crosspiece. Replace, lubricate and reinstall.
- Place the crosspiece on the shaft and carefully hit the bearings with a rubber mallet.
- Secure the crosspiece and pulley, put on the belt.
- Place the machine vertically and check the smooth rotation of the shaft.
- Install the front door, top cover and rear hatch.
Do-it-yourself repair of the Ariston Margarita 2000 washing machine is completed.
AVSL 100
The AVSL 100 model has a malfunction that is not found in other Ariston machines. When the washing mode starts, all the indicators light up, but the wash does not start, water does not fill, and the drum does not spin. The device is not equipped with a self-diagnosis function, so the malfunction cannot be determined by the error code.
Users have determined that the malfunction occurs due to wear on the motor brushes. To replace the brushes, you need to remove the electric motor, which is not difficult. To do this, you need to remove the top cover and back panel. Disconnect the wires, unscrew the bolts holding the motor and remove it. Replace the brushes, install the electric motor in place, and reassemble the housing in the reverse order.
AVTF 104
The peculiarity of replacing the drive belt in the Ariston AVTF 104 model is associated with the design feature of vertical machines. Access to the pulley and drive belt is through the side wall, rather than through the back, as with front-loading models. Sequencing:
- Remove the lower decorative apron, unscrew the 2 bolts securing the side cover.
- From the rear side, unscrew the 7 bolts securing the right side wall.
- Using caution, remove the side panel - it is attached to the top with plastic hooks.
- Remove the belt that has become unusable.
- Buy a belt with the same number of grooves. Model 1213 H8.
- Place a new belt on the motor shaft, pull it halfway around the drum pulley, insert a screwdriver under the belt and, turning the pulley counterclockwise, put the belt on the rim.
- Check belt tension. It should not sag or fly off. To increase tension, move the belt 1 or 2 grooves of the motor shaft closer to the edge.
- Reassemble in reverse order.
Bearings are worn out
If, during washing, the owner of the equipment hears an increasing hum, which turns into a loud knock during the spin cycle, this most likely indicates the failure of the bearings. To verify this, open the hatch and manually turn the drum. If the bearings are deformed, a strong play will be clearly felt.
This malfunction occurs as a result of prolonged use. The seal that covers the seat and bearing dries out over time and cracks form on it. Moisture penetrates through them, washes out the lubricant, and as a result, the bearing rubs and deforms during operation.
Troubleshooting this type of fault is much more difficult than replacing a heating element or pump. To do this, the owner of an Ariston washing machine will need to completely disassemble his device and remove the tank and drum from the housing.
Further repairs depend on the type of tank. Usually on washing machines of this manufacturer it is non-separable, so you will need to cut it into two halves along the seam. You should first select the bolts with which the parts of the tank will be connected during assembly and drill holes of the appropriate diameter along the seam.
Next, the faulty bearings are knocked out and new ones are installed in their place. The seals also need to be replaced.
After repair, the Ariston washing machine is assembled in the reverse order. The tank halves at the joints must be lubricated with silicone sealant to avoid leaks.
Replacing bearings is a very complex and difficult process, therefore, if you are not confident in the successful completion of the repair work, you should contact specialists.