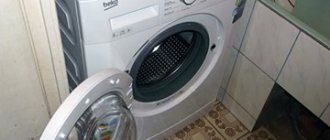
The products of the Polish company Hansa entered the Russian market recently, but have already managed to gain a good reputation.
Buyers of washing machines of this brand are attracted by their pleasant appearance, reasonable price and fairly high level of reliability.
However, some Hans models cause trouble for owners in the form of various types of breakdowns. Some of them can only be fixed at a service center, but many can be fixed at home. So, Hans washing machine - do-it-yourself repair.
Major breakdowns of Hans washing machines
Users and experts note a number of unreliable Hans washing machine systems.
They are the ones that fail most often. The list of “unreliable” included the drum and pump, drum flywheel and oil seals. The electronic modules of the unit also have complaints.
Often machines fail due to a clogged drain mechanism or inlet filter. A suspicious noise indicates wear on the drive belt, brushes or bearings.
It happens that the electronic controller fails. The machine refuses to carry out the washing program, its drum begins to rotate only in one direction, the machine does not turn on or turns off spontaneously - this means that some kind of defect has formed in the device’s memory.
In some cases, it is necessary to change the electronic board, and sometimes it is enough to reprogram it.
Fixing problems with electronics is the work of specialists; it cannot be done at home. Malfunctions related to the mechanical part of the machine can be repaired independently.
Checking the operating modes of the washing machine using a service test
The check is performed in the following sequence:
- Set the program selection switch to the position corresponding to the selected test (except “0”).
- Press and release the START button.
- Control the execution of selected operations.
Short service test
A shortened test procedure is provided to check the performance of the main functions of the SM during statistical tests on the production line. CT can also be used to quickly check the SM by service specialists.
To carry out the test, the washing machine must be connected to the water supply network with the ability to manually shut it off.
The procedure for launching a shortened ST is as follows:
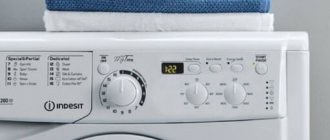
- set the program switch to position 1 (see figure above);
- press and hold button 17 (START/STOP). At the same time, the programs are switched as follows: 1 (initial position) - 2 - 3 - 2 - 3. The switch is held in each position for at least 1 s;
- after this, indicator 18 (START/END) should blink;
- release button 17;
- alternately (with a delay of 1 s) move the program switch to the following positions: 16 - 15 - 14 - 13 - 12 - 11 - 10 - 9 - 8 - 7 - 6 - 5;
- press and hold button 17;
- The program switch is moved to position 4;
- release button 17.
If the CT startup is successful, indicators 19 (OPERATION) and 20 (DOOR LOCK) on the front panel of the SM should light up, and indicator 18 (START/END) will flash.
Then perform a shortened ST in the following sequence:
- Move the program switch to one of the positions other than 1 and 4.
- Within 60 s, the drum begins to rotate at maximum speed (for each specific SM model, the rotation speed may be different).
- The water inlet valves are turned on alternately in the following sequence: for 6 s through the pre-wash chamber - pause 6 s - through the softener chamber (6 s) - pause 6 s - and then through the main wash chamber to the first pressure switch level (about 8 l for SM with a laundry load capacity of 5.5 kg).
- Within 35 s, the water heating element is turned on.
- Within 2 minutes, the water in the tank heats up to 30°C. At the same time, the drum begins to rotate as follows (as in washing mode): 12 s clockwise - pause 3 s - 12 s counterclockwise - pause 3 s. Then the cycle repeats.
- The valve for filling water through the softener chamber is turned on until the maximum tank level is reached. After this, the shortened ST is completed.
Note.
- One of the disadvantages of this CT is that after its completion, water remains in the SM tank. Therefore, after starting step 6 ST, manually turn off the water, otherwise you will have to drain more than 8 liters of water (as after performing step 3).
- The execution of ST can be interrupted at any place. To do this, you need to press and hold button 17 for 3 seconds - indicator 19 will go out and indicator 18 will light up.
Full service test
A full service test allows you to check the performance of most modes and functions of the washing machine.
To carry out the test, the washing machine must be connected to the water supply network and to the sewerage system.
The procedure for running a service test is as follows:
- Set the program switch to position 1;
- Press and hold button 17 (START/STOP). At the same time, switch programs as follows: 1 (initial position) - 16 - 15 - 16 - 15. The handle is held in each position for at least 1 s;
- After this, the G1 indicator (START/END) should flash;
- Release button 17;
- Alternately (with a delay of 1 s) move the program switch to the following positions: 14—13—12—11—10—9—8—7—6—5—4—3—2;
- Press and hold button 17;
- Turn the program selection knob to position 2;
- Release button 17.
If the service test has been started correctly, the G2 (OPERATION) and G3 (DOOR LOCK) indicators should light up on the front panel of the washing machine.
- Then the verification operations of the service test are performed in the following sequence:
- Move the program selection knob to one of the positions other than 1 and 11-16.
- Press and release button 17 (START/STOP).
- Monitor the execution of the selected service test operation (depending on the position of the program selection knob - see Table 4). During the test, indicators G2 and G3 are illuminated, but indicator 17 (START/STOP) is not.
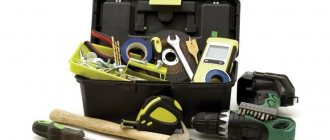
Necessary tool
Before you begin disassembling and repairing Hansa, prepare the following tools:
- screwdrivers – Phillips and flathead;
- wrenches (flat) - 19 and 8/10;
- clamp pliers;
- pliers;
- wire cutters
You will also need a special tool - a service hook.
If you need to replace bearings, stock up on a set of end tools, an extension cord for them, and a screwdriver. You will also need bearing pullers and special lubricant - a repair kit for waterproof bearings.
P O P U L A R N O E:
Other reasons that render the power supply unusable: Read more...
GRAVERS
Previously, we already talked about one device for harvesting. Today we’ll see how to make the same device from a plastic bottle. One of the most vivid fruit and berry fantasies of very skillful hands is rightfully “grabbers” - special devices for collecting hard-to-reach fruits. Read more…
An article for beginner radio amateurs. It provides examples of checking the main radio components used in electronic equipment (resistors, capacitors, transformers, inductors, chokes, diodes and transistors) using a multimeter or a conventional pointer ohmmeter. Read more…
Troubleshooting procedure
Troubleshooting any problem in a washing machine begins with disassembling it.
First of all, remove the top panel. It is attached to the casing with Phillips screws. Having unscrewed them using a Phillips screwdriver, lift the back side of the panel and move it towards the rear of the car until it is completely free. After this, the part can be easily removed.
Further actions depend on what kind of breakdown is planned to be repaired.
Washing machines may have electronic or mechanical parts that fail. It is almost impossible to repair electronics on your own, but when it comes to mechanics, many breakdowns are beyond the control of even the most experienced technician. Do-it-yourself Beko washing machine repair - causes of breakdowns and ways to eliminate them.
You will find everything about repairing Zanussi washing machines with your own hands here.
This information https://aquacomm.ru/cancliz/mnogokvartirnyie-doma/santehnika/stiralnaya-mashina-ardo-remont-svoimi-rukami.html will help you deal with the main breakdowns of Ardo washing machines. You will learn what to do if the unit does not drain or heat the water, and also why the machine makes a lot of noise.
Replacing the heating element
Following the top panel, the control panel is dismantled. It is held on by two screws. To get to them, you need to remove the detergent dispenser hopper.
Having released the control panel, it is moved outward and rotated almost 90 degrees (until it is completely unhooked from the locking latch). The next step is to rotate the part 180 degrees and then hang it on the side wall of the machine casing using a service hook.
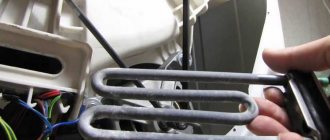
Replacing the heating element of a washing machine
After unscrewing the fasteners, remove the base panel. It is held on by two mounting screws. It is enough to unscrew them and then pry off the panel with some available tool.
Remove the wires from the terminals of the heating element, unscrew the nut securing the heating element and carefully remove it. Replacement is carried out in reverse order.
To avoid damaging the surface of the panels, only plastic tools should be used as available tools.
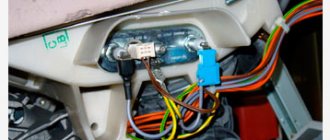
Replacing the noise filter
Once the top panel is removed, you can disconnect the electrical wires from the noise filter terminals. Then you need to unscrew a couple of screws securing the filter and remove it from the mounting sockets.
Replacing the drive belt
If the problem is in the drive belt, then after dismantling the top panel, you need to unhook the spring on which the loading tank is suspended.
And then, turning the pulley, remove the old belt.
The new one is installed in the reverse order.
Replacing bearings
Replacing bearings in a machine is one of the most difficult repair jobs. In this case, most of the unit must be disassembled:
- Remove the top panel.
- Remove the detergent drawer: it hides two screws that will need to be removed.
- After this, unscrew another pair of screws holding the aluminum strip (it is located under the top panel).
- Now you can disconnect the clamps from the tank and cuvette hoses.
- After unscrewing the two screws holding the bottom facing panel (covering the pump filter) on the sides, remove it. Underneath there are screws that hold the middle panel with the loading hatch.
- The clamp that presses the cuff of the loading hatch to the facing panel must also be dismantled.
- Remove the electrical connector from the UBL. Now you can unscrew all the remaining fasteners and remove the facing panel along with the loading hatch.
During repairs, carefully place the panel with the hatch in a safe place: the hatch breaks easily if dropped.
Rear of the drum from the pulley side
You've reached the weight plate. Using a 13mm socket, unscrew the fastener and remove it.
Your next steps:
- Using a socket head 8, unscrew all the bolts located around the perimeter of the front wall of the loading tank and remove it together with the hatch cuff. The exposed wires of the heating element do not need to be removed.
- Disconnect the spring that connects the rear top point of the tank to the rear wall of the machine.
- Remove the pair of bolts securing the engine frame. Then slide it back off the guides and it will fall down.
- All that remains is to disconnect the clamp connecting the pump and the lower corrugated pipe.
The tank, freed from all fastenings, can now be removed from the car. The shock absorbers on which it sits will remain in place, and the rubber bushings will come out with it.
All further work is carried out directly on the tank:
- Unscrew the nut holding the pulley with a 19mm wrench. Remove the pulley from the shaft.
- We take out the shaft. If the bearings are good, it comes out easily. But if there is rust in the supporting units, this operation becomes problematic. Bronze knockers are used. It’s more convenient to work with two people: one taps the shaft with a drift, the other pulls the drum.
- Having taken out the shaft, begin to remove the bearings.
The bearings are pressed tightly, so there is a danger of leaving the outer race inside - the inner part of a large-diameter bearing can crumble when knocked out. Therefore, the outer bearing of smaller diameter is knocked out first.
If removing bearing units is difficult, you can use WD lubricant.
After removing the bearings, proceed to install new ones. Hans washing machines have three designs of bearings - depending on the modification of the machine and the method of loading the tank.
It is best to buy a complete repair kit - it includes:
- pair of bearings;
- stuffing box;
- device for safe installation of units;
- special waterproof lubricant.
If you install bearings that are misaligned or replace them, they will soon require repair again due to water getting into them.
Upon completion of the repair work, the machine is reassembled in the reverse order. Make sure that the heating element fits into the socket specially designed for it, that the sealing rubber is not pinched, and that the spring at the back of the tank is installed in its previous position.
No matter what washing machine you purchase, any unit is not immune from breakdowns. Whirlpool washing machine - diagnostics and repair of basic faults, read carefully.
We will discuss methods for eliminating the main breakdowns of Bosch washing machines in this article.
Reasons for errors
Error codes for Hansa Comfort washing machines (800, 1000, 1200) and Hansa Optima models (800, 1000) may occur due to the following malfunctions of the equipment:
- the door lock is faulty, the triac is broken or it is automatically blocked (E 01, 11, 42, D);
- low pressure in the water supply, clogged hoses, a faulty or broken sensor that takes into account the amount of water collected or its level indicator (E 02, 04, 05, B, A+C, C+D);
- clogged hose filter or pump that discharges water (E 03, 06, B+C+D);
- The temperature device of the washing machine is broken, there is a short circuit or a chain break (E 31, 32, A+D);
- malfunction or short circuit of the drive motor (E 21, 22, C);
- failure in the power supply parameters (E 08, A+B+C+D);
- failure in non-volatile memory, destruction of its microcircuit (E 52, A+B);
- the float sensor is faulty, liquid leaks into the pan due to depressurization of the drum or other elements (E 07, A).
Repair work on Hansa Comfort and Optimum washing machines should be carried out by professionals to avoid further unwanted failures and disruptions.
Thus, the Hansa Comfort and Optimum series (800 and others) have a convenient diagnostic system, which, if the washing machine breaks down, shows the required code and allows for quick and targeted repairs.
How to call a service technician?
Let's take a closer look at the process of calling the wizard:
- We recommend writing down the model and manufacturer of your washing machine. This information will be useful so that the technician can replace the necessary part on the spot, which he must take with him.
- Call our service center at phone number: or write to us. The company manager will answer all your questions and give answers to everything that interests you.
- Next, the technician will contact you, you can find out the probable cause of the equipment failure and find out the price for repairs.
- You can agree with the company manager or technician on a time when he will come to you and be able to repair the faulty unit.
- At the specified time, a service center employee will arrive at the address and carry out repair work.
Repair Tips
You cannot repair equipment without performing diagnostics and finding out the cause of the breakdown. If it is insignificant, then it is not necessary to take the washing machine for service. It is better to do the repairs at home yourself. You need to be careful when assembling it afterwards so that not a single part is lost. If you have the following defects, you need to call a specialist:
- the appearance of vibration and noise in technology;
- the water stopped heating or draining;
- The electronics have failed.
It is worth carefully monitoring the operation of the equipment and periodically cleaning the filter. If the water in the house is hard, then special softening agents are added when washing. In addition, Hansa washing machines can last for many years if preventative measures are taken on time. In the event of a breakdown, the equipment is diagnosed and the cause of the malfunction is determined. As you can see, you can do the repairs yourself or call a specialist. Everything will depend on which part has failed.
For details on bearing replacement, see below.
Diagnostics
Before proceeding to troubleshooting, repair technicians conduct diagnostics of the equipment. The process is divided into several stages.
- Service mode starts. The electrical appliance is set to the “Ready” state. The knob is turned to the zero program, pressed and held in START mode. Then the switch is set to position 1, and then turned to program 8. The START button is released. Again the switch is placed in the initial position. The button is pressed and then released. The machine door should be locked.
- The filling of equipment with water is checked, first by monitoring the level switch, and then using electric valves.
- The liquid is pumped out with a drain pump.
- The electric heater and temperature sensor are inspected.
- The operation of the drive motor M1 is checked.
- A water injection system is being investigated.
- All operating modes of the SM are disabled.
After diagnostics, the washing machine is taken out of service mode.
Prices for services
| Services | Price from) | Application |
| Departure + Diagnosis of the problem (in case of repair work)* | ||
| Departure + Diagnostics | ||
| Replacing shock absorbers | ||
| Replacement of drum, tank | ||
| Replacing the motor (motor, drum drive, electric motor) | ||
| Replacing the wiring harness | ||
| Replacing the fill/inlet valve (KEN, water supply valve) | ||
| Replacing buttons and switches | ||
| Replacing the cross (shaft) | ||
| Replacing the hatch (door, cover) | ||
| Replacing the hatch cuff (elastic band, rubber seal) | ||
| Replacing the tank support | ||
| Replacing the pipe | ||
| Bearing replacement | ||
| Replacing the pressure switch (water level sensor, relay) | ||
| Replacing the drive belt | ||
| Replacing the programmer (program selector, command device, timer) | ||
| Replacing the counterweight | ||
| Replacing springs | ||
| Replacing the hatch handle | ||
| Replacing the oil seal | ||
| Replacing the mains filter (FPS, starting capacitor) | ||
| Replacing the drain/fill hose | ||
| Replacing the drain pump (pump) | ||
| Replacing the drain filter | ||
| Sunroof glass replacement | ||
| Replacing the thermostat (water temperature sensor) | ||
| Replacing the heating element (heating element) | ||
| Replacement of UBL (hatch lock, lock) | ||
| Replacing the drum pulley | ||
| Replacing the drum curtain of a vertical machine | ||
| Replacing motor brushes | ||
| Repair of control module, board, block, triac | ||
| Cleaning the fill/drain system | ||
| Clearing the blockage | ||
| Removing a Foreign Object | ||
| Installation / Connection of the machine | ||
| Telephone consultation | ||
| Malfunctions | Price from) | Application |
| Gives an electric shock | ||
| Vibration / Vibrates heavily / Jumps / Shakes / Jumps | ||
| Stinks / Rotten smell | ||
| Knocks out the machine (RCD, traffic jams) | ||
| Gives off a fur coat | ||
| Takes a long time to wash | ||
| Freezes / Stopped during washing / Freezes during the spin cycle / Stopped with water | ||
| Programs are frozen | ||
| Smell of burning / Smoke | ||
| Key flashing | ||
| Indicators (buttons, lights) are flashing | ||
| Won't turn on/Won't start/Won't start working/Stopped working | ||
| Indicators do not light up | ||
| Doesn't heat water / Doesn't heat water | ||
| The door does not close / The hatch does not block | ||
| The drum does not spin / The drum is jammed / The drum does not rotate | ||
| Doesn’t take up water / Doesn’t get water / Doesn’t fill up with water | ||
| Doesn't pick up speed / Drum doesn't spin well | ||
| Doesn't stop/Won't turn off/Won't finish washing | ||
| Doesn’t spin clothes / Stopped spinning / Spin doesn’t work | ||
| The hatch (door, cover) does not open / Blocked / Jammed | ||
| Doesn't rinse clothes | ||
| Timer doesn't work | ||
| Buttons don't work | ||
| Doesn't respond / Doesn't switch modes | ||
| Does not drain water / Drain does not work / Does not drain water / Drains poorly | ||
| Doesn't wash / Takes up water but doesn't wash / Doesn't start washing | ||
| Water remains in the drum | ||
| Remains powder, conditioner | ||
| Turns off during washing | ||
| Stains laundry / Doesn’t wash things | ||
| Water overflow/Collects a lot of water | ||
| Squeaks | ||
| Doesn't wring clothes well | ||
| Constantly fills with water / Constantly fills with water | ||
| Tears things | ||
| Programs crash | ||
| The hatch handle is broken | ||
| Broken hatch (door, cover) | ||
| Immediately drains water / Fills and drains water / Continuous drainage | ||
| Leaking / Leaking / Leaking | ||
| Noisy / Humming / Knocking / Rattles / Creaks / Crackles / Whistles | ||
| Other fault | Call |
None « HAIER Bearing Replacement | Replacing the HISENSE bearing »
Electric motor
The motor drives the washing machine drum. The electric motor spins the “centrifuge” to user-specified speed through the drive belt. All Hansa are equipped with commutator motors. In terms of quality, inverters are better than collectors, but direct drive machines are an order of magnitude more expensive. The maintenance-free life of an inverter motor is 10-15 years, while a commutator motor still has to be periodically serviced.
The commutator motor reacts sharply to voltage changes in the network, so it is better to use a stabilizer to connect Hansa washing machines.
Collectors will have to be serviced every 3-5 years. We are talking about electric brushes, which tend to wear out. When the graphite rod is worn out by more than 50%, a replacement pair is necessary. You can do the work at home without turning to a professional for help.
The electric motor is the “heart” of an automatic machine. It starts working immediately after starting the washing mode. The control module regulates the motor speed, thereby controlling the drum rotation speed from low, at the beginning of the cycle, to maximum, at the spin stage.
Tank and bearings
There is no need to remove the cuff. Remove the drum pulley. Unscrew the fastening screw.
I work in the household appliance repair industry. Extensive experience in restoring washing machines and dishwashers.
Important! This is another nuance of the HANSA washing machine. Bolt size - 18! Use an adjustable wrench.
A thread locker is applied at the factory, so it is not easy to unscrew. It is advisable to use an extension lever to increase the pressure. At the first stage this is mandatory.
You can use a pipe for this. And fix the pulley using pliers, inserting the handles between the stiffening ribs of the tank.
Pulley with unscrewed bolt
Unscrew all the mounting screws in a circle. The photo shows parts of the shock absorbers that remain.
Tank with screws
We divide the tank and take out the drum. It just won't come out like that. It is necessary to hit the shaft with a hammer through a wooden plank. Then we inspect the surface for the presence of development. In this case, an extreme situation occurred - the internal bearing collapsed, because part of it was welded to the shaft. This happens, especially if a machine with a malfunction has been in use for a long time.
Drum shaft with bearing part
This problem can be solved. You will need a grinder, a metal disc and a little skill. You need to cut off one edge (or two). After this, you can use a gas wrench and remove the stuck part of the bearing.
This is what he looks like after working as a grinder.
Cut off part of the bearing
Removed part of the bearing
This is what a running shaft looks like
Important! Use WD-40 penetrating lubricant if you have difficulty dismantling metal parts.
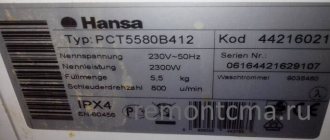
The parameters of spare parts for other Hansa SMA models can be viewed in the correspondence table.
Be sure to clear debris from the tank, drum, and shaft seats. Photos of knocking out the bearings, pulling out the oil seal, and installing new ones did not work out. Therefore, I suggest watching a short video on these works.
Be sure to use lubricant! Apply it also to the shaft.
Lubricant on the oil seal seat
It is better to use a special lubricant for washing machine seals. You can buy from suppliers of spare parts for household appliances. It is appropriate to use analogues. This is discussed in the video.
Lubricate the oil seal well.
New oil seal with lubricant in the tank
It is recommended to use “super moment” glue for a reliable connection.
Fastening the oil seal in difficult cases
The following bearings are used on this model of the Hansa machine:
- 6203;
- 6204.
The oil seal has the following dimensions: 25*47*10.
On other models the following may be used:
- 6204;
- 6205.
Disassembling the case
You can disassemble the electrical appliance yourself. You need to be very careful and careful while working so that the screws do not get lost and the parts do not break. The whole process is divided into several stages.
- The top cover is removed and the bolts are first unscrewed.
- The panel at the bottom of the device is dismantled. The screws are unscrewed from the end: left and right. Another self-tapping screw is located near the drain pump.
- The container for chemicals is pulled out. The screws under the device are unscrewed.
- Two self-tapping screws are unscrewed from the top, which connect the control panel and the housing itself.
- The board itself is pulled out and left to the side. To prevent the part from accidentally breaking or falling off, it is screwed with tape.
- The transverse metal bar is dismantled and the pressure switch is unhooked.
- A screw is unscrewed from the back, which secures the incoming valves for filling the liquid. They are removed and the filter mesh is immediately checked for blockages. If there is debris and dirt, the part is pulled out using pliers and a screwdriver. It is washed under the tap and installed in place.
- The upper suspensions are dismantled; you need to handle them carefully, since they are made of concrete and weigh a lot.
- The spring is detached and the dispenser is removed, but first the clamp is moved from the pipe. The rubber is pulled out.
- The hatch opens and the clamp holding the cuff is tightened. The rubber comes off. The screws are unscrewed from the front panel, which is easily removed.
- The counterweights located near the cuff are dismantled. The grounding and the chip are pulled out from the engine.
- The drive belt is pulled off from above and the motor itself is pulled out, the screws are unscrewed.
- The chips and contacts are detached from the tubular heater. The plastic clamps connecting the tank and the cable are cut off with wire cutters.
- The terminals are removed from the drain pump and the pipe is unhooked.
- The tank itself is pulled out. The device is heavy, so you will need an assistant.
The case is completely disassembled. All details are carefully examined. Broken devices are replaced with new ones, and the machine is assembled in the reverse order.