Regardless of the model of the washing machine, its owners may experience damage to the cuff or, as it is also called, rubber. And, if most machine malfunctions are difficult to repair on your own, you can replace the cuff at home. Replacement is the only reasonable solution in this case. Yes, you can glue it, but where is the guarantee that after a short period of time the washing machine will not leak again? If the cuff does not tear at the gluing site, it will tear in another place.
What are the reasons for wear of a part?
The breakdown of elements of a household appliance depends on several factors. Thus, the wear factor on the hatch cuff of a washing machine may depend on the following reasons:
- The machine has been in use for a long time. Each part is designed for a specific period of use. If washing was done regularly and for a long time, the sealant has lost its properties. It can change its density, that is, become too soft or vice versa, which will lead to a loose fit to the surface.
- The material is greatly influenced by detergents. They have a chemical composition, especially substances for removing stains, scale, and bleaches. Also, when washing work clothes, oils can get on the part, which also affects its wear.
- Temperature difference when washing on different modes, using the drying function.
- When loading the drum, the recommended weight must be taken into account. Since overload will lead to deformation of the hatch cuff. Load and unload carefully, try not to frequently touch the cuff.
- After draining the water, water may remain in the parts, which will lead to the formation of fungus. It also affects the deterioration of rubber quality.
- Before putting clothes into the drum, be sure to check all pockets and remove excess items, as they can lead to cuts or punctures. You also need to wash clothes and shoes in special bags that have parts on their surface that can cause damage.
- Rubbing may result from contact with other machine parts. If such a moment arises, it must be urgently eliminated. If rubbing occurs, apply a patch.
- An incorrectly positioned washing machine will vibrate strongly, which will cause the rubber seal to rupture. Before replacing it, the cause of the rupture must be eliminated.
- Poor quality material. Manufacturers try to save on materials and install low-quality parts. Household appliances should be purchased from proven and proven brands.
Signs and causes of malfunction
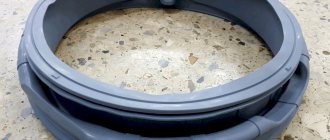
The main sign of a faulty cuff is water leakage both during washing and during rinsing and spinning. Scuffs, cracks and holes appear in this elastic band.
A silicone seal can work for 10 years without any problems, especially when the SMA is quite expensive. The manufacturer, which is a well-deserved and reputable brand, does not skimp on the quality of materials and technological processes for manufacturing parts.
No matter how high the quality of the parts, they are subject to gradual wear. The cuff cracks from frequent overheating when you wash in boiling water, due to the use of special bleaching reagents, loaded either separately or contained in expensive washing powder. Scale washed off from the boiler (and a remedy for it), excessive water hardness, as well as untimely cleaning of the seal from mold that forms on it also have an impact. The latter is the most dangerous: mold itself is quite adaptable to new conditions. Growing into any material, including rubber, it irreversibly damages it over time. In addition to mold, other types of fungus are also dangerous. By creating growths on the surface of the seal, they disrupt the outer smooth contour of the cuff.
Other signs are:
- inability to close the hatch;
- extraneous sounds when the washing machine is operating.
There have been cases where the machine leaked water after an iPhone was accidentally washed without being removed from its pocket. The metal frame of this smartphone, which fits the device around the perimeter, completed its dirty deed, namely, it tore the thinned SMA cuff in several places.
Any electrical appliance, including washing machines, will soon break if handled carelessly. Not entirely careful transportation can also damage it, for example, when moving to a new apartment.
As for washing, it is permissible to use special bags that are easily permeable to water and washing powder, and also to turn clothes inside out. The latter will protect the drum, cuff and hatch door from fasteners, locks, buttons and plaques from which they cannot be released.
Installation of new sealing rubber
Carefully replacing the rubber hatch seal is a responsible matter; the continued operation of the washing machine will depend on it. Especially if the repair is done by yourself. To change old tires to new ones, you need to match the mark of the cuff and tank. Then insert the curved side of the cuff onto the grooves lubricated with soap. To do this, you need to take the rubber by the inner side and carefully press it onto the rim of the tank with your fingers. But, when the main part of the rubber has already been inserted, further insertion of the cuff will be difficult, since the inserted side will begin to slip.
The area of the cuff that has not yet been inserted should be put on the tank ring, moving your thumbs towards each other. When you have managed to completely replace the tires, you should finally feel the entire rim of the tank to be sure of the tightness of the fit. All repairs to the washing machine should be carried out very carefully, avoiding the use of sharp objects, so that the new rubber does not tear.
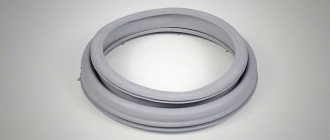
What is a cuff?
The main purpose of the rubber part installed on the hatch of an automatic washing machine is to hermetically seal the loading tank during operation of the machine. This layer does not allow even a drop of water to seep out.
The location of the cuff and its appearance completely depends on the model of the machine. If loading is frontal, a rubber layer connects the tank to the front wall of the unit and has a round shape. In models with vertical loading of laundry, the part combines the tank with the upper wall and has the shape of a rectangle.
Without a door seal for loading laundry, the machine door cannot be closed tightly. The special composition of rubber or silicone from which the part is made ensures complete sealing of the tank during washing
Previously, seals were made of very flexible rubber. In modern models, cuffs are almost always installed from a similar material of artificial origin - silicone. It does not lose its elastic properties over a wide temperature range and does not “tan” over time.
Cuffs of different models differ in size and shape. If the washing machine has additional functions, for example, drying and aquaspray, the part may have additional holes.
Prevention measures
To reduce the number of repairs, experts recommend carefully studying the manufacturer’s instructions and following the following recommendations:
- use of high-quality detergents with a low level of aggressiveness;
- removing all foreign objects from pockets;
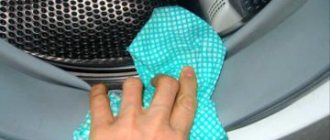
- Carrying out monthly cleaning of the cuff from accumulated dirt and detergents;
- compliance with the volume of laundry washed;
- carrying out timely and regular preventive measures for the entire apparatus.
Experienced housewives do not recommend putting bulky outerwear and hard shoes in the drum, contact with which can cause unnecessary friction between the rubber and the product.
A special flask with salt, which is installed in the path of water entering the machine, will help reduce the frequency of repairs. This trick helps soften the water and reduce the amount of salt deposits and scale. The use of special industrial compounds that are used together with detergents will help soften tap water.
Several times a year it is necessary to wipe the inner surface with a solution of vinegar or soda. This manipulation will help prevent the development of pathogenic microorganisms and mold, and the appearance of an unpleasant odor.
After each wash, you must thoroughly wipe the rubber seal and close the door only after the inside has dried.
An automatic washing machine is a device that can be seen in every living space. Like any household appliance, the machine needs regular technical inspection and replacement of deformed elements. When solving the problem yourself, you need to carefully study the technology for carrying out the work, as well as purchase high-quality components. If you have no repair experience, experts recommend contacting a special service center, where specialists will solve any problem efficiently and quickly.
Replacing the washing machine hatch cuff is shown in the video below.
Subtleties of cuff repair
It is not always possible to purchase new replacement material. Therefore, they repair the old one, but for this you need to know all the intricacies of repair.
When repairs may be needed
There are rare models of equipment for which it is difficult to find a suitable seal, so it is better to resort to repairing the cuff of the washing machine.
Recovery is also possible if the cuff is torn on the side or top. Then you can seal it instead of buying a new one.
How to select and prepare a cuff
When selecting a new seal, be sure to take into account what brand it belongs to.
If repairs are being made, you first need to find out the cause of the damage. Then select the material to apply the patch.
The patch should be strong and flexible. Rubber gloves may be suitable for this, but it is better to use material for sealing inflatable pools. The glue needs to be waterproof, for rubber products, and after drying, it will give flexibility and not dry out.
Instructions for sealing the seal
If gluing needs to be done in an inaccessible area, then for convenience you need to remove the part from the tank.
In order for the gluing process to give a positive result, you must follow the instructions:
- Preparing the patch. The material is folded into a series of layers that are glued together. Then the required patch size is cut out. It should be about one and a half times larger than the crack.
- Degreasing the gluing area and the material itself. The area should be degreased with maximum overlap around it. Alcohol and solvents are used for work.
- Allow it to dry for a few minutes.
- Apply glue to the gluing area and to the material. Considering the instructions for the glue, wait a while.
- Place the surfaces to be glued together and press down.
- Wait until completely dry. Complete drying occurs within 24 hours.
- Correctly install the part in place.
It is possible to combine gluing with stitching the gap. In this case, the tear is sewn together with artificial thread, and then a special sealant is applied to the seam and left for a day. Afterwards it is possible to install the part in its original place.
Removing the internal (second) clamp
Before removing the second clamp of the washing machine, you must carefully inspect the cuff for a mark for installation. Thanks to this mark, the cuff is located in a strict position in relation to the tank. This ensures hermetic closure of the hatch and proper drainage of water. If it was not possible to find the mark, you should mark on the rubber band its location in relation to the tank. This little detail will turn out to be important when a new cuff of the washing machine is installed. Then the grooves, freed from the worn rubber, must be thoroughly cleaned of accumulated dirt and thoroughly lubricated with a soap solution. When the grooves are slippery, it will be easier to replace the cuff with a new one.
Preparation for gluing
If you still decide to glue a silicone part, prepare properly for the job:
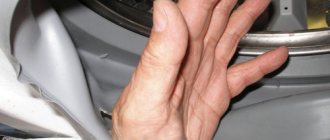
- Inspect the seal, determine the cause of damage and the advisability of gluing. To get a good look at everything, you should press out the spring clamp that holds the front part of the cuff on the outside of the washer. For Bosch, Siemens, Samsung, Beko, LG, GE and Hansa machines, to access the seal, you must remove the entire front wall of the housing.
- Decide whether the cuff needs to be removed for repair. Sometimes the damage is “on top”, and you can seal it without removing the part. But it will be safer and neater if you apply the patch from the inside, and to do this the seal will have to be removed. True, there are cars in which the entire tank must be dismantled to disconnect the cuff. Immediately think about whether you have enough experience to put him in his place.
- Choose a patch that is durable and elastic. Experience shows that condoms and household rubber gloves, folded in two to four layers, work best in this capacity.
- Choose your glue. It must have maximum adhesion and elasticity (these properties are usually indicated on the packaging). Instant rubber and shoe adhesives work well.
How to seal the hatch cuff in a washing machine
Cause of failure
Typically, the cuff breaks due to cracks that occur due to excessive vibration of the drum of your washing machine. To do this, first of all, you need to balance your unit on the floor surface.
The cuff also breaks due to friction against another part of the washing machine. In the future, friction will lead to displacement of the drum and more serious malfunctions of the washing machine. In this case, before gluing the cuff, eliminate any problems in the mechanism.
But, as experience shows, most often the cuff breaks due to the fact that foreign things regularly get into it, such as small change or sharp objects that you did not remove from the clothes before washing. If the cuff of your washing machine is cracking due to age, repairing it will not help. It will tear every time you wash it.
Preparation for repair
If the damage to the cuff is located on the outside, it can be glued without removing it. If the damage is internal, remove the clamp holding the cuff in place. In some models, this will require removing the hatch or even the drum. Select a patch and glue. An ordinary medical glove, or even a condom, folded in several layers, is suitable for this purpose. The glue must remain elastic after hardening and be moisture resistant. Regular rubber or shoe polish is perfect for this purpose. You will also need scissors, surface degreasing liquid (alcohol, gasoline) and a soft cloth.
Cuff repair
If you choose rubber to seal the cuff, cut it to the size of the damaged area of the cuff. If you decide to seal the break with a regular condom or glove, fold the material in several layers, carefully gluing each layer of the future patch. And only then cut out the patch.
Please note that it should be approximately one and a half centimeters larger than the gust on all sides. The cuff must be thoroughly degreased, and after sealing, do not use the washing machine for about 24 hours.
It is important that the patch lies on the cuff as naturally as possible, does not tighten the cuff and is smooth itself. After a day, run a test wash to make sure that the washing machine works without leaks
If you follow these instructions, the cuff will stop leaking. But it is worth remembering that gluing the cuff is only a temporary measure that will help until you purchase a new cuff, and it is better not to postpone this purchase. Frequent washing or washing at high temperatures may cause the patch to come off.
Examination
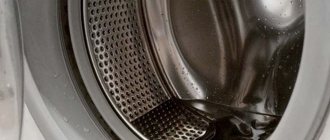
When you have managed to replace the sealing rubber of the hatch and install the clamps, you should check the quality of the repair. Having set the rinse mode, we start the machine, wait two or three minutes, and drain the water. When the water has subsided, tilt the machine in the opposite direction and inspect the bottom of the rubber. If there are no drips, then the repair was successful.
Of course, the first is determination by the eye, i.e. visually. Look carefully at the cuff itself; if you find a hole or puncture in the elastic band of the washing machine, you have found the reason for the appearance of a puddle of water on the floor, i.e. The cuff tore.
The second is the nature of the leak. Those. water may appear from below under the washing machine or leak from the hatch during washing or rinsing.
If leaks occur, carefully inspect the hatch cuff to determine damage. As practice shows, detecting them is not difficult.
What causes the need to replace the washing machine door seal?
1. Natural “physical” wear and tear.
When washing clothes, the cuff, which is made of rubber, is constantly exposed to various types of influences: changing cold and chemical detergents, friction against the elastic band of the clothes and the drum of the washing machine. Over time, under the influence of the above factors, the elastic acquires such physical qualities as fragility and looseness, which undoubtedly violates the tightness of the cuff, and, as a result, leakage occurs.
The hole might look like this
2. Mechanical damage. When washing, various sharp objects (a pin, a screw, small children's toys, etc.) may accidentally fall into the drum of the machine, which tear the rubber seal. Or you could pinch the cuff by carelessly closing the door.
3. Mold or fungal lesions. In such a situation, it will definitely appear in the washing machine. The most common way to solve this situation is to replace the rubber seal on the washing machine.
What to do: replace or repair the cuff?
Do not rush to replace the cuff!
In some cases, you can save your finances and get away with repairing it. Wait and listen to a professional's advice on this matter. Often, if the cuff is damaged on the side or at the top, the repair will only consist of sealing it and not replacing it with a new one. By the way, for some unpopular models of washing machines it can be very difficult to find the necessary spare parts, so a specialist needs to repair the damaged seal.
Note! Repair by sealing the cuff is a temporary measure, because... it is constantly exposed to aggressive influences, both chemical and mechanical. Therefore, replacing a new one is a matter of time. It is on this basis that the cuff repair warranty is given for 2 weeks.
Repair of a rubber seal by a specialist includes the following steps:
Stages of work to replace the cuff
When contacting a specialist, find out the following information in advance:
- and, if possible, the washing machine model that requires seal replacement. For example, Bosch WLG2426WOE or LG F1089ND5. On the tag located on the body of the washing machine you will see the model number. If you yourself have already purchased a new spare part, you only need to indicate the brand of the device. We also ask you to indicate the time and day of the week that is convenient for you for the master’s visit. And of course, your contacts – address, phone number, first and last name.
On the day you specify, the specialist will call you back to clarify the time of the visit, because plans can sometimes change.
Advantages of our repair:
1. Convenient work schedule.
Specialists work from 8 a.m. to 10 p.m. every day, not excluding weekends and holidays. You choose a time that is convenient for you for repair services.
2. and a technician’s visit – the service is free when repairs are performed by a specialist from our company.
3. Carrying out repairs at home within 24 hours. There is no need to organize the delivery of the washing machine to the office yourself; all repair work will be carried out directly at home - the necessary tools and spare parts are always with you.
- Providing a guarantee. When installing a new cuff, you are provided with a 1-year warranty.
The process of replacing a cuff on a washing machine
Installing the cuff
The company replaces cuffs on washing machines in St. Petersburg and in large cities of the Leningrad region. A day after receiving your request, our specialist will rush to you and quickly repair the cuff of your “assistant” door, and most importantly - with a guarantee! We provide a 1-year warranty on the new cuff and repair work to replace it.
How much does it cost to change the hatch cuff on a washing machine?
The cost of replacing the cuff, excluding the cost of a new rubber cuff seal, starts from 1,900 rubles. The final cost of replacement is determined by a specialist on site and varies depending on the brand and model of the washing machine. The table shows the estimated cost of cuff replacement, which covers:
- cost of a new part,
- dismantling the old seal,
- installation of a new cuff.
| Washing machine brand | Cost of repair services, work of a master + spare parts) |
| Ariston | from 2700 to 6500 rub. |
| Atlant | from 3200 to 5500 rub. |
| AEG | from 3200 to 5900 rub. |
| Ardo | from 3900 to 6900 rub. |
| Brandt | from 3800 to 7200 rub. |
| Bosch | from 2900 to 6900 rub. |
| BEKO | from 3300 to 5500 rub. |
| Candy | from 3500 to 6500 rub. |
| Gorenje | from 3500 to 6500 rub. |
| Hotpoint Ariston | from 3800 to 7500 rub. |
| Indesit | from 2700 to 5900 rub. |
| Electrolux | from 3200 to 5900 rub. |
| LG | from 3500 to 7500 rub. |
| Miele | from 4500 to 11500 rub. |
| Siemens | from 4300 to 9000 rub. |
| Samsung | from 3200 to 6900 rub. |
| Zanussi | from 3600 to 7500 rub. |
| Whirlpool | from 3900 to 7900 rub. |
| Other brands | from 2700 to 12000 rub. |
| Call a specialist | For free |
If you purchased a new cuff yourself, then payment is made only for replacement or repair services (from 1900 rubles).
Contact companies
Replacing or repairing a cuff is a rather complex process that requires the necessary skills and knowledge. If you determine that the rubber seal is leaking or damaged, trust the professional technicians.
A maximum of 24 hours after your request, our experienced specialist will arrive to you and repair or replace the cuff of your washing machine. Everything is done accurately, quickly and, most importantly, with high quality!
Before you start replacing the cuff of the Indesit washing machine, you must disconnect it from the electricity. Repairs may be necessary if it becomes damaged or mold accumulates.
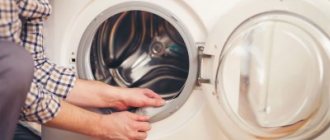
You can replace the rubber hatch seal without disassembling the machine and removing the tank. Since its outer edge is attached to the front body of the machine, and the inner edge is attached to the tank, you need to start removing the old cuff from the front.
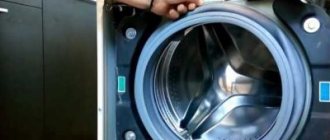
The photo shows detaching the door, but this is not necessary. It is enough to open the hatch and access to the cuff will be provided. If, nevertheless, it is more convenient for you to remove it, then you need to unscrew the two fastening screws, move the entire structure up, slightly pull it towards you and the door will detach from the body along with the hinge.
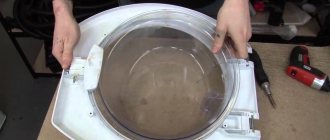
The cuff is attached to the front wall using a metal clamp, which is a wire in the shape of a circle, the ends of which are connected by a piece of spring for tension. To disconnect the clamp, you need to find the spring on it by inspecting the perimeter of the circle and pry it off with a flat-head screwdriver. Then, moving it to the side, remove the clamp.
Starting from any area and moving along the perimeter, manually detach the outer edge of the cuff from the front wall. After this, it is necessary to gain additional access to the interior. To do this, you need to remove the top cover of the washing machine. This will open up a view of the tank and its connection to the cuff, which is secured to it using a clamp made of a solid spring.
To disconnect, just grab the seal with your hand anywhere, closer to the tank, and carefully pull it out together with the clamp.
Before installing a new cuff, it is important to compare it with the old one in order to additionally visually verify the similarity of their sizes. Then find and understand for yourself the seats on which it will be fixed, as well as the marks of the upper and lower points:
- the top point is almost always marked with a triangular protrusion and is aligned with the mark on the tank during installation;
- a guideline for the lowest point; in addition to the same marks, there may be holes for water drainage in the cuff itself.
ATTENTION! It is very important to install according to the marks. Otherwise, the cuff may move during installation and may be damaged during subsequent work.
Installation must begin from the top edge, aligning the protrusion of the cuff with the mark on the tank. Holding the already attached upper section with one hand, press the rubber seal completely inside the body with the other hand. Next, starting from the top and moving around the perimeter in any direction, completely insert the inner edge of the cuff onto the washing machine tub.
For ease of installation, it is better to view it through the top, through the opening of the removed cover (photo in the center). After attaching the inner part of the cuff to the tank, you must carefully check the alignment of the marks. If they are displaced during the installation process, then you need to take the time to remove the cuff and perform the installation again.
Next comes the installation of the spring clamp. This is the most difficult part of replacing the cuff. For convenience, it is advisable to fold its outer edge inward. And disconnect the hatch lock by unscrewing two screws, as shown in the photo.
Insert a screwdriver into the locking hole and hook the spring clamp onto it (pictured on the left). This is necessary so that during the process of pulling the clamp onto the cuff it does not come off and remains fixed.
You need to tighten the clamp around the perimeter in any direction, both up and down. When tensioning, you need to constantly monitor the position of the screwdriver, especially if the work is done alone, without an assistant. Since in the event of weakening of the tension or other sudden movements, the screwdriver may move to the side and then the spring will jump off it.
When the spring is fully put on and is in the recess of the seat on the cuff, then holding it, you need to slowly pull the screwdriver out from under the spring.
Next, you need to feel the entire spring around the perimeter with your fingers and make sure that it fits correctly into the recess everywhere, and that the edges of the cuff fit exactly to the tank everywhere and are not wrinkled. Loose spring fits need to be corrected.
ATTENTION! If the spring does not fit tightly into the cuff seat, a leak may occur.
Also at this stage it is advisable to check the tightness of the connection between the cuff and the tank:
- To do this, use a ladle to draw water into the tank, but so that it does not flow out of it.
- If there are no leaks, then the spring is installed correctly.
- If leaks appear, locate the location where the seal is broken, drain the water, fix the problem and check the leak again.
Before we begin securing the outer edge of the seal, we return the hatch lock to its place and secure it with two screws. The front edge of the cuff has a bend of a certain shape, which corresponds to the bend at the edge of the hole in the front wall of the machine. Having folded the front edge, as shown in the far right photo, you need to put it on the body of the machine and so on around the entire perimeter.
When the cuff is finally put on from the front, you need to look and feel it along the entire perimeter in order to finally set it in place.
At the last stage of assembly, all that remains is to put on the outer clamp. Doing this the first time is not always easy, since the spring is not easy to stretch by hand. However, there are two ways to fit the clamp:
- One of them is shown in the photo. Holding the clamp with both hands from different ends of the spring, stretch it in different directions, push it into the recess and, without weakening the tension, sliding your hands along the clamp further and further from the spring, put it on until it is completely seated.
- The second method is to fix one end of the spring, apply tension to only one side, and gradually place the clamp around the perimeter into the recess.
After installation is completed, you need to check the correct placement of the second clamp and the location of the front edge of the cuff. The tightness of the seal to the glass of the hatch depends on this. This tightness can be checked visually by closing the door. Place the top cover of the washing machine in its place.
As always, after a repair, you need to check the serviceability of the element that was replaced, in this case the tightness of the joints of the cuff with the tank and the hatch glass. To do this, run the machine for washing. If leaks are detected, repair the problem.
A washing machine, like any other device, consists of many parts. Each of them has its own service life. When any part fails, it is time for repair. Most often, the rubber seal on the drum needs to be replaced. How to repair it? How to remove the rubber band from the drum of a washing machine?
Reasons why cuffs fail
If a breakdown occurs in a front-loading machine, this will entail more serious consequences than in a vertical-type device. Most malfunctions occur for the following reasons:
- natural wear (even in the most durable material, vibration along with variable loads leads to rubbing of the rubber, it is useless to fight this, therefore, if a part becomes unusable, you simply need to replace it);
- damage due to the impact of sharp clothing fittings (decorative fasteners and buckles, sharp objects left in pockets - all this can lead to a cut of the rubber element, and if this happens, it is unlikely to be saved);
- the use of overly aggressive detergents (some chemicals lead to the dissolution of vulcanization, as a result, the rubber becomes less durable, so before washing you need to carefully read the composition of the products);
- fungal infections (over time, these bacteria spoil absolutely everything; timely cleaning of the washing machine and its regular ventilation will improve the situation; to ensure prevention, it is customary to use detergents that contain citric acid).
Practice shows that the lion's share of breakdowns occurs due to careless handling of equipment. Only compliance with operating conditions and regular preventive measures will lead to a long service life of both the cuff and the device itself.
Features of installation and dismantling
Firstly, you need to be extremely careful when working with the cuff, especially when using sharp objects such as a screwdriver. If you make a careless movement, it can be damaged. Secondly, you should not use a lot of force when removing and installing the metal rim, as it can be stretched or broken.
The problem is that this element is not included with the elastic band.
Thirdly, it is prohibited to perform any operations while intoxicated.
Why is this happening
The cause of a cuff tear should be understood at the very beginning. It will become clear whether it makes sense to carry out such home renovations, as well as how to avoid a similar situation in the future. There may be several reasons that caused the gap.
- Cracks that occur as a result of strong vibration of the machine drum. Repairs can be made, but the issue with vibration must be resolved, and this is much more difficult.
- Sometimes rubbing of the cuff occurs if something in the mechanism is broken and the cuff rubs against some part. Drum displacement can lead to such a breakdown. Before carrying out repairs, the cause of the damage must be eliminated.
- A tear or cut that can be caused by small items forgotten in pockets.
- “Incurable” damage, the repair of which does not make sense.
Conclusion
A washing machine is a unit that must be repaired by specialists. But there are operations that you can perform yourself. Our article describes in detail what to do if the rubber band of your washing machine breaks.
If you follow the instructions, performing all operations one by one, you can replace the cuff in a short time. It will be much cheaper, since you won’t have to overpay for work and home visits.
Naturally, this cannot be done if the washing machine is under warranty, since then it can be lost. In the event of a serious breakdown, you will still have to contact specialists.
Installing gum machine
Some owners decide to install the old rubber after cleaning, but this is up to everyone. Either way, the reassembly process will look the same. Assembly requires more attention and even more effort. You can't miss a single detail.
Before reinstalling the cuff, it is necessary to determine where the outer part is and where the inner part is. It must be installed in such a way that there is a special mark on top and a drain hole at the bottom. As a rule, the drain is located at the lowest point. If the automatic machine has a drain hose and adapter, then before replacing the rubber of the hatch, you should connect it, and only then install the inner hose.
As a rule, additional plastic elements are not included with a rubber product, so it is not recommended to throw away old components. In addition, you need to carefully dismantle it, removing all the elements one by one and putting them in one place.
Next, the iron rim is put on. This is the most complex operation of all that is performed during assembly. The screw is unscrewed from the lock and a screwdriver is inserted into it. This must be done to engage the spring. In this case, the sleeve should be tucked inside the drum.
To install the headband, you need to put it on the back of the cuff. Using a second screwdriver will allow you to install the elastic in its place without any problems. After this, you can install the lock.
It is much easier to assemble the car and generally replace tires if the front panel is removed. After completing these operations, you can install the remaining panel elements.
Installation is performed in the following sequence:
- counterweight;
- middle panel element;
- castle;
- bottom and top panels;
- compartment for powders;
- top cover.
The last thing to do is thread the cuff. This operation is performed using a flat-head screwdriver. After this, the hatch of the automatic washing machine is installed.
https://youtube.com/watch?v=k43iekwVrTM
What to do if the rubber seal breaks
Due to the use of different design solutions, the removal and installation of cuffs on automatic washing machines may differ. Therefore, before performing such an operation, you must read the operating instructions. This operation is usually included in the book.
Do not forget to unplug the machine by removing the cord from the outlet, especially if a leak has already occurred. If you touch a bare part of your body to a puddle or metal element, you can get an electric shock if there is a short circuit.
The fundamental difference between the various models is the method of mounting the front panel. In any case, in order to dismantle it is necessary to disconnect the front part. Therefore, the hatch is first opened and then removed, for which the existing screws, if any, are unscrewed.
Next you need to find the metal rim that presses the rubber and pull it. It will be easiest to remove with a screwdriver. The metal rim can be easily removed if you find the spring. Then the applied effort will be several times less.
Replacing the fill pipe
The pipe connecting the tank to the powder receptacle often becomes unusable. More often than not, it’s not a matter of cracks, but a blockage - part of the detergent settles on the surface of the tube in a thick layer. As a result, the washing machine stops the cycle, or the hose breaks due to increased pressure. The easiest way for owners of modern washing machines from LG. Here, removing and inspecting the inlet pipe is much easier: just unscrew the top cover, find the hose and release it from the clamps. On the vast majority of machines, for such a check you will first have to get rid of the front panel. The instructions are as follows:
- disconnect the washing machine from communications;
- remove the top cover;
- remove the powder receptacle;
- Unscrew the bolts located in the recess from the tray and along the perimeter of the dashboard;
- Carefully pry off the “tidy” with a screwdriver, release the latches and, without disconnecting the wiring, place the panel on top of the machine;
- slide the technical hatch door off the latches;
- open the hatch and loosen the outer clamp on the cuff;
- tuck the cuff inside the drum;
- Unscrew the screws holding the UBL;
- loosen the screws securing the end around the perimeter;
- pull the front panel towards you - it will immediately “come off” from the grooves.
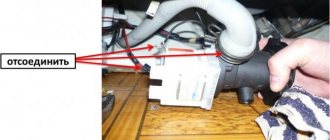
Finding the fill hose is easy - it connects the washing tank to the powder receptacle. To remove the tube, you need to loosen the clamps holding it and unhook it from both fittings. Then inspect the hose for damage and blockages. If everything is clean and intact, we return it to its place; if it’s clogged, we clean it with a brush; if it’s torn, we replace it with a new one.
How to dismantle the first clamp
To make repairs or remove the rubber band from the drum of the washing machine, you must first remove the clamp holding the cuff along the curly curved side. As a rule, each washing machine has either a spring or a plastic clamp visible on the side of the rubber band. To properly remove the plastic clamp, you should pull it towards you in the area where the locks are located. If the clamp is made in the form of a spring, you need to unscrew the retaining screw or simply pull the spring towards you by prying it with a screwdriver. After the clamp has been removed, the cuff sealing the hatch closure can be easily removed.
We install a new part
Returning the cuff to the washing machine is many times more difficult than removing it. It takes a lot of strength and patience to pull a tight elastic band onto the drum. But even a “newbie” can cope with the task; the main thing is to act strictly according to the instructions. The scheme is as follows:
- we clean the seat - the grooves on the drum, removing debris and generously soaping the entire surface;
- do not wash off the foam, but leave it for easy stretching;
- find the mounting marks on the elastic band;
- We are looking for similar “cuts” on the machine body;
- put the gasket in the groove;
- pull the cuff onto the drum;
- fix the inner clamp;
- we return the front panel of the machine to its place by tightening the previously removed bolts;
- insert the powder receptacle into the washing machine, snap the technical false panel into place;
- put the cuff on the protrusion of the drum;
- tighten the outer clamp, placing it with the spring down.
If everything is done correctly, the new cuff will fit tightly onto the drum. The next step is to check the quality of the repairs. We connect the washing machine to the communications, start the “Rinse” mode and monitor the hatch door. During the test cycle, you cannot leave the machine - if there is a leak, you will need to stop the program and collect the water.
When does a rubber seal need to be replaced?
If a leak is visible under the loading hatch or housing, the cuff is inspected first. If the upper outer part is damaged, water may leak directly from under the door. A more complex malfunction is damage to the internal part. Then a leak occurs under the body of the automatic washing machine (WMA).
On the Internet you can find recommendations for repairing rubber using patches. This method is not justified, because soon there will be a leak in this place again.
The causes of damage are various:
- Natural wear and tear. The friction of the drum against the seal during rotation and thermal effects affect it. Then the surface becomes brittle and cracks form through which water escapes.
- Poor quality powder, its excess. All this affects the condition of the cuff, leading to its destruction.
- Incorrect care. Mold and mildew eat into the inner layers of rubber over time. A leaky product is unable to maintain a seal.
- Mechanical influences. Metal objects forgotten in pockets end up in the drum. When they rotate, they damage the seal. Strong claps and careless closing of the door also have an effect.
To replace a part, you need to dismantle the old one and install a new cuff. Prepare your tools and materials in advance.
How to put an elastic band on the drum of a washing machine?
The job is quite doable. All you need is a slotted screwdriver and pliers. Prepare materials in advance; stores sell ready-made repair kits.
- New seal. Buy specifically for your CM model.
- Clamps. There are two of them: internal and external. Depending on the manufacturer of the washer, the clamps can be metal or plastic with a latch. If old parts remain after repair, they can be reused.
- Fine sandpaper, sponges, rags, soap, marker - to prepare the seat and facilitate installation.
The removed front panel of the machine will simplify the task. Perhaps it was removed during repairs, then it will be easier to carry out the work.
It takes a long time to specifically remove the wall, so we’ll tell you how to remove the sealing rubber using another method.
Disconnect the SMA from the network. Close the water inlet valve.
- Open the hatch door.
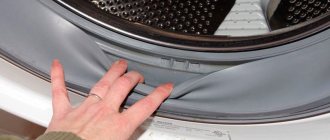
- Bend the edge of the gasket until you see the clamp.
- Pry off its spring with a flat-head screwdriver.
- Pull the screwdriver around and pull the clamp out of place.
- Remove the cuff from the outer panel. This is easy to do by hand.
- Place it inside the tank.
- Unscrew the bolts securing the top cover from the back.
- Slide it back and remove it from the body.
- Using a Phillips screwdriver, loosen the inner clamp bolt. Take it off.
- Now lift the cuff and remove it from the machine.
What else damages the cuff?
Many factors can disrupt the function of the sealing ring on the washing machine hatch. Repairing the machine due to damage to the cuff will cause such common reasons as:
- exposure to laundry detergents;
- careless loading/unloading of laundry;
- loss of sealing qualities over time;
- fungal infection;
- damage to internal components of the machine.
When the hatch cuff is torn or worn out, losing its original qualities and function to prevent water leakage, you can replace it. Doing this type of machine repair with your own hands will not be difficult. All you need is a little time, experience working with your hands and a little ingenuity. With this, repairing the machine to replace the cuff will not cause any problems. Replacing the cuff on a washing machine itself is performed in five steps.
Step 1
First you need to remove the outer clamp. It holds the curved part of the cuff in the front groove of the hatch. The retaining clamp can be of two types:
- spring;
- plastic.
The spring can be removed in two ways. The first is to simply unscrew the screw holding it, the second is to pry the spring itself and pull it towards you. Having removed the outer clamp, you need to bend the edge of the cuff and remove it from the dispenser pipe located on top.
Step 2
Next you will need to remove the inner clamp. To do this, first find the installation mark on the cuff. It helps to determine the correct position of the sealing rubber of the hatch relative to the washing tank. Because only a correctly installed cuff prevents water from leaking from the hatch and guarantees proper drainage.
If it was not possible to detect the mark, you can make it yourself. Place a mark on the cuff with a felt-tip pen to indicate it is factory installed. In the future, this will allow you to correctly install the new seal.
Before moving on to the next step of replacing the cuff on the washing machine, you need to carry out preparatory steps. Remove any possible dirt from the mounting grooves. To make it easier to insert a new seal, prepare a soap solution and apply it to the edges of the groove.
Step 3
At this stage, you need to insert a new cuff into the prepared grooves. It is when performing this step that you will need ingenuity and some effort. Before you pull the sealing rubber onto the edge of the hatch, you need to align the mark on the cuff with the mark on the tank. Then, take the seal from the side facing the tank and insert it sequentially with your thumbs. If the edge of the hatch has been treated with soapy water, then the insertion process will be easy.
Having put on more than half of the cuff, the process becomes slightly more difficult, since the part already put on will slide off the hatch. Therefore, to dress the remaining part, change the principle of operation. Do not pull the cuff sequentially (in one direction), but insert it simultaneously from both sides. After pulling the seal, check how tightly it fits to the tank.
Step 4
To secure the cuff, you need to reinstall the clamps. You need to start from the inside. To put on a spring clamp, be sure to fix it at the initial tension point. To do this, you can use a screwdriver by inserting it into the hole that blocks the hatch. When the spring is put on the screwdriver, stretch the clamp and gradually push it inward along the circumference of the hatch until it falls into place.
When installing the spring, the same difficulty arises as with the cuff. Having put the clamp on a little more than halfway, the tension angle changes, creating difficulty in further installation. But with a little practice and patience, the inner clamp can be completely put on.
If the washing machine is an old model, then you can only tighten the clamp using pliers. Because on older models the clamps do not have springs or screws for adjustment.
Step 5
The last thing that involves repairing is installing an external clamp. It will be much easier to install it. If the outer clamp is like that of older machine models, that is, without an adjusting screw or spring, then round nose pliers will come in handy again. They need to open and close the hooks located at the ends of the clamp.
After completing the repair of the washing machine, it is worth checking the result of the work. Start the rinse program and leave the machine to do it. When it is completed and the water drains, tilt the washing machine back and look for any signs of leakage. If they are not there, then the cuff replacement was done efficiently.
Finally, we suggest watching a video about replacing the cuff.
Installing the Inner Clamp
The internal clamp of the washing machine has a screw for adjustment; during installation, it should be turned to the required diameter, put the clamp in place and tighten it with the screw. If the clamp is a spring type, replacing the collars will be a little more difficult, but also doable. You will need to securely hold the first tension point of the clamp. To hold the spring clamp of the washing machine, you will need a screwdriver. It should be inserted into the channel that fixes the hatch all the way to the stop. After this, the spring is pulled with a screwdriver along the entire rim of the tank, placing it in the grooves.
Having put on most of the spring, difficulty in holding the clamp again appears, since the tension angle has changed. To replace the spring clamp on older machines, pliers are used because such springs were produced without an adjusting screw.
If you managed to cope with the internal clamp, the external one can be installed without much effort. To install clamps that do not contain spring or screw tension, curved round nose pliers are required. With their help, you need to open the tightening hooks and install the clamp.
Why do seals deteriorate?
The cause of the cuff damage must be known in order to make the right decision about the advisability of gluing it together. The information will also be useful during the further operation of the washing machine - in order to prevent similar breakdowns in the future. The most common damage to seals:
- Cut, puncture, breakthrough with a hard object. The culprit may be small items forgotten in pockets (nails, coins, keys, paper clips), as well as parts of the clothing itself (for example, loose bra underwires). Seal the damage and check the laundry carefully before loading.
- Wiping. It happens that something is broken in the design of the machine, and the cuff constantly rubs against another part, for example, against a drum. Gradually, through holes are rubbed through it. In this case, it makes sense to glue the seal only after eliminating the cause of friction.
- Cracks due to vibration. They occur if the washing machine tub vibrates very strongly during the spin cycle. You can seal the cuff, but you will have to get rid of the vibration, and this is a more serious problem than a leak near the hatch.
- "Incurable" cracks.
The latter arise for several reasons:
- natural aging of the part (silicone also has a service life);
- exposure to oils or solvents (perhaps oily technical clothing was often washed in the machine);
- initially low quality of the material (this can happen if you previously replaced the “original” washer seal with a cheap, non-original part).
In any of these cases, gluing the cuff is pointless. After all, the material of the part itself is damaged, which means it will crack again and again, each time in a new place.
When does the need for repair arise?
You may need to remove the old one and install a new rubber band in two cases:
- The part has worn out and its service life has expired.
- Mechanical damage has occurred.
An elastic band can break for several reasons:
- Low-quality detergents were used during the washing process.
- The washing machine was often used to wash heavy or hard items, such as sneakers or large outerwear.
- Loading and unloading laundry is very sloppy.
- The washing temperature exceeds the maximum permissible.
- Keys, nails and other sharp objects got into the drum.
How to understand that the rubber seal for the washing machine drum has failed? There are several signs:
- During washing, a puddle of water appears near a device of any model, for example, LG or Samsung.
- The machine door is harder to close than usual.
- During the washing process, you may hear extraneous sounds, for example, crackling. This is the most dangerous sign. If repairs are not started in time, a leak may occur, and then a short circuit.
The repair will depend on which seal needs to be repaired.
DIY cuff repair
In some situations, instead of replacing the cuff, it is repaired. For example, when it is currently impossible to find the part you need, or delivery requires a certain wait. Or when it is not possible to allocate money from the budget, and washing needs to be done regularly. In such cases, the cuff is simply sealed.
Preparing the cuff for gluing
The first step is to organize an inspection of the leaky part and find out why it was damaged. Only with this approach will it be possible to determine the feasibility of repairs. Indeed, in some situations it is easier to wait for a complete replacement without gluing. To carry out the test, you need to remove the cuff from the machine using the method described above.
If the size of the cut, puncture or abrasion is insignificant, repair definitely makes sense. If the damage is large, there is no need to seal it. The next step is to select the material that will be needed for the patch. It must have an increased level of strength and at the same time elasticity. An excellent option would be to use patches that are designed for repairing air mattresses; they can be purchased at specialized sporting goods stores.
As for the glue that will be used during the work, it must have excellent adhesive properties. The substance itself should be elastic after it is completely dry. This is exactly how compounds that are usually intended for repairing rubber products and shoes behave.
Instructions for sealing the cuff
The process of sealing the cuff itself is simple. But to ensure that the result does not disappoint, it is recommended to adhere to a certain procedure:
- first, a patch is prepared from the previously selected “raw materials”, folded in several layers (its size is one and a half or two times the diameter of the defect);
- then the damaged area and the area around it are disinfected, this is done using acetone, alcohol, white spirit, etc.;
- an adhesive composition is applied to the cuff itself;
- after this, the surfaces that have been lubricated are pressed one against the other (this can happen immediately or after some time);
- the element is then fixed in its natural position using objects deemed most suitable.
After this, you need to leave the part for a day, and when the glue is completely dry, install it in place. Along with this, there is another method of gluing the cuff, which is considered more reliable among ordinary people and professionals:
- first, the damage is stitched using a thick thread;
- this area is then impregnated with a silicone-based sealant, it should be designed for rubber and plastic.
After this, as when using the previous option, the cuff is left in its natural position for one day, and then installed again in the washing machine body. Then a quality check of the work performed will be required. To do this, you need to load the drum with laundry (fully), and then start the wash on the shortest mode. When the cycle comes to an end, the bonding area should be carefully inspected to identify repeated breaks, if any.
Repair process
For quick and high-quality repairs, you should prepare in advance and lay out all the tools and devices that may be needed at the most crucial moment:
- Thin rubber.
- Scissors.
- Alcohol/gasoline for degreasing.
- Glue "Moment".
- A soft cloth that you no longer need or cotton wool.
In order for the machine to serve you as long as possible without unexpected surprises after such repairs, adhere to the following algorithm of actions .
- First, prepare the patch itself . If it is rubber, then you should carefully trim it to the size of the patch. If you use a condom or medical gloves as a patch, first glue each layer, and then simply cut out the part to the required size. The patch itself should be about 2 cm larger than the hole on all sides.
- In the area with the hole in the cuff of the washing machine hatch, degrease it using gasoline or alcohol . The cuff with the glued patch should be straightened until completely dry.
- Next, apply a thin layer of glue to the surfaces to be glued . Perform the following steps according to the instructions given with the glue. There may be two options. You will either need to connect the parts right away, or wait a while for the glue to “set” and then glue.
- For the glued surface, ensure the most natural position, and then fix it until the glue dries .
- Leave the part to dry for a day . The machine cannot be used during this time.
And that’s it, consider that the home repair of the washing machine cuff is over.
But you shouldn’t be sure that no more problems will arise. After the glue has completely dried, you can start assembling. When the installation of the parts in their places is completed, perform a test wash to check the effectiveness of your own repairs. If you did everything correctly, problems should not arise and your machine will work for some time without any leaks.
How to protect your washing machine cuff
The following recommendations should be observed:
- After each wash, wipe the rubber surface dry, not allowing water to stagnate in the recesses and grooves of the cuff;
- Leave the hatch door of the washing machine slightly open, thereby preventing the formation of mold and mildew in the internal cavity of the rubber;
- Do not use chemicals when washing that are not recommended or prohibited by the manufacturer;
- Select the required washing mode that provides the best final result at the minimum water temperature;
- When loading laundry, make sure that the items are completely loaded into the drum;
- Adjust the level if the washing machine vibrates a lot.