Korean home appliance developers LG develop and produce an impressive line of washing machine models. In their products they combine maximum reliability and enormous functionality. The manufactured devices have a modern look and various sizes and fit perfectly into the design of any home.
The convenience of their use and the results of their work do not leave attention either. But like any household product, washing machines wear out over time and require maintenance. LG machines are equipped with an intelligent system for recognizing errors that may occur in their operation for various reasons.
Malfunctions can occur either due to the fault of the device itself or due to their inappropriate operation. If there is a malfunction, the washing machine stops the set program and displays an error code on the display, which is explained in detail.
This makes it easier to troubleshoot lg washing machine problems.
Many problems that arise with a washing machine can be corrected at home at the place where the appliance is used. Frequent breakdowns of LG washing machines that occur during long-term use, as well as due to inattentive use, will be described below.
Washing machine won't turn on
If the device does not turn on when you press the corresponding button, do not rush to look for the cause of the failure of the washing machine itself.
You should not disassemble the device without making sure that there is a breakdown in the washing machine:
- First you need to check that there is power in the outlet. This can be done with a multimeter, voltmeter or a regular test light. Or you can simply plug another device into this outlet and check its operation. Frequent breakdowns of sockets occur due to non-compliance with their rating when they were installed. When heating the washing solution, the machine consumes a lot of electricity and weak sockets cannot withstand large passing currents;
- If power is still detected in the outlet, you need to carefully inspect the cord of the machine itself for a break or break. Often, an installed appliance in a bathroom is powered from an outlet in another room. In this case, the electrical cord is laid through the doorway, where it can be damaged by the door if you are careless;
- If the cord is fine, then the washing machine is broken. There is a surge protector at the cord entrance on the inside of the case. Due to frequent power surges, it fails. The required voltage must be present at its output;
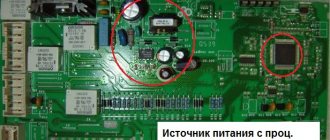
- If voltage comes out of the filter, it must go to the main part of the machine, namely the control unit. If voltage comes to the control unit, then it is the cause of the breakdown of the washing machine. Repair of this unit is best left to specialists. Attempts on your own may result in more expensive costs, including replacement. The cost of the unit is high, so it is much cheaper to repair it even if you pay for the services of repairmen.
Troubleshooting the heating element
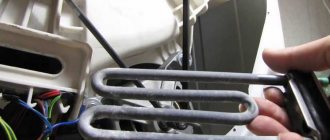
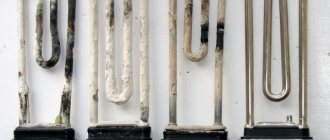
If the cause of the breakdown is the failure of the heating element, then you can carry out repair work on your own. To do this, you will need to carefully unscrew several fasteners that secure and hold the back wall of the washing machine. Afterwards it is dismantled. The lower part of the tank is located near the bottom - two paired contacts should stick out from it, and a screw is located in the middle. Several more small wires are connected to this node - this will be the heating element.
The next troubleshooting step is to check the contacts using a multimeter. A malfunction of the heating element will be confirmed if the device readings are less than 20 ohms.
In order to remove the heating element (heater), you will need to perform the following steps:
- Unscrew the screw.
- Pry off the rubber seal.
- Retrieve element.
If it is faulty, characteristic damage will be noticeable - in most cases there will be smoke. The cause of the breakdown is the presence of a layer of scale, the ingress of water or a voltage drop.
It is important to remember that repairs are carried out only by completely replacing the element - it will not be possible to change a certain part of it. To eliminate the malfunction, you need to purchase an original part and install it in the reverse order of removal. In order for the rubber seal to fit securely, you need to lubricate it with machine oil. If it is not located tightly, then with a high probability water will get onto the contacts of the heating element, which will again cause its failure.
Water does not drain
It happens that during washing the machine does not switch to further stages of the program and there is a lack of drainage of waste water. In this case, the program is disrupted and a fault code is displayed on the display.
Reasons for failure:
- The drain pump is not doing its job. Malfunctions of the unit may occur due to wear of its parts or jamming by foreign objects. Rapid wear occurs due to poor-quality water used during washing, and foreign objects get into the machine with laundry;
- Pump filter clogged. The filter has the function of retaining foreign objects to prevent them from entering the pump. It retains various clothing accessories, threads and the contents of the pockets of things. When it overflows, the passage of water through it becomes difficult, as a result of which the machine freezes during the spin cycle due to not draining the water.
- Clogged hoses or pipes. The cross-section of the pipes allows them to become clogged only with large objects. Socks, items of children's clothing, handkerchiefs, and plastic wraps may be the cause if there is no drainage.
Checking the sewer and drain hose
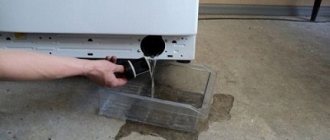
After it has become clear what this error means, it is necessary to move on to correcting the situation. The first thing to do is to make sure there is no major blockage in the sewer lines. It would be a good idea to arm yourself with a long wire, bent at the end, and clean the drain to the maximum possible length.
If the machine is connected through a siphon, it must be disassembled, the debris accumulated during operation must be removed, and washed with running water.
Often the machine is drained directly, without a siphon; in this case, special attention should be paid to the connection point - this is an ideal place for blockage to form.
Next in line should be the drain hose. Often, trying to rationally use the small area of the apartment, the car is pushed into a corner, as a result of which it bends. At the bend, a blockage forms that water cannot overcome. Another option is possible - the hose is too long and something heavy has been installed on it, or they are constantly stepping on it. In any of the above situations, there is only one way out - you need to change the hose.
Even if no physical damage is visible, it would be a good idea to remove the hose and rinse with running water. A clean drain system will reduce the load on the pump and contribute to the long life of the machine as a whole.
Electronic module malfunctions
The lack of water drainage may also be affected by a malfunction of the control system. The module is adversely affected by power surges in the network.
At the end of the washing program, the pump may not receive a signal from the control board and may not drain the water.
Only specialists in this field of repair can check the serviceability of the control unit. It’s better not to do this on your own.
P.E.
A PE failure may occur during washing, spinning or rinsing. In the future, the failure occurs constantly.
Water sensor problem
The presence of a PE code means a problem with the pressure switch. Due to a problem, the sensor cannot determine the amount of water in the tank.
Checking the water pressure in the water supply
Lack of pressure or excessive pressure often leads to an error. If you notice a failure, you should check the pressure level.
Pressostat performance
In most cases, the cause of the error is a broken pressure switch. If the pressure switch tube is clogged, it is enough to blow it out, but in other situations a replacement is required.
Extraneous sounds during operation
For various reasons, various extraneous sounds may appear during operation of the washing machine. By the type of sound and time of the washing cycle, you can determine the area of their origin.
- During washing and rinsing at low speeds of the washing machine, a squeaking sound is heard, most likely this is the rubber of the drive belt that has lost its elasticity. The creaking occurs due to poor coupling with the pulleys of the drum and the engine; the belt slips and creates a characteristic sound. You can try to soften the belt with some means, but this will not last long. Only replacing it with a new one will help;
- When draining the water, pay attention to the pump. After the washing stage or the next rinse, the waste water drain is turned on. If this creates a crackling or growling sound, there is a problem with the drain pump. Over a long period of service life of the machine, the bushings on which the pump rotor rotates wear out. This creates a crackling sound and then a growling sound when the pump is turned on. But the sound could simply be caused by a small foreign object getting into it. If the pump wears out, it must be replaced with a new one; if an object gets into it, the filter must be cleaned;
- The drum of the washing machine at high rotation speed creates a dry noise, which gradually develops into a rumble, the reason for this is worn out bearings. Repairing a malfunction of an LG washing machine can be corrected in this case only by replacing the entire bearing assembly of the device;
- When washing and spinning, a knocking sound is heard, which increases synchronously with the increase in drum speed, and the shock absorbers may break. These parts are designed to absorb the vibration energy of the tank. But knocking or friction may occur due to foreign objects getting under the drum of the washing machine. They should be removed immediately, either on your own or with the help of specialists;
- After drawing water during the supposed rotation of the tank, a squeak is heard, but the drum does not rotate at this time, then the reason for this will be a failed engine tachogenerator. This occurs on direct drive machines only.
Electrics
Carrying out electrical repairs yourself without sufficient knowledge is difficult. The main actions in this case come down to checking all the wires and terminals present in the assembly, going from the control module to all elements, parts and assemblies.
The test is carried out using a multimeter - this way you can find out basic information about the condition of a particular device. It is also necessary to carry out visual inspection. It will help you find torn clamps, fragments of wires that are without insulation, the presence of burning and melted contacts. All wiring problems can be resolved by replacing failed conductors or terminals.
Causes of breakdowns
The main malfunctions of washing machines are worn parts due to their long operation. But often the culprit of the breakdown is the user himself.
When many components malfunction, the automatic washing machine displays a special code on the display, deciphering which the area or causes of failure of the washing machines become clear.
Many codes will only indicate the reasons for their occurrence due to a poorly closed hatch, a clogged drain system or a closed water supply tap. But they may indicate faulty parts that will need to be repaired or replaced.
Let's look at some washing machine malfunctions and how to fix them:
- The electric door lock is broken. The error code will indicate that “the hatch door is not closed.” The machines are designed in such a way that operation begins after the door is closed and locked with a lock. If closing the hatch again does not solve the problem, then the part needs to be replaced. Sometimes adjusting it helps.
- heating element. In lg washing machines there is no fault code for this fault. When the heating element burns out, the machine simply continues to wash without switching to rinsing. The solution to the problem is to replace the heating element with a new one. The main reasons for the failure of a part are scale impurities that are deposited on it and prevent its good heat transfer;
- Pressostat. In most cases, breakdowns of the pressure sensor occur due to the natural wear of its contacts inside. Less often, the thin tube connected to it from the washing machine tank becomes clogged. If a malfunction occurs due to a clogged hose, it must be disconnected and blown out with air pressure. If this does not help get rid of the problem, then it is worth replacing the pressure switch;
- Bearings. This is the main unit that bears the entire power load of the machine. When the laundry is spun, its weight exceeds its original weight hundreds of times, and you can imagine the pressure the machine bearing takes on. Gradually, the unit wears out and requires replacement; this is signaled by a gradually increasing noise when spinning clothes. Almost all models of LG washing machines are equipped with the same type of bearing assembly parts. This makes it easier to repair. Also, washing machines of this brand are equipped with collapsible tanks, which makes them easier to replace;
- Pumps. The machine display will show the error “no water draining”. The first step is to check all the hoses and pipes of the drain system for blockages. Don't forget about the pump filter. If the error does not disappear, then the malfunction is hidden in the drain pump. It must be inspected for the presence of foreign objects that impede its operation. If there are none, then you need to replace the pump. Sometimes there may simply be no power to it.
Operating principles
The operation of modern washing machines is based on the general principles of similar devices that were used in the first stages of their production - water (ordinary, room temperature) enters the body, then it is heated by the device to user-specified values. Linen is placed inside the tank and washed using a rotating drum. This operating scheme is the main one for any device, so up to 70% of breakdowns are associated with the main components, the rest falls on the control panel and additional capabilities of the machine.
Features of work
In order to better understand the cause of the breakdown, you need to understand how the main stage of work is carried out after starting the program. The machine performs the following actions:
- The valve that supplies water to the tank opens (enters through a dispenser installed in the tank).
- The water is heated to the parameters specified by the program.
- The heating element turns on.
- The motor turns on, causing the drum to rotate.
- The main wash cycle is running.
- Finally, the water drain pump (pump) is turned on.
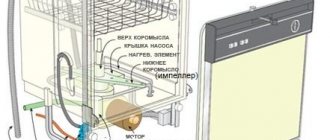
Also, to eliminate major breakdowns, you should know what the main elements of the device are called and what they do:
- Dispenser – container for detergents (powder, gels, softeners).
- Heating element – heating element.
- Tank – a container for water (it also contains a drum and heating element).
- Pressure switch (pressostat) – controls the level of filling of the tank with water, shuts off its supply if necessary.
Washing machine pressure switch
- Thermostat – controls the temperature indicators of water heating, connected to a pressure switch.
- Pump – a pump designed to drain water.
In addition to the details, you will need to take into account the presence of basic components in machines of this brand that ensure stable and uninterrupted operation of the device. The devices contain:
- Water filling system.
- Water heating system.
- A system that starts and carries out laundry washing.
- Water drainage unit.
- System for spinning washed clothes.
- Drying system for washed clothes
It is important to remember and take into account when carrying out repairs with your own hands that in each subsequent model the company’s developers strive to improve a certain system or component, add parts to it and increase the range of functions performed. This can complicate the process and make it impossible to do at home, so it is recommended that you carefully read the operating instructions supplied with the washing machine to avoid premature repair work.
You will have to be careful and follow the rules already at the stage of loading laundry, since, for example, a button that comes off during washing can damage the drum or the system responsible for draining the water.
Diagnostics and repair of main machine components
If washing machines malfunction, their elimination is facilitated by an intelligent fault recognition system. Also, lg washing machines have a diagnostic mode, during which we can look at the operation of many units of the unit separately.
This mode is activated differently depending on the specific LG model.
But it looks something like this: while simultaneously holding two additional function buttons, press the power button. All indicators on the panel will light up and the device will beep. Then, simply by pressing the start button, we turn on each electrical unit individually. Upon completion of the diagnostic mode, the last press of the “start” button will turn off the device.
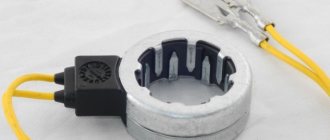
Disconnect the wires from the tubular electric heater (TEH)
The time has come to meet the electronics and start turning off the heating element, an item that is almost the most important part of the entire washing machine as a whole. There will be no electric heater - the water will be icy... well, or rather, the temperature set by the management organization.
In order not to confuse anything, take as clear a picture as possible of how the heating element was connected before dismantling
At the beginning of the article, we already recommended making a photo report of the entire process, but special attention should be paid to disconnecting the wires from the heating element
Any mistake can cost a fatal breakdown of the tubular electric heater, and replacing it will cost a pretty penny... although, of course, if the LG washing machine is being disassembled precisely because of a faulty heating element, you don’t have to think too much, but still take precautions
Fault codes for LG washing machines
All the necessary codes for possible faults in washing machines are available in the instructions supplied with the product. Any housewife can handle these breakdowns. After all, she will be able to independently open the cold water supply tap to the car, close the hatch and clean the pump filter.
But there are also codes that only specially trained household appliance repair technicians or people with experience in similar areas of repair can handle. But if you have doubts about the correctness of repairing your device yourself, it is better to entrust it to specialists.
Incompetent intervention can lead to additional breakdowns, and therefore costs for repairing the product, including its replacement.
- How to remove coffee from white clothes
- How to remove red wine from white clothes
Electrics: tips and tricks
Wiring is an important element in any device. It is very difficult to carry out diagnostic measures on your own, but if you suspect a problem, it is important to take all necessary actions to eliminate the breakdown. It is the wiring that is responsible for the performance of 90% of the elements in the unit. Contact failures lead to a variety of consequences, including the possibility of fire.
The most important tip to remember is that if there is any doubt about which element has failed, the electrical is checked first. You should follow the rules of safe work:
- Before performing any diagnostic or repair actions, it is necessary to de-energize the device - remove the electrical plug from the outlet.
- Then you need to open the top and bottom covers.
- If there are problems with draining water, you will also need to remove the plastic panel.
- A visual inspection and control of electrical elements is carried out - the terminals in working condition should be clean and shiny.
- The wires must have insulation without damage. Its color is bright and uniform.
- Do not allow water to be present on wires and contacts.
Wiring problems include the following:
- Presence of oxidized contacts (plaque color white, green).
- White or dark insulation.
- Insulation that has lost its integrity (presence of cracks, burnt areas, collapsed areas).
- Wet contacts.
If even a small amount of water comes into contact with the contacts, they must be wiped or dried immediately. The next step is to fix the leaks. Oxidized terminals must be thoroughly cleaned. Additionally, you will need to look for a possible leak location to prevent oxidation from happening again.
If darkening occurs on the wires, then this is a sign of overheating (the brighter they are, the stronger the heating). The main cause of the problem lies in poor contact. In order to avoid breakage, it is required that the insulation be intact, as well as the clamps that secure all the wires.
Oxidized contacts also need to be thoroughly cleaned. It is recommended to find the opposite end of the problem wire and replace it entirely. The work should be carried out using a soldering iron with a power of 60 watts. A temporary measure is allowed - cleaning the contact and then inspecting it after 1-2 weeks.
If the wire insulation is damaged, replacement becomes inevitable. The problem is identified by the appearance of darkening. It can be caused by overheating of the wire or poor contact. Immediate repair work is required because melting insulation can cause a short circuit and possible fire. If you have any problems or doubts about the causes of the breakdown, the source of the malfunction, or the quality of the work you did yourself, it is recommended not to use the machine, but to contact a specialist for qualified help or competent advice.
Test progress
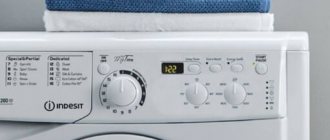
To start the test mode on an LG washing machine, you must immediately press the following keys: “power on”, “temperature”, “spin”. An example is shown in the picture below.
If you have an LG without a Russified control panel, then you should hold down similar keys with the names “TEMP”, “SPIN” and “POWER”. After performing this simple step, you will see that the control panel of the LG washing machine lights up with all the lights just like a Christmas tree.
Now all we have to do is press the “start” button and the machine test will begin safely. Then a logical question arises: where will such a test begin, what will be checked and, most importantly, what should the user do? Everything is simple here.
- As soon as you press the “start” button for the first time, the LG washing machine will begin to test the rotation of the drum in the opposite direction, that is, counterclockwise.
- A second press of the “start” button will check how the drum will rotate when the pre-spin mode starts.
- Press the “start” button a third time and the LG washing machine will check how the drum rotates at the maximum possible speed.
- A fourth press of the same button will start checking the intake valve and pressure switch. This test will fill the machine with a full tank of water. Moreover, you can observe the filling process on the display in the form of a digital value. An empty tank is indicated by numbers, approximately 261-263, and when it is normally filled with water, you will see a number of approximately 230.
- The fifth press of the “start” button activates a test of the heating element’s operation. Nothing changes on the screen.
- The sixth press of “start” controls the water temperature. Again, everything is still on the display.
- We press the “start” button again and the test of engine operation will start in normal mode, that is, clockwise rotation. The display will show changing numbers indicating the speed.
- The eighth stage of the LG washing machine test is to check the heating element for quick on/off. The control chip activates the heating element several times for 3 seconds. At this time, the display will display a number indicating the temperature of the water in the tank.
- And finally, pressing the “start” button for the ninth time will allow the washing machine to start checking the drain pump, which will immediately begin draining water from the tank.
Once the drain pump has removed all the water from the tank, the number on the display will increase from 230 to 261-263. If the water has not gone completely, then the final number 252-259 will appear on the screen. In this case, you will need to figure out why the water does not drain completely from the tank. By pressing the “start” button of the LG washing machine for the last time, we complete the test mode.
So, as you can see, there is nothing difficult about testing your LG washing machine yourself. The main thing is not to change the procedure described in this publication and then everything will go well. Good luck!
How to disassemble the LG washing machine?
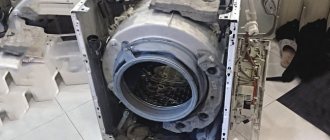
You can only get to the failed part by partially or completely disassembling the LG washing machine.
In order for the work to proceed quickly, it is important to adhere to a clear algorithm of actions:
We prepare the car for disassembly.
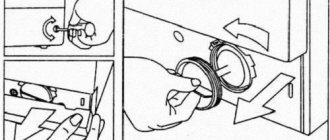
To do this, disconnect the equipment from the electrical network, unscrew the intake and drain hoses (located on the rear panel). We drain the remaining water, unscrew the drain filter (hidden behind the hatch at the bottom of the front panel), and move the washing machine away from the wall.- Remove the top panel. To do this, unscrew the screws (located on the rear panel), lift the cover and, slightly pushing it forward, remove the panel from the body.
- Remove the back panel. It's simple: the service hatch is fixed around the perimeter with bolts that need to be unscrewed.
- Remove the control panel. To do this, pull out the powder receptacle (press the lock located inside the dispenser), and unscrew the screws in the opened niche. Then, using a flat-head screwdriver, bend the latches holding the control panel (do not touch the contacts on the back of the panel).
- We dismantle the front panel. We carry out the work in the following sequence: open the hatch door, pull back the edges of the cuff, remove the retaining clamp, hide the cuff in the drum, unscrew the fasteners holding the UBL. Additionally, we unscrew the fasteners holding the lower part of the front panel (hidden in the niche of the drain filter). The final touch is to unscrew the screws around the perimeter of the front panel and remove it from the washing machine body.
- We dismantle the elements located on top of the tank. First of all, we unscrew the bolts that secure the heavy counterweight blocks (one is located on top of the tank, two are located to the right and left of the hatch). Then we unscrew the screw that secures the detergent dispenser, disconnect the pipe, the contacts leading to the inlet valve. Lastly, disconnect the pressure switch hose from the tank and, unscrewing the fixing elements, remove the drain pump.
- We dismantle the engine. First of all, disconnect the drain pipe. Then we remove the wiring (fastened with special clamps) and unscrew the central screw (fixes the engine cover). The last step is to unscrew the fasteners hidden under the engine cover and remove the unit from the housing.
- We dismantle the heating element. To do this, first disconnect the wiring, then unscrew the central nut (not all the way). Use a metal pin to push the bolt inward, pry up the sealing rubber with a flat screwdriver, and remove the heating element.
- We disassemble the tank and drum.
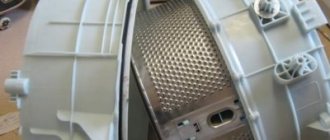
To carry out dismantling quickly, first of all we remove the racks. To do this, we throw a socket wrench with a 14 mm head onto the fastening pin so that the two locking tendrils are compressed. After this, grab the pin with pliers and pull it out of the racks. We lift the tank and remove it from the hooks. We unscrew the fasteners around the perimeter of the tank. We open the tank into two parts. We set the upper one aside, and from the lower one, lightly tapping the bushing with a hammer, remove the drum.
Disassembly of the LG washing machine is completed!
Why does the washing mode not start?
There are also cases when, when the device is turned on, the indicator lights up, but the washing does not start. If, when turned on, the washing machine informed you that it is working with a lighted indicator or a sound signal, but when you select any mode, the washing does not start, then the problem lies in something below.
Door lock faulty
The first thing to do is to make sure that the hatch is really tightly closed. If nothing interferes with the door and it is closed, you need to check whether the hatch was locked after the program was started. If blocking does not occur, this indicates that the door lock is faulty. To be completely sure of this, you need to ring the mechanism.
If, when the program starts, voltage is supplied to the door, but blocking still does not occur, then the UBL (hatch locking device) is faulty and must be replaced.
Indicators flash when turned on
If, after connecting the equipment to the network, you notice that all the indicators are blinking in a chaotic manner or go out and light up in the same way, then the problem lies in the wiring. In this case, you need to find the problem area and replace it.
How to repair?
The specific list of actions will depend on the exact reason for which the device failed.
So, if the lock on the machine door stops working or the handle on it breaks, you will need to completely replace these parts . To do this, you need to purchase a new locking element and handle from the same manufacturer and designed specifically for this model of machine.
In addition, a breakdown of the surge protector may also be the reason why the washing machine stops turning on.
This device is designed to protect the device from combustion. Voltage surges, frequent switching on and off of power negatively affect the operation of the device. It is network filters that are designed to eliminate these consequences.
However, if power outages occur too often, they themselves can burn out or short out, which means completely paralyzing the operation of the machine. In this case, you need to do this:
- find the filter - it is located under the top cover of the housing;
- using a multimeter, you need to determine how it reacts to incoming and outgoing voltages;
- If in the first case the filter works normally, but does not catch the outgoing voltage, it must be replaced.
If the machine does not turn on for other reasons, you need to do something a little differently.
- Check whether the automatic safety interlock device has tripped. Today it is installed by default on all automatic washing machines from this manufacturer. It is triggered in cases where the device is energized, that is, it is not grounded. In such cases, the machine is disconnected from the network and its grounding is checked and, if necessary, corrected.
- If all the indicators or only one are on, and no error code is displayed on the electronic display, you should check that the “Start” button is working properly. It is quite possible that it was simply disconnected from the chips or simply stuck. In this case, the device should be de-energized, the button should be removed from the machine body, the contacts on the microcircuit should be cleaned and installed in place. If there is any damage to the button, it should be replaced with a new one.
- A malfunction of the control unit may also be the reason why the automatic machine does not turn on. In this case, the module must be removed from the housing, its integrity checked and, if possible, taken to a diagnostic center for replacement.
All these methods of solving the problem help in situations where the machine does not turn on to work at all. In addition, they require the use of special tools and skills in handling them.
If there are none, then it is better to entrust the repair work to a specialist.
Water enters the tank very slowly
Quite often, situations arise when, despite observing all the required standards regarding the amount of laundry, washing powder and settings, water is still drawn into the tank too slowly or not at all.
In such situations, first of all, the presence of water in the system and its pressure, the position and serviceability of the water supply valve to the machine, as well as the condition of the water hose are checked. If everything is in order here, the washing machine needs to be emptied of laundry, turned off the power and diagnostics carried out to identify faults.
The main reasons for slow water supply:
- Inlet valve filter clogged. It is a small mesh placed behind the inlet hose screwed to the water supply valve. The water is first turned off and the inlet hose is unscrewed, after which the filter is removed, cleaned with a brush and washed. The hose is also cleared of debris and washed, then the parts are put back in place in the reverse order.
- The additional filter is clogged. Such elements can be main ones, protecting against sand, rust and other impurities, as well as magnetic and polyphosphate to soften water. They are installed before the inlet hose and require better cleaning under strong water pressure.
- The door does not close well, the hatch locking device is faulty. The sensor blocks the water supply when the door is open. The malfunction is eliminated by dismantling the door and installing the locking rod in its place. If the thermal blocking fails, it must be replaced.
- The water supply valve is not working. The valve is installed on the rear panel and the inlet hose is screwed to it. Water supply and shut-off is carried out by an electronic signal. The valve stops working due to a malfunction of the coil, weakening of the rod spring, or loss of flexibility of the cuff. In all these cases, the valve must be replaced.
- Control module malfunction. In this case, the command to draw water simply will not be received. The problem is solved by flashing or replacing the control module.
A.E.
Error AE on the machine display indicates a failure when trying to automatically turn off. Due to the presence of a problem, an unscheduled shutdown may occur.
Auto power off
The presence of an auto-off function saves the washing machine's resources. If after turning on the power there is no action for several minutes, the machine turns off.
Float sensor
The probable cause of the AE error is the presence of liquid in the pan. In this case, a leak occurs and the float sensor is activated.
Checking components for leaks
If you notice a malfunction, you should check the drain pipe components. Leaks often occur due to sharp objects getting inside the drum.
