A washing machine is an integral attribute of the home, which simplifies life and helps maintain cleanliness. Sometimes cases arise that indicate the device is not working properly or the possibility of an imminent accident. A cause for concern may be a situation when the drum in the washing machine dangles during washing, making loud noises. You can deal with this problem yourself by inspecting and fixing the problem.
Eliminating problems
Disassembling the drum
The tank in the washing machine consists of 2 halves. Some tanks are fastened together, while others are soldered.
To disconnect the tank, you just need to unscrew the mounting bolts.
At this stage, the oil seal becomes accessible and if it needs to be replaced, you can remove it using a screwdriver or pliers.
It's more difficult with a bearing. It will have to be knocked out using a metal tube and a hammer. I think there is no point in talking about accuracy, and that’s understandable.
You can also replace the crosspiece, again, if necessary.
Important! Before replacing a new part with an old one, the installation site is treated with lubricant. If the tank is not dismountable, it is more difficult to carry out repairs on your own; you may need the help of a professional
If the tank is not dismountable, it is more difficult to carry out repairs on your own; you may need the help of a professional.
Changing the bearing
In what cases is it necessary to replace a part and how to remove a bearing from a washing machine drum?
For example, if a puddle has formed under the machine and there is a strong hum and vibration during operation. Why did this happen? There is a high probability that water got into the bearing and caused it to fail. In general, the service life of this part is not short, from 7 to 11 years, but sometimes trouble happens and you have to replace it ahead of time.
Troubleshooting shock absorbers
Shock absorbers are responsible for the smooth operation of the drum during washing and spinning. There should be no knocking.
How to check their serviceability?
Just. Open the car hatch and pull the drum towards you. Now let go. What happened?
If the drum, like a swing, swings from side to side and does not fall into place, this is a sure sign of the need to replace the part. Moreover, the shock absorber must be replaced in pairs.
To do this, you don’t have to disassemble the car, as is the case with bearings, but this is true only in LG, Veko, Ardo models. It is enough from the bottom, unscrew the fasteners and change the parts. But with the rest of the models you will have to tinker.
- – The top cover is removed and the dispenser is removed.
- – The control unit is disconnected.
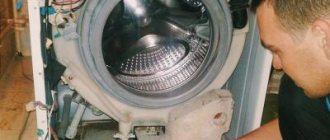
- – Remove the rubber seal with the clamp.
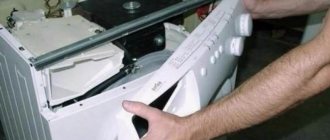
- – The front part of the machine body is removed.
- - Details change.
Removing the foreign object
What does foreign object mean? It can be:
- coins, even rhinestones,
- buttons and other clothing items.
If you do not reach and free the drum from these things, the consequences can be tragic, including jamming and breakage.
What other problems can you solve on your own?
Changing the cuff
There are many reasons for cuff failure. This could be: wear due to long-term use, due to mold, due to cracks and tears, due to limescale, etc.
If there is water left under the machine after washing, check the cuff. After all, this is a dangerous business. The power supply may short out or the machine may fail completely.
What is needed to replace the cuff and how to remove the rubber from the drum of the washing machine?
Firstly, you need a new cuff, which must match the old one 100 percent, otherwise an incomplete fit may occur.
To replace an old rubber band with a new one, you need:
- Remove the front panel of the machine, remove the powder compartment, remove the front of the machine.
- Remove the cuff. In the usual version, the cuff is screwed to the tank with two metal clamps. You just need to pry the spring of the clamp and pull.
- After the first clamp is removed, you can remove the top of the rubber band, which ensures its correct location in the tank. The cuff will be released without any problems and can be removed after removing the second clamp.
- When installing a new rubber band, use the marks on the rim of the hatch as a guide.
- Before installation, it is necessary to carry out cleaning work on the rim of the hatch, at least with just a soap solution.
- The cuff is pulled over the hatch. If the top is pulled, the bottom is held in place; if it's down, then vice versa.
- Next, all the parts are assembled in reverse order.
All that remains is to check the work done by running the wash without laundry. If there are no leaks, everything went well and you did it!
Common faults and how to fix them yourself
It will be difficult for a non-professional to immediately determine which mechanism of the washing machine has failed. To conduct a successful diagnosis, you need to start by identifying the symptoms of the malfunction. Next, we'll look at the signs of common problems and how to fix them.
Washing machine won't turn on
One of the most unpleasant situations for equipment owners is when the washing machine does not turn on. The manifestations of the problem can be different: the machine starts, but the washing cycle does not start, or the unit does not show signs of life at all. In the first case, you need to immediately check whether the hatch door is tightly closed. If it is not pressed firmly against the drum, a function is triggered that prevents the device from continuing to operate. The machine reacts in exactly the same way when the hatch locking device (UBL) is broken. If the lock breaks, it must be replaced.
According to statistics, more than 90% of washing machine breakdowns can be fixed by the user himself, and only 8-10% of faults require specialist intervention.
If the washing machine does not turn on, this is not a reason to panic
There are times when a device does not work on one program, but starts on another. These are the first signs of a timer failure. Try to check the operation of the part by turning on the unit in different modes one by one. If the product starts on one of them, then the timer needs to be replaced.
Before you start repairing the washing machine yourself, make sure that the warranty period has expired.
When the machine does not respond at all to pressing buttons when turned on, the reasons may be as follows:
- lack of power supply;
- broken wiring;
- control panel failure;
- faulty surge protector or socket.
To identify the problem and repair the washing machine yourself, proceed as follows:
- Check the electricity in the apartment.
- Eliminate a short circuit in the wiring that could knock out the plugs.
- Inspect the power cord for damage; it may need to be replaced.
- Test the operation of the extension cord or outlet by plugging in another household appliance.
- Check the power button with a multimeter. If it doesn't "sound" it will have to be replaced.
- Pay attention to the FPS (interference filter), which is found in most popular brands of cars. It may be faulty and need to be replaced.
If following all the recommendations does not produce results, the problem is most likely in the control module. Before checking the electronics yourself, evaluate your knowledge in this matter, because completely replacing the electronic board in case of unsuccessful repair can be quite expensive.
When repairing electrical wiring, be sure to follow safety precautions.
Problems with water collection
What should I do if the machine does not fill or fills slowly with water? This breakdown does not occur in semi-automatic activator washing machines - in such models, water is poured manually. If you start the unit, but water does not flow into the tank, look for the reason as follows:
- there is no water in the tap;
- the water supply tap is closed;
- the inlet filter is clogged or the valve is damaged;
- the inlet hose is damaged or clogged;
- The water level sensor (pressostat) is broken.
If there is water in the water supply and the tap is open, check the elements of the filler system for damage and clogging. First, inspect the outer hose to see if it is pinched or damaged. To inspect the filter, turn off the water, disconnect the hose and remove the filter using pliers. To remove contamination, rinse the filler system elements under running water and then return them to their place.
If the external parts are clean and water is not being collected, check the inlet valve, which often fails due to contaminants entering the membrane. If repair is not practical, the part should be replaced.
If there is no water flowing into the washing machine, you need to check the inlet filter for blockages.
The water regulator (pressostat) is usually located under the top cover, on the side wall of the machine. Most often, part malfunctions consist of a clogged or kinked tube leading to the sensor, or a violation of the integrity of the contacts. A faulty sensor does not send signals to the module, and water is not drawn. How to fix a part? First, inspect the tube, make sure that it is tightly seated on the pressure switch and that there are no blockages or kinks. Then check the operation of the sensor by blowing into the tube: if you hear a click, then everything is in order with the pressure switch. It would also be useful to make sure that the contacts are intact. At the same time, inspect the pressure chamber located in the drain pipe for blockages. If necessary, loosen the clamp on the hose between the camera and the tank - it may block the water supply.
To get to the water level sensor, you need to remove the top cover of the unit
Problems with water heating
The lack of water heating cannot always be detected immediately: the machine continues to wash, rinse and spin, but the quality of the wash drops sharply. When you notice that things are not washed regardless of the selected mode and the detergent used, it’s time to check whether the machine is heating the water. Start the program at high temperature and in the active wash mode, carefully touch the sunroof glass. If it is cold, it’s time to look for the causes of the problem, of which there may be several:
- heating element malfunction;
- thermostat failure;
- problems with electronics (control panel).
Before proceeding with repairs, make sure that heating is provided for by the selected washing mode.
The first thing you need to check in the absence of heating is the performance of the heating element. It may fail due to voltage surges, short circuits, or scale formed on it. It is best to remove the back cover of the case, remove the heater and check it with a multimeter. A burnt heating element should be replaced.
The most common reason for the lack of heating of water in the machine is a breakdown of the heating element.
If the thermostat is broken, the control module may receive an incorrect signal and turn off the heater prematurely. In modern Samsung and Indesit units, this element is located on the heating element. The easiest way to check the performance of the part is with a multimeter. If it is broken, only replacement will help - the temperature sensor cannot be repaired. To get it, disconnect the sensor from the wires and loosen the heating element mount.
Unexpected device shutdowns
Another common problem is that the machine suddenly turns off in the middle of the wash cycle. How to act in such a situation? First check the power and water supply. Then inspect the inlet and drain hoses for blockages, remove any contamination if necessary, and restart the unit. The reasons may be more serious: breakdown of the pump, heating element, motor, thermal relay or timer. To check their functionality, disconnect the machine from the water supply and power supply, then drain the water manually. By inspecting each of the nodes in turn, you will probably find a malfunction. Broken heating elements, pumps and sensors can be replaced yourself.
If the machine stops working mid-cycle due to engine failure, it is better to entrust the repair to a qualified technician.
Drum problems
When the drum does not rotate or rotates in one direction, the machine starts the wash cycle as usual and the user does not even suspect a breakdown. You can notice the malfunction through the hatch window. Lack of rotation may have the following reasons:
- the drive belt is damaged;
- motor is broken;
- a foreign object is stuck between the tank and the drum;
- The electronics have failed.
Start diagnosing with a simple action: unplug the machine and try turning the drum by hand. If this cannot be done, it means that a foreign object inside is preventing the rotation. By eliminating it, you will solve the problem. If, when turned off, the drum rotates freely, then you need to disassemble the unit and find another cause of the malfunction.
After removing the back wall of the machine, inspect the drive belt for damage. It should be well tensioned and move by 12 mm when pressed. If the belt is damaged, it needs to be replaced, which is easy to do yourself. Remove the drive by carefully turning the pulley wheel clockwise, and when installing it, first put it on the engine drive gear.
Problems with electronics and the motor are more difficult to fix on your own; you may have to change the motor brushes, restore its winding, or repair the control board.
To check the drive belt, you need to remove the rear panel
Problems with draining water
After completing the wash cycle, the machine should completely drain the water. If after spinning there is liquid left in the tank, then there is a malfunction in the drain system. The cause of the problem may be a clog or a broken pump. First, inspect the drain hose; it may be pinched or clogged and needs to be cleaned. Then check the drain filter. In most units it is located at the bottom of the front part, behind a window or removable panel. Unscrew the part, remove any debris and rinse under running water. If the filter is damaged, it must be replaced.
Before repairing the drain system, you must manually drain the remaining water from the washing machine.
To check the pump, you need to remove it from the machine. To do this, lay the unit on its side and, if necessary, remove the tray. Then remove the wiring, loosen the clamps that secure the hoses going to the pump, turn it half a turn to the left and remove. Inspect the pump for foreign objects. Next, check the impeller and loosen it if the part rotates with great force. It is important to make sure that nothing is wrapped around the shaft. If the impeller moves freely and the drain still does not work, the pump may need to be replaced.
The causes of a malfunction of the drain system can also be a breakdown of the pressure switch or timer.
Noise and vibration during operation
Many users are familiar with the noise and strong vibration that occurs during operation of the washing machine. Most often, this behavior of the unit is caused by one or more reasons:
- drum overload;
- uneven distribution of laundry;
- unstable position of the unit on the floor;
- problems with counterweight;
- problems with tank springs;
- bearing failure.
If there are a lot of things in the drum or they are tangled into one lump, it is enough to manually distribute the laundry or remove a few extra items, and then start the washing process again. You can check the correct installation of the unit relative to the floor using a building level. To reduce the noise level, it is necessary to place the machine on a flat, stable surface, tightening the legs if necessary. If after these manipulations the equipment continues to make a lot of noise, remove the top cover, check the integrity of the counterweights and make sure that they are tightly screwed to the tank.
It is also easy to check the condition of the springs that hold the tank. They are located at the top of the body. Most often, parts break off or lose elasticity, so they cannot fully dampen tank vibrations. If you notice damage or wear to the springs, they need to be replaced.
Bearing failure is indicated by a characteristic sound that is heard when the drum rotates. The supporting parts of the shaft fail under the influence of moisture, constant overload of the drum or during long-term operation of the unit. Replacing a bearing is a rather labor-intensive process that requires certain knowledge and skills. If you do not have these, it is better to entrust the work to a specialist. You can learn more about the procedure for replacing the unit by reading our article “How to replace a bearing in a washing machine with your own hands.”
To reduce vibrations, install the unit on a stable, horizontal surface. You can check the position of the equipment relative to the floor using a building level
Hatch door malfunctions
It happens that after the wash cycle is completed, the hatch door does not open. The cause may be either a breakdown of the UBL or problems in other systems of the washing machine. First of all, look into the drum, perhaps there is water left there after washing. Then you need to eliminate the drainage problems described above. If there is no liquid inside, just wait a little. In some machines, the unlock signal is sent to the lock within a few minutes after the cycle is completed.
You can unplug the unit for a while, then turn it on again and try to open the door. If there is a failure in the operation of the UBL, a reboot will help fix it. The same principle applies to restarting the washing program, which can be used to unlock the hatch. After turning on, the machine will first unlock the door, then lock it again to start a new cycle. At the stage of unlocking the lock, which is accompanied by a characteristic click, stop the program and open the hatch.
If none of the options help solve the problem, you can perform an emergency opening of the hatch. Some models of machines have a special bright-colored cable at the bottom of the front panel, hidden behind a small cover. By pulling it, you can open the door in an emergency. When the hatch is open, you can inspect the lock mechanism and, if necessary, replace it.
In case of software failures, rebooting the unit helps to open a locked door.
Repairing a washing machine yourself is not always as difficult as it might seem at first glance. If you follow the operating instructions, and when troubleshooting, do not rush and act step by step, the result of the work will meet your expectations.
How to disassemble the tank and drum
Washing machines of the Indesit brand usually have non-separable tanks, that is, if any element located inside fails, the manufacturer recommends replacing the entire part. Such repairs can be expensive, so if it is necessary to replace, for example, a bearing, it is still better to disassemble the tank.
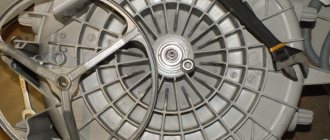
In the photo you see a non-separable washing machine tank in which the drum is located
Dismantling begins by removing the pulley (the wheel through which the belt passed)
The bolt that secures this part is subject to significant stress, and it is important that it holds tightly. Therefore, when assembling a machine, it is often not just screwed on, but also additionally secured with glue.
It is better to use a T40 hexagonal star wrench and loosen the bolt, gradually loosening it. If the part does not give in, spray it with WD-40 or carefully knock it off the glue with a hammer.
In order to unscrew the bolt securing the pulley, you need to use a T40 hexagonal star wrench.
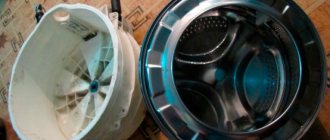
Next, we lay the tank on its side and carefully cut it with a hacksaw along the seam (where the two halves of the part are soldered). First, use a drill to drill holes around the entire perimeter of the seam (during assembly, the halves can be easily fastened with bolts).
When the tank is open, unscrew the bolts securing the drum, unfasten the fastenings and remove the tank wall. Now you can disassemble the drum, that is, remove the oil seal and bearings from it.
We start with the bearing located closer to the outside of the drum. We lay the part with the hatch hole down, place the chisel on the outer rim of the metal ring and hit it with a hammer.
You will need a hammer and chisel to remove the bearing from the drum.
We carefully monitor the position of the chisel when knocking out the bearing - if the tool slips and the inner ring is struck, it may fly out, and it will be quite difficult to remove the remaining bearing from the seat. We dismantle the inner bearing in the same way, and then remove the oil seal.
Why does the drum fly off?
How can you tell if the drum has fallen off in a washing machine? Do your own check:
- Open the hatch door and rotate the drum by hand. If you hear a hum and grinding noise, this indicates wear of the bearings. The same thing happens when you notice play by shaking the drum back and forth. That is, the drum has shifted or sagged, resulting in a gap between it and the tank. This means that the car needs urgent repairs.
- Run the spin program in the washing machine at maximum speed. If you hear a hum and beating of the drum against the walls, it has been torn off its axis, or it is hanging on the edge of the shaft. There may be problems with both bearings and shock absorbers.
- Spin the drum by hand. If it rotates slowly with extraneous sounds, it seems as if it has fallen off the shaft. The reason may be in the drive belt: it could jump off or come off.
- Look at the back of the drum through the bottom of the washing machine or through the back panel. If there are visible water leaks, wear and tear, the cause of the failure is in the bearings.
Let’s summarize and consider the main causes of failure with the symptoms described above:
- Problems with the drive belt. It could have stretched or worn out.
- Bearing wear.
- Shaft deformation.
- Damage to shock absorbers or suspension springs.
Now you know what the problem might be. You need to check all the options.
Choice of funds
You can clean the washing machine drum from dirt and deposits not only with commercial chemicals. In some situations, home remedies will come to the rescue.
Household chemicals
On store shelves you can see a lot of products designed to clean and subsequently protect automatic machines from scale and other contaminants. The following solutions may be useful in a housewife's arsenal.
- Bleach Whiteness is an inexpensive chlorine-based liquid. The advantages of “Belizna” are not limited to the low price - the product will eliminate small lime deposits in the drum, remove rust and unpleasant odors.
- Cleaners for washing machines of the Frisch-aktiv, Tiret, Dr. brands. Beckmann and many others. The cost of a bottle can vary from 150 to 500 rubles, however, the spectrum of action of these chemicals is wide. The products can remove lime and soap deposits from the drum and internal parts of the machine, oily contaminants, and even dissolve the remains of threads, hair or wool in the filter.
The fundamental difference between specialized products and chlorine bleach is the presence of anti-corrosion components in the composition. This means that all metal parts are covered with a film and wear out less during operation.
Important! Both chlorine bleach and other cleaners should not be used more than once or twice a year. Due to the aggressive effects of chemicals, the rubber band of the drum may lose its elasticity and even crack.
Home Remedies
Among the folk remedies that are effective are:
- acetic acid;
- lemon acid;
- baking soda.
With their help, you can eliminate unpleasant odors, clean soap deposits in the drum or in the detergent compartment. Vinegar or soda are unlikely to cope with old lime deposits, but this is their only drawback. The advantages of home remedies include absolute safety for the washing machine and humans, accessibility and ease of use.
Causes
It is better to carry out diagnostics immediately after the next wash. First of all, you should determine the cause of the breakdown.
To do this, we perform the following steps:
- We look under the bottom of the washing machine. Water leaks and puddles on the floor indicate that the device has become depressurized. If the washing and spinning process was accompanied by a knocking sound, after which we discovered a leak, most likely the problem is a worn-out bearing. This is also indicated by the following sign: the drum of the washing machine rotates with difficulty, as if something is stopping it. If the floor under the machine is dry, the problem is different.
- We open the door of the washing machine, grab the drum with both hands and begin to swing it from side to side. The drum should give in, but no extraneous sounds should arise. If you hear a knock, it means there is a malfunction in the system and, most likely, the problem is in the shock absorber.
Removing and sawing the tank
Now you need to put the washing machine on its feet. Carefully return the machine to the vertical position
This must be done carefully, as the tank is now held in the housing only by a pair of springs
Take a close look at your washer. The control module may interfere with removing the drum. If this is the case, you will have to disconnect the board. Unhook the wiring from the block, unscrew the bolts securing it, and, having mastered the latches, pull out the part.
The tank-drum assembly is heavy, so it is better to pull it out with two people. Together with an assistant, remove the mechanism through the top of the housing, removing the reservoir from the shock-absorbing springs.
After removing the assembly, it may seem that the work has come to an end. This is wrong. The tank of Candy washing machines is non-separable, so to get to the drum, you will have to saw the container. Such a misfortune as a “monolithic” tank greatly complicates equipment repair.
It is very simple to understand why the supplier equips washing machines with a non-separable unit. At a minimum, this allows us to reduce production costs, and therefore the cost of production, as well as the assembly time of units. As a maximum, the manufacturer hopes that if the components “hidden” in the tank break down, the consumer will most likely buy an automatic machine in a store rather than repair the equipment, since the cost of repair is usually equivalent to a new purchase.
However, the masters found a way out of this situation. They discovered a way to split the tank in half and remove the drum from it. The body of the container is carefully sawed with a hacksaw, and after repair work is completed, it is connected back together using silicone waterproof sealant.
To cut a non-separable tank of a Kandy washing machine and carry out repairs, you must:
- carefully inspect the container;
- understand where the factory weld goes;
- using a marker or pencil, mark the line along which the cut will be made;
- make small holes in the tank with a drill with a thin drill bit along the entire length of the cut line, at a distance of 3-5 cm;
- cut the plastic container along the intended line using a hacksaw;
- separate the upper part from the half with the drum;
- remove the drum. To do this, turn over half of the tank, find the wheel connecting the parts and remove it;
- to solve a problem. If the bearing assembly breaks down, remove the worn-out components, replace them, and install a new oil seal. If the process started due to “interference” stuck between the tank and the drum, remove the object and make sure that the plastic walls are not damaged.
When all the planned manipulations are completed, all that remains is to assemble the container. Moisture-resistant silicone sealant is used to connect the tank halves. First, the area of the new seam should be degreased, then apply the product around the entire circumference and connect the parts.
This is where the main difficulties end; all that remains is to assemble the Candy washing machine. The parts are attached to the housing in the reverse order. Refer to the photographs you took. Securely fix the elements inside, connect the wiring and sensors, and carefully check the connection diagram.
The process of removing the drum is very labor-intensive. This is why the cost of repairs carried out by specialists is so high. By doing the work yourself, without resorting to service, you can save a large amount of money.
Share your opinion - leave a comment
How to change the bearing yourself?
First of all, evaluate your strength. If you are not confident in yourself, then it is better to call a specialist. Also note that repairs will require specialized tools.
.
Important! Different models of washing machines may differ in internal structure.
Preparation
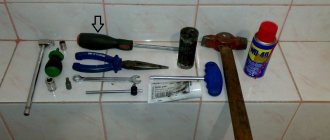
Required tool:
- sets of keys (socket, open-end and hex);
- regular and rubber hammer;
- various screwdrivers;
- a pair of adjustable wrenches;
- bearing lubricant (usually LITOL-24 is used);
- spare bearings and seals;
- chisel.
Prepare your workspace in advance. Disconnect the washing machine from the network and communications
. Move it so that you can easily reach the back of the device.
Disassembly process
This stage includes the following points:
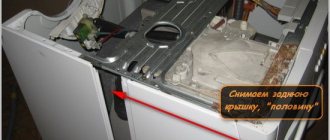
- First, unscrew all the bolts on the back panel and remove it.
- Remove the dispenser.
- Remove the control unit by unscrewing the screws that secure it.
- Remove the blockage.
- Remove any remaining mounting hardware and remove the front panel.
- Now you need to loosen the clamp, but first remove everything that interferes with this.
- Remove the counterweight and then the heating element.
The work of dismantling the heating element, although not too difficult, is very responsible. Be sure to remember or write down the order in which all wires are connected.
- Disconnect all wires, pipes and belt from the tank.
- Unscrew the engine and remove it from the mount.
- Now you can easily remove the tank and drum.
It is better to move the tank to another place, for example, a table, where it will be convenient to work with it.
Stage of disassembling the tank and replacing bearings
This stage is simpler, so it should not cause you any difficulties. Sequencing:
- Remove the rubber seal (cuff) to avoid damage during disassembly.
- Place the tank so that the pulley is on top and remove all the bolts holding the pulley in place. Remove the last one.
- Now the crucial moment is knocking out the shaft. This must be done with a rubber hammer by lightly hitting the shaft.
You can also use a regular hammer, but place a block of wood on the shaft, otherwise you may damage it.
- Once the shaft is free, remove all the bolts connecting the two halves of the tank. After this, separate them (the halves).
- Now the bearing is visible. But before you take it out, remove all excess grease and dirt that has stuck to the top
.
Take the time to inspect all parts of the washing machine for damage. In order not to disassemble it again later, it is better to identify all the faults at once.
- Knock out the bearing using a chisel, then remove the seals.
- Wipe thoroughly and lubricate the area.
- Install new seals and bearings and press them in using a hammer and chisel.
The work is finished. Now you need to assemble everything in reverse order, connect it and check it in action.
Before starting repairs, read about your washing machine on the Internet. If the tank is non-separable, then repairing the bearing is much more difficult. It is better to take the device to a service center.
How to seal the washing machine tank?
After repairing and replacing faulty parts, you need to reassemble the tank in the reverse order:
- First of all, carefully treat the joint surface of the tank halves. They should be smooth and free of rough scratches that may remain from sawing. To clean the surface, use a stationery knife:
- position the blade at 90 degrees to the surface being processed;
- Grind down all the irregularities, bringing it to perfect smoothness.
- Degrease the interface between the two halves of the tank.
- Lubricate the oil seal and shaft with oil seal grease.
- Insert the drum axle into the bearings.
- Secure with a pulley.
- Apply silicone glue (aquarium silicone washing machine sealant is ideal) to both halves of the tank.
- Spread the sealant layer so that it is even.
- Place both halves of the tank on top of each other.
- Tighten the halves around the circumference with bolts until the silicone dries.
- Let the glue dry.
- Reassemble the washing machine in the reverse order: screw the front weight, install the heating element, hang the tank, connect the pipes, motor, etc.
Repairing a washing machine tank is a rather complicated and lengthy task, because you not only need to properly disassemble the device, remove the tank, also disassemble it without errors (after all, not all washing machines have collapsible tanks) and only then begin the repair. And it’s not a fact that this repair can be done at home - it all depends on the malfunction. We hope that the information presented in the article will at least a little help you achieve your plans, and the washing machine will be grateful to you and will repay you with high-quality and long-lasting work.
Replacing shock absorbers
In modern washing machines, classic shock absorbers have been replaced with dampers, so disassembly will be described in accordance with the design of the new devices. The tank in the device is hung on springs, and shock absorbers are placed at the bottom.
Most often, in washing machines, it is not the damper itself that breaks, but the gasket and liners, which are responsible for the “elasticity” of the shock absorber, wear out. The cylinder wears out less often.
Replacing shock absorbers (this method does not work on all models)
In order not to disassemble the car in vain, it is better to make sure 100% that it is the dampers that have failed. To do this, place the equipment on one side, gaining access to the shock absorbers. In some models, damaged elements can be replaced in this way.
. Unscrew the mounting bolts that secure the dampers to the body (plastic pins can be used instead of bolts). In the same way, disconnect the element from the tank. Install new ones.
Even if the problem is in the gasket or liners, finding a repair kit is now almost impossible. Therefore, it is easier to replace the entire shock absorber.
If you can’t get to the dampers from below
On some models, the shock absorbers can only be accessed by removing the front panel. To do this you need:
- remove the top cover from the washing machine: unscrew the fixing bolts on the back of the device and slide the top panel;
- remove the powder tray and remove the bottom plastic panel covering the drain filter;
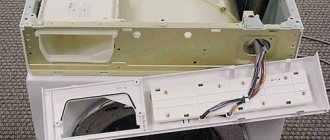
- dismantle the control panel - unscrew all fastening bolts, disconnect the wires;
- remove the rubber cuff, having first removed the clamp from it;
- Unscrew all the bolts that hold the front wall in place and remove it.
Before removing the front wall, you need to disconnect the wires coming from the door lock.
Having gained access to the dampers, dismantle them, then replace them with new ones and reassemble the constructor in the reverse order.
Reassembly and inspection
The reverse assembly process follows the following algorithm:
- we mount the tank in its original place (suspended on springs);
- install shock absorbers (for this work it is convenient to place the machine on its side);
- connect the drain hose;
- we connect the wiring to the heating element and the engine (it is convenient to carry out the work when the machine is positioned vertically);
- install the drum cuff and secure it with a clamp;
- connect the water intake, control panel;
- install a counterweight;
- fix the lid of the washing machine;
- We connect the washing machine to the sewer.
You can check the operation of a repaired washing machine only during the washing process. The machine is plugged in, select the required program on the control panel, and press the “start” button.
Common codes for Zanussi washing machines
Typically, a Zanussi washing machine produces the following error codes: E11, E12, E21, E22. Let's look at the most common combinations.
| Code | Problem |
| E11 | Washing water is not supplied. Most often, the code lights up if the valve supplying water from the water supply to the machine is closed. The pressure in the pipe may also be weak. It is possible that the filter mesh on the inlet valve is clogged. The integrity of the hose is checked and the filter is cleaned. It is advisable to check the resistance of the valve coil - a working element will give a reading of 3.8 kOhm. |
| E12 | Problem with water filling during drying. If the cause is the water inlet valve, the code will appear on the display 10 minutes after the start of the wash cycle. |
| E21 | Water does not leave the system - the drain filter needs to be cleaned and the pipes checked for blockages. It is also necessary to check the functionality of the pump impeller - it should rotate freely in both directions. If movement is difficult, the pump needs to be replaced. |
| E22 | Indicates a low level of water drainage during drying. The condenser may need to be cleaned. |
Assembly Tips
The assembly of washing equipment from different manufacturers may differ, but general recommendations from professionals will help to carry out this work efficiently.
After sawing, the two parts of the body can be glued together with silicone glue - this is the best sealant for this purpose, connecting both metal and plastic well. They need to carefully go around the edge of the cut, but try not to use it in large quantities. Before installing the new bearing, the seating area must be cleared of dirt and small debris. You can tap it not only with a hammer, but also through an insulating washer made of getinax
It is very important to hammer the part all the way. After removing the bearings, the drum shaft is thoroughly polished, and there is no need to remove the spider. Before checking the machine, it is also important to clean all parts of the equipment, including washing the drum and descaling the heater. It is better to place the tank on the springs with two people, but it is also possible to fix the spring at the top and then tension it.
If you are repairing the unit yourself, remember that assembly must be carried out strictly in the same sequence as disassembly.
Tricks for repairing a washing machine tank in the video below.
How to disassemble an automatic washing machine
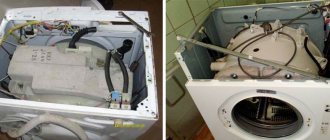
It is important to remember that work is performed only if the machine is completely disconnected from the network. Before disassembling, you must make sure that there are no foreign objects in the machine.
The water drain hose must be disconnected and the water supply must be shut off. Washing machines are divided into two types: horizontal loading and vertical loading machines. Each type has its own parsing features.
Disassembly of a horizontal loading type machine:
- Using a screwdriver, remove the screws that are responsible for securely fastening the back panel of the washing machine to the body;
- The front panel and top surface of the washing machine are dismantled in a similar way;
- A slotted screwdriver can be useful for removing the container into which the powder is poured and removing the control panel;
- The rubber cuff for the hatch is removed, then the bottom panel is removed;
- Before removing the tank, unscrew the screws on the bottom panel;
- It is necessary to remove all electronics from the drum and turn off the motor.
When disassembling a washing machine, you need to take into account the design features of the model
In any case, you need to watch the training videos a couple of times to fully understand the entire analysis scheme. Each machine may have its own peculiarities of connecting electronics and mounting, which will create difficulties in disassembly. This manual is suitable for Indesit, Bosch, Samsung machines.
Disassembly of a vertical loading type machine:
- It is necessary to unscrew the screws that secure all the walls and parts to each other;
- Pull out the side panel;
- For a vertical machine, the automatic wiring is located around the casing; it is dismantled by unscrewing and removing the screws.
The design features of a top-loading washing machine are its compactness. It takes up little space, and the disassembly of such machines differs from standard machines of various brands, such as Indesit or Ariston. The laundry tank itself is secured with screws, so it can be removed according to the instructions given above.
Bearing needs to be replaced
Bearing failure is diagnosed based on a number of criteria:
- Presence of backlash when swinging the drum by hand
Uncharacteristic hum when washing
The appearance of puddles under the machine
The bearing is considered a durable mechanism, the service life of which reaches 7-10 years. It breaks due to wear or flooding. Rusting of metal parts is a sign of a leaking drum or cracks in the powder reservoir. In this case, you should call a specialist who, based on professional diagnostics, will identify the causes of the washer failure.
Let's halve the glued tank
Disassembling a glued tank will be different from working on a “new” tank. First of all, this will affect fixation, since after repair it will be attached not only with self-tapping screws, but also with sealant. The first ones are easy to unscrew, but the second one will have to be tinkered with - the dried glue holds well and is not removed quickly.
Some “craftsmen” suggest removing the sealant with a sharp knife, picking and cutting. However, experienced craftsmen do not recommend doing this for two reasons. Firstly, it is too long and ineffective. Secondly, the blade can jump off its intended path and puncture the tank, creating a new problem. It is much safer and more effective to go the other way: cut the tank with a hacksaw with small scars, going in a circle along the seam. Repeated cutting will be easier, since only the layer of dried glue will provide resistance.
The main thing is to act extremely carefully, focusing on the old “path”. Even the slightest bevel will ruin the tank - gluing it will be extremely difficult
It is not enough to simply halve the tank - it is important to remove any remaining sealant. A layer of dried glue will prevent the tank from sticking together, so you need to clean it off the seam
We proceed like this: take fine-grained sandpaper and sand the cut without going into the plastic. Then we shake off the crumbs with a rag and proceed to repair the bearing assembly.
Washing machines with collapsible tank
50% of SMAs are collapsible. It is this solution that allows craftsmen to change bearings without problems. In the collapsible version, the halves are connected by bolts. The joint of the parts is lubricated with sealant or sealed with rubber - all this is done to prevent leaks. Disassembling a glued drum:
- A wooden beam is placed in the drum pulley and jammed. In this case, the tank is located with a hatch in the floor.
- Take a socket of the required size with a ratchet to unscrew the bolt securing the pulley to the shaft.
- Remove the pulley. Next, unscrew the bolts connecting the halves of the tank.
- Having unscrewed the bolts, they hit the shaft lightly. Remove the rear part of the element being dismantled.
- Use a blowtorch to heat the bearings and then pull them off with a puller.
