How to determine a breakdown
It is believed that the service life of bearings is 6-10 years. However, situations occur that accelerate wear. Loss of elasticity and tightness of the oil seal leads to water entering the bearing and washing out the lubricant.
If you often overload the SMA drum with laundry, then know that you are shortening the life of the bearing.
Factory defects account for a minimal percentage of all breakdowns.
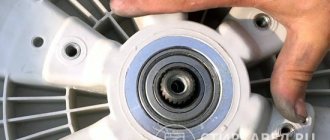
The louder the noise and the stronger the vibration during the spin cycle, the greater the wear. If you turn the drum by hand and it rotates unevenly, it means that the parts are almost worn out.
The same applies to the appearance of backlash. Rock the drum back and forth. If it moves far away from the tank, this is play, which indicates the need for repair.
Let's figure out how to independently replace the drum bearing in an Ariston washing machine.
Replacing a bearing in a Samsung washing machine with your own hands. How to replace a bearing: preparation
Replacing a bearing in a Samsung washing machine is the only correct solution in case of a breakdown, since repairing this component is often impossible.
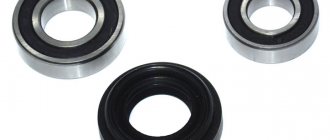
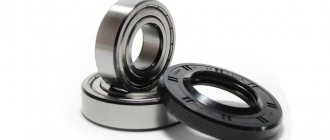
You should start preparing for work by searching for suitable spare parts. Now the market (both stores, service centers, and on the Internet) offers a huge selection of bearings for any model of Samsung washing machine. In the kit you will receive:
- the bearings themselves;
- oil seals;
- lubricant
To avoid confusion and to avoid buying the wrong set, tell the seller the exact model and year of manufacture of your washing machine. To make it easier to navigate, look at the table of spare parts for Samsung machines:
In addition to the part itself, you need to prepare a small set of tools. To dismantle the fasteners, unscrew the tank into 2 parts, knock out the bearings, arm yourself with:
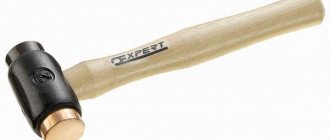
- small copper hammer;
- lubricant or WD-40;
- bent hex key;
- marker;
- metal pin;
- pliers;
- adjustable wrench;
- keys of various modifications;
- indicator, negative and positive screwdrivers;
- sealant.
All this will help you replace the bearing yourself according to all the rules.
Preparation for repair
Gather the tools that will be useful in your work:
- screwdrivers (flat, Phillips);
- hammer;
- bit;
- pliers;
- wire cutters;
- puller (if any);
- socket wrenches;
- WD-40 product;
- glue, sealant.
You will also need new seals and replacement bearings. These two parts need to be replaced at the same time, even if one of them is less worn. This is cost-effective, because without doing this, after a while you will be repairing the machine again.
You can find out how much a bearing for an Ariston washing machine costs in any online store. You can select new elements based on the brand and model of the washing machine. Look at the markings on old bearings if the markings are clearly visible.
Now start preparing the car. Unplug it. Look around to see if there is enough space for work and complete disassembly of the SM. It might be better to move to the garage.
Prepare a container to collect water. Close the inlet valve and disconnect the intake hose from the housing. Drain the water from it.
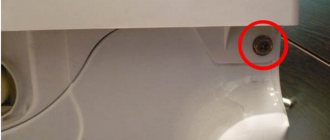
Then go to the front wall of the SM. Below you will see a small hatch with latches. Remove the lid, place the container and unscrew the drain filter. After draining the water, proceed to the next steps.
Replacing bearings in an Ariston Hotpoint washing machine with your own hands.
Time is merciless(((... rumbled... but... honestly... the next one will be Ariston again... the hub assembly with bearing and oil seal is simple and ingenious! No need to saw or solder anything... it’s like changing the hub on a car... I was pleased with this technological solution... in general I didn’t take a lot of photos... I read here for information... but at first glance everything is easy... in fact, for a very long time, micron by micron, I removed both the pulley and the right hub... what was leaking there and was a little rusty... ... I also removed the pulley in the same way... beat the shaft through a piece of wood or screw in a bolt!..
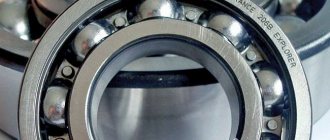
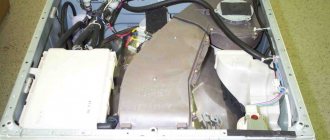
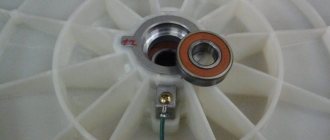
the condition of the oil seal and bearing, alas... the years have taken their toll...... the wear from the oil seal is visible on the shaft. with something in Belgorod in a company selling spare parts......an SKF 6204 bearing with a groove, like the hub assembly itself......with a knife we break off the edges above the bearing and press it out on a press...
... again, we cut off the outer edges of the hub with a knife, and in the middle from the groove...
...on the press we press in a new bearing, previously filled with grease on one side... I put FAG on the right side, and there was a small mistake... SKF comes with rounded corners, respectively, in its seat the same... FAG has straighter corners, it is about a mm didn’t fit in the hub......well, the toad categorically did not allocate a budget for a new oil seal, so a regular 35*52*7 was installed, with a pre-spring in it......we put grease between the oil seal and the bearing...the new hub comes with a tube of lubricant......well and installation in reverse order...
the left side was easy, there was no rust there... I didn’t take a photo... I already installed SKF there... it stood up like a native)...
Total... new hub assembly from 1200 RUR. one... oil seal from 500 rub. one... it's in stores... well, a stork brought me oil seals and bearings)... replacement cost is only 0 rubles)... Happy May holidays to everyone)!
Stage-by-stage execution of work
We will tell you how to change the bearing in an Ariston washing machine. Disassembly of the SM will be identical for Hotpoint Ariston Aqualtis, Hotpoint Ariston ARSL 105, Ariston Margarita 2000 and other models.
Covers and panels
Take a Phillips screwdriver. Walk around the washer, standing towards the back wall. Remove the two bolts that secure the top cover. Then slide it forward and remove it from the body.
Proceed to the back panel. Unscrew the screws around the perimeter and set the cover aside. At the same time, remove the drive belt - turning the pulley by hand, pull it towards you.
Control Panel
Go to the front of the washer. Pull out the detergent dispenser: pull the tray towards you by pressing the lock in the center; take it out and put it aside. There are several bolts behind it, and another 1-2 bolts on the opposite side of the panel. Unscrew them and unfasten the plastic latches.
Now the panel is supported only by the wires - you can throw it on top of the case. But if you decide to disconnect, it’s better to immediately take a photo of the location of the connectors for proper connection.
Top part
You need to remove anything from the top of the tank that might interfere with its removal. This:
- Powder receiver. Loosen the clamp on the pipe leading from the hopper to the tank. Remove the pipe. Disconnect the inlet valve contacts and unscrew the fastening screws. Remove the valve together with the powder receptacle.
- Counterweight. Unscrew the bolts securing the upper counterweight and remove it.
- Pressostat. Disconnect the pressure switch hose that is attached to the tank, otherwise it may break during dismantling.
Front Panel
Open the hatch door. Having bent the sealing rubber, use a screwdriver to pry up its clamp and pull it out of place.
Unfasten the hatch lock wiring (UBL) by placing your hand behind the body. First unscrew the two mounting bolts.
If you are afraid of damaging the door glass, we recommend removing it immediately. To do this, unscrew the screws that secure the door hinges and set it aside.
All that remains is to unscrew the screws around the perimeter of the front panel and remove it. Now unscrew the lower counterweight bolts to remove it.
Rear end
Disconnect the wiring from the electric motor at the bottom of the tank. Unscrew the bolts (three to four pieces), move the engine first forward, then pull it back and remove it from the housing.
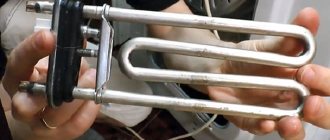
Disconnect the heating element wiring. The heater itself does not need to be dismantled. If you damage its sealing rubber, you will have to completely change everything.
Also, if there is wiring attached around the perimeter of the tank, use wire cutters to cut the clamps and move the wires to the side.
Shock absorbers
The tank is secured only by shock absorbers and hanging hooks. Unscrew the shock absorber screws, remove the tank from the hooks and pull out the tank.
You have disassembled the washing machine. Now you need to get to the bearings.
Replacing the bearing in an LG washing machine with your own hands. Replacing a bearing in an LG washing machine
Household appliances from LG, a popular company among Russian consumers, are distinguished by their comfort and low noise level during operation. Therefore, if a washing machine, which has served faithfully for several years, begins to hum, knock and shake during washing or spinning, this is the first sign of a malfunction. And, most likely, you will have to replace worn out bearings.
Replacing a bearing in an LG washing machine is not such a difficult task for skilled men’s hands. However, this type of repair will require some skills, accuracy and patience. Therefore, think twice whether to take on this troublesome task yourself or whether it would be more practical to turn to a specialist. To replace the bearings, you will have to almost completely disassemble the washing machine, and one awkward movement can lead to the breakdown of any part of the complex equipment, which will entail even more problems and expenses.
Do-it-yourself bearing replacement in an LG washing machine
Have you decided to change the bearings in your LG washing machine yourself? Then carefully study the instructions or find a suitable
Preparing for work
You won't be able to replace the bearings directly in the bathroom - you need a large space to disassemble the machine and lay out all the parts separately from each other. After all, after the work is completed, you will have to reassemble the unit, and it will be easier to do this if all the components are in place.
It is important to prepare in advance all the necessary tools for the upcoming work, so as not to be distracted by searching for this or that during the process itself.
What tools are needed to replace a bearing?
- Small hammer.
- Screwdrivers – flat and Phillips.
- Pliers.
- Set of open end wrenches and sockets.
- A metal pin about 40 cm long or a rod.
- Sealant and lubricant for bearings.
- Liquid WD-40.
Having prepared the tools, you can begin purchasing suitable replacement parts. It is best to buy original components from the LG manufacturer, but they also need to be selected based on the specific model. Therefore, before such an important purchase, check the component correspondence table and determine which spare part is suitable for your SM model.