Date: 08/27/2015
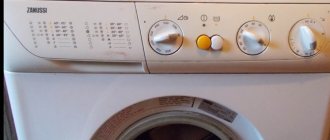
The most important driving element of a modern washing machine is its electric motor. It is responsible for rotating the drum in the washing, rinsing and spinning modes. And if it breaks, the device will freeze. Is it possible to repair a washing machine motor with your own hands without the help of experienced specialists?
Having straight hands and certain skills in repairing simple household appliances, you can repair anything, including the motor of a washing machine. If you are absolutely sure that the reason for the lack of performance is a malfunction of the engine, you can begin to remove it and carry out repair work.
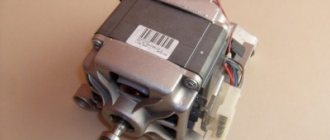
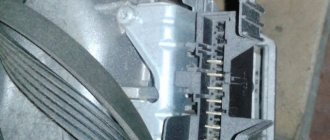
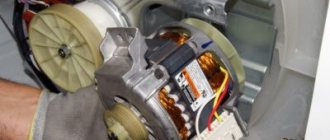
Before you start repairing the washing machine motor, you need to obtain information about the type of motor used in a particular device, because depending on the type of washing machine, it may have a different type of motor. A brushless induction motor, a simple brushed motor or a direct drive motor can be installed here.
Asynchronous motors are highly resistant to breakdowns, but they are rarely used in modern washing machines. are another matter - they work on the vast majority of devices . They are characterized by good technical data and low cost, and can work for up to 8-10 years.
In addition to machines with commutator motors, there are direct drive models on the market. They use special engines, which are almost impossible to repair on your own. And the manufacturers provide such a long warranty on them that it is easier to send a broken engine to a service center for repairs. For example, the warranty on LG engines is 10 years.
Removing the motor from the washing machine
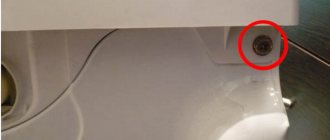
But let's return to our commutator motor. How will we repair it? First, we'll look at how to remove it. First of all, remove the back cover and belts in the same way as when replacing the belt of a washing machine. After this, we proceed to remove the bolts holding it - the fastening system may differ slightly. Also, do not forget to disconnect the connecting terminals with which the motor is connected to the power wires.
In some models, the engine may be pinched by the tank itself. In this case, the tank will need to be raised slightly, which will allow the motor to be released with relative ease. By the way, the number of bolts holding the engine may vary - to remove them, prepare a set of wrenches.
Does the rear cover prevent you from reaching the engine and removing it? Then try removing one of the side walls - it is quite possible that this is where access to the engine will be located.
Video material
The washing machine is considered by many to be almost the main technical invention of the last century. Of course, because it simplified life in many ways and saved time. However, unfortunately, equipment can fail and a common problem is motor failure. If this happened after the warranty period had expired, then repairs to the electric motor of the washing machine will need to be carried out at your own expense. Doing the repairs yourself or turning to a specialist is a matter of believing in yourself and objectively assessing your own skills.
Motor fault detection
Commutator motors have one important advantage - simplicity. Three things most often break here - brushes, lamellas, windings. Let's figure out how to inspect the components and identify the malfunction. But before that, let's try to start the engine, because we need to see whether it will work or not.
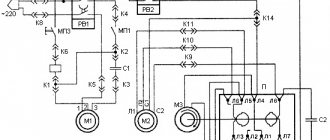
To start the engine, you need to connect the rotor and stator windings in series, and then connect an alternating current source with a voltage of 220 Volts to the remaining connectors. If all is well, the engine will begin to rotate. At this time, we can determine its noise level and identify sparkling brushes.
Brushes
If your washing machine is about 10 years old, then the brushes will be in terrible condition - this is most often indicated by severe sparking of the engine. Worn out brushes are small in size, you will see this immediately. If the brush is intact, it will be long enough, without chips or cracks. If this is not the case, then a replacement needs to be made. When replacing brushes, try to use original components - this will increase the service life of the repaired engine. Choosing brushes for a washing machine and replacing them yourself is a simple, but responsible task.
Rotor and stator winding
If the engine operates with strange noises or does not reach full power, makes a lot of noise or gets hot, then the reason for this may be a faulty winding. The windings are checked using a very ordinary multimeter (in ohmmeter mode), by successively touching the probes to adjacent lamellas. The difference in resistance should not exceed 0.5 Ohm . If this is not the case, then we can diagnose an interturn short circuit.
By the way, interturn TZ can be diagnosed by the presence of strong carbon deposits on certain lamellas - reduced resistance increases the current strength. Also, overheated windings give off a strong odor, which is associated with their overheating. If there is no resistance between the lamellas, then this is a consequence of a break in one of the windings.
We also need to determine the performance of the stator - this is done in a similar way. Lastly, we check the short circuit of all windings to the stator or rotor iron (to the housing). To do this, we use a multimeter, applying one probe to the body, and the second one passing along the lamellas and the output of the stator windings.
If the windings are working properly, then the resistance will be very high (tens and hundreds of megaohms).
Slat wear
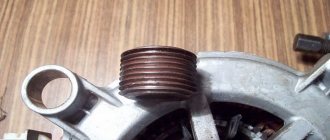
Diagnosing lamella wear is as easy as brush wear. To do this, you simply need to inspect the manifold by completely removing the rotor from the engine. Peeling of the lamellas, breakage of the supply contact, the presence of burrs - all this leads to the fact that the brushes begin to spark.
The cause of peeling of the lamellas is jamming of the rotor or the presence of an interturn short circuit. As a result, the lamella begins to overheat and peel off. If the contact is broken at the junction with the lamella, then the reasons may be different, but getting the wires back can be very difficult.
First, the “engine” needs to be removed
There are three types of SM motors: inverter, commutator and asynchronous. At the moment, most washing machines around the world are equipped with commutator motors, so using their example we will consider the entire procedure.
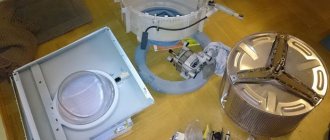
Naturally, you need to start by disassembling the washing machine and removing the engine itself. Disconnect your home assistant from all communications and position her in such a way that you have easy access to her from all four sides. Take action.
- Remove the panel hiding the utilities. For front-loading machines, this is the rear panel; for vertical-loading machines, it is the side panel. Unscrew the bolts and slide the wall down.
- Locate the pulley (the large wheel adjacent to the drum) and the drive belt that goes onto it. Grasp the belt at this point, rotate the pulley and remove the belt. The algorithm of actions is reminiscent of replacing a bicycle chain.
- Remove the wiring from the motor.
- Using a spanner wrench or other suitable tool, remove the screws holding the motor in the socket.
- Take out the engine. It is held on by straight pins, so you need to take it out by rocking it slightly down and forward. Experienced craftsmen lightly tap with a hammer to make the task easier, but it’s better not to take risks, you don’t want to inadvertently damage the part.
Usually the dismantling process is easy for users. Now that the electric motor is in your hands and before your eyes, you can begin diagnostics.
Replacing brushes on a washing machine motor
Brushes on commutator motors are quite easy to change. Only some models can cause us some inconvenience - sometimes the brush mounts are hidden deep in the engine, so it has to be completely disassembled. This is typical for older engines, but in new models everything is done much more simply - you can get by with an ordinary screwdriver, using it to pry off the fasteners protruding near the collector itself.
If your car has an old-style engine with closed brushes, then it needs to be disassembled. Try to disassemble it so that it can be easily and quickly returned to its original state without messing up anything. As a last resort, photograph your every step. After replacing the brushes, try cranking the engine - the brushes should rustle gently along the lamellas, without making much noise, and without clinging to them.
What to do if the winding is faulty
What to do if we find a short circuit or break? The best option is to find the same rotor or the same stator. If we give the engine for rewinding, then they will charge us enough to buy a new engine and still have some change left over. This is due to the fact that in addition to rewinding, the rotor must be centered to avoid its beating.
We conclude that if the windings are really faulty, you should either change the stator or rotor, or completely replace the motor.
Are the slats intact?
The rotor lamellas are held on to it by a special adhesive material. When the rotor jams, or a short circuit occurs between the turns, strong heating occurs and the lamellas begin to peel off. It is also possible that the contact in the rotor section has broken.
Sometimes small nicks appear on the lamellas, which cause the brushes to wear out faster and spark heavily. The causes of such a breakdown may be jamming of the rotor or starting the wash with the drum flaps open in machines with a vertical loading type.
Grooving the lamellas yourself
Has the lamellas become detached? Then you need to assess the scale of the disaster. If the lamella has peeled off by literally 0.5 mm, an ordinary groove on a lathe will help - clamp the rotor and carefully equalize the thickness of the lamellas. After this, carefully clean the gaps between the lamellas; there should be no traces of metal shavings left in them.
As a result, we get a flat surface from many lamellas, with well-cleaned gaps - to make sure of this, we check the resistance between the lamellas with an ohmmeter. If the ohmmeter shows a short circuit, then the spaces between the lamellas need to be cleaned more thoroughly.
By the way, cutting lamellas does not always give positive results, since most often we eliminate the effect, not the cause. It should also be remembered that it is almost impossible to return the slats to their factory appearance, so grooving is not a panacea . If the lamella has completely peeled off or torn off, you should throw the engine in the trash bin - nothing can be done here at home.
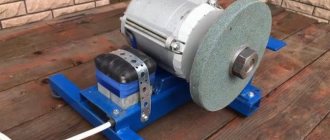
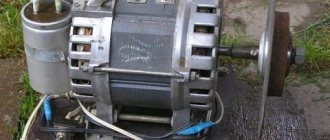
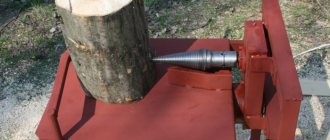
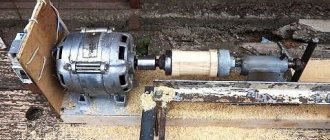
Don’t despair if the engine cannot be repaired, because you can use it to make various homemade items from a washing machine, for example, a sharpening machine.
Diagnostics
Initially, the brushes needed to be replaced due to their complete wear. As a result, a circuit break occurred. Since we are talking about the engine of a Bosch washing machine, operation was blocked and error F21 was displayed. As in Siemens washing machines, this indicates problems with the motor or control module. This is done in different ways, depending on the model.
You can find out more about how to reset error F21 in this article. So, after repeated attempts, the fault code did not disappear from the display. As a result, the engine was again additionally dismantled, and after checking the contacts, a current leakage to the housing was discovered. It was because of this that the error could not be reset. But blowing and cleaning accessible parts did not help. Largely due to the fact that Bosch washing machine motors are very tightly packed.
