How to reset?
The easiest way to reset a program on any machine is to reboot the system.
But this method is used if the machine does not respond to commands and freezes a lot. In other cases, an emergency reboot is not recommended, since the board and electronics as a whole are at risk. It's better not to take risks and practice safe cycle reset. To reset the program safely, you need to follow the following instructions.
- Press the “Start” button for 3-6 seconds.
- Wait until all the lights on the dashboard turn green and go off.
- Make sure the wash is paused.
When the mode is reset successfully, the machine “goes silent” and all the lights on the panel blink and go out. If after the manipulations there is no “blinking” and silence, then the situation is bad - the machine is faulty and the system generates an error. In this case, you cannot do without a reboot.
A proper reboot is done like this.
- Turn the programmer to the first position.
- Press the Stop/Start key and hold for 5-6 seconds.
- Disconnect the machine from the power supply by unplugging the power cord from the outlet.
- Turn on the power supply and run a test wash.
If the machine does not respond to turning the selector and the start button, you will have to act radically and immediately pull the cord out of the outlet. But it is better to try to carry out preliminary manipulations several times. Do not forget that if the machine is suddenly disconnected from the network, the user risks damaging the control board and the electronics as a whole.
Video
For your viewing pleasure, here is a video of the repair of a Samsung S821 washing machine:
About the author:
Electronic engineer with many years of experience. For several years he was involved in organizing the repair of household appliances, including washing machines. Loves sport fishing, water tourism and travel.
Found a mistake? Select it and click the buttons:
Ctrl + Enter
Interesting!
Washing machines equipped with the “No Iron” or “Easy Iron” functions can wash clothes with little to no wrinkling. This effect is achieved through a special approach to spinning - it is performed at low speeds, with long pauses, and a small amount of water is retained in the tank.
Samsung washing machine error codes
It is much easier to determine damage if there is a display on the control panel. In case of malfunctions, symbols are displayed on it, each of which corresponds to a specific breakdown.
| Basic error codes | Corresponding fault |
| 4C | Water does not fill or fills too slowly (the filling process takes more than 20 minutes) |
| 4С2 | Make sure that the inlet hose is connected to the cold water pipe |
| A0,B0,C0,D0,E0 | Diagnostics of the washing machine is enabled (test mode, which is used at the factory) |
| 5C, 5E, E2 | Water does not drain |
| dC | Door is open |
| O.C. | Excess water, you should spin the machine and restart it |
| LC,LC1 | Problems with the inlet hose |
| Ub | Spin does not work |
| U.C. | No power supply, low voltage, check connection |
| 3C | Engine doesn't work |
| NS | The heating temperature has been exceeded; the thermostat may be faulty |
| 1C | The water level sensor is not working correctly |
| DDC,ddC | Appears if the Add Door (for loading forgotten laundry) is opened without pressing the Start or Pause button. |
| DC3 | Add Door lock does not work correctly |
| Sd | Too much foam |
| DC1 | The main door lock did not work correctly |
| Sun | The unit cannot start the engine |
| PoF | There was a power outage during the washing process |
| Hot | During the drying process, the temperature inside the drum exceeded 700C |
| LE,LC,E9 | Spontaneous drainage of water due to a low-lying hose or a leak. |
Please note that the listed fault codes are periodically modified and new ones are added. Therefore, before starting repair work, you should check the list of errors specified in the instructions.
Source
Leaking
If a puddle forms under the machine during washing, you need to check the following places for leaks:
- Supply hose;
- Loading hatch cuff;
- Pump, filter and drain pipe;
- Tank seal;
- Retractable powder dispenser and water supply tubes.
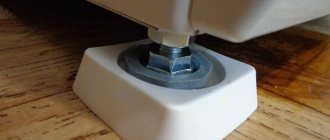
Inlet hose
Connection points for the inlet hose - you need to tighten the nut more tightly, but without using a wrench.
Drain pump with drain pipe
Leaking from under the bottom of the washing machine. We lay it on its side and check all the connections between the drain pump and the filter and the drain pipe. The clamps need to be tightened more tightly. If the pipe material has lost its elasticity, it is better to replace the part completely. But as a temporary measure, for 1-2 washes, the seat can be lubricated with some kind of sealant, then install the pipe and tighten the clamp.
Very often, during washing, foreign sharp objects fall out of pockets, which can damage the cuff near the hatch. In this case, there is only one way out - simply replace it. The cuff is made of silicone and cannot be repaired.
Cuff damage
Replacing the cuff
This type of malfunction is especially likely in vertical washing machines, since they have a large cuff area.
For a vertical cuff, replacing the cuff is a rather troublesome procedure, but does not require special skills, only accuracy. The plastic retainer that holds the cuff on a metal or plastic body does not provide for the possibility of removal or reuse, so it must be carefully cut off or removed in another way (nippers, pliers).
The cuff itself must have a special profile that is put on the protrusion - the seat, until it stops
When installing, pay special attention to the markers. Both on the cuff and on the body of the washing machine there are arrows, and in the cuff there are additional protrusions for fasteners
They need to be carefully placed in the right places.
Markers must match
When purchasing a spare cuff, make sure that the repair kit includes clips.
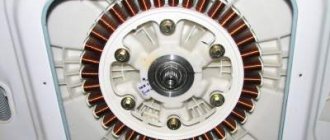
General scheme. Basic parts of the washing machine
Not every user can understand the electrical circuit of a washing machine, but it won’t hurt to learn about the basic systems. The pictures below show the following components, which are found in almost every washing machine:
- counterweight;
- water level relay (sensor);
- noise suppression filter;
- drain filter;
- pump (pump);
- drain hose;
- drum motor;
- tubular electric heater (TEH);
- start-up voltage relay;
- power block;
- thermostat;
- inlet hose;
- drum pulley;
- drum (tank);
- dispenser;
- detergent supply system;
- drum springs;
- solenoid valve.
Let's consider some basic parts, the failure of which is the reason for contacting the service center, the reason for purchasing a new washing machine.
Control system
All modern automatic washing machines are equipped with some kind of computer that processes information from sensors, controls the supply and drainage of water, and switches cleaning programs. The number of programs that are installed in the control module varies depending on the model. The presence or absence of particularly convenient washing modes has a significant impact on the price of the unit.
The cause of the breakdown can be either a failure in the operating system or failure of electrical components and sensors. Broken electronics usually cannot be repaired. Here is a list of those relays whose failure will not allow you to start washing.
- Water level sensor (pressostat). Reports the amount of water in the drum.
- Thermostat. Built into the drum from the bottom, it regulates the temperature of the liquid.
- Drum rotation speed sensor.
Solenoid valve
This module is responsible for filling the drum with water. Works in conjunction with a pressure switch. When the valve receives a signal that there is enough liquid in the tank, it closes and water stops flowing.
Drum motor
It is a standard electric motor. Rotates the drum, transferring the energy of movement through a belt drive to a pulley. The speed and direction of rotation are set by the control system taking into account the indicators of the speed sensor.
If it breaks, you can replace it with any similar engine that is suitable in size and power. There are washing machines with direct drive: the drum rotates due to a magnetic field. Many models with this type of engine are found in Indesit and Zanussi.
Loading hatch
The door located on the front panel. Before starting the wash, the control system locks it so that the user cannot accidentally open the hatch while there is water in the tank. The latest Ariston models have the function of loading items during washing through a special compartment. Through it, the clothes are loaded into the drum.
A heating element
Begins to heat the water in the tank upon command from the control system. At this time, the thermostat begins to measure the temperature. When it reaches the required value, the heating element turns off. The most common cause of failure of this part is the formation of a thick layer of salt deposits (scale) on it. This layer impairs heat transfer, which leads to systematic overheating of the metal tube.
Use cleaning products along with powder to prevent deposits from forming on the heating element. Samsung supplies its washing machines with heating elements that are extremely resistant to scale formation. This is achieved through a double ceramic coating.
Drain pump
Before starting the spin program, all water is drained from the tank. A pump is involved in this process. It consists of a filter and an electric motor with an impeller. The cause of pump failure may be failure of the electric motor or general contamination of the system. The filter is located at the bottom of the front of the housing in most washing machines.
Don't forget to take it out for cleaning every six months. LG and Bosch are developing the latest generation of filters that will have a self-cleaning function.
heating element
Hard water causes the heater to break down, resulting in scale formation. On the heating element, due to constant heating, it turns into stone and damages the surface. Note that in regions where there is soft water, for example, in St. Petersburg and the surrounding area, heaters practically do not fail. Moscow has hard water, and such damage is a pressing issue.
Removing the heating element
In order to extend the service life, use anti-scale products: Calgon, professional converters, or folk ones in the form of citric acid.
The malfunction manifests itself in two ways:
The heating element burns out;
leakage occurs on the housing.
In both cases, diagnosis is carried out with a multimeter. In order to gain access to the contacts, you must remove the front panel. See the disassembly sequence here. Unhook the wires. We put the tester to check the resistance.
First, we examine the contacts that receive voltage. If there is infinity between them, then replacement is necessary. Then we set the maximum limit.
Expert opinion
I work in the household appliance repair industry. Extensive experience in restoring washing machines and dishwashers.
Ask a Question
Important! Reliable results can be obtained if the multimeter measures up to 40 MΩ. We look at the resistance between ground and each contact
If the value is different from zero, then the heater must be replaced. Operation with current leakage will lead to incorrect operation and damage to the control module.
We look at the resistance between ground and each contact. If the value is different from zero, then the heater must be replaced. Operation with current leakage will lead to incorrect operation and damage to the control module.
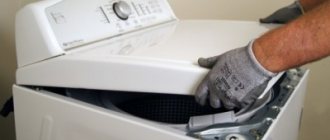
Preparing for disassembly
Before you begin the main procedure, you need to perform several preparatory steps.
They include 3 main stages:
- Take the device out of the bathroom, as it is very difficult to disassemble it in a narrow room. In addition, the room should be well lit. The area of upcoming work should be covered with rags or newspapers so as not to spoil the floor covering (if the work is planned to be carried out in an apartment).
- Prepare tools.
- Prepare the device itself for upcoming repairs.
To completely disassemble the washing machine, you will need the following set of tools:
- screwdrivers or screwdriver;
- wrench and hex key;
- pliers;
- multimeter;
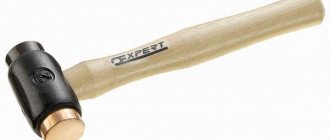
- hammer;
- colored markers;
- WD-40 lubricant;
- sealant;
- rag.
Sometimes it becomes necessary to cut the tank, for example, to gain access to the cross. In this case, you cannot do without:
- hacksaws,
- drills,
- drill,
- self-tapping screws and bolts.
You need to take care in advance about the possibility of taking photos or videos of the entire work process. This will allow you to correctly assemble the device after repair.
Preparing the machine itself involves going through the following steps:
- Turn off the power to the device. It is unacceptable to disassemble a machine connected to the mains.
- Disconnect the water fill and drain hose.
- Remove the drain filter and drain the water in it. If it is dirty, it can be cleaned.
- Place the device in a convenient place.
After all the preparatory work is completed, you need to study the diagram of the washing machine. You can learn how a Samsung washing machine works from this article.
If the Samsung machine is under warranty
If a machine that is under warranty breaks down, you should not try to repair it yourself. .
First you need to find a warranty card. It may indicate the number of the service center to contact.
If there are no contact details, you need to go to the store where the equipment was purchased. At the point of sale, the goods must be taken away for examination.
After determining the cause of the breakdown, there are 3 options for the development of events:
- The device will be repaired free of charge.
- The buyer gets his money back.
- The product is exchanged for a similar one.
As a rule, problems do not arise with equipment that has a manufacturing defect. If the store refuses to accept a broken machine, you need to write a complaint addressed to the director. When you cannot get an answer, you should contact the court or the Consumer Rights Protection Department. The maximum period for consideration of a claim is 10 days.
Delivery of the washing machine to the store is the responsibility of the buyer. The seller must transport the equipment to the examination site.
If he did not do this, and the cause of the breakdown is defective, the store is obliged to pay the costs incurred by the consumer. In this case, you need to collect all the receipts to prove your case in court.
Manufacturer
Washing machine manufacturer Samsung is an experienced player in the global household appliances market. Its history began back in 1938, and the Samsung brand itself was registered in 1948.
Where are Samsung washing machines made?
The Samsung brand belongs to a Korean company of the same name. The word is translated as “three stars,” which symbolizes the connection with the three sons of the company’s founder.
Do not think that Samsung washing machines are produced only in Korea. To date, production facilities have been established in China, the USA, Russia, Poland and other countries.
The products are aimed at a wide consumer, so the manufacturer cares about its quality and maintaining the image of a global brand. This article will tell you where Samsung washing machines are assembled.
Technologies
Exclusive technologies of Samsung washing machines:
- AddWash.
It allows you to add items to the appliance after starting the wash cycle. For this purpose, an additional door is provided in the hatch. Thanks to its presence, you can reload forgotten items, or add them to the drum only for rinsing or spinning. - Eco Bubble is an option that involves turning on a foam generator. It promotes deeper penetration of the detergent into the fabric fibers and better removal of dirt.
- Samsung Smart Home. Thanks to this technology, the washing machine is synchronized with a smartphone or laptop. This allows you to control the device remotely.
- Volt Control. This technology is aimed at protecting the washing machine from voltage surges.
- Diamond Drum. It has a special relief, which leads to less tissue damage during spinning.
- VRT+ - vibration prevention technology.
- Aqua Stop – an option to shut off the water supply if it leaks.
- Can Balance is a drum balancing technology.
- Child lock. Activating this option allows you to lock the panel.
The range of technologies may differ depending on the washing machine model. The more expensive the device, the more options it has.
Advantages and disadvantages
The main advantages of Samsung automatic machines include:
- High quality electronics, the presence of powerful technological components.
- Intuitive interface.
- An abundance of programs and additional modes even on budget models.
- A wide range of products allows you to choose a device based on your personal needs and financial capabilities.
- Stylish futuristic design.
- Service maintenance. Availability of branded workshops in most localities.
The main disadvantage of Samsung washing machines is their high noise level. This drawback is especially noticeable during spin startup.
Although the manufacturer claims that its equipment is “super quiet”. However, it should be noted that the hum produced by the drum is uniform and is not capable of affecting the quality of life of the owner of the device.
The weaknesses of the equipment include frequent bin leaks and damage to the drainage system.
Device
The main elements of Samsung washing machines:
- electric motor;
- tank;
- water pump;
- pipes;
- tray for receiving detergents;
- shock absorbers;
- heating element;
- drain filter;
- electric pump;
- drum pulley;
- snail;
- temperature control sensor;
- counterweights;
- hatch blocking device, cuff;
- control module;
- water level sensor;
- drain block;
- hose;
- control Panel.
The body itself is represented by side, top, front and back covers, as well as a bottom. Depending on the type of loading, the hatch can be located horizontally or vertically. In Russia, models of the first subspecies are predominantly found.
You can learn how a Samsung washing machine works from this article.
Dimensions and weight
The width, depth and height of Samsung washing machines are different. There are three size options:
- Standard. Their width is 60 cm, height – 85 cm, depth 60 cm. They are designed for a load of 7-10 kg.
- Narrow models. Their dimensions are: height 85-90 cm, depth 32-45 cm, width - 60 cm. The average load of such a device is 5-6 kg.
- Compact machines, the dimensions of which are: width 45-50 cm, depth - 45 cm, height - 70 cm. Such devices are designed for a load of 3-4 kg.
Vertical models have the following parameters: height - from 85 to 95 cm, depth - 60 cm, width 40-45 cm. The weight of most machines is 70 kg, although some models can weigh up to 85-90 kg.
Read more about the sizes of Samsung washing machines here.
Causes of malfunction
A sudden leak can occur in a device from any manufacturer, even Samsung. The main reasons for the appearance of puddles on the floor include:
- operating errors;
- use of low quality parts;
- using the wrong detergent;
- mechanical wear of elements and components;
- violation of the tightness of connections.
It is extremely rare that a leak can be the result of a manufacturing defect. In this case, the defect appears almost immediately after starting the washing machine.
The following error codes on the display can indicate water leakage or spontaneous draining of the tank in Samsung washing machines: LC1, LC, E9, LE1, LE.
On devices that do not have a display, the leakage signal may be the following condition:
- blinking mode lights (all);
- the glow of the temperature indicators - the highest and the lowest.
The washing machine does not always display an error code when water leaks.
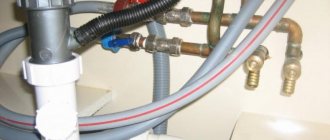
Inspect the hoses
Two hoses lead to the washing machine:
- drain;
- for collecting water.
Both of them can become sources of leakage. Therefore, a complete and thorough inspection should be performed:
- It is necessary to check the quality of connections to communications and to the machine itself, first the water supply hose, then the hose that provides drainage.
- Inspect the entire surface of the hoses, checking their integrity.
If there is a defect in the hose itself, it is better to replace it. It is not advisable to repair or patch them.
If no leak is detected outside the device, you should proceed to examining the machine itself. To do this, provide free access from all sides.
Leaking from drain filter
If water leakage occurs in the area where the drain filter is located, it is necessary to remove the panel at the bottom of the machine. There is a possibility that it is simply poorly screwed on.
This may be the case when, after the next cleaning of the drain filter, it was not screwed all the way. The solution to the problem is to be careful not to strip the thread, but at the same time screw the filter tightly enough.
The filter requires regular cleaning, as small objects that accidentally fall into the drum can accumulate in it.
Dripping from the powder receptacle
This situation can arise in several cases. The most common option is a blockage.
It is also quite possible to cope with the problem on your own. To do this, remove the cuvette. Clean and wash it separately, removing layers of unwashed detergent, lime, etc.
It is also advisable to check the condition of the powder receptacle of the washing machine into which the cuvette is inserted. It should also be cleaned.
The second case that leads to a leak through the powder receptacle is very high water pressure in the water supply. This situation is relatively rare and may occur primarily in the private sector.
An artificial decrease in water pressure will help to cope with an emergency situation. You can do this yourself by adjusting the degree of opening of the valve on the water supply hose.
How to deal with the problem, you can watch the video:
It pours from the hatch
If during washing water pours out or even slightly leaks from the hatch of the washing machine, you need to make sure that the cause of the leak is laundry that did not fall on the seal, which broke the seal of the door. Otherwise, most likely the problem is in the cuff.
Damage to the cuff may be very minor, but during the washing and rinsing process, quite a lot of water can leak out.
In some cases, the cuff can be repaired with a patch as a temporary solution. But it is advisable to change the seal by installing a new part.
If you carry out repairs yourself, you need to purchase a completely identical cuff. You need to be prepared for the fact that during the process of replacing a part, the washing machine will have to be partially disassembled.
Leaking from below
A leak under the machine may be a sign that the problem lies in the pipes. If the clamps are simply “loose”, they are tightened. But if the pipes themselves are damaged, they are replaced with new ones.
Damage to the tank wall
Cracks on the surface of the tank itself can cause leaks.
The reason may lie in the overload of the washing machine, frequent entry of foreign objects, malfunctions of the heating element, etc.
The solution to the problem is to replace the tank. But doing this on your own is very difficult, even with experience.
It is best to contact a washing machine repair company for help.
Samsung washing machine device
Let's get acquainted with the structure of a washing machine using the example of the well-known Sensor Quick model. Main front elements of the model:
- removable front panel;
- distribution hopper for powder and special products;
- control Panel;
- electric valves;
- level relay;
- laundry tank;
- adjustable stand legs;
- drain pump with filter;
- drain hose;
- drain hose plug.
Rear elements:
- power cable;
- counterweights;
- tank suspension springs;
- shock absorber;
- engine;
- pulley with drive belt.
The control panel is a board with buttons and indications that turn on the washing mode, change the temperature, spin speed, washing time, and delay start. It is also possible to manually set all these parameters with the “Manual program setting” button. The display shows the current washing status and error codes.
Principle of operation
Automatic washing machines operate according to a specific algorithm. Today in our article we will look in detail at the principle of operation of the device.
- First of all, to start work, you need to carry out the switch-on procedure. The machine must be connected to the network using a special cable.
- Next, load the dirty laundry into the machine drum. This procedure can be carried out in several ways, depending on what type of loading the machine has (front or vertical). In addition, the load of laundry should be carried out in accordance with the volume of the drum (2, 4, 6 or more kilograms).
- The next step is to add detergents (powder, conditioner, etc.). For this purpose, special compartments are provided in the outer casing of the device.
- Now you need to close the washing machine door tightly and start the wash.
- The most important step is choosing the appropriate mode. It depends on the amount of laundry you load, its color and type of fabric. There are several washing modes: delicate, intensive, manual, quick, etc.
- After the actual washing procedure begins, the pump in the device will start working. Thanks to this device, water enters the machine through specially designed round holes (you can see them on the drum).
- As soon as the water reaches the appropriate level, the liquid supply will stop and the actual washing procedure will begin.
- From the special compartment where you previously poured the powder, water will wash out the detergent, and it will fall into the drum of the machine. Wet laundry is saturated with powder and cleaned thanks to the rotational movements of the drum. In addition, additional water may be added at this time.
- Also, during the wash, the rinsing and spinning procedure will occur (provided that the mode you have chosen allows for these processes). The rinsing process is accompanied by pouring clean water into the drum - this happens several times. At the same time, such an important element of the washing machine as the pump is included in active work. The spinning procedure occurs due to centrifugal force.
- After the wash cycle you have chosen is completed, the water will go down the drain.
- After the wash is finished, the washing machine will turn off automatically. All you have to do is turn off the power.
- After the washing has stopped completely, the front door will remain locked for a few more minutes. It will then open and you can remove the laundry.
Possible difficulties and solutions
In the process of connecting the washing machine, the user may encounter unexpected difficulties, which the following tips will help to cope with:
- If it is not possible to organize a connection to the sewer immediately after purchasing a washing machine, you can temporarily use the option of draining into a bathtub or sink, and then organize a permanent connection.
- In the absence of a centralized water supply, the washing machine can be supplied with water using a water tank raised by at least 100 cm. In this case, the hose must be attached to the bottom of this tank and ensure that the container always remains filled. This situation may be relevant for dachas. The cardinal solution is to install a water pump.
- If, even at the stage of unpacking the new machine, housing defects or insufficient equipment were noticed, it is necessary to demand replacement of the defective equipment.
- If, upon first start-up, defects in the automatic machine were identified, you must contact a service center that supports Samsung equipment under warranty.
- Installing a built-in washing machine poses a special difficulty. If you have no experience in carrying out such work, it is better to entrust the connection of equipment to professionals.
List of required tools
You can’t take a “Korean” with your bare hands - you need to prepare something:
- a set of screwdrivers or a screwdriver with a replaceable tip;
- a set of socket and open-end wrenches;
- adjustable pliers (the grip width can be adjusted);
- pliers;
- side cutters;
- two tweezers: one with increased length, the second with curved tips;
- soldering iron with a power of 30 - 40 W;
- knife;
- mirror with long handle;
- flashlight or small electric lamp;
- low power gas burner;
- crimping pliers for fixing wires in lugs and contact connectors;
- a flexible metal ruler with a length of 70 cm or more (using this tool, it is possible to rotate the drum into its normal position, the flaps of which were left open by mistake by the user when starting the machine);
- a magnet on a nylon thread or nylon cord (helps to remove small metal objects that have gotten inside the unit);
- hammer weighing from 300 to 400 g;
- pliers for dismantling spring clamps that secure flexible hoses to fittings.
You will also need the following measuring instruments:
- multimeter;
- voltage indicator in the form of a screwdriver;
- current clamps or ammeter for alternating current at 20 A (used to estimate the power consumed by the heating element during heating).
In addition to the indicated devices and tools, you may also need some materials:
- Super glue;
- silicone sealant;
- sealing/insulating compound;
- wire lugs;
- rosin for soldering or flux LTI-120;
- heat-shrinkable tubes of different diameters;
- stranded wire;
- metal and plastic clamps;
- fuses for current 4 - 5 A;
- insulating tape.
Prepare a liquid for treating rusted connections, for example, “Liquid Key”.
Often during repairs it is necessary to understand whether power is supplied to the heating element. To do this, just turn on the machine to warm up and look at the electric meter: the rotation speed of the disk or the blinking frequency of the LEDs (for electronic meters) should increase.
What should you check first?
In a situation where the Samsung washing machine does not turn on, diagnostics should begin with the following key points.
Availability of power supply
First of all, check the connection of the washing machine to the power supply. If a device connected to the network does not work, then it is worth checking whether the fuse on the electric meter has blown.
Perhaps the power supply circuit breaker was knocked out due to a burnt-out light bulb, then after turning on the toggle switch, the electricity supply will resume and the washing machine will start working.
If, after plugging the washing machine back into the socket, the safety circuit breaker trips again, then the problem requires a more serious approach to solving and cannot be done without the help of a qualified technician.
Socket performance
Check the presence of electricity in the outlet into which the washing machine is connected. To do this, plug any other household appliance into the outlet. If it works, then the reason should be looked for in the washing machine; if not, then test other outlets in the house.
If the washing machine is connected to the network via an extension cord, it is necessary to check its functionality.
The extension cord is carefully inspected. The plug must be intact, not melted, and the wire must not be pinched.
Hatch closing tightness
The thing is that the Samsung washing machine has a special hatch locking device built into it. If the hatch is not closed tightly (clothes or other foreign objects have gotten into the gap between the doors and the body), then the lock is activated and the washing machine does not turn on.
Possible power surges
There was a sudden power surge and the protection was triggered, resulting in the washing machine not working.
If after 10 minutes the device does not work, then a sudden surge in voltage could cause failure of the wiring or electronic control board. Such malfunctions require qualified assistance from a technician.
Quality of connection of the water supply system
There have been cases when the water supply tap was closed for a while and they simply forgot to open it.
Also, the Samsung washing machine does not turn on if the water pressure in the tap is very weak. The pump does not have enough power to draw the required volume of water for washing, and the device turns off.
If, as a result of the initial diagnostics, the Samsung washing machine does not turn on, you will have to stock up on the necessary tools, patience, knowledge and move on to the next stage - disassembling the household appliance and repairing the failed element.
Engine control
Among others, there is such a part in the Samsung washing machine as a tachogenerator. It is also called a tachometer. Its failure is indicated by code 3E. In order to carry out the repair yourself, you will need to remove some elements. Troubleshooting requires care. Some may not want to pick up a screwdriver, and in this case the repair should be entrusted to a professional. It is difficult to understand what the reasons for the breakdown are. It is likely that there is no contact between the tachometer and the motor, or the winding is damaged. There is a high probability that the engine is blocked by a foreign part - a screw, nut or something else.
If this element malfunctions, error 3E1 may appear. The code indicates that the motor is overloaded with a large amount of laundry, or there is no contact between the tachometer and the motor, one of them is faulty. Error 3E2 means that signals are coming from the tachogenerator that are too weak to be recognized, or signals that cannot be identified are coming from the relay. Code 3E3 informs that the tachometer is sending incorrect signals or contacts, the control module connections are damaged, and engine parts may also be displaced. Error 3E4 gives a signal that there is no contact, something is not working in the engine or tachometer.
In the Samsung WF washing machine model, a problem with the tachometer is indicated by a code such as IE, BE. Malfunctions of the Samsung WF washing machine are similar to all problems with washing machines in general and are slightly different at the same time, they have their own specifics. Although there is nothing unusual about them. WF is a washing machine like any other. There are, of course, special functions that only WF adds. Otherwise, why buy WF? Of course, for their sake. WF repair is not a problem.
Troubleshooting
Let's look at how to repair a Samsung washing machine yourself.
Samsung machine does not pump out water
You need to check the drainage system: most often the cause is a clogged drain pipe or pump.
- Unplug the machine and turn off the water.
- Disconnect all communications.
- Remove the dispenser tray by pressing the lock in the center.
- Open the drain filter hatch on the front panel from the bottom.
- Drain off any remaining water and clean the filter.
- Lay the SM on its side, open access to the bottom.
- Having found the location of the pump and pipe, loosen the pipe clamps.
- Disconnect the pump wires.
- Unscrew the screws securing the pump.
- After removing the pump, check it for blockages.
- Remove the pipe and wash it to remove any dirt.
Carefully inspect the pipe for damage. Most often, it loses its tightness at the places where the clamp is attached. If the pipe or pump malfunctions, new elements must be installed.
No heating
To check and replace, you need to get to the heating element. Based on how the Samsung washing machine is structured, we can conclude: to get the heating element, you need to remove the front casing of the washing machine.
We repair the washing machine ourselves:
- After disconnecting the SM from the network, unscrew the screws securing the top panel from the back.
- Pull out the dispenser tray. Unscrew the bolts located behind it.
- Unscrew the remaining mounting bolts and remove the control panel of the Samsung washing machine.
- Remove the bottom panel.
- After bending the hatch cuff, pry up the metal clamp and remove it.
- Place the cuff inside the drum.
- After unscrewing the door lock screws and disconnecting the wires, remove the front panel.
- At the base of the drum there is a heating element.
- Disconnect the heater wires.
- Unscrew the central nut (not all the way).
- After pushing the central bolt inward, remove the heating element.
- Remove the thermostat from the heater.
If the thermostat is working properly, simply replace it with a new heating element. Installation is carried out in the reverse order, after which the housing is installed.
Doesn't take up water or fills up too much water
The reason for the lack of water may be a blockage. When repairing a washing machine with your own hands, first of all:
- Turn the shut-off valve.
- Check to see if the water pressure in the tap is sufficient.
- Inspect the inlet hose. Maybe he was bent, twisted.
- Disconnect the hose and rinse under pressure from the tap.
- Remove the inlet valve mesh filter.
- Clear it of any blockage.
If an excessive amount of water enters the machine, you need to check the fill valve.
- Having removed the top panel of the CM, you will see the inlet valve on top of the wall.
- Disconnect the valve wires.
- Unscrew the fixing bolts.
- Loosen the clamps and disconnect the hoses.
If the valve is generally in good condition, replace the rubber seals. If not, install a new part.
Drive belt wear
To replace the belt, you need to know how to remove the back wall of a Samsung washing machine:
- After unscrewing the bolts, remove the back panel.
- Remove the old belt from the pulley.
- If inspection confirms belt wear, install a new element.
- Begin to slide the belt onto the engine pulley by moving and turning the drum pulley.
Now you know how to repair a washing machine without calling a technician.
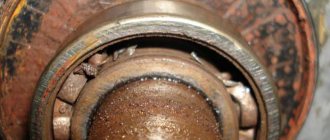
Samsung machine is noisy
When washing, did the SM begin to vibrate strongly, hum, or make noise? Check whether the installation is correct and how stable the equipment is on the floor.
A more serious cause of noise is bearing wear. To replace it, you need to know the device or have a diagram of a Samsung washing machine. Changing bearings is described in detail in the video:
SMA does not respond to button presses and does not turn on
The reason may be in the control panel. You need to check the contacts of all the buttons, perhaps they are stuck, or the keys themselves have been pressed through.
Another problem lies in the electronic board. Repairing the control module in a Samsung washing machine is not an easy task, so it is better to contact a service center. Of course, before contacting, you can inspect the board yourself:
- After removing the top cover, pull out the detergent tray.
- Remove the screws holding the control panel in place.
- Unclench the plastic latches and disconnect the wires.
- Unlock the block latches, remove the cover and remove the board.
Visible damage can be caused by burnt elements and paths. If nothing is noticeable visually, contact service.
Having studied typical malfunctions, you learned how to repair and repair a Samsung washing machine with your own hands.
When starting repairs, do not forget about safety precautions. This video will help you:
Source
Water fill valve
The fill valve is a fairly reliable element, but breakdowns do occur. The nature of the faults is as follows:
- liquid is not poured into the dispenser tank;
- water flows even if the machine is turned off and the program is not selected.
To make sure that the fill valves are faulty, check that there is no blockage in the fill hose. We will also clean the mesh on the valves themselves. If this does not help, and the control module is working properly, then we replace it.
Actions:
- We unfasten the rubber pipes, having first removed the metal clamps with pliers.
- We remove the chips with wires.
- Unscrew the screws from the back wall.
We replace them with similar ones.
Washing machine fill valve
How to replace the pump in a Samsung washing machine
The design features of Samsung washing equipment allow you to repair it not only without unnecessary hassle, but also with your own hands.
Before starting repairs, it is necessary to free the machine from all communications - disconnect from the power supply and sewage system, disconnect the pump motor wires.
A visual assessment of the condition of the pump is carried out after it has been cleaned and makes it possible to determine the need for repair or replacement.
If replacement is still needed, the procedure should be as follows:
- unscrew the screws on the back panel and remove the top cover;
- take out the powder dispenser;
- open the filter cover located in the bottom panel;
- Having unscrewed the screws, remove the bottom panel by moving to the right;
- unscrew the 4 screws located under the panel;
- open the hatch, loosen the clamp, remove the cuff;
- unscrew the 3 bolts under the top panel, remove the front wall;
- unscrew the 3 connecting bolts from the pump volute and the housing;
- disconnect the pump from the electrical circuit;
- unscrew the pump from the filter;
- installing a new pump.
Reassembling the machine is done in the reverse order. For ease of repair, the machine can be placed on its left side.
Video:
https://youtube.com/watch?v=W4dGohB6HBs
After the work of replacing the pump has been completed, it is necessary to assemble the washing machine and carefully check its performance.
The video in the section clearly and in an accessible form demonstrates the sequence of replacing the pump in a Samsung washing machine.
_ _ _ _ _ _ _ _ _ _ _ _ _ _ _ _ _ _ _ _ _ _ _ _ _ _ _ _ _ _ _ _ _ _ _ _ _ _ _ _ _ _ _ _ _ _ _ _ _ _ _ _ _ _ _ _ _ _ _ _ _ _ _ _ _ _ _ _ _ _ _ _ _ _
The loading hatch does not open
The loading hatch is blocked for the entire washing process. The blocking process is controlled by a ceramic resistor. After the program has completed all the functions and the resistor is no longer supplied with power, it persists for 1-2 minutes and only after that the blocking plates take their original position and the hatch can be opened.
One of the possible causes of a malfunction of the washing machine locking mechanism is constant voltage drops. They can lead to wear of the bimetallic plates or simply burn the contacts.
Burnt lock contacts
In this case, the lock must be completely replaced. You can remove it as follows:
- We bend the cuff, gaining access to the lock;
- Unscrew the two screws;
- Disconnect the contacts.
The lock has been removed and can be replaced with a new one.
Replacing the lock
Repairing damage to a Samsung machine
We present to you a diagram of the device, which will come in handy for repairs. The technical content of machines of different brands is approximately the same. If you have already had to deal with replacing spare parts for a washing machine, then it will be easier for you to cope with the next repair.
List of components of the washing container: 1 – heating element (heating element); 2 – front part of the tank; 3 – front brackets, 5 pieces in total; 4 – heating element bracket; 5 – heating element spacers, 2 pcs.; 6 – screws, 3 pcs.; 7 – overlay; 8 – washer; 9 – screw; 10 – drum; 11 – sealing collar; 12 – rear part of the tank; 13, 14 – tank clamps, 9 pieces in total
Now you can start talking about certain types of breakdowns and how to repair them.
No. 1: unexpected stop during washing
The most common reason is insufficient water pressure. Then the machine stops, and to start it again, you need to turn it off and then turn it on again. If you have a lot of laundry loaded, in order for the machine to work, you just need to turn it off and remove the excess.
All problems with the washing machine stopping during operation can be dealt with quickly enough if you correctly determine the cause, which is not related to the failure of parts of the equipment
If there is a break in the power cord or an initially poor contact in the power button, then the device periodically turns itself off. The machine may also stop if it is not level and there is some misalignment.
No. 2: difficulty getting water
To fix this problem, you should first check the water pressure in the plumbing system and also make sure that the valve supplying water to the machine is well open.
If everything is in order, then you should check the filling valve, hose, and cleaning filter located at the inlet for debris and foreign objects.
You should know that the free end of the drain hose connected from below must be located at a height of more than 2/3 of the height of the device, otherwise water will immediately pour out of the machine.
No. 3: leakage from the unit
There are many reasons to explain this problem. Sometimes it is enough just to clean the powder container well - if it is clogged, water may simply leak out of it.
The most common cause of flooding caused by a washing machine is a damaged or disconnected drain or fill hose. Leaks can also occur when connections become depressurized.
If, after checking these hoses, you are convinced that everything is in order with them, then the reason lies in the o-ring.
It is necessary to check the tightness of the seals, both in the door and in the connection of the filling hose. If they are worn out, they should be replaced. Then you need to check the drain pump and hose for any foreign objects stuck in them.
No. 4: breakdowns and wear of the heating element
Therefore, the washing water does not heat up. This happens due to the failure of the heating element, but do not rush to change it - this may also be damage to the electrical wiring.
Therefore, you should carefully check the entire electrical circuit, as well as the contacts of the heating element itself, using a multimeter. If the tester shows the presence of voltage in the entire circuit, this means that the heating element will still have to be replaced.
In order to remove the heater, you need to disconnect all the wires and sensors, and then unscrew the nut securing it, then remove the heating element
The place where the heater is installed should be thoroughly cleaned, only after that it will be possible to install a new heating element.
No. 5: noise and vibration during operation
The most common cause of noise is improper installation of the machine. Because of this, the unit produces a strong hum during the spin cycle. To do this, the position of the machine must be leveled using a level.
But sometimes excessive noise can occur due to severe wear of the bearings. It is impossible to repair them - only change them. For an inexperienced repairman, this is a rather difficult task, because it may require sawing and subsequent gluing of a non-separable tank, behind which the bearing is located.
Therefore, if you are not confident in your skills, then do not take on this matter; it is better to call a specialist from the service center. But if your car's tank can be disassembled, then this task may be up to you. To do this, you need to remove the tank, then disassemble it by unscrewing the bolts and disconnecting the fastening latches.
The bearing must be removed using a special puller or hammer. We warn you that you need to use a hammer very carefully so as not to damage the parts.
After the bad bearing has already been removed, you should thoroughly clean the shaft, check whether it is worn, and then just install a new bearing.
Removing the cover
Often the need for dismantling work arises when there is a breakdown inside the housing. If you are faced with a breakdown of your washing machine, you need to figure out the cause of the malfunction - this is where disassembly will be necessary. In many cases, it starts with removing the cover.
If you are interested in which washing machines have the top cover removed, then the first answer to the question will be: SM with front loading. In the article we will consider whether it is possible to do this yourself.
As for brands and models, it happens that under the same brand there are different model lines, in which the covers are removed in different ways, or maybe not removed at all.
Removing the top cover of the washing machine does not require careful preparation, and all you need is a screwdriver - give preference to the Phillips type.
Remember to be safe: Before removing the cover, unplug the power cord by removing the plug from the outlet. Then proceed like this:
- Pull out the machine for convenience and unscrew the mounting bolts (located at the back).
- Move the panel back slightly by pushing it slightly.
- When it comes out of its grooves, you can easily remove it.
- Now nothing prevents you from getting inside the SM housing to carry out the necessary checks and repairs.
Knowing how to open the top lid of a washing machine automatically gives you the idea of how to close it. To replace the panel, you need to place the front part in the grooves and push it forward. At the very end, the fasteners are screwed in.
Preventive measures
To avoid damage to the heating element, first of all, you should carefully read the instructions and use the device as described in it. It
is also important to properly care for the unit. For example, detergents should only be used that are intended for automatic washing machines.
Scale forms when water is too hard. This problem is inevitable, so you should periodically use special chemicals to solve it. It is also necessary to clean the internal parts of the washing device from scale and dirt.
Useful tips
If the machine stops working (does not start), you first need to check whether the power supply has been turned off and whether the system is connected to the mains. To extend the life of the heating element, you will have to ensure that only soft water enters the system. When replacing the pump, it is worth preparing a container and old rags to collect the leaking water. In many cases, problems can be resolved by removing the threads and many other objects wrapped around it from the impeller. It is advisable to see if something is wound around the electric motor shaft.
To learn how to repair a Samsung washing machine with your own hands, see the following video.
Step-by-step instruction
Unscrewing a soured washing machine filter is sometimes very difficult.
It is necessary to act carefully, not to apply too much force, so as not to break the machine parts.
In addition, you need to make sure that the rotation is in the right direction - counterclockwise. To resolve the issue, you can use several methods.
Using a tool
One of the easiest options is to try to grab the filter handle with pliers and unscrew it
Caution is required here as the force is quite large.
Without proper calculation, you can break the handle of the knot. You need to act slowly, rocking, turning the plug in both directions and gradually increasing the amplitude.
If the filter can be turned a quarter turn but does not go any further, do not apply force. It's better to try another way.
Removing the drain pump
If you cannot unscrew the cover using the usual method, you can try dismantling the entire pump. As a rule, it is attached to the machine body with two screws, but there are a lot of manufacturers, so any options are possible.
Getting to the node from the other side is much more difficult. Partial disassembly of the machine body will be required. In order to determine the location of the device, you need to look inside the case.
The easiest way is to tilt the car and look from the bottom. Sometimes it is not there at all, or it can be easily removed. Then you can support the housing on a wall or other strong object and disassemble the pump from below.
Another option is to turn the car around, remove the back wall and disassemble the pump from the back. This method is somewhat worse, as you will have to reach for the part through the entire thickness of the machine, which is filled with other parts.
However, the issue is completely solvable. The main thing is to acquire the necessary tools and ensure maximum ease of work.
The insides of the machine should be well illuminated, act carefully, trying not to damage the plastic tank of the machine.
Deflection of the machine and tapping on the filter unit
One effective way is to carefully rest the machine on the wall at an angle of approximately 45° and tap the filter with something soft.
The easiest way is to use your own fist. Shock may cause debris and particulates to fall off the filter cover. After this procedure, it is often possible to unscrew the filter without much difficulty.
Sometimes things don't work out the first time. You can try repeating the procedure several times if any positive changes are noticeable.
The main thing is not to overdo it and not to drive the lid in even harder. Then the only option left is to completely break out the problem unit and replace it with a new one.
Breaking out
Sometimes situations arise when no methods help. For example, the filter cover broke immediately (or during previous attempts), or when unscrewing, parts of the housing, pipes and other elements were damaged.
If such situations arise, all that remains is to resort to the last, most drastic method - break out the filter in order to get rid of the defective unit and replace it with a new one.
To perform the work, the machine is placed on its side and work begins from the bottom. Unscrew the mounting screws. If this cannot be done, they are drilled out or carefully cut off.
Some craftsmen destroy the plastic case from the inside and gradually break off pieces of plastic from it. After some time, the filter and pump can be disconnected from the machine body.
Immediately you need to unscrew and disconnect the pump - it is in order, it will still serve. Be careful with the terminals, they are fragile and can be damaged! The remains of the housing with screws are removed, the spring clamps are pressed out and the pipes are disconnected.
It is necessary to remember which of the rubber pipes leads where, since for an untrained person they are all the same.
ABOUT
Often it is possible to completely disconnect the filter with the pump, but the cover still does not unscrew.
In such situations, you can try to disconnect the filter from the pump, clean it from the inside and soak the housing in a basin or bucket.
Take warm water, dissolve liquid soap or washing powder in it and leave the body for several hours. Fatty deposits and dirt will become wet and fall away from the inner surface of the lid. Now you can try again to unscrew it in the usual way.
Replacing the snail
The washing machine pump (pump or “snail”) sooner or later fails. In addition, when removing a soured filter, it is easy to damage the pump, which will require replacing the entire assembly.
The procedure is simple if the old filter and pump are already disconnected and turned off. The main problem is to find suitable replacement elements.
Then all actions will consist of sequential installation of the filter and pump in their standard places in the machine body.